Our 1930s front door (Before + After)
This post contains affiliate links, for more information look at the disclosure page

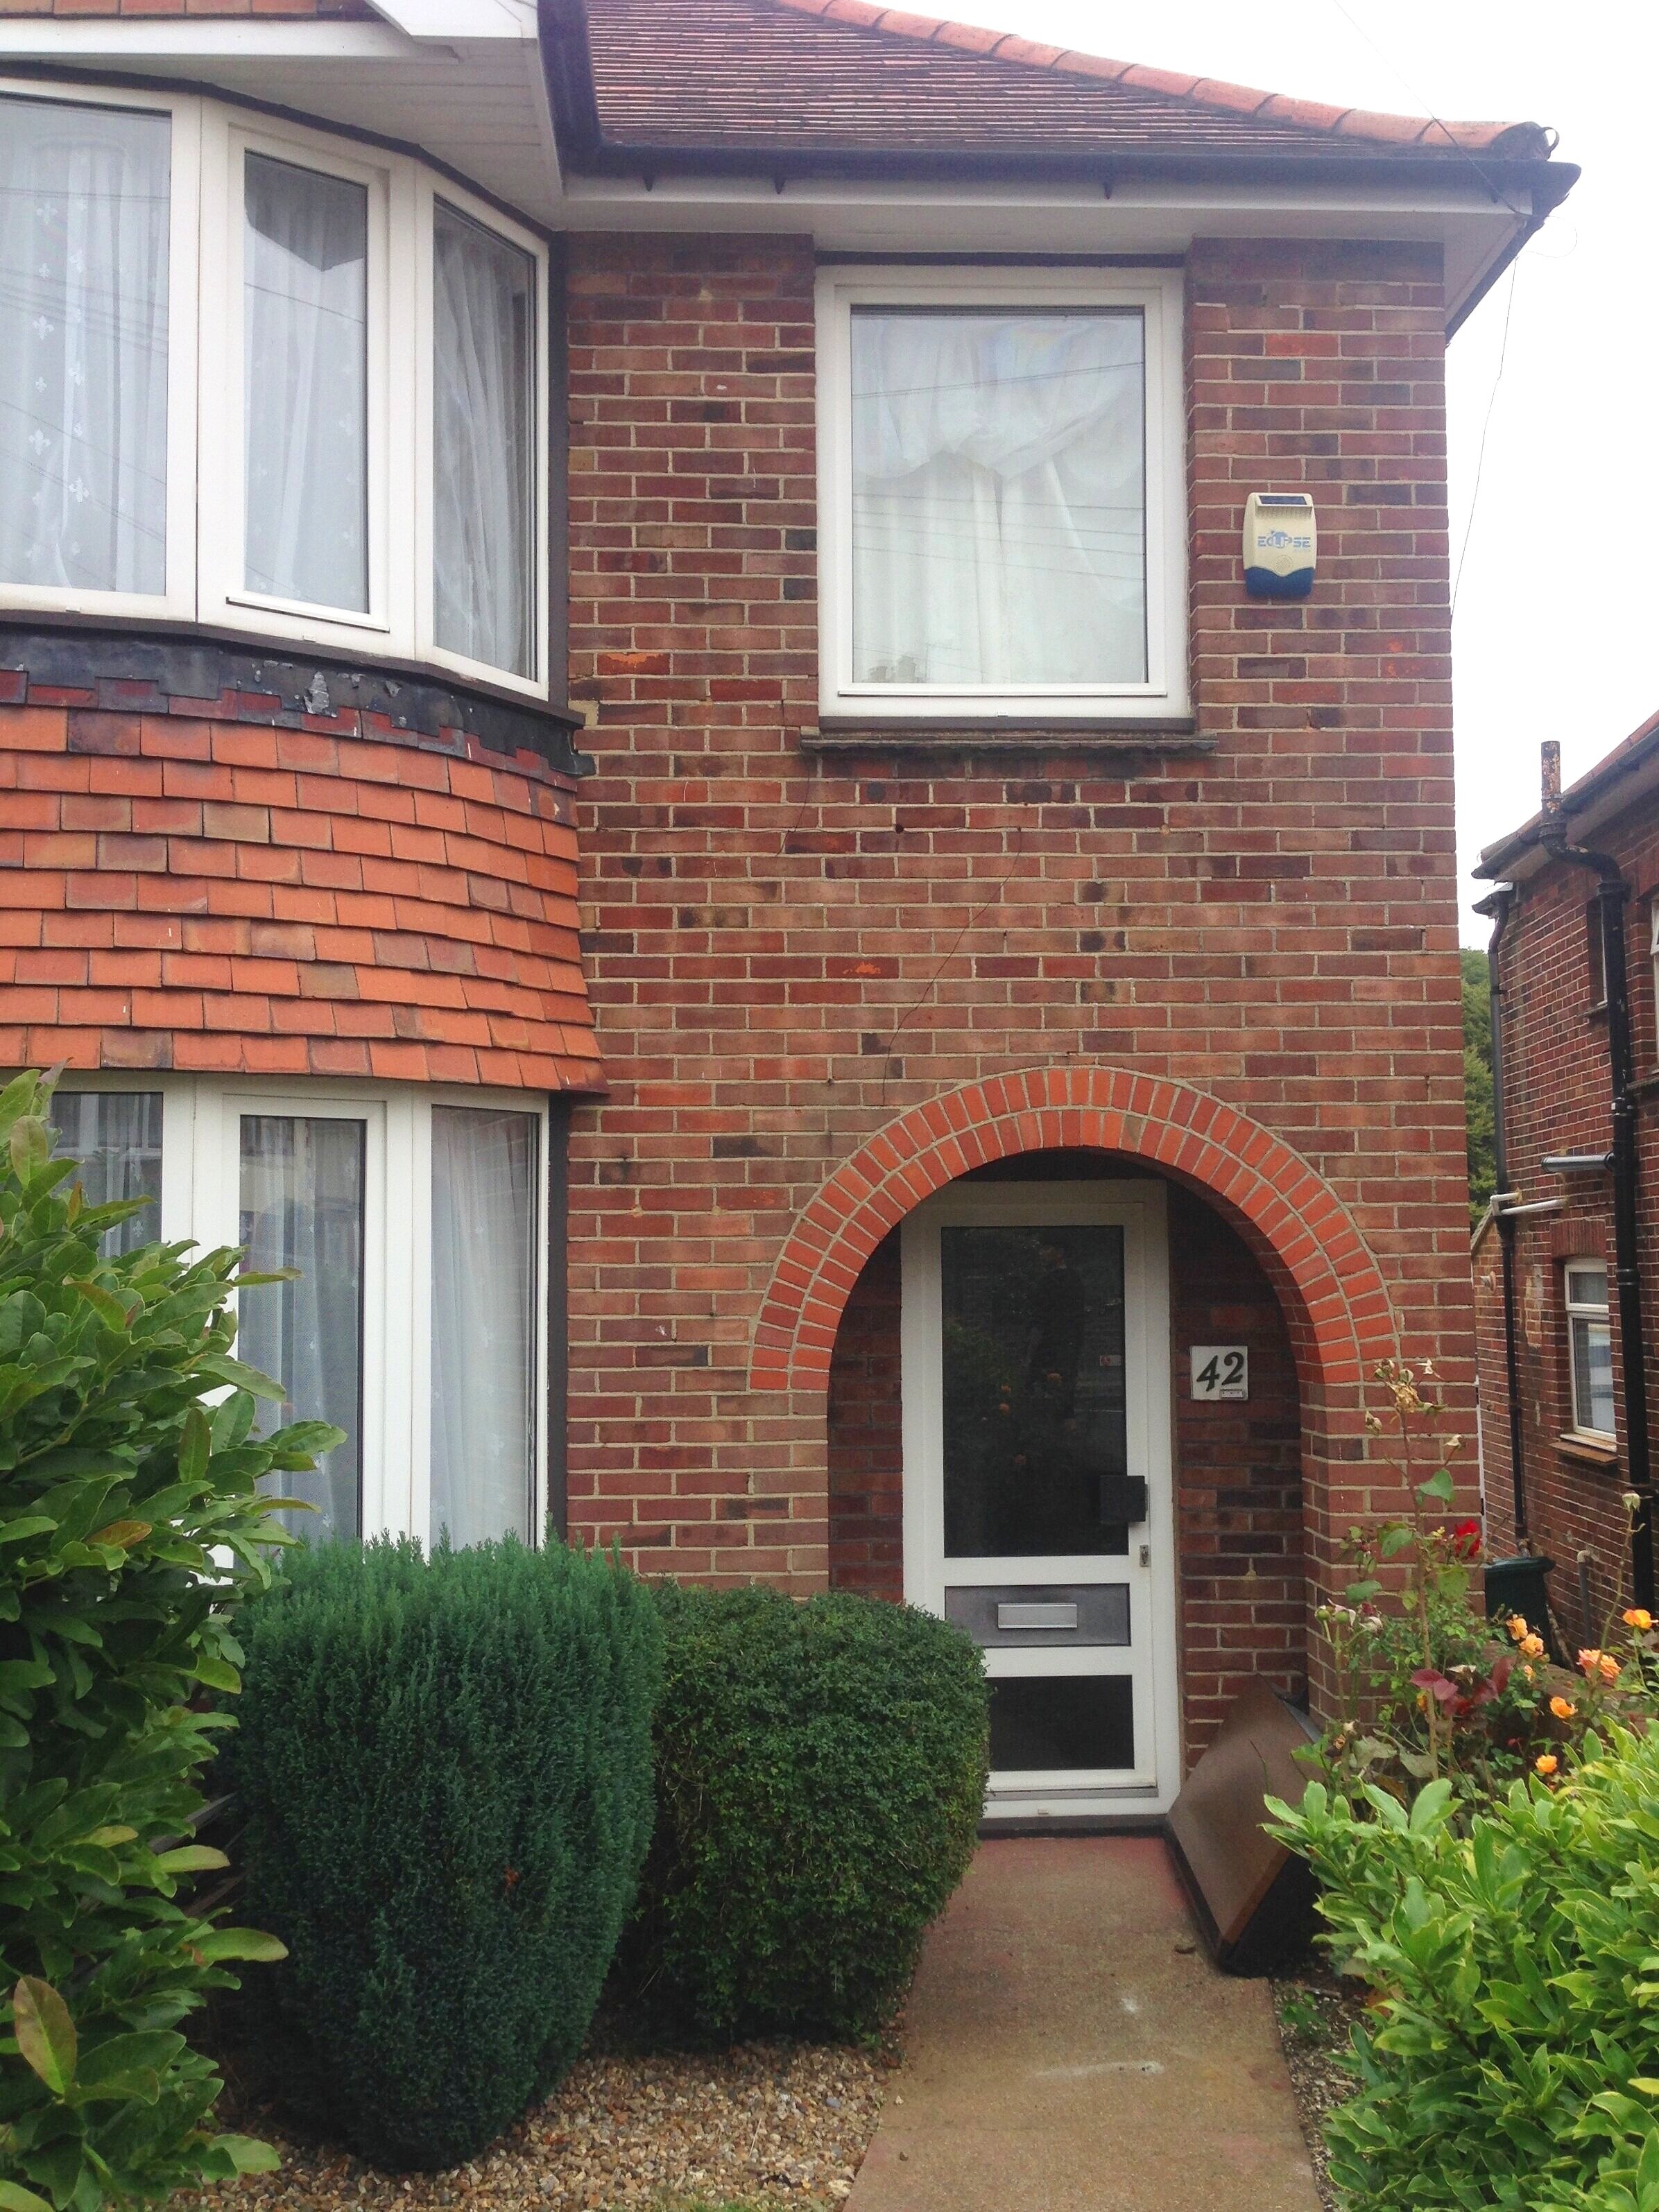
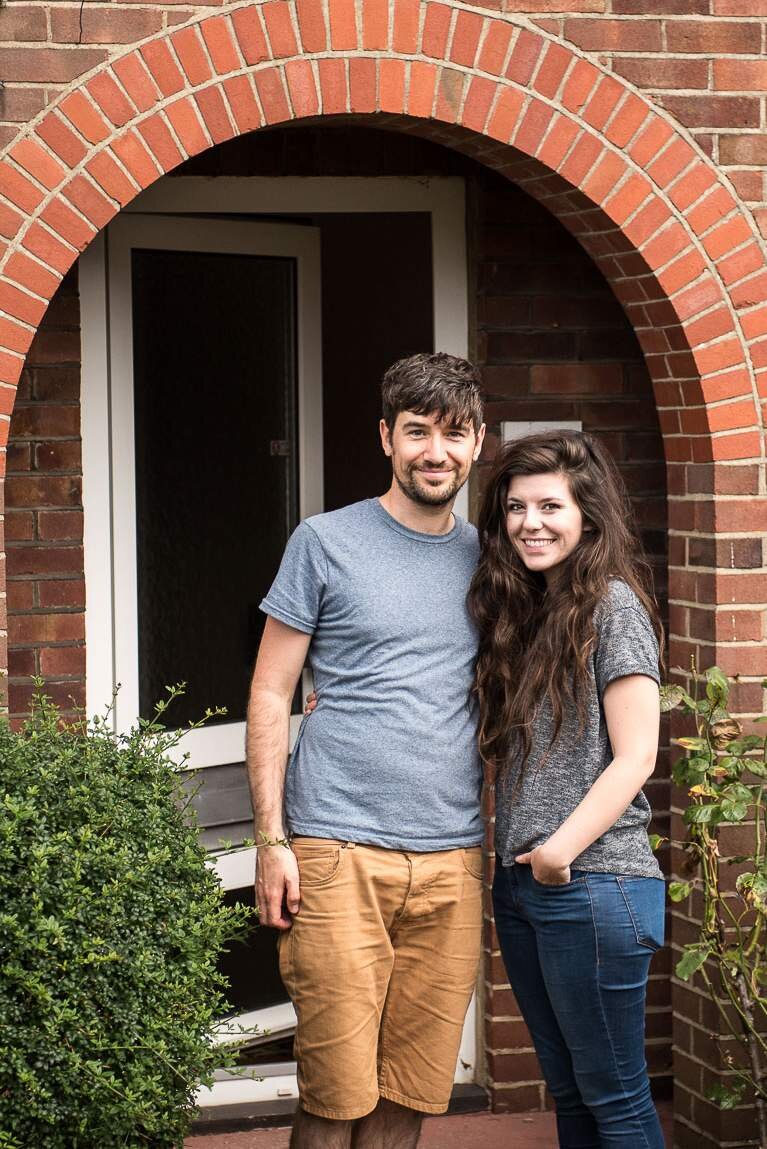
In 2016 we moved into this 1930s fixer upper of epic proportions!
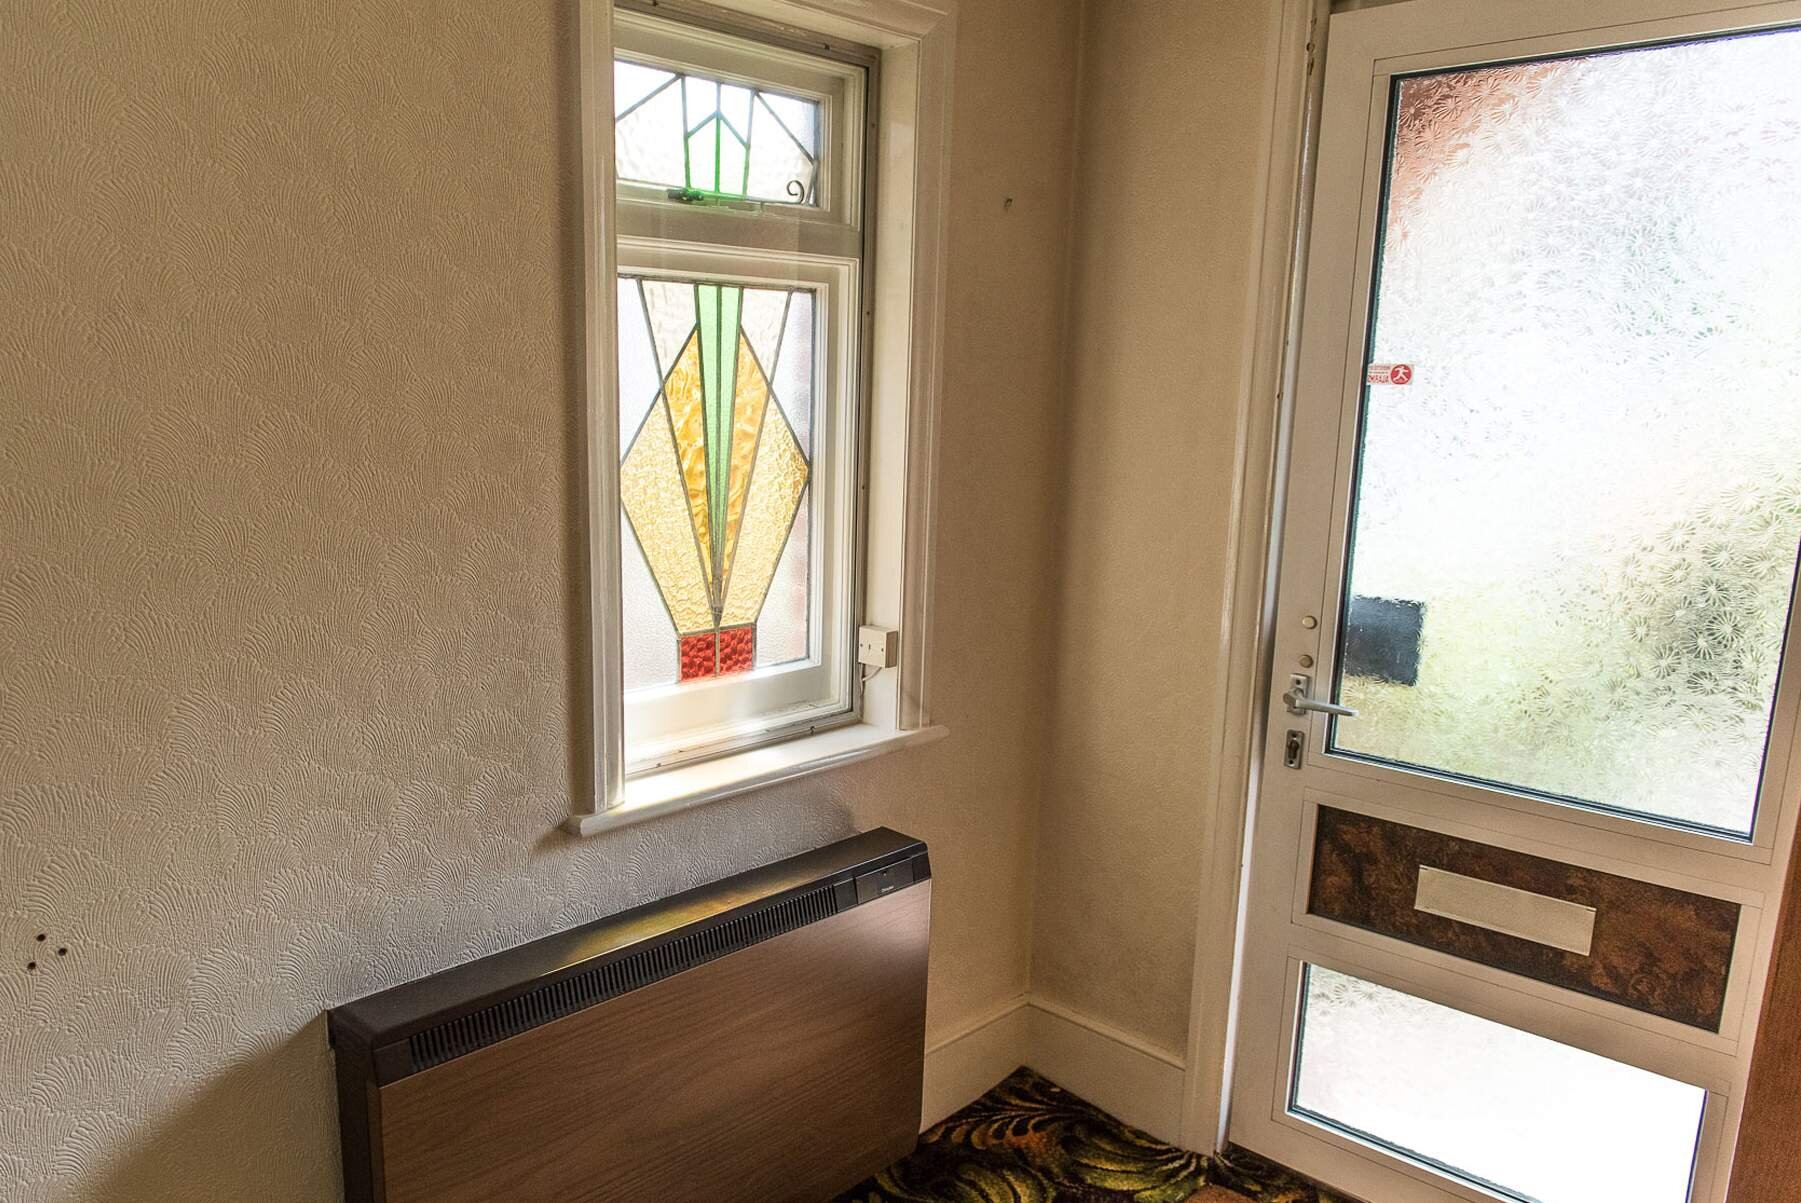
What welcomed us the day we moved in to our new house was a very clunky, plastic, glass (and leather!!) front door that let lots of light through to the hallway, but gave us zero privacy.
It looked hideous on the house.
It's no exaggeration when I say we had the ugliest door on the street 😂
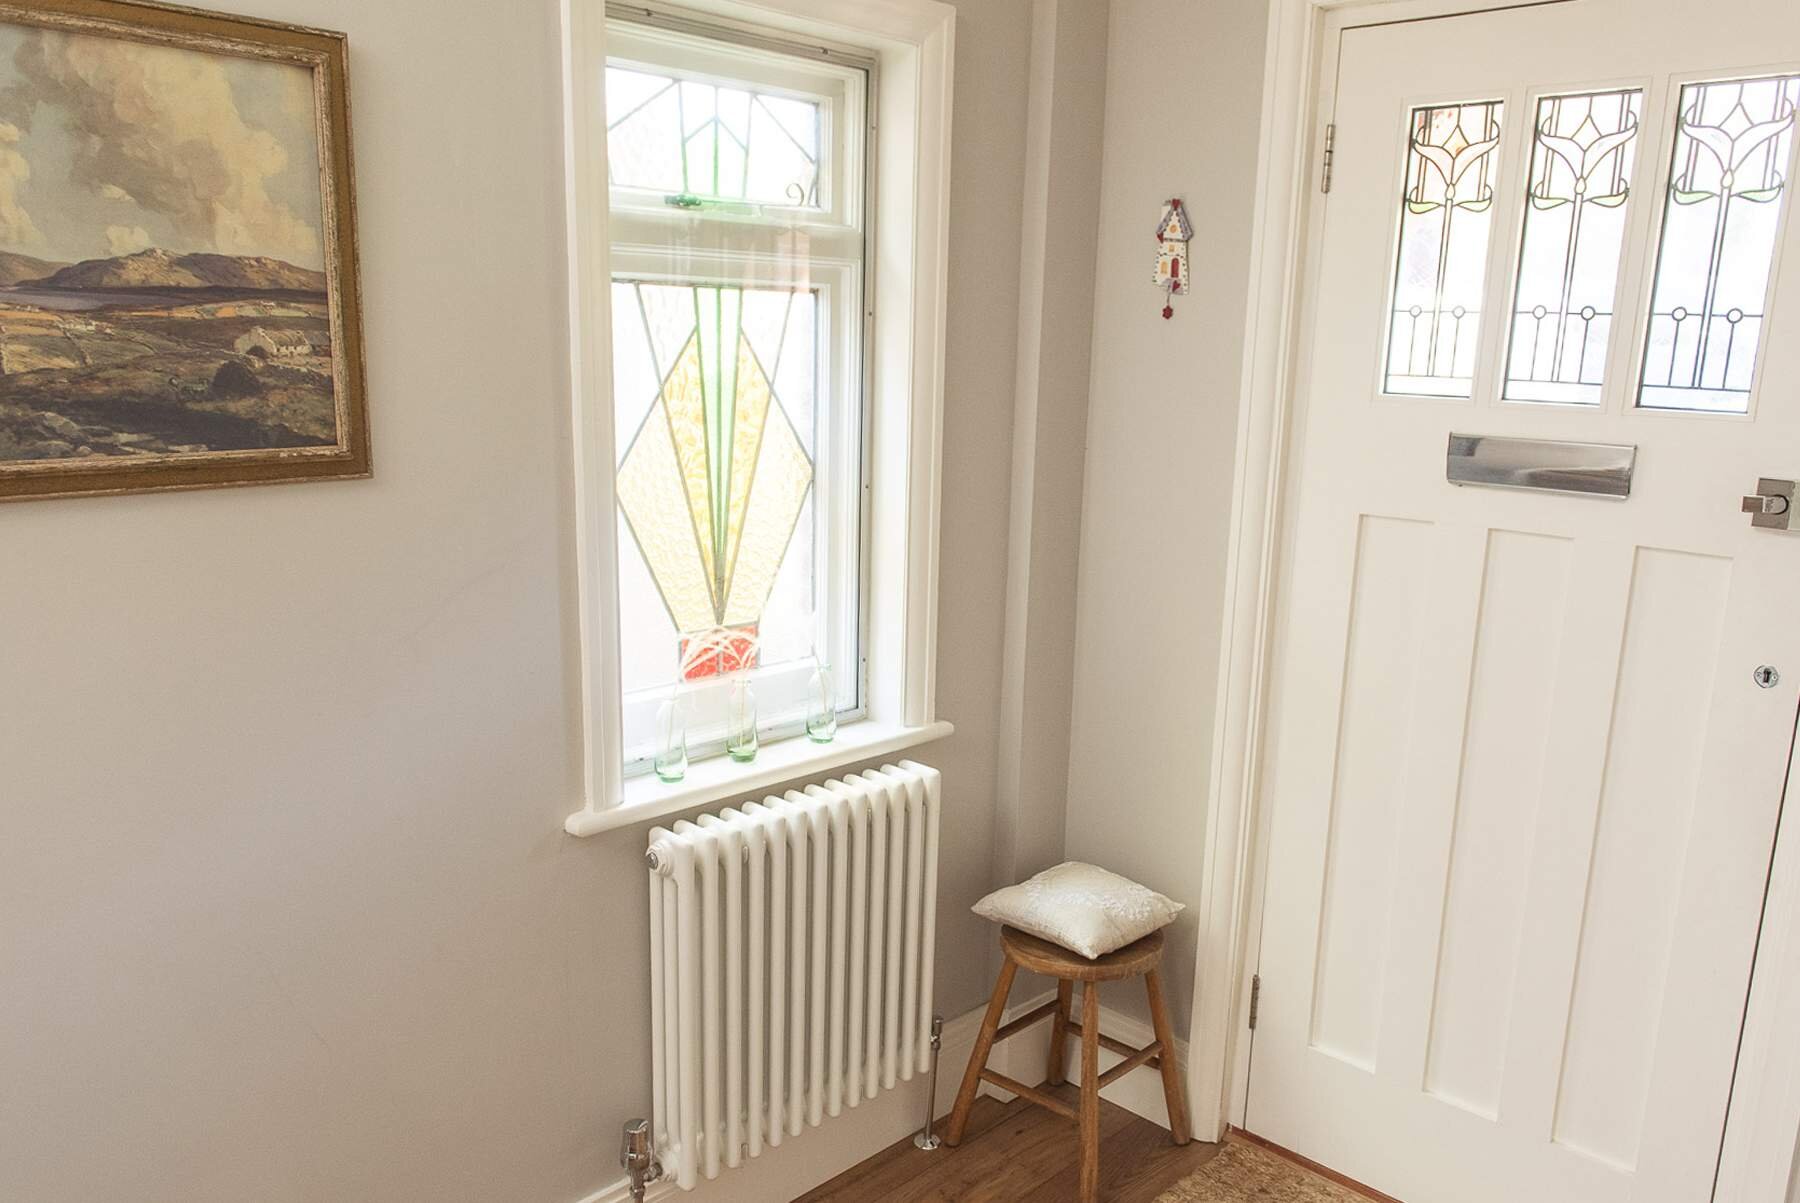
All the other houses on our road are either fortunate enough to have the original 1930s wooden doors which we later found are referred to as “1 over 3s”, with stained glass and tiny letter boxes.
Or they've simply upgraded to composite doors opting for the lower maintenance and more secure option vs wooden exterior doors.
We literally had to kick this door to get it to open.
The frosted panes of glass were so dated, and the handle (made of croc print faux leather, oh God) was bleached from the sun and falling to pieces.
About 3 weeks in to living at No. 42, we said enough was enough.
A new front door it was!
Deciding which front door was right for us


THIS SHOT WAS PRE PLASTERING OUR HALLWAY, MY GOD WHAT A MESS
Neil and I researched for about 2-3 weeks to decide on the right door for the house.
It had to be:
Safe
Visually appealing and fit the 1930s shape of the building
It had to have some level of glass in it (for light) but not too much (so that we could pretend there's no one home when door salesmen knock!)
A 1930s front door with a twist

Gathering exterior ideas and hallway ideas is normally hard as you need to take into account how the door looks on the outside as well as from the hallway. I was adamant that the style of the door should fit with a classic 30s look which is usually called a "1 over 3". They have 1 pane of glass or wood that sits at the top third of the door, with 3 long mouldings of wood below it. But we ended up with something a little different to this: “3 over 3”.
Initially we were keen to see if we could get a composite door in a 1930s style given they are safe, low maintenance and not prone to the wrath of rain and swelling.
They were above our budget though, so wood was our choice in the end. Which we treated very well to weather proof it prior to hanging it.
We have a small porch which doesn’t get too much rainfall within it, so we were confident the wooden door would be fairly protected from the elements anyway.
Ordering the front door
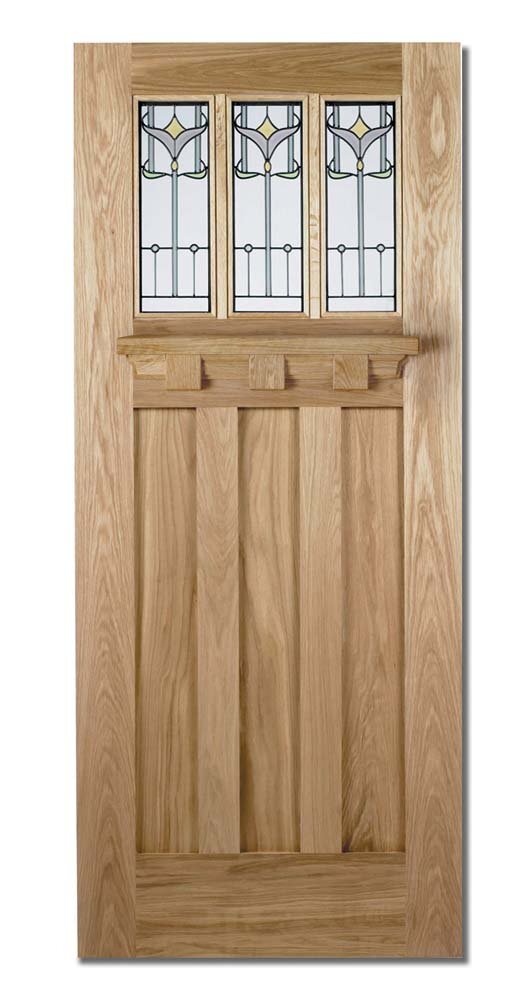
We then scoured the internet for the style we wanted. We ended up buying our door from Door Depot online, for just £285 at the time, but unfortunately the company has since closed down.
It's the LPD External Hardwood Engineered Tuscany Tulip door and is sold by Amazon, although you have to be quick because it keeps getting sold out. There’s a similar one on eBay too however it has a more geometric pattern in the glass.
We also ordered Yale locks, an oval escutcheon, a letter box and interior letter cover and key hole all in chrome for a clean finish, as doors usually don't come with door furniture unless you're buying it second hand. Most of the door furniture we just ordered from Screwfix and Amazon for ease and speed.
Preparing the front door before fitting it
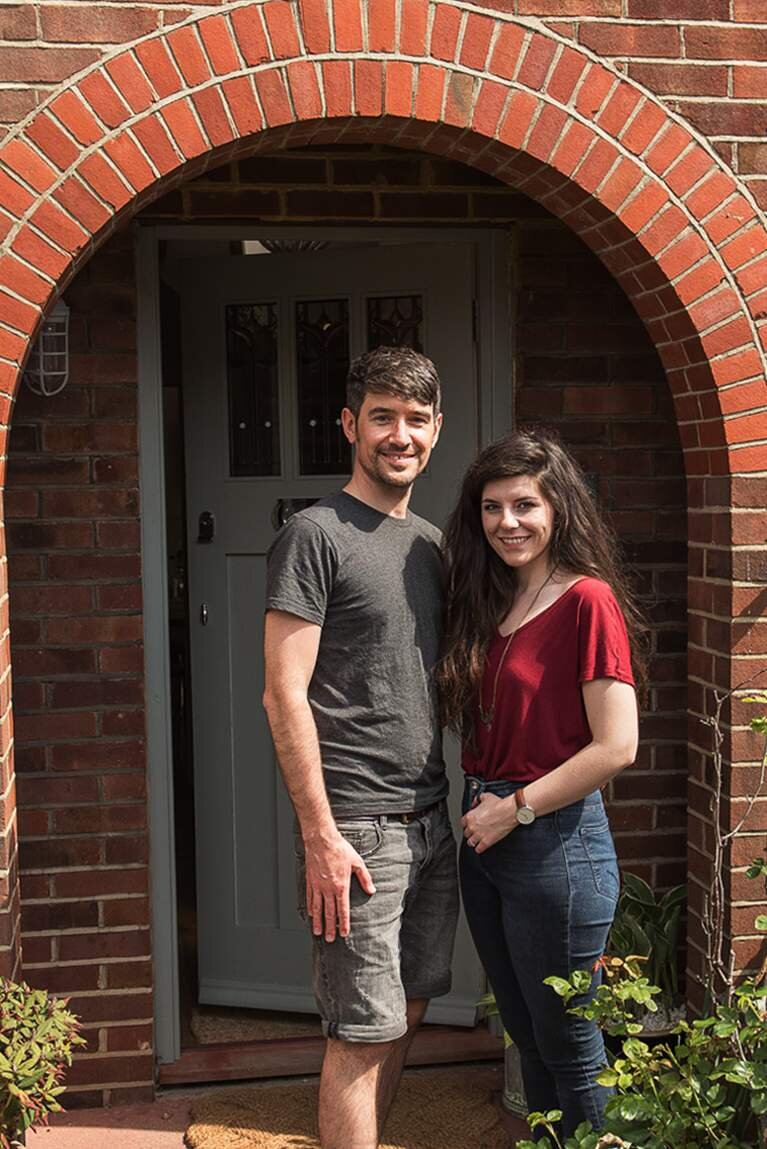
Before I called round to get someone to fit the door, frame and furniture, Neil had a mammoth task on his hands, to paint the front and back of the door. And I had the mammoth job of choosing the colour (hey, colour choosing can be hard work too!)
After a trip to B&Q I came home with Valspar's Exterior Wood & Metal paint in Platinum Sage for the front door and frame, but Neil also layered on Valspar's Exterior primer undercoat beneath that. I think all in all it took him about 5 coats of paint for the wood to be sealed in and looking beautiful.
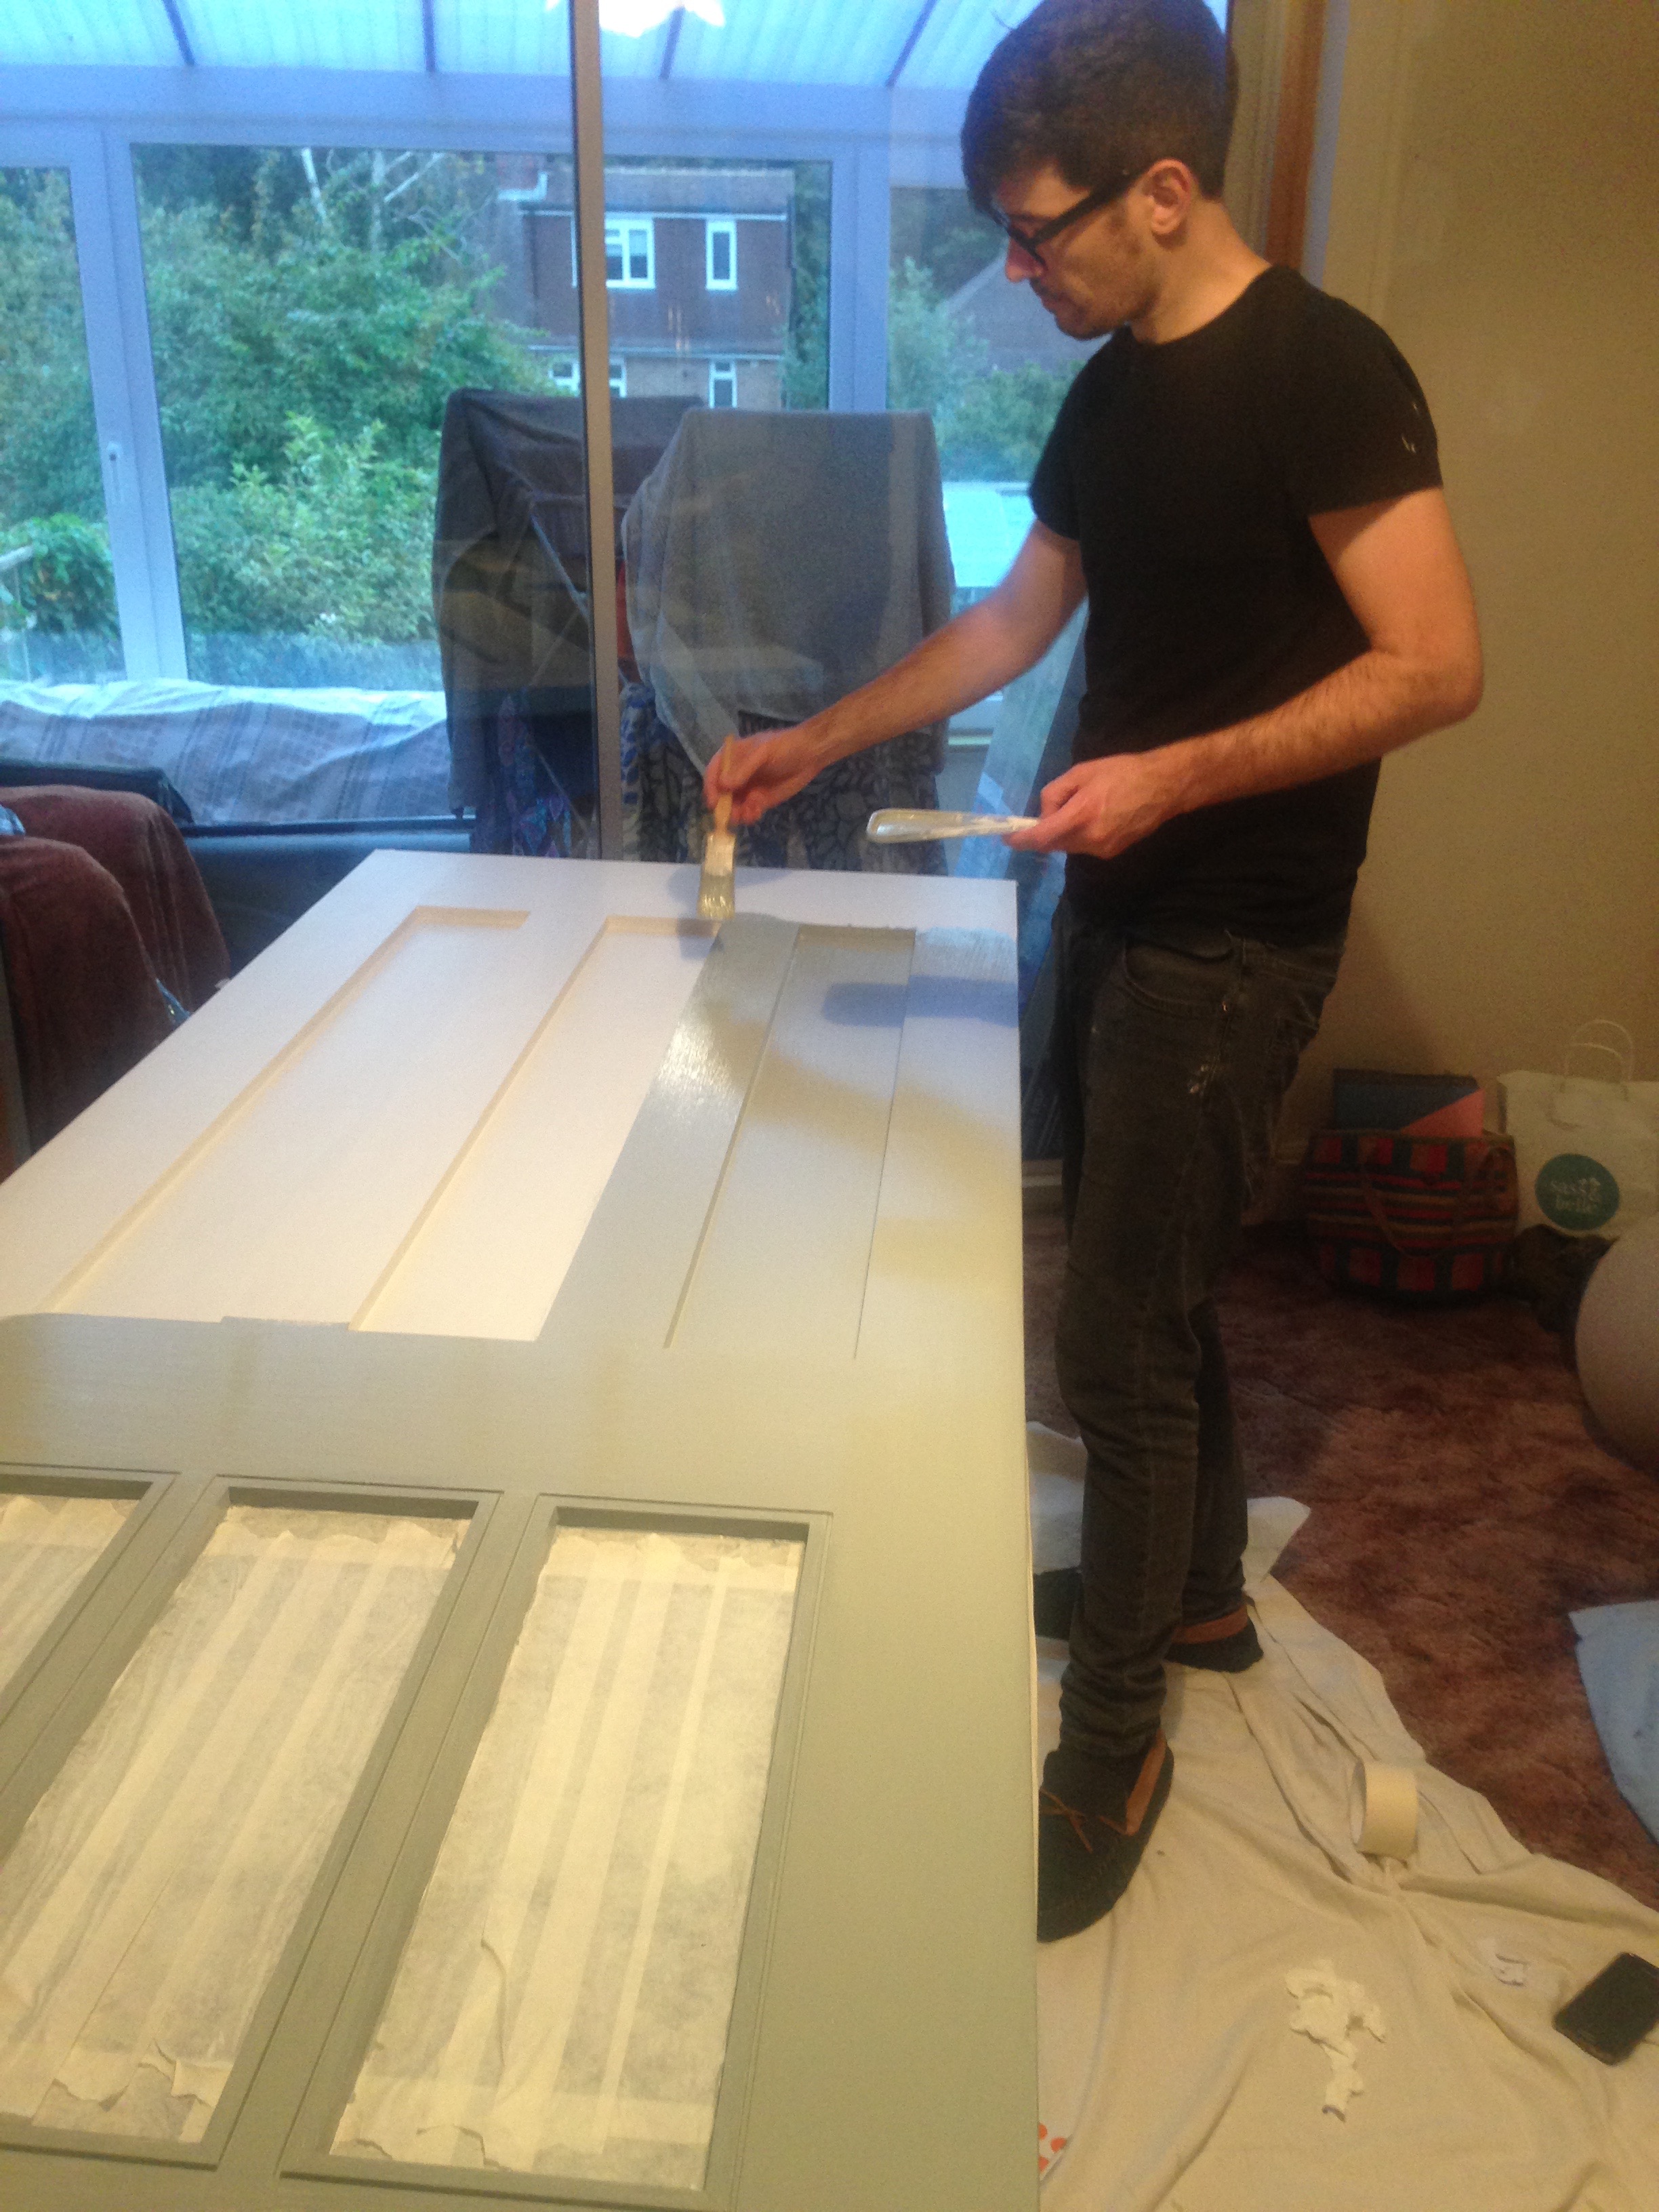
The paint job was a real credit to Neil. He was meticulous with it, especially as it was a 36 hour job in total. Don't be fooled into thinking painting a door is quick work, it certainly isn't!
The front door was then installed by my best friend's dad who did it meticulously well. It's the sort of job you need someone pro to do as any gaps can cause leaks, draughts and there's every chance door furnishings won't be flush or lock right. He did a great job! These are some progress shots whilst it was being hung.
We decided to change the direction it was hung too, which made a real difference to the vibe when you walk into the house. You can see directly down into the garden now, which we love.


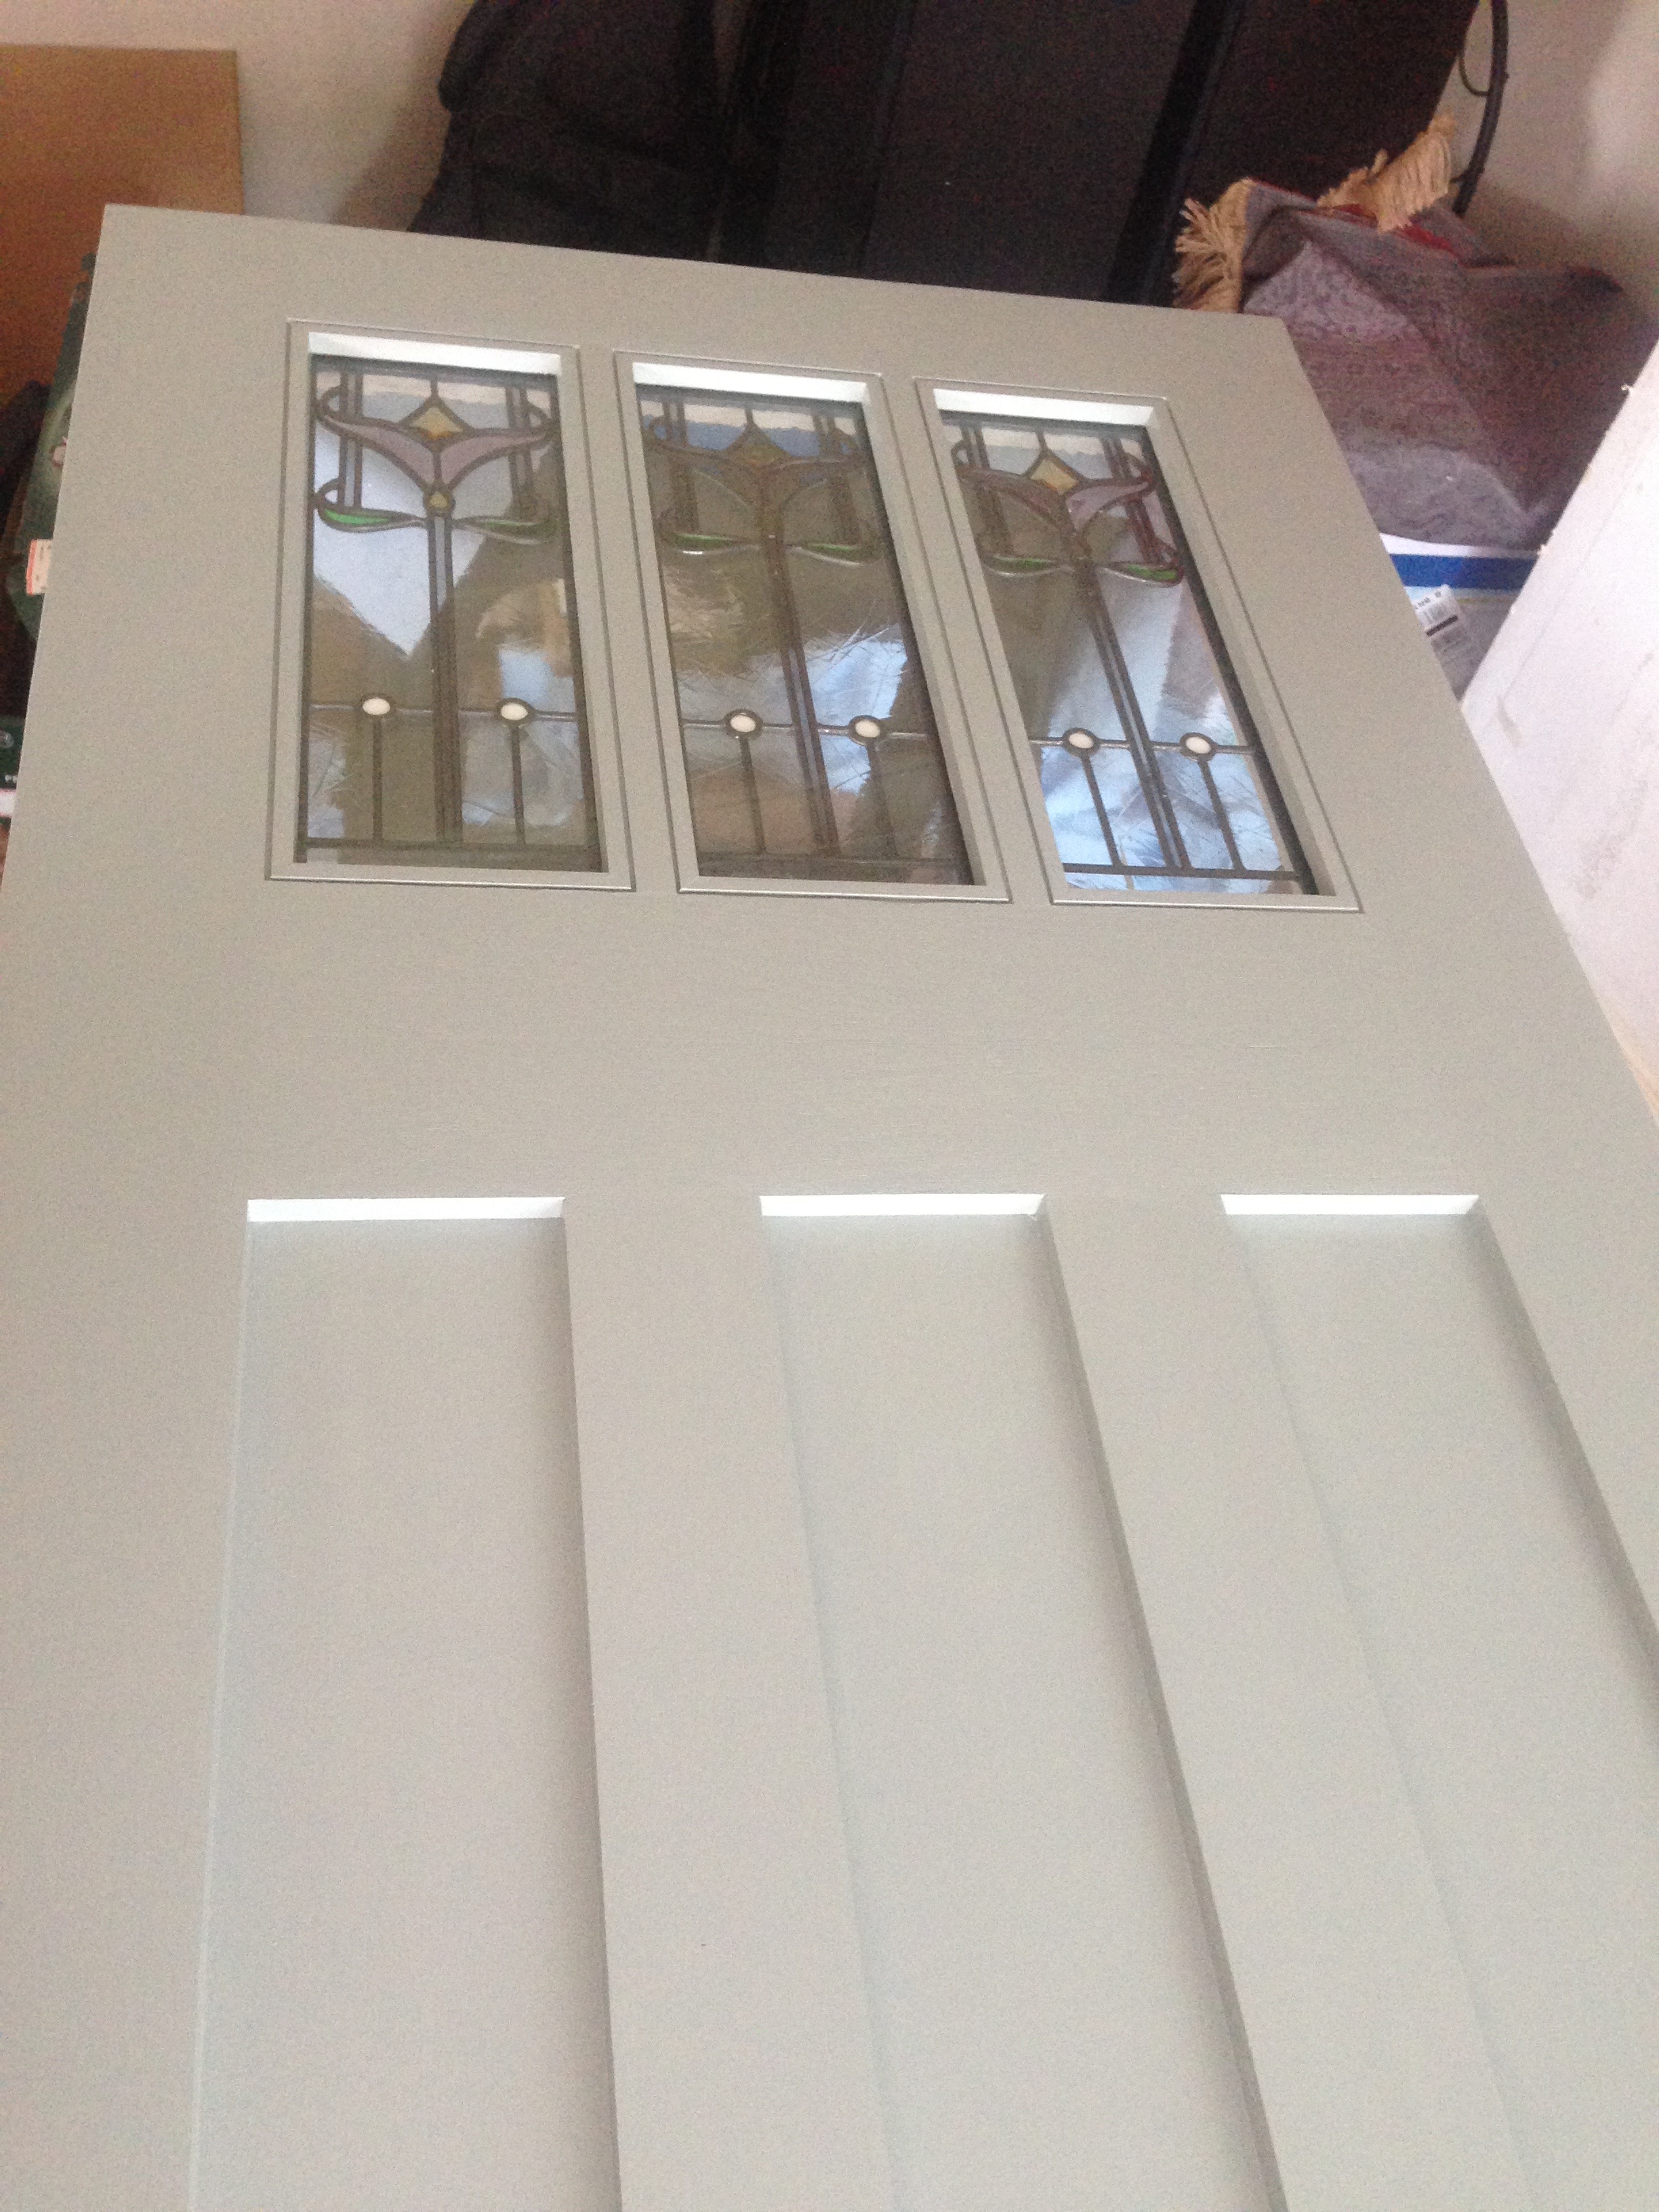
For the inside of the door we just used some Wimborne White Farrow and Ball Estate Eggshell paint that I'd got for all of the skirting boards throughout the house. I decided to pull my weight and painted the frames for Neil. I have a really steady hand but zero patience – so we make a great team when it comes to painting. I do the small areas, he does the big areas (and most of the work haha).


Our Front Door - Internal - After
Our Front Door - External- After


We then got our driveway paving done and we think it just makes the door pop!


We absolutely love it! Years on and it’s still keeping us safe and cosy.
Thanks for reading,
Fi and Neil xoxo