A beginner's guide to gutting a house

Welcome to home renovation! You’ve made the bold decision to remodel your new home, starting with the task of gutting the property.
If we’re honest, in moments of reno-fuelled stress, the temptation to turn the whole thing into a massive wrecking room can be pretty overwhelming. But no one ever actually tells you where to start when it comes to gutting a house.
With the average cost to gut and remodel a house standing at £50k-£150k, you’ll want to be as efficient as possible as save those pounds (where possible) for dreamy decor instead.
So, why not cut the cost to gut your house by throwing on the overalls, grabbing the tools and doing it yourself.
As always, we’re here with our know-how (and a healthy dose of learning from silly mistakes) to lend a helping hand on the road to home happiness. Trust our experience when we say ‘it’s really not as hard as you’d think’.
Tool up
There’s potentially nothing worse than getting half way through a gut job and realising you don’t have the right tool to detach a tricky bit. To start you off, here’s a basic list of tools you’ll need:
Protective equipment (e.g. protective glasses, ear protection, hard hat, gloves, dust mask)
Sledgehammer
Crowbar
Hammer
Saw or reciprocating saw
Stud finder
Retractable knife
Breaker drill/Air chisel
Power drill
Dropsheets or carpet protector film (if keeping flooring)
Do your research
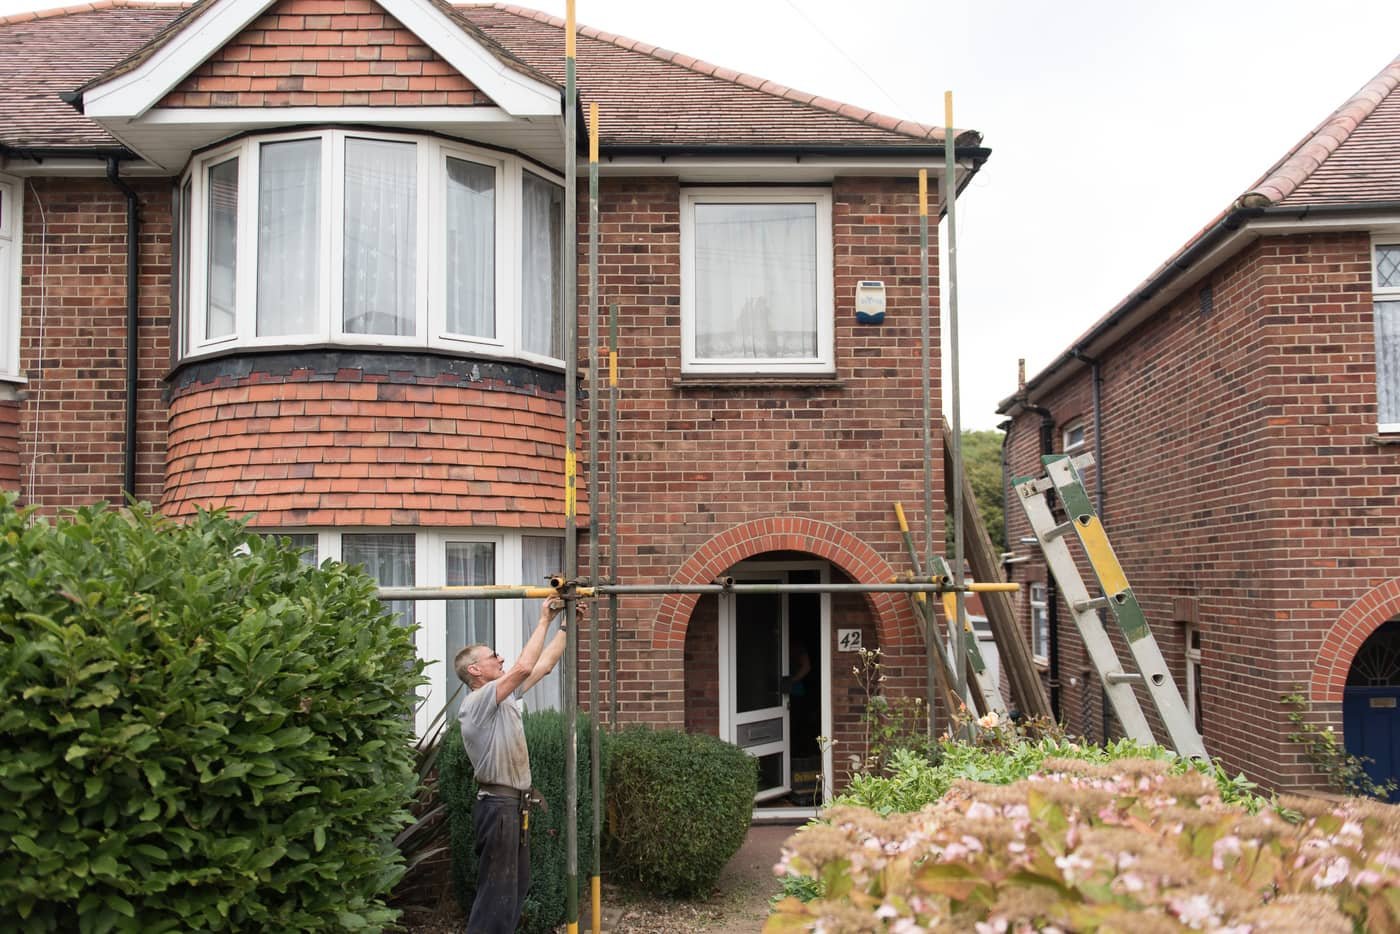
Our 1930s house renovation project
Firstly, always check whether you are covered under your home insurance before you commence any works. If not, you might need to purchase specialist home renovation insurance.
Then make sure you know which walls are loadbearing and non-loadbearing. Knocking down loadbearing walls is usually a job for the professionals. If you are unsure, consult a building surveyor.
Knocking down internal walls is usually covered under Permitted Developments but make sure you check to be on the safe side. Anything more may require Planning Permission and it seriously pays off to check first. It’s also a smart move to check fire regulations as some walls may serve a double purpose to protect your escape route in case of a fire. Some changes may need to be approved in line with your building regulations so sitting down to do the checks before you fully plan your work could save an awful lot of stress down the line.
Make a plan of attack
Since you’re going to want to keep the skip rental time to a minimum, you might want to go all in and gut the whole house at once. Efficiency is key here.
Clearly every project is different, and it can pay off by tactically doing it room by room. This might be a god-send if you find yourself in the situation of needing to move in mid-gut or if it’ll be your main residence throughout anyway.
In terms of making a plan of attack (or lack thereof), we once made the mistake of taking a door off because we were excited to make progress, not thinking about the consequence of noise, dust and drafts. It was quickly refitted until such time we actually needed it to be removed.
The urge to rip into that brick, wood and plaster can be alluring, but some careful planning makes life a little easier. Aim to leave demolition until the last minute, before the actual renovation work gets started, this keeps dust and disruption to a minimum.
Distinguish materials
It may seem silly, but clearly identifying and marking brick from plasterboard walls can make the chaos of gutting a room or whole house far more simple. You can go for the good old tapping test and work with your floorplan (they’re SO much fun to make if you don’t already have one) to make a solid plan. This also saves a lot of fuss when making your plans so you’re not stumped when you need to make major changes to initial plans.

That beautiful panelling in our client’s house – it had to stay!
Protect what’s staying
We all get tempted to rush in with the big tools and get to work but taking the time to protect the bits you’re keeping will pay dividends when you’re not spending extra time doing deep cleans at the end or replacing broken windows or other costly items.
Remember, dust travels. And it travels far and is great at getting itself stuck into tiny nooks and crannies. It’ll be especially necessary to make sure dust isn’t sneaking into furniture etc if you’ve got anyone with lung or breathing conditions in your family/friends too.
Safety first
Speaking of protection, make sure you’re protected too. Your safety should always be the priority with any gut renovation so suit up with PPE (personal protective equipment) and don’t take silly risks. On this note, remember that whilst it’s not in the news so much these days, asbestos is still lurking around in older properties. Educate yourself on how to spot it and what to do if you do.
We don’t want to sound like moaning parents here but we really do care about this. Neil learnt the hard way by giving himself permanent hearing damage when using incorrect ear plugs. There are risks involved in gutting a house so PLEASE be careful when you’re making your house a home.

Be realistic with skip size
It’s nice to save some pennies where we can, but running out of room in a skip mid-gut will be a big pain and end up costing more in terms of time and ordering another skip. Be realistic with size, make sure you alert your neighbours, make sure there’s space cleared for delivery. You’ll fill any excess space in no time! If you’re totally lost on estimating skip capacity, the company you go with should be able to help you too.
We’ve found that sometimes, depending on the amount of waste, it may be more cost effective organising waste pickup rather than a skip. But do be conscious of keeping the neighbours happy.
Onto the practical bits…
First things first
With any gut renovation job, big or small, safety is the priority. Start by turning the power off. Flick the circuit breaker switches on your main electrical panel and double check with a few light switches just in case. Remove switch and plug panels first and any light fittings that need to go. If you’re a newbie to minor electrical work, just call in a profession for these jobs.
How to gut a kitchen
Assuming that you’ll be trying to salvage the cabinets to re-sell, kitchens can be gutted in much the same way as they’re installed. With the mains water off and pipes drained, you can detach any taps and dishwashers by unscrewing and shuffling out. Adhesives can usually be detached with a chisel or retractable knife. Go at the cabinetry with a power drill and it should all come apart easy peasy. Tiled splash backs can be dismantled with an air chisel.
How to gut a bathroom
As with a kitchen, turn off the mains water and electrical sources. Flush the toilet and drain all pipes including the basin. From here, you can start taking taps out, unscrewing and chiselling or slicing away at silicone holding the toilet, basin and bath/shower in place. Wall and floor tiles can be air chiselled off as with the kitchen. Vinyl flooring can be ripped after cutting into sections with your retractable knife.
How to take down a plasterboard wall
These are the walls that sound hollow when tapped. There’ll be vertical strips of wood (studs) as the skeleton with plasterboard over the top to form your wall surface. Use a chisel and hammer or crowbar to separate the skirting board from the wall and floor. Repeat the process with coving. Locate the wall studs with your stud finder, mark them out. Take a sledgehammer (the fun bit) to the gaps in between. Complete with a saw by using it to detach each stud top and bottom.
How to take down a brick wall
Internal brick walls are more often than not what is supporting your ceiling and the rest of your house structure. They tend to end up being internal walls due to extensions so they’re fairly common in older properties. We wouldn’t suggest taking on this job yourself as you’ll need to get everything checked structurally first and the risk factors in doing it yourself are way higher, not to mention the price of equipment.
NOTE: these guidelines are very simplistic and will not suit every situation but hopefully give you an idea of the process. Take every precaution to check for pipes, electrical wires and other hazards in any area you work on.

Be efficient
Make sure all debris goes straight out and doesn’t hang around. Don’t wait until the walls are down before you start clearing. On that note, why not rope in some friends. Gutting a house isn’t highly skilled work. Call in a few favours or failing that, promise pizza and some drinks at the end. It makes the whole process far more fun and creates wonderful (although sometimes chaotic) memories as well. If you do have extra hands helping out, make sure you delegate. Assign roles for dismantling, removing debris and tidying up. You’ll be the most efficient team going with a little planning.
Discard wisely
As with uncovering some hidden character-filled gems as you renovate, the bits you don’t want to keep can also hold some hefty value. Put anything that isn’t absolutely skip-worthy to one side and see if you can flog it for a profit. Think old radiators, copper piping and even bath tubs, toilets, kitchen cabinets and basins if you can keep them intact. Even if they’re not worthy of re-selling, they might be hugely appreciated by someone else in your neighbourhood and can still find a new home with a dash of kindness.
Enjoy
Dance around in your nice big open space and take great delight in appreciating the fruits of your labour. Serious homeowner points there, go you!

Now you’ve got your lovely, big blank canvas, you might need a helping hand in what to do next. We’ve got you covered! Head to our renovation online course and we’ll guide you through each step to ensure renovation success!