DIY tool list for the aspiring UK renovator
Looking for a DIY tool list? Having renovated and decorated a couple of properties now we've done our fair share of DIY. For many people DIY isn't always fun, but with a few tips from what we have learnt we hope you'll improve your efficiency, the quality of the job and who knows, you might even start to enjoy it more!
We made mistakes buying cheaper equipment so the key learning point was that if you invest in great equipment you'll be set up for a long time. This applies most of the time!
So without further ado…

1. Use a DeWalt drill and use good drill bits
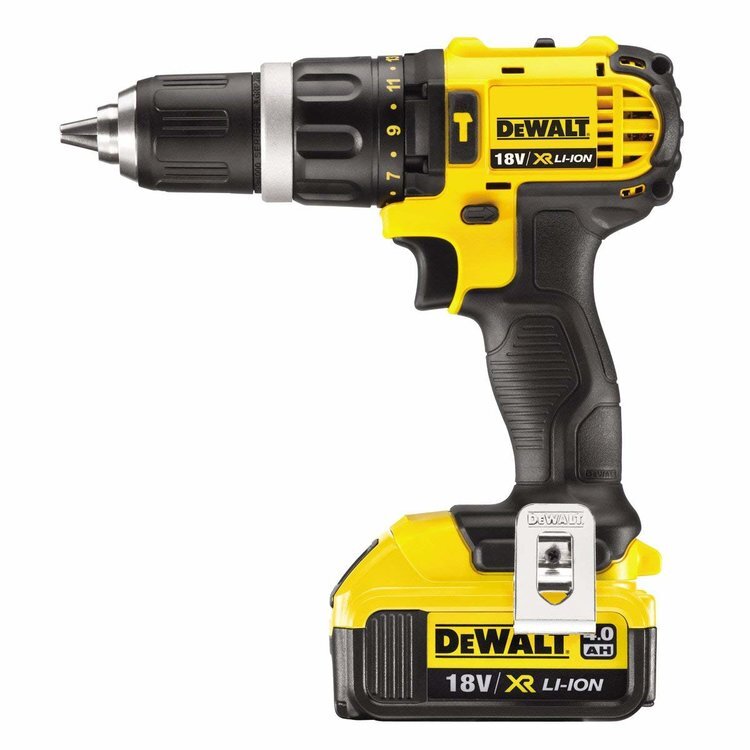
No DIY tools list would be complete without one of these. We spent a few years prior to the renovation using cheaper drills and bits and they just led to the same frustration of blowing out huge holes in the plaster and brick. In the end this led to us feeling quite nervous about picking up the drill through fear of failure. Even now, we could perhaps attribute a lack of pictures on the walls through this historical lack of confidence.
When we started using this DeWalt drill, it was a bit of a game changer as they have the power and quality that improve your chances of first-time success. However the problem was that we still had a few old drill bits in our collection and so we learnt the hard way - they're cheap and they're just not strong enough. In the end we also acquired a set of decent drill bits and we haven't looked back.
*Tip* Before using your drill, always check your drill bit turns around perfectly, if it wobbles side to side at all, it means that it was bent on a previous task and will create a bigger hole than you need - avoid this disaster by checking the bit first.

2. Those Dremel things are as good as they look
We've all seen the sales pitch for Dremels; "you can polish, sand, cut, drill" etc and when we bought this we suspected it was going to be a bit of a gimmick really - use once and then it just sits on the shelf.
Although this Dremel Multitool will not be something you are constantly using, it certainly does things that no other tool can do. It's great for situations where you need to trim something down, smooth a rough edge or get into nooks and crannies that a normal sander would not be able to get.
Learn from our mistakes and pay for the real/branded Dremel refilling parts. We bought cheaper replacement sanding tubes which are tempting, you can buy big bags of these cheapo knock off alternatives, but quickly found that they were oftentimes faulty, of much lower quality and led to stress and poor results. Pay for the real thing or don't bother at all.
3. Mouse sander
Our trusty Black and Decker Mouse Sander has made our lives a whole lot easier. Because it is so light, it makes sanding a real breeze and the size of the unit and shape of the sanding pad (and the supplied attachment) means that you can get into those tight fitting corners and spaces really easily. Due to it's effectiveness in small to medium jobs it can be tempting to use the mouse sander for larger sanding jobs and having done this we would recommend getting something a little more robust.
There are really three different levels of sanding that you might want to do in a general refurbishment
Black and Decker Mouse sander - use for light sanding for plaster and woodwork

Black and Decker Orbit Sander - Use for bigger sanding jobs e.g. large areas of wood like panelling

Bosch Belt sander - Fantastically powerful sander for stripping doors etc back to wood - watch your fingers with this one.
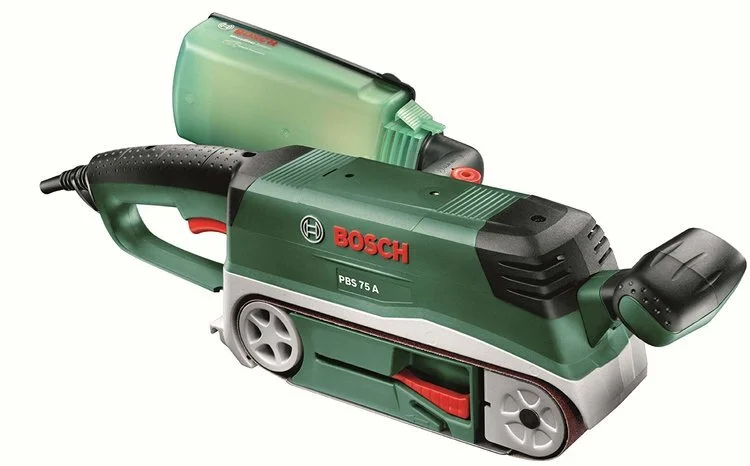
Tip: Make sure your doors are actually wood before attempting to sand with this! We found out that the middle panel of our lovely traditional doors were actually plastic - when we'd spent many hours sanding the many layers of wooden sides back, the middle panel melted within seconds (facepalm emoji)
4. Gamechanger for cutting in
Cutting in is the process of creating clean lines where two different paint colours meet e.g. where the wall meets the ceiling, or the wall meets skirting. After spending many hours of mistakes and almost bursting into tears (yes, really), we learnt that you should NOT cut-in with a normal brush. You 100% need a Hamilton cutting in brush which makes the job approximately 150X easier. The other approach you can also try in some scenarios is using masking tape but paint bleeds through sometimes so it's not great. Really the cutting in brush is one that just needs to be in every DIY painter's brush set.
I wrote a blog post all about my technique for cutting in, I don’t know if it’s the best way but I like it!

5. Caulking/sealing gun
You’re going to get very familiar with one of these bad boys over the course of your project, whether it’s caulking around skirting, or windows, using it for No More Nails, sealing around a sanitary ware, better make it a goody because trust us; no one enjoys using a poor quality one.

6. Cable Extension Lead
It’s a great idea to get a nice, easy to unwind cable extension lead like this with a thermal cut out (just in case you overload it with big power tools). We bought this exact model and it’s long enough that we can go all the way to the bottom of our garden so it’s been great for our project.

7. Metal work platform
We borrowed one of these metal work platforms from my neighbour for a job. It’s definitely a lot more stable and portable than working on a stepladder.

8. Saw horses
These saw horses came in extremely handy, they allow you to cut or paint longer lengths of wood or skirting. We used them extensively for priming and painting the skirting throughout our house before they went on and they were also really useful for doing our 1930s front door.

9. Laser measure
Sometimes technology comes along for technology’s sake. Not so so with a laser measure. You get super accurate measurements and it will save you a shed load of time. Get one.

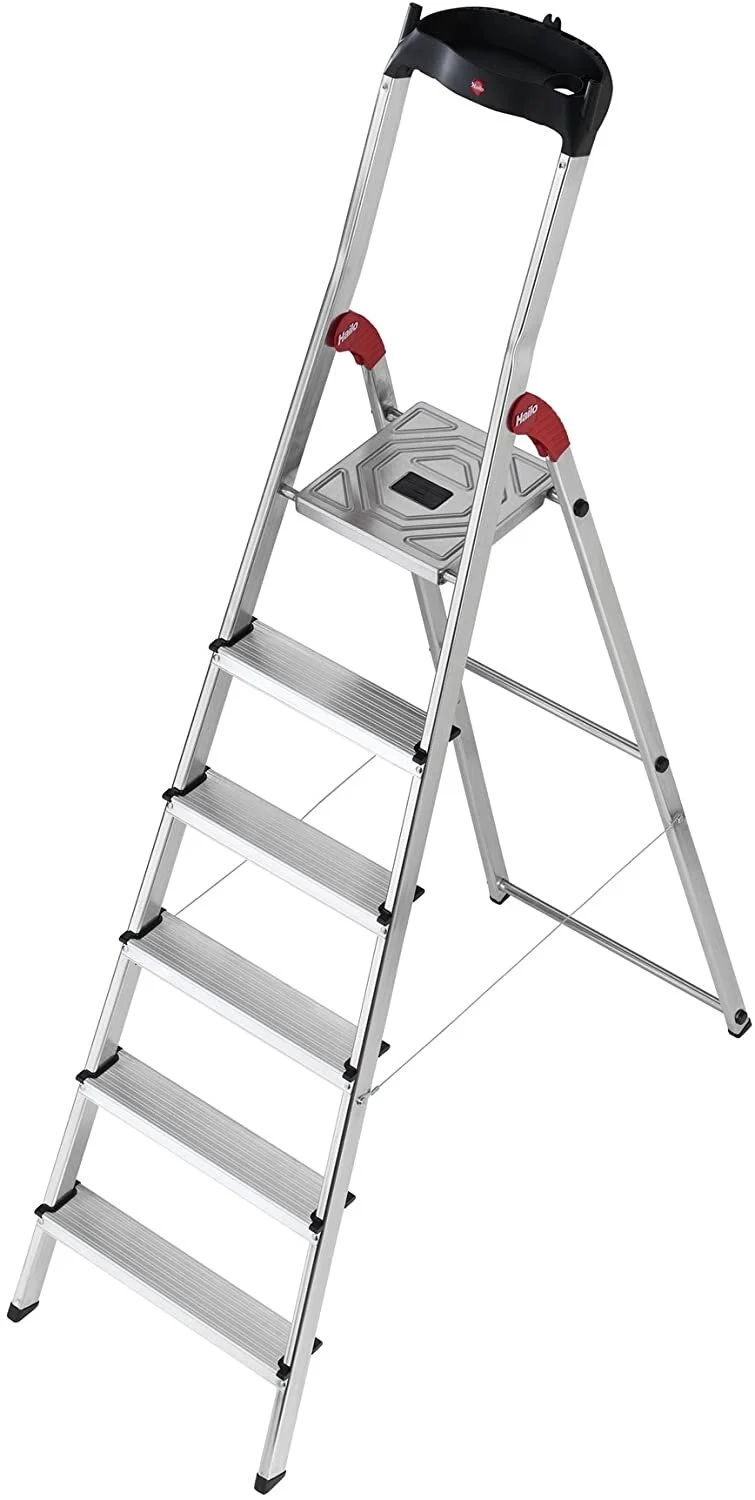
10. Stepladders
These Hailo Stepladders have been my pride and joy since we bought them. Being German made, they are of course robust. They have plastic bits all over them so you don’t scratch floors and walls and have a lovely little compartment at the top for all of your little bits and bobs. The top step can hold roller trays nice and snug. Get one.
11. Scrapers & fillers
These don’t need any explanation! Check them out on Amazon

12. Tape measure
Make sure to grab a good old Stanley tape measure and don’t mess about with piddly little ones, get this 8m one and you’ll (hopefully) never need another.

13. Drill bit and screwdriver set
You’re going to need a whole load of drill bits to go with that drill of yours. This Dewalt Drill bit set has a handy screwdriver inside it too.

14. Circular saw
I don’t know where I was until I found the love of my life; the Worx circular saw. This lovely machine has given me so much pleasure and I was very interested to see that the new version has a laser sight on it so you can pretend to be the Predator when you’re cutting your 2 x 10. Yes please.
You probably don’t realise how much you need a circular saw until you get one and then you will never look back. Trust.

15. Work bench

When you’re starting out as a renovator, getting a great quality work bench probably doesn’t seem like the biggest priority, fortunately there are many lower priced products out there that can see you through your renovation (but beyond that you would want to look at more expensive and durable tools.
This is a similar workbench to the one I have and it’s been just fine for infrequent use.