Painting tips for DIY newbies
This post contains affiliate links. See our disclosure policy.
Not many people know that I (Neil here!) used to work for Farrow and Ball. It was my first job in my late teens to early twenties where I worked with my mum - oh yep no doubt I was the coolest cat on the block.
Once I had left home in the early 2000s I remember using my staff discount to get myself a tin of Eating Room Red Estate Emulsion to paint my rather small bedroom. If you don’t know Eating Room Red, it can be described as the sort of thing used in a French boudoir or gothic palace, or at the very least; a period property. For this scenario, F&B’s demographic had now extended to a grunge fan in his early twenties painting on top of wood chip wallpaper in the box room of 1960s purpose built flat in Poole.
The end result was to say the least, oppressive. But who knows, maybe that’s what 20 year old me wanted…
From those ill-advised decorating days I like to think I’ve come a bit of a way with my skills, including testing lots of colour matches with farrow and ball. Painting is one of those things that is easy to learn and a little trickier to master and with every decorating job comes new learnings that make life that little bit easier.
I’m not claiming to be a world class painter but here are some tips and tricks I’ve picked up along the way (some from my Dad) that might help a newbie painter.
Preparation is the key
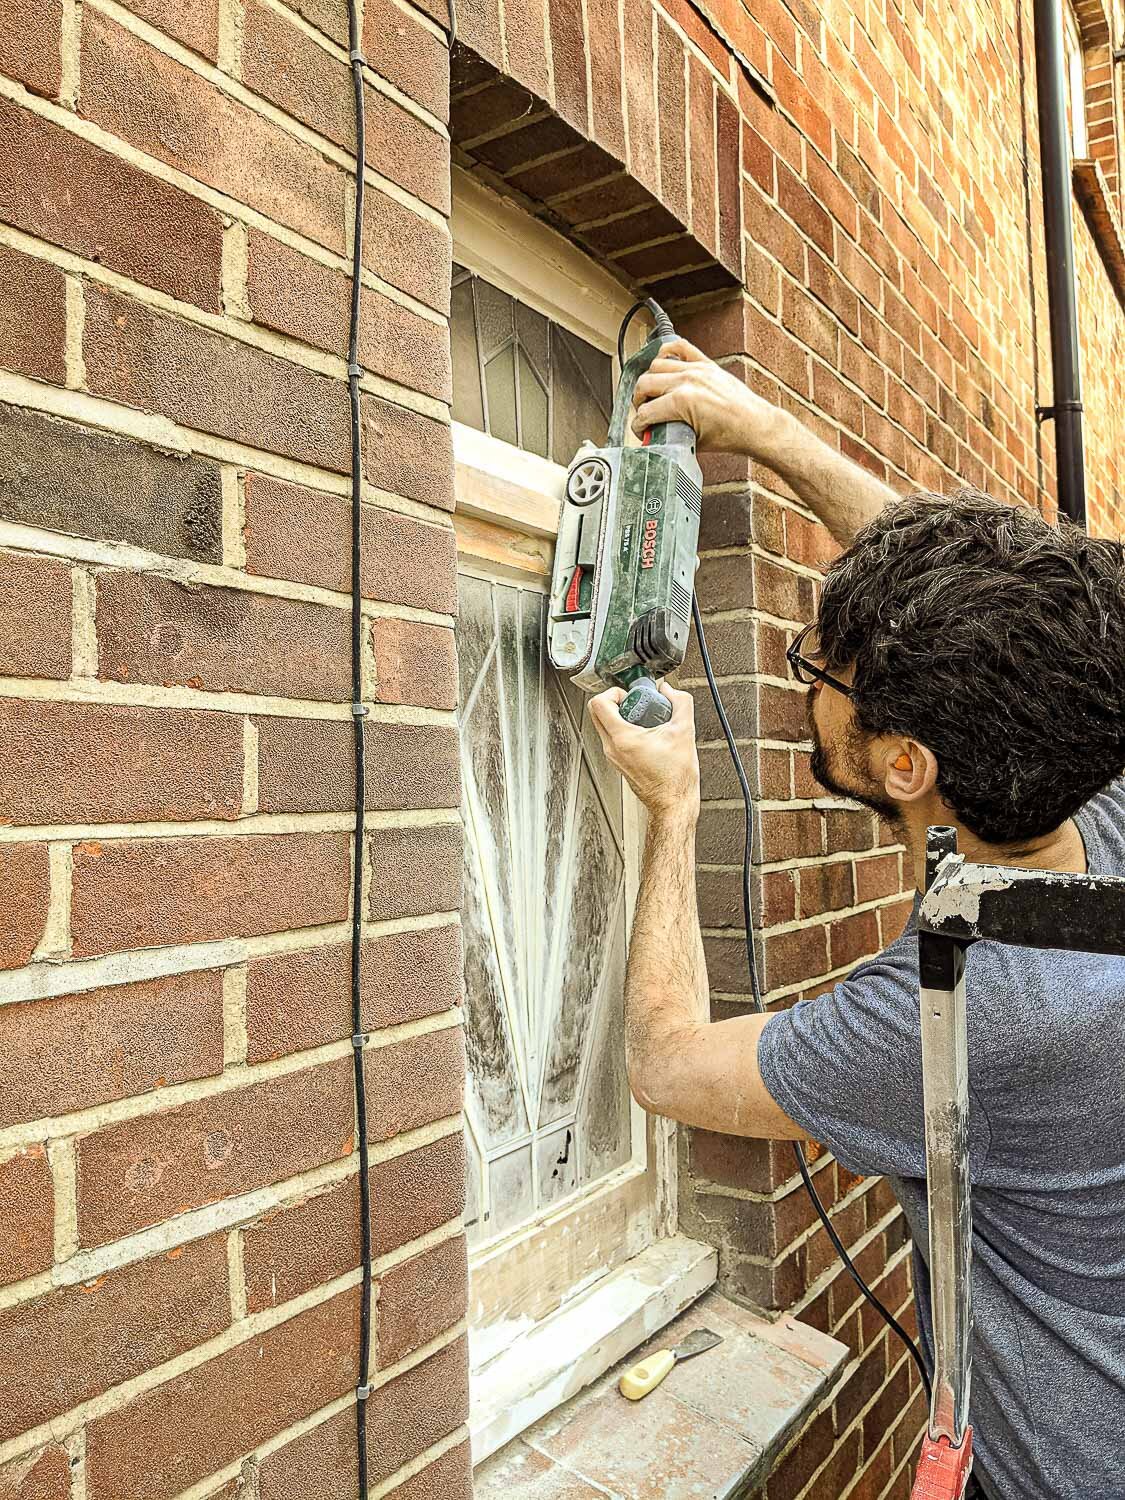
You could write a whole blog post about making surfaces sound for painting
Inside that header is a little joke - getting a ‘key’ is what you do when sanding surfaces creating ‘micro scratches’, which allows your primer or paint to adhere to the surface.
Run your hand over the surface to be painted, if there are any bumps or indents, they are more than likely going to be visible once you’ve painted. Make sure you fill/sand these areas.
Wood knots should be covered in a layer or two of knotting solution (if you don’t the knots will stain through the paint for years)
Primer/undercoat should always be used on bare wood and metal to ensure no peeling or chipping occurs later down the line
Bare plaster, once dried, needs a layer of mist-coat. Buy some cheap white paint and water it down 70/30 (70 paint). In the words of one of our favourite contractors just “piss it on”. i.e don’t worry too much about taking care of the finish, just get it on.
PRO TIP: sand between coats of paint where the initial result is a little rough. Yes it takes a bit longer but it will get an extremely fine finish. Just makes sure the surface is cleaned before painting
Trust us, skipping any of the above steps will produce a lack lustre result
2. Invest in your paint brushes
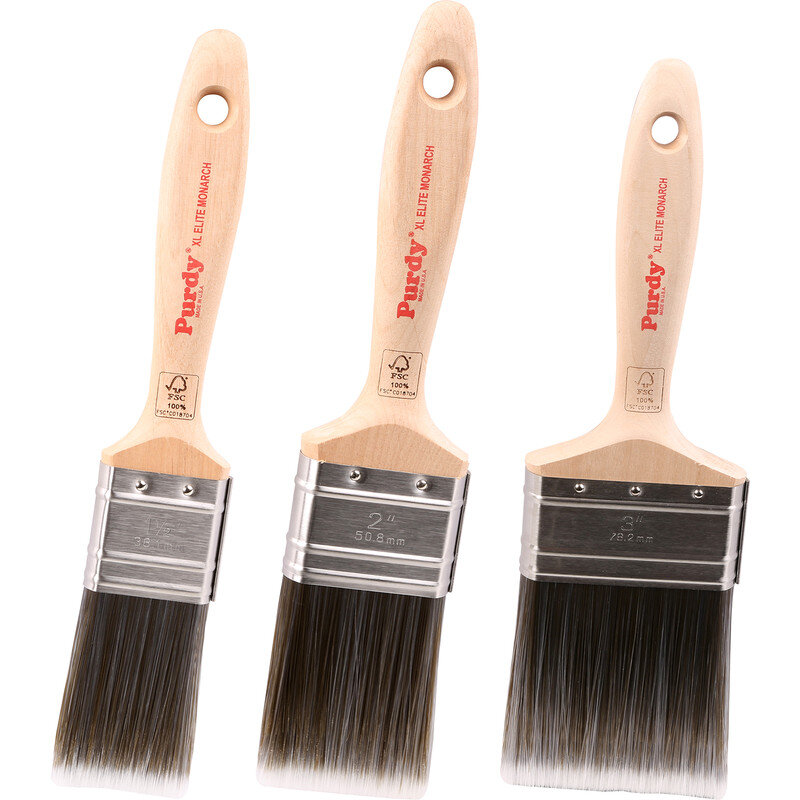
You know those cheap bulk-buy brushes you get at your local DIY store? Don’t touch those with a barge pole. They will shed their bristles and leave you with an undesirable finish that you’ll be looking at for years.
Do yourself a favour and invest in an upmarket set of brushes and look after them. Harris brushes are a good start for a fine finish, but if you’re really looking to up the ante, then go for our insider tip of this blog: Purdys brushes. They come recommended by a painter and decorator that we know.
3. Use masking tape with care
Masking tape can be used to great effect in certain situations, for example when you need to protect a surface from paint splatter or an unsteady hand. When it comes to masking tape, expensive does not mean better. We’ve had some poor results with the upmarket options that can sometimes rip paint straight off the surface - something that is particularly frustrating to repair. Surprisingly we’ve had success with the cheaper beige/cream masking tape.
4. Become a pro at cutting in
As a decorator/renovator you often learn the hard way, having those “a-ha” breakthrough moments when you realise the process/tool/tip/trick to get it right. There is a rite of passage that any decorator must go through until they shed those ‘noob’ emblazoned overalls, and that is the dreaded CUTTING IN. Dun, dun, dun!

Vader after making a mistake cutting in
For the uninitiated, ‘cutting in’ is defined as the process of carefully painting an edge where two different surfaces/colours meet. Finished your fun bit of rollering? That was quick wasn’t it? Well look forward to some gruelling, boring, slightly stressful cutting in. You only have one chance to get it right because if you slip and go over the line, it’s quite time consuming and tricky to resolve. OK it’s not the end of the world but at the time it sort of feels like it…
We painted a room or two before we found out about cutting in brushes. We don’t use the term game-changer lightly. They make it soooo much easier because they are angled.
Make sure you are at the right height/level; get a step ladder and don’t stretch too far
Hold the cutting brush as close to the bristles as possible - think holding a pencil technique - even holding much of the metal bit
Make sure to make contact with the wall in two places - one with the brush and again with your arm/hand to ensure stability
Don’t drench your brush in paint. Think small-medium amounts.
When you’ve just dipped your brush into the paint tin, it will still have quite a bit of paint on it. Don’t go straight for the edge/corner, paint the open area part of the wall first to disperse the excess paint and then use the residual paint to do close to the edge.
Try not to move your wrist as this makes a curve, try to move your entire arm with the brush to make a straight line
5. Get yourself the right roller

Who would have thought that there are so many different types of roller?
There are even quite a few different diameter roller sleeves; make sure it is compatible with your rollers. Get familiar with the measurements of yours.
If you’re painting a ceiling, you’ll need a telescopic roller so that you can reach (you can do it with a normal roller and a stepladder but it’s tricky and takes longer)
Different surfaces require different roller piles - don’t think that you can use every roller on every surface. A general rule of thumb is that the rougher the surface, the longer hair the needs to be on the roller sleeve.
6. Take care of your clean up job
When you’ve finished a day of painting, all you can really think about is sitting down, maybe eating dinner and unwinding. The last thing you want to do is do any more work. But the truth is, there’s a bit of extra work that can save quite a bit of hassle and money.
If you’re finished, clean your brushes out as soon as you finish - if any paint dries on them they will be ruined. You can actually buy brush combs which make the job even easier.
If you’re painting or rollering the next day, then you don’t need to wash anything out - you can wrap rollers in cling film or bag up your paint brushes so they don’t dry out.
Important: don’t pour solvents down the drain
7. Get a decent stepladder

Just the three of us
We love our trusty Hailo stepladder, it’s done such a good job for us for painting over the last few years. It’s super light, has a handy tray section for placing random bits and bobs (also stops it scratching surfaces) and it is just about the right width to fit a roller tray on the top step (one would expect they’re all made that way?). One reason it’s well made might be because it’s German and we all know those Germans do make stuff well don’t we?
8. Take your time and have fun
Try and and take your time with painting. If you’re renovating then there might be a mad rush to paint certain areas before installation of cabinets/furniture etc - but try to front-load your DIY - do as much as early as possible, to avoid these situations where you’re just running around because that is when you make mistakes and get a poor finish.
Our advice is, stick a great playlist on, make plenty of tea and just have fun with it, seeing your room go from drab to fab in one day can be extremely rewarding and a memorable experience!
We hope this was helpful and good luck with your decoration project!
Whilst you’re here
If you enjoyed this post and want to stay engaged with all things Fifi McGee, then why not sign up to our newsletter the Happy Home Letters for a fortnightly dose of home making magic into your inbox?


