How to Plan a Kitchen Layout (Step-by-Step Guide)
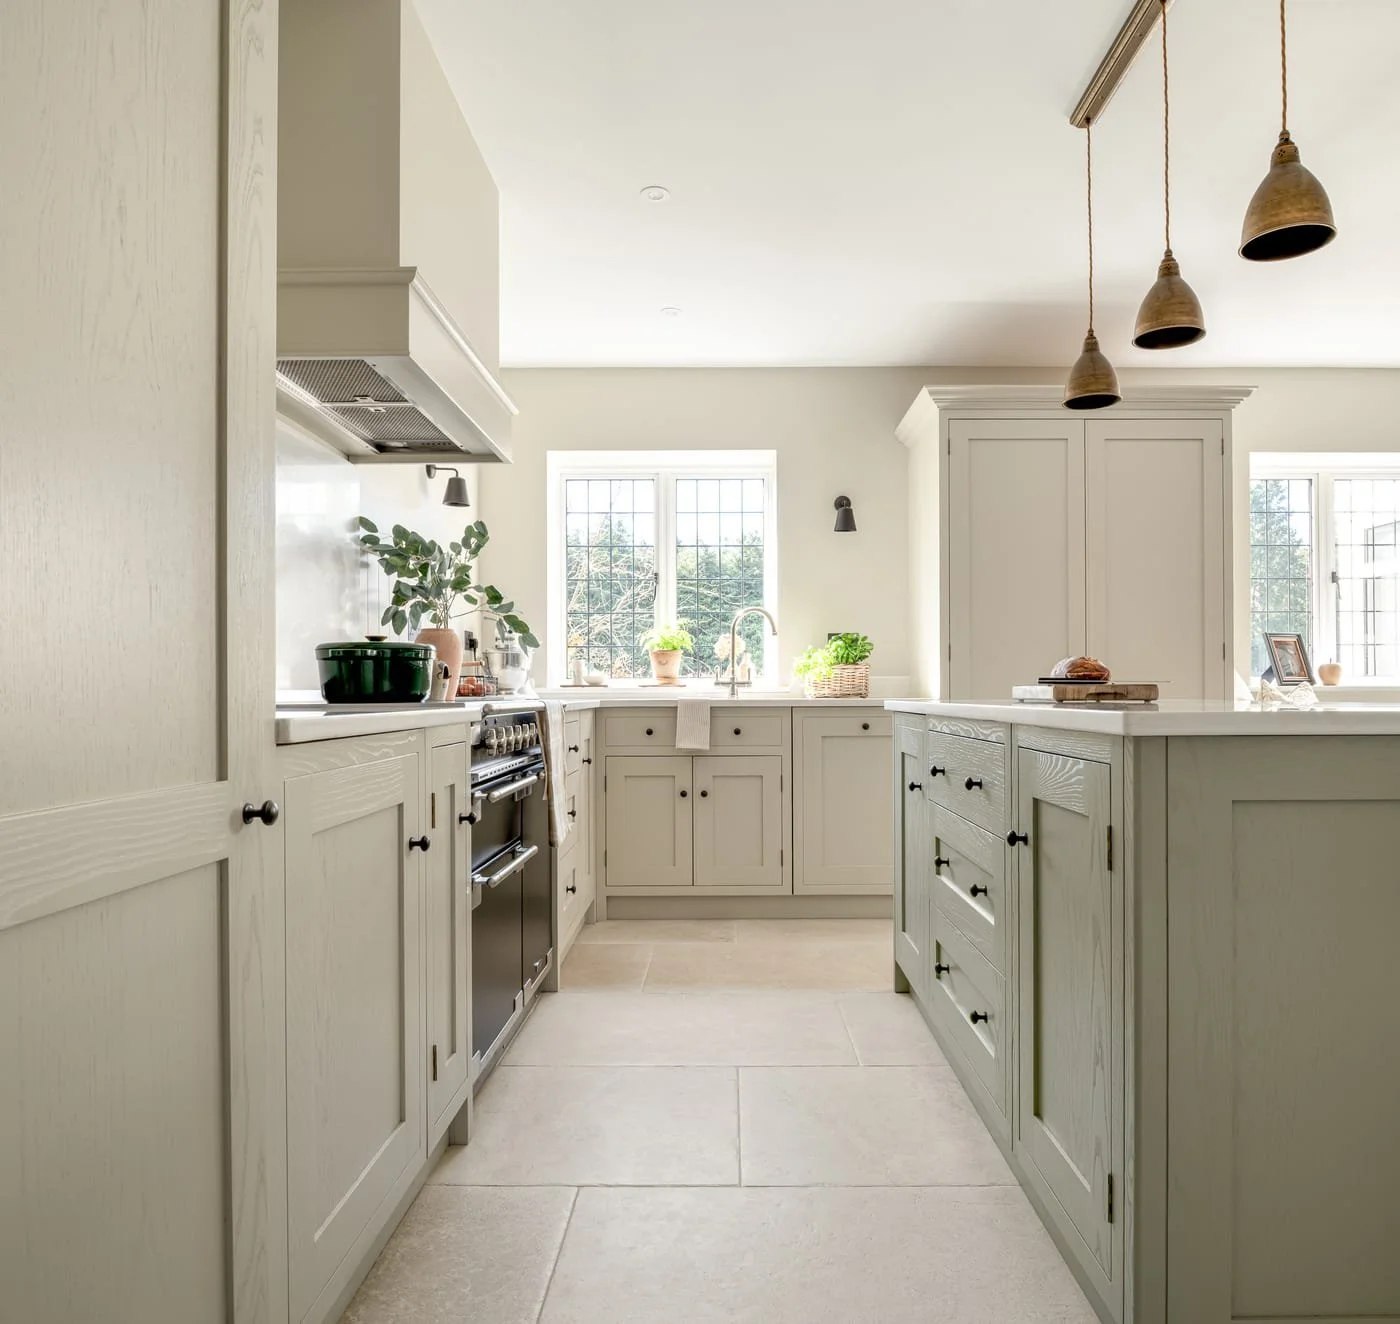
COPYRIGHT: FIFI MCGEE LTD
The best way to plan a kitchen layout is to decide your cabinet positions, appliance locations and clearances before building work starts. Start by positioning the sink, cooker and fridge on your floorplan, then check walkways, storage, lighting, plumbing and electrical requirements before finalising the design.
Wrong layout decisions can ruin even the most beautiful kitchen. You end up with a space that doesn’t flow, can’t fit the features you want, or worse, it becomes questionably unsafe to use.
So in this post, I want to show you exactly what to do step-by-step and break it down.
Contents:
How to plan a kitchen layout
Kitchen layout myths
Step-by-step planning method
Drawing your layout
Common mistakes
FAQ
Next steps
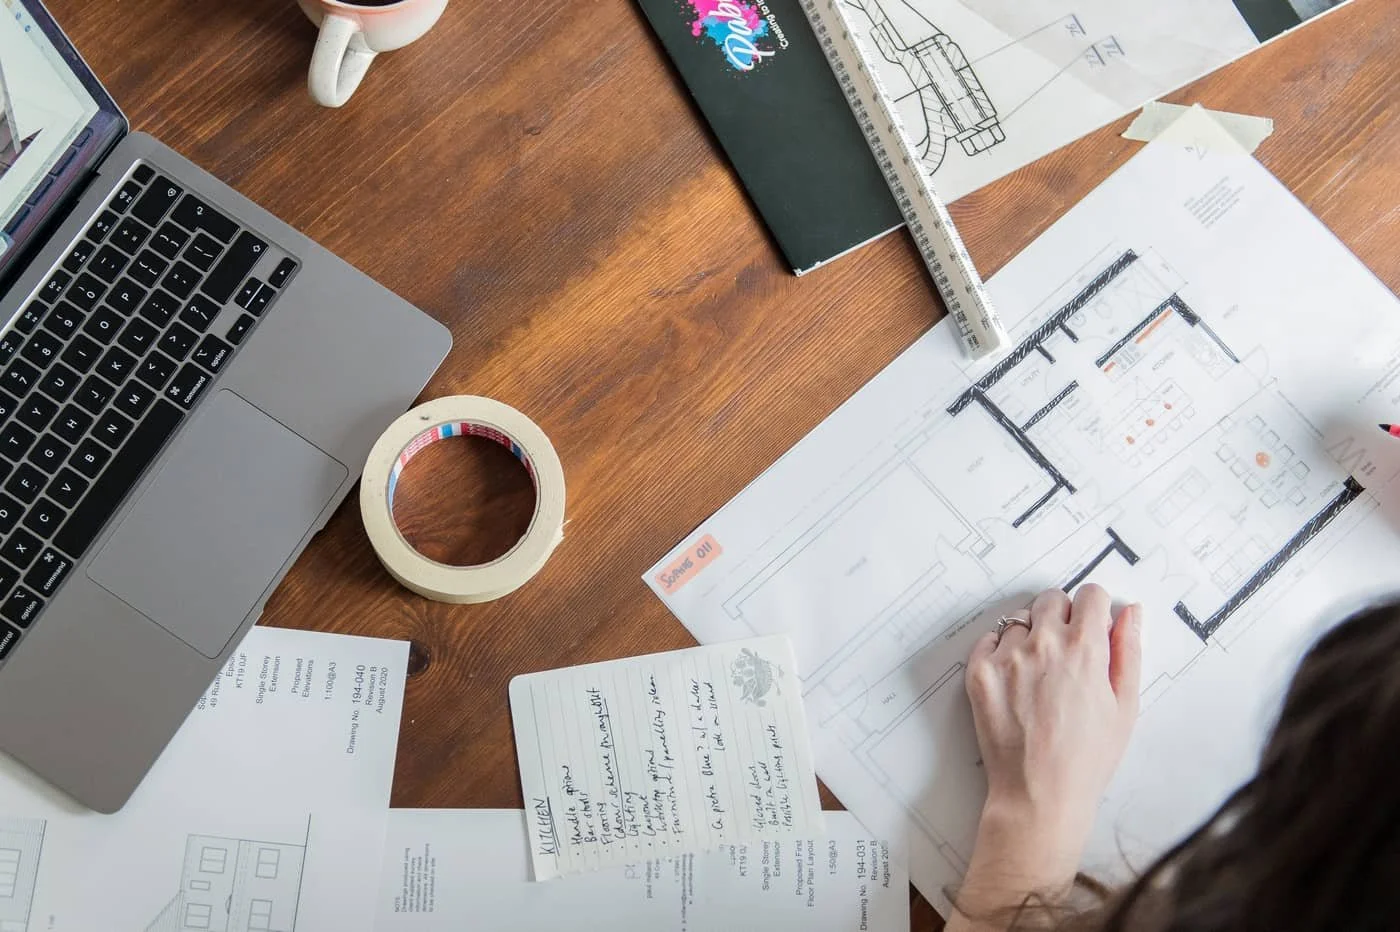
How to plan a kitchen layout
The best way to plan a kitchen layout is to decide your cabinet layout, appliance positions and clearances before your build starts. Otherwise you risk choosing the wrong socket & lighting placement, or make mistakes under pressure.
In this guide, I'll show you the exact process I use as an interior designer to create practical kitchen layouts that work in everyday life.
And stick around until the end of this post, because I’ve got 2 serious layout mistakes that can wreck your kitchen layout - one of them could even put you or others in your household in danger. We don’t want that!
fi duffy, interior designer
Hello if you’re new here by the way.
I'm Fi, an interior designer who has helped thousands of homeowners plan kitchens and avoid expensive renovation mistakes. This process comes from real client projects as well as the methods we teach inside our renovation courses.
The Kitchen Layout Myths To Ignore
OK first I need to give you a heads up on something.
As I’ve worked with clients over the years, I’ve noticed a few really common beliefs about kitchen layouts that leaves them questioning their decisions (and then completely derailing the design if they’re followed).
So I want to bust those myths, one by one.
❌ Myth 1: “The builder said we can finalise our kitchen layout later”
A lot of people think they can get the build underway, then figure out the details like the dishwasher position, where pan drawers will go, or where the recycling bin will be positioned, later on.
But problems can unravel later.
You become so focused on quotes, contractors, and timelines… you tell yourself you’ll nail down the details with the kitchen supplier later…
But when the build starts, walls are going in, the first fix electrics & plumbing are happening, and when you eventually start deciding your cabinet placement, you suddenly realise:
There’s no space for the dining table you imagined.
Your dish washer is going to block a walkway.
The fridge freezer you wanted throws off the whole balance — and forces you to shift the cooker so it’s no longer central.
All the electrics need to be rerouted.
And by that point, you’re stuck making compromises you didn’t want to make.
The truth is your kitchen layout needs to be planned cabinet-by-cabinet long before the builders arrive. And don’t worry I’ll get you started on your layouts in the next section of this blog post.
When should you plan a kitchen layout?
Before first-fix electrics and plumbing. Your contractors need to know how your kitchen will be laid out. Otherwise sockets and drainage could be placed in incorrect locations, costing you more to have repositioned.
❌ Myth 2: “Our architect/kitchen showroom designer will have thought of everything”
I wish this one were true, but it’s not!
Your architect is brilliant for the big picture, but they won’t detail every drawer or think about things like whether your bin fits under the sink.
Similarly your in-house kitchen designer will know their product range inside out, but their focus is on the showroom sale not necessarily the lived-in reality in your home.
The people you bring on board are not always thinking about things like:
Where your extractor fan vents (and whether it’ll blast steam over your patio doors).
Whether your tall units will block your only natural light.
If your hob choice affects the clearance needed under your extractor.
How appliance and cabinet doors swing in real life.
If YOU don’t ask these questions before ordering your kitchen, you’ll be stuck with whatever the plan has set out.
You have to be PROactive not REactive with your planning... and if you want to get really smart with your planning, then our online courses are where to start.
❌ Myth 3: “That small kitchen detail won’t matter!”
So many people go wrong when they think this. Small details won’t magically sort themselves out.
In fact, oversights, and not thinking things through, is the fastest way to end up with a kitchen that’s really frustrating to use.
I’ve seen:
Drawers that can’t open because the handle hits the wall.
I’ve seen dishwashers that are a nightmare to plumb because they’re too far from waste pipes.
I’ve even seen islands that you can’t walk around without sidestepping.
How much space should you leave around an island?
At least 900mm for walkway and cupboard clearance. Ideally more, to enhance the space and flow when you have 2 or more people working in the kitchen.
Truthfully, when it’s your first or second kitchen you’ve ever designed, you’ve got to give yourself the right reference points when you plan.
That’s why I equip my students with the Kitchen Layout Cheat Sheet. It’s a step-by-step list to make sure you’re provisioning your kitchen layout correctly. (It’s free to download for a short time).
The Fifi McGee Kitchen Layout Methodology
Step by step planning a kitchen
Next I’m going to reveal some of the Fifi McGee Kitchen Layout methodology that we apply to client’s kitchens. It’s the same approach we teach students in our online courses including that checklist I mentioned – big shout out if you’re a student reading this.
This methodology is how we make sure kitchen layouts not only function correctly but they become more straight-forward to plan, nothing is missed, cupboard space is provisioned accurately, and you end up with a stunning design that stays within budget.
Part 1 – APPLY The Kitchen Work Triangle
What is the kitchen work triangle?
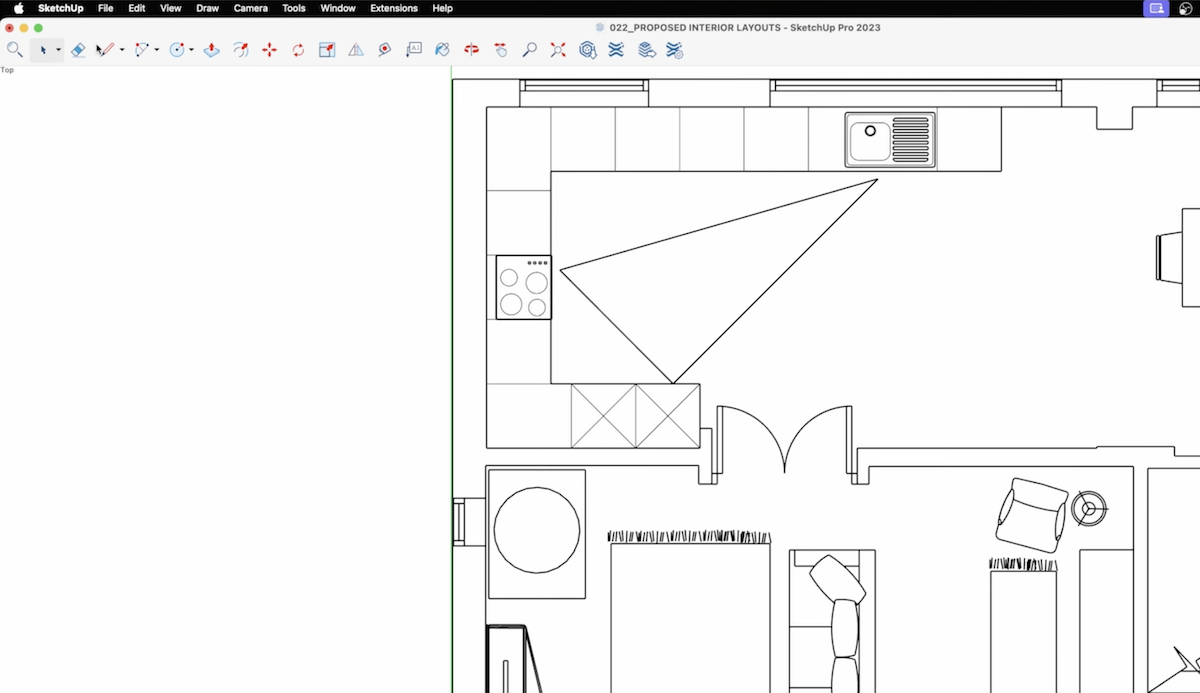
The first step in the methodology is considering The Kitchen Work Triangle. This is a really simple design principle – and even if you’ve never heard of it before, you’ve probably felt the benefits of it in a kitchen that’s well designed. Tasks just seem to work.
The work triangle is about putting your cooker, fridge, and sink in positions where you can glide between them while you’re cooking, instead of zig-zagging unnecessarily across the room.
If you get this right, everything from boiling pasta to grabbing milk for your tea feels easy - and you’re not constantly bumping into people or furniture along the way.
Don’t worry you’re not going to need to dust off your scientific calculator, and start doing trigonometry to get the exact distance, millimetre perfect between your fridge, sink and cooker. It’s just about being mindful when your fridge, cooker, and sink are too far away and cooking becomes a workout. Keep them in a relative triangle and the whole kitchen will flow.
Part 2 – CHOOSE YOUR FOCAL POINT
How do you choose a focal point in a kitchen?
A focal point is somewhere your eye is drawn to and becomes the centre of your kitchen design bringing balance and harmony to the space.
Typically it can be a feature wall, like the wall your cooker or the sink sit on.
When kitchens lack a focal point they can feel a bit lost and lack personality. So make sure you know which wall will be your focal point as you plan your kitchen layout and floorplan.
Part 3 – SET YOUR Budget
How much should you budget for a new kitchen?
There's no single budget that suits every renovation. The right kitchen budget depends on the size of your room, the specification you choose and your renovation priorities. The most important thing is deciding where to invest and where you can save before you start designing your kitchen.
Your kitchen will be one of the most expensive rooms you’ll be renovating and it’s fair to say that costs can run away with you faster than you can boil the kettle!
Budgeting & ways to make savings plays a big role in the methodology & our online courses but just to give you some ways to bring costs down:
Swap out some wall cabinets for open shelves.
Remove expensive add-ons like corner carousels or pull-out larders - they can be retrofitted later.
Stick to standard-size appliances to avoid custom cabinetry which can be costly.
When our students are concerned about designing a kitchen that’s too expensive for them, they follow a structure and use tools like our Vision First Method calculator to show them exactly where to invest and where to save without compromising your style.
Part 4 – ALLOCATE CABINETS
How do you know how many kitchen cabinets you need?
One of the biggest questions homeowners have is, "How many kitchen cabinets do I actually need?" The answer depends on what you need to store, the appliances you've chosen and how you use your kitchen. I always start by planning storage before choosing cabinet styles, so I know every item has a home.
This is precisely why I created the Kitchen Layout Cheat Sheet - are you ready for this?
It’s the exact resource I give my design students to make kitchen planning so much easier. It takes away the guesswork of ‘how many cabinets do I actually need?’ and ‘what have I forgotten to include?’ so you can be confident your layout covers everything.
Inside, it’s split into three simple sections:
Standard kitchen layout essentials – the minimum units every kitchen needs, with the right mix for food storage, cooking, dinnerware, and general storage.
Appliances to include in your plans – so you don’t forget anything that could throw off your design later.
Special extras – things like wine coolers, coffee stations, or display cabinets, so you can plan for them now instead of wishing you had later.
It’s basically a shortcut to making sure you’ve got the right cabinet provision, the right measurements, and the right appliance positions, without overlooking the small details that make a massive difference day to day.
Normally, it’s only available inside our online course, but I’ve made it available to download for a short time if you’re reading this — so click the link here now to grab your free copy.
How to draw a kitchen layout
You might be keen to see how everything I’m showing you is put into practice in a real life kitchen so in the next part of the video I’m going to walk you through how I draw kitchen layouts and apply the methodology.
When I’m planning a kitchen layout, I’ll start by measuring up the room, then drawing a blank floor plan of the space.
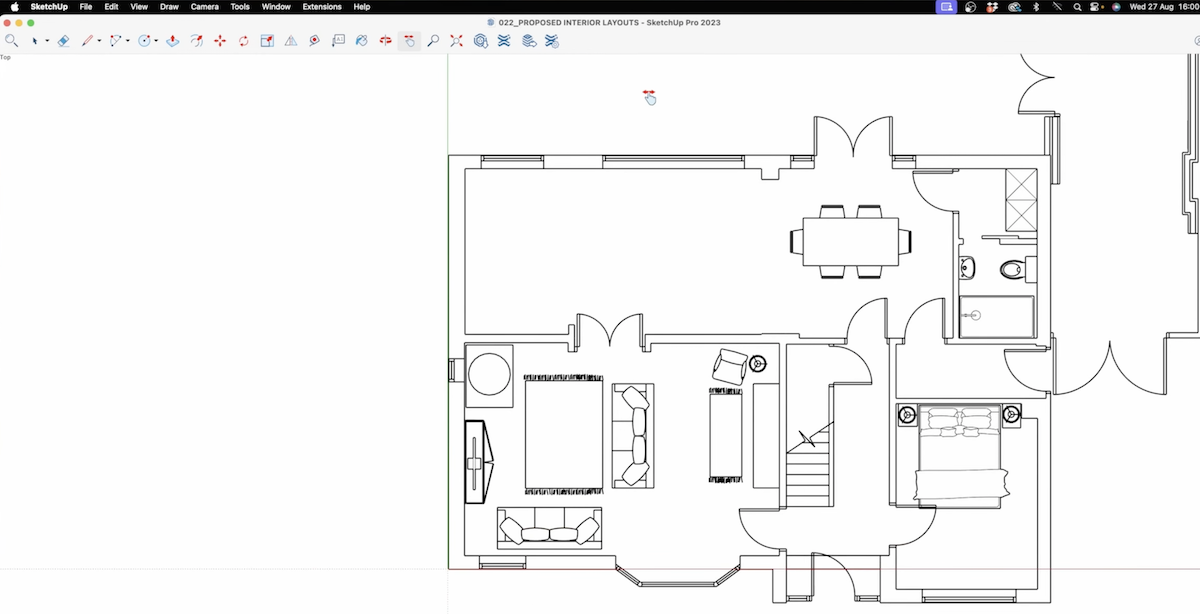
step 1: Drawing the space
I use Sketchup, which has a bit of a steep learning curve but you can also find free tools online like the DIY Kitchens 3D Planner, Floorplanner and Magicplan.
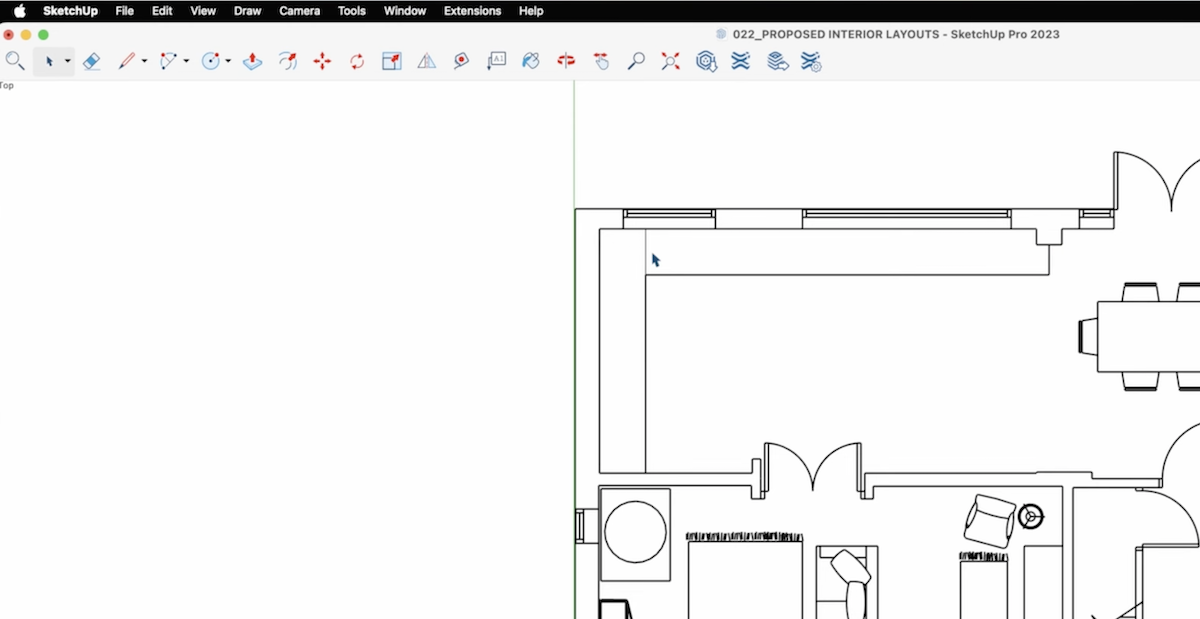
step 2: draw the unit runs
I’ve got the 4 walls and any doors drawn, and then the first thing I do is draw a run of units where the kitchen will be positioned. Kitchen units typically finish 600mm away from your wall. Your worktop is usually 600mm deep unless it’s an island.
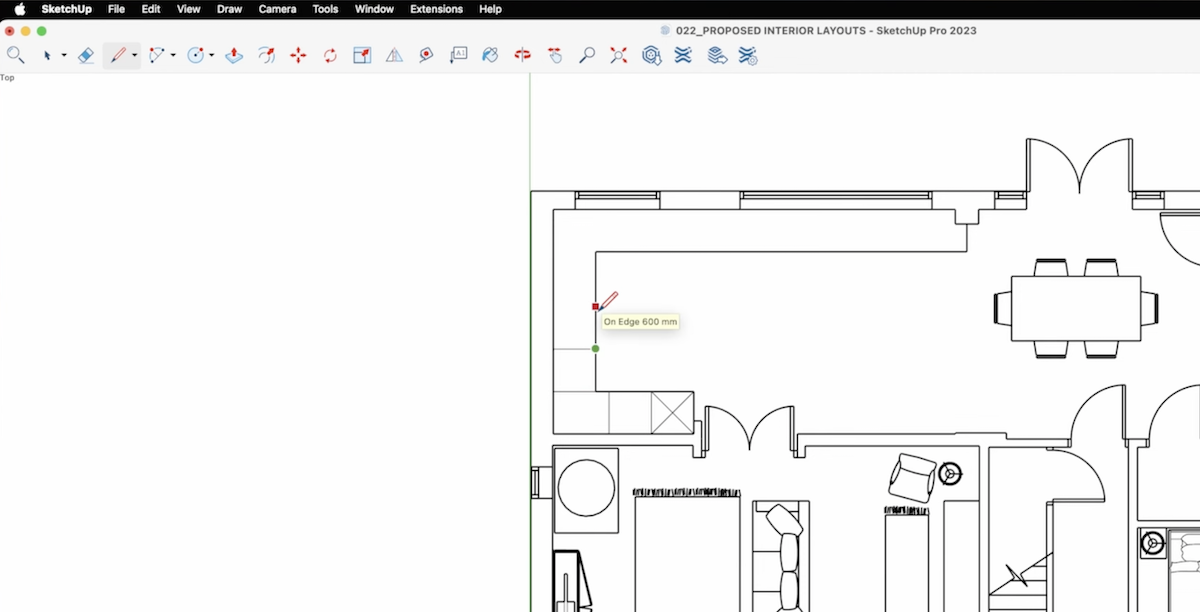
step 3: split the unit lengths into 600mm blocks (cabinets!)
Then, I start splitting the length of units up in 600mm blocks.
And the reason why is because standard appliances and base cabinets are 600mm wide —so your fridge freezer, washing machine, dishwasher and standard base cabinets are usually 600mm. This way I can quickly see exactly how many standard units could fit on each wall. Obviously we can have narrower and wider units which I’ll switch around using the Kitchen Layout Cheat Sheet as a reference point! But this initial approach helps me to just start somewhere and figure out how big the space is.
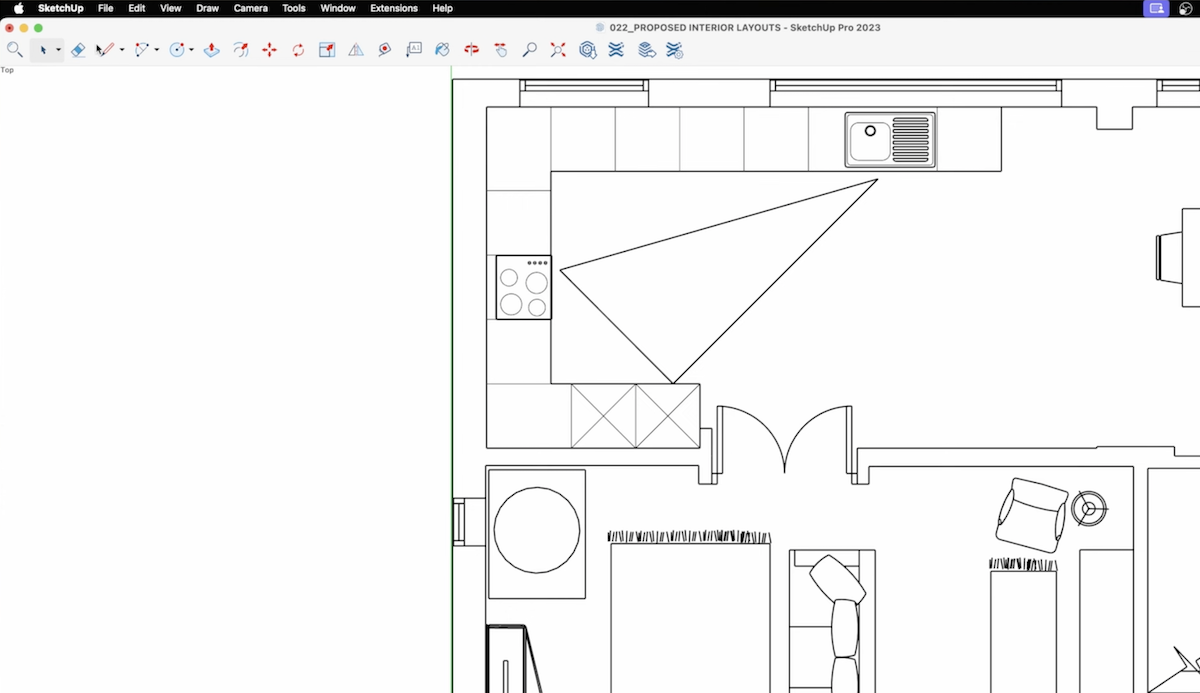
step 4: position the big 5 (and reference the layout cheat sheet)
Next, I position what I call the Big 5.
The Cooker & ovens
The Dishwasher
The Fridge freezer
The washing machine if it’s not going into another room
The Sink
And here’s where I aim to create that work triangle between the cooker, fridge, and sink so tasks flow easily.
From my experience, I’ll usually try to keep the sink and dishwasher close to each other and on an external wall for more straightforward plumbing, placing the sink under a window if I can (especially if there’s a nice view of the garden) but I’m not rigid about it. Sinks can work well on islands or against walls too.
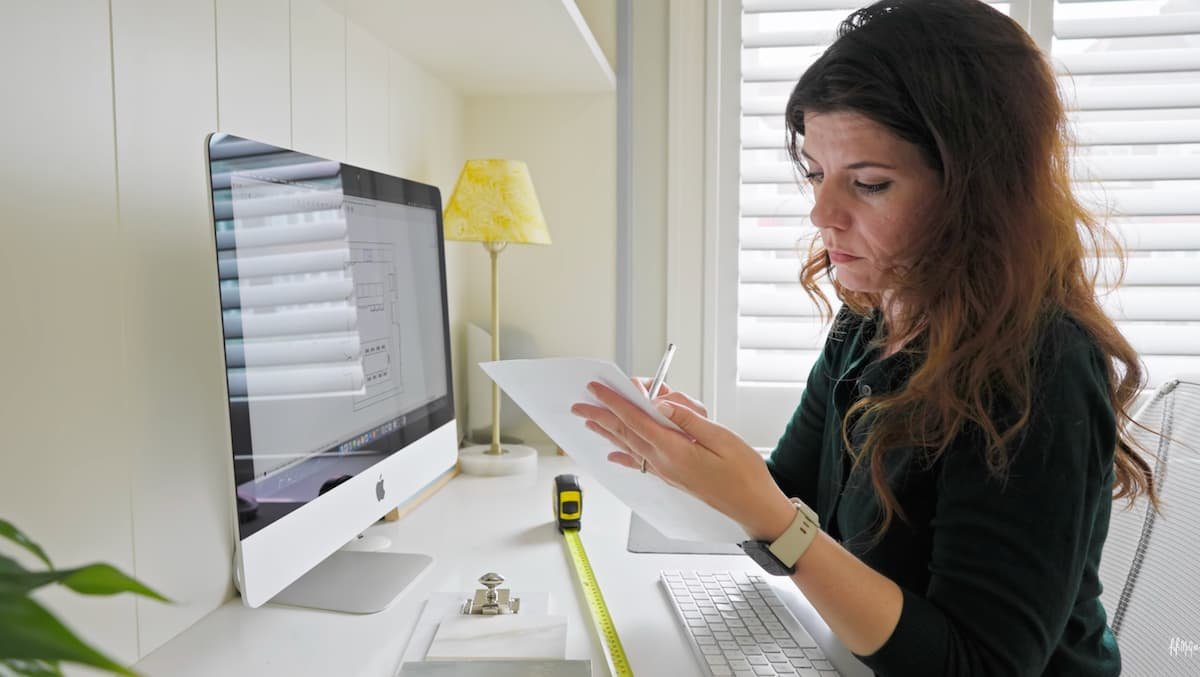
Then I try to determine the focal point. Usually it’s the cooker or sink that becomes the focal point of many of my designs especially as my clients love modern country kitchens where the cooker or belfast sink is a really central part of design. So it really depends on the space and client’s needs.
Reviewing the kitchen layout for issues
On every project I design, I pull out my Kitchen Layout cheat sheet to start positioning in pan drawers, tall cabinets, recycling units and making sure I’ve provisioned enough space for everything from dried foods, to glasses and plates.
I’ll do a quick check on paper to ensure everything has the right clearance and nothing will obstruct walkways or appliance doors, which I also do on-site too.
I recommend actually using masking tape to measure out where your units will run in your space, and roleplay things like making a cup of tea, unloading the dishwasher, things like that.
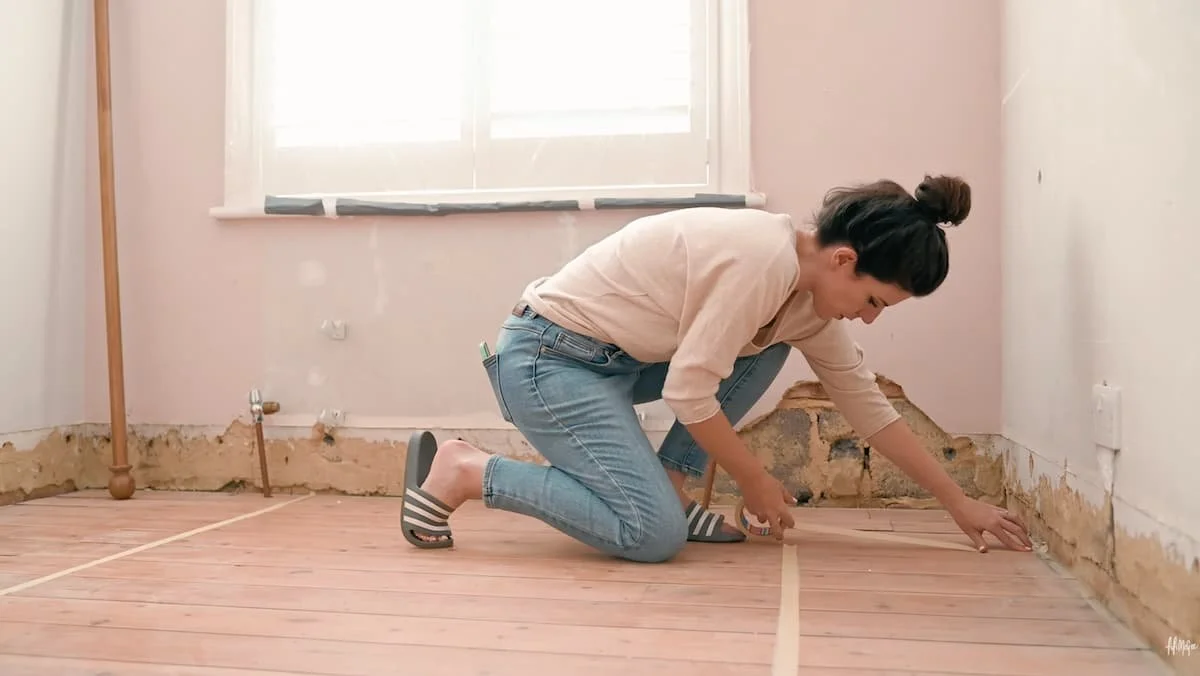
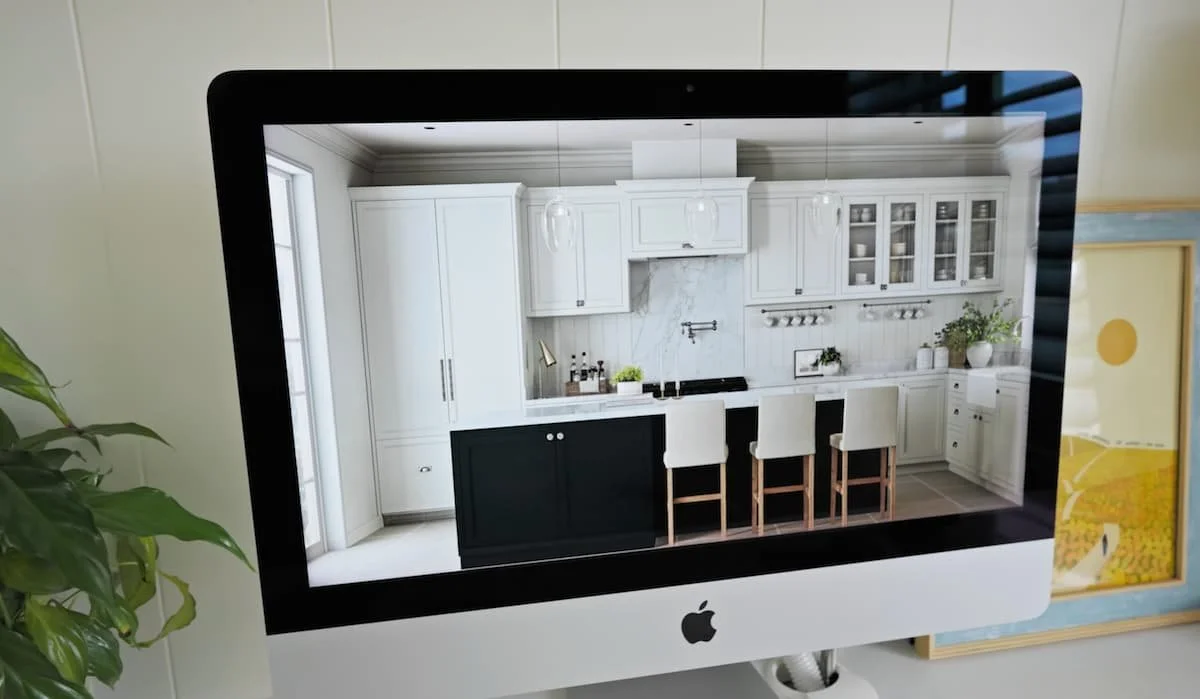
Then I move into 3D design, where I test how the kitchen will feel in terms of scale and light. It’s not just about looks and design. I’m checking the proportions, whether any natural light is blocked, and how the kitchen is flowing.
So as you can see, I’m leaning on the methodology we teach our students to make sure this kitchen layout functions well. That 3D example I’m showing you is from our Kitchen Design Pack by the way so if you like the design and want to apply the same kitchen range, colours, worktops, handles, taps and more, you can order it via the link below to take all the stressful decisions away.
Common Kitchen Layout Mistakes to Avoid
I promised at the start of this post that I would tell you about the 2 serious kitchen layout mistakes you need to avoid as you’re planning your kitchen layout.
The first mistake is positioning your hob somewhere that looks great on paper, but could become a fire risk.
UK Building Regulations recommend positioning your cooker away from an exit point. They can request you redesign or raise the spec of fire safety in your home by moving your hob or introducing sprinkler systems if they feel it’s too close to fire exits. It’s just something to keep in mind if you’re working with a small space. Also make sure there won’t be any doors swinging near your hob either.
The next mistake is not leaving enough clearance between your units and an island or opposite run of kitchen units. On every kitchen I design, I leave at least 900mm for comfortable movement and for a dishwasher to be fully open. Less than that and the space could feel cramped and unsafe when two people are cooking.
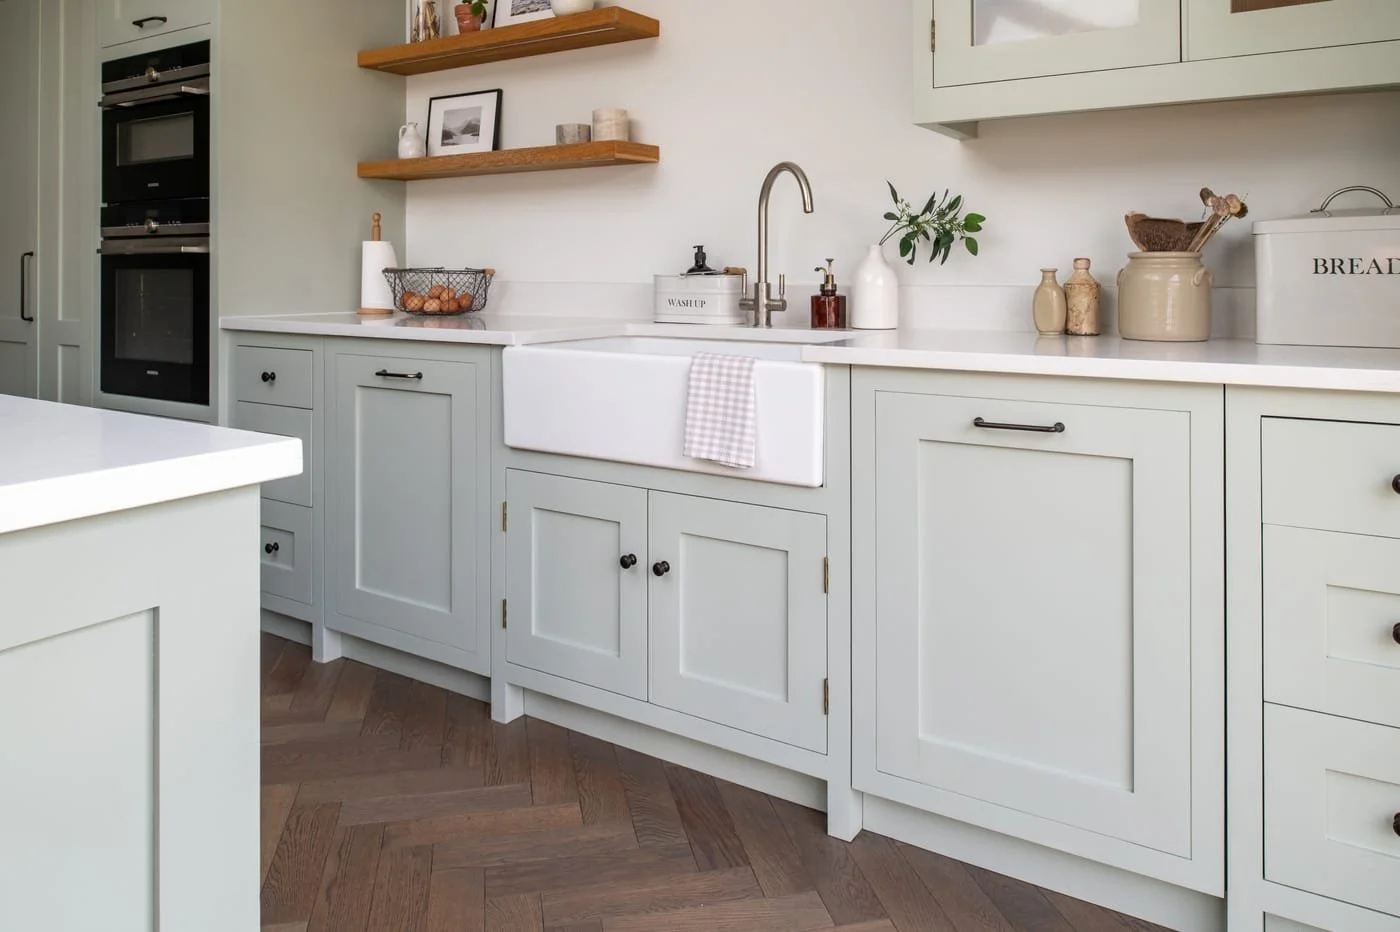
copyright: fifi mcgee ltd
Next steps 👇🏻
Phew guys, we got there! If you’re keen to make a start on your kitchen layout planning, download the Kitchen Layout Cheat Sheet now before we lock it down for students only again.
And If you want more mistakes to avoid — plus detailed guidance on getting your layout right — check out my Done-For-You Kitchen Design Pack. Depending on when you’re watching this, it’s either launching in a few days time or it’s already live. I’ve left links all down below for you.
Best of luck with your kitchen layouts, remember to give yourself enough time and headspace to get this right, and lean on professionals to feed into your project plans, because the result will be worth it!
OK, I’ll see you in the next one! Bye guys!