

We’re welcoming back Anna, our online course student to divulge how she renovated her property on a super tight budget.
So many tips here, so listen and take notes for your project 👇🏻

Hello I’m Anna! And after 10 years of property ownership and three doer-uppers, renovating on a budget has been a consideration I’ve worked with time and time again.
Renovating on a budget: where to begin?
Unless you’re blessed with an endless pot of cash, this is probably the first step you’ll need to consider: how much you can afford to spend on the property in the first place?
Here are a few questions to ask yourself before hitting Rightmove…
How much do you have as a deposit/in savings?
How much more could you save between now and the end of the renovation (bearing in mind, this could be a lengthy process)?
How much can you realistically afford to borrow (worth speaking to a mortgage advisor – and thinking cautiously – on this one)?
What are the other costs associated with buying the property? Stamp duty? Surveys? Legal fees? These can all add up and really take their toll on your budget.
In my case, I had £250k to play with, which needed to cover the cost of buying the property, paying the upfront fees, totally renovating and furnishing throughout. As this was going to be a holiday let, the furniture and styling was a big deal to me as high-end pieces would help me to justify higher-end rates and help me to recoup the investment once it was let out.
Calculating a rough estimate for the renovations and furnishing, I worked backwards, setting myself a budget of just £180k for a two-bed property in Cornwall. Again, ambitious.
At the time, the area was seeing huge rises in house prices due to everyone relocating to the coast, so it was competition central!
I glued myself to Rightmove, setting my filters to sort from lowest to highest price, checking if anything new came in each day, considering auctions and driving ten-hour round trips to view each potential property as they came up (COVID restrictions meant that although I could travel to view them, I couldn’t stay overnight).
And then I saw it…
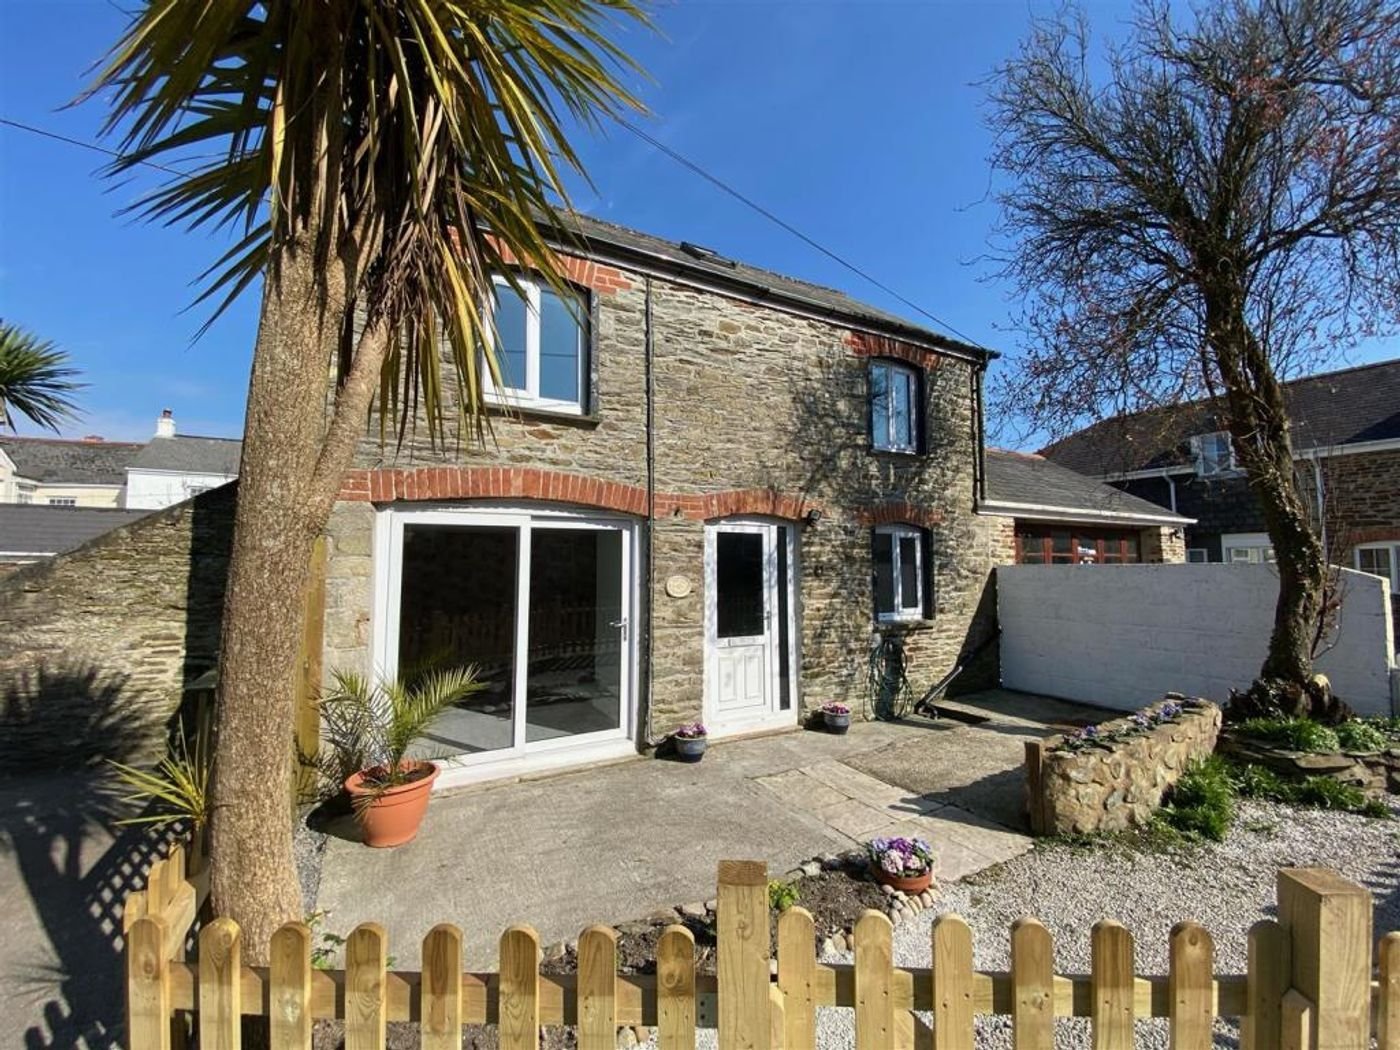

Although slightly over budget now (I’d increased it so see what I was missing out on), The Old Coach House was everything I wanted.
✅ Two bedrooms. Check.
✅ Close to the coast. Check.
✅ Walking distance to a pub and a shop. Check.
✅ And all wrapped up in the charming facade of a traditional stone building. Dreamy.
It felt too good to be true so I offered the asking price of £210k immediately.
Considering it had only been on the market for 16 hours (15 of which were overnight) and I hadn’t even seen it in the flesh, the seller and estate agent were both reluctant to agree, so I jumped back in the car the next morning to confirm what I already knew: this was the place.
It was the sixth property I’d seen in person and the first that didn’t come with complicated lease issues, significant structural issues or private drainage, which although I was open to, sounded like a hassle (and kind of gross). When I got the call to confirm the offer was accepted, I was delighted, nearly running myself off the road in celebration.
Renovating on a budget: time is money
The first time I went back, reality began to set in. I needed to get this up and running as a business as soon as possible in order to cover the ongoing costs of the loan repayments and bills, which at that point were about £1,000 per month.
It meant that each vacant month added an extra £1,000 to our day-to-day living costs and with just £30k left now after fees, I needed to hit the ground running.
If you’re planning to move out during your renovation, you’ll be in a similar position. I know plenty of people who’ve rented a small place nearby so the work can happen more quickly and they don’t have to move all their stuff in (and get it covered in dust) immediately.
If you’ll be renting while renovating, you’ll need to add the additional cost of living to your renovation budget or just factor in the monthly cost of paying for two places at once. I can see why you’d try to cut this out but in reality, it’ll save everyone a lot of headaches if you can be elsewhere.
Smaller projects should be okay, but if you’re doing everything at once like me, I’d suggest you try to move out of the way.
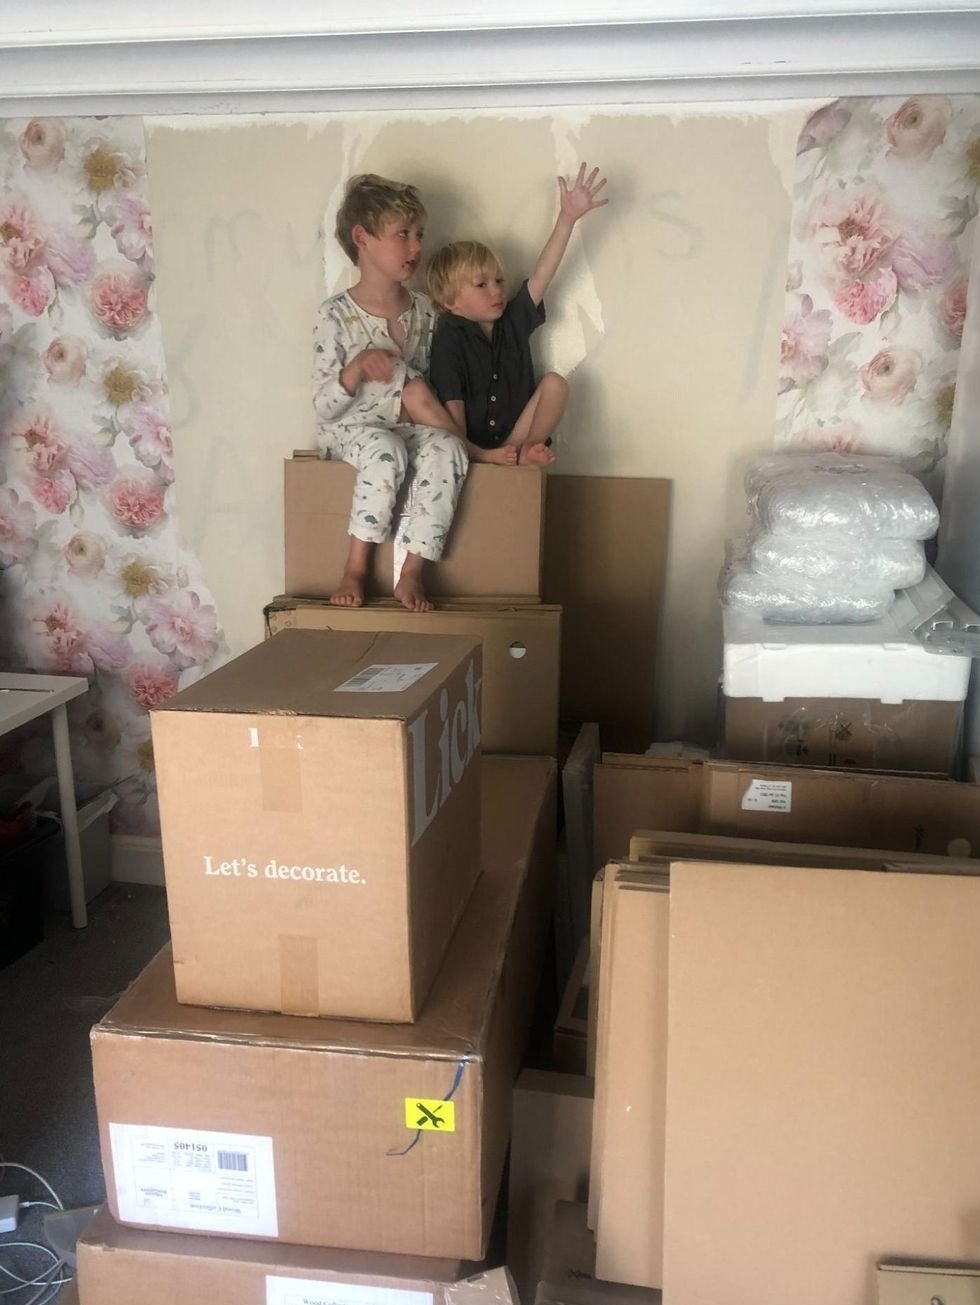
In my case, I was aiming for six months. The timing of our completion in June 2021 meant there was no way we’d have it ready for that summer season, so, along with my husband and two young boys, I packed up our life and moved down there for the school holidays (thankfully everyone was still working from home back then so we managed to relocate, find childcare and continue working very easily).
Planning is key when renovating on a budget
The Old Coach House is small. Just 500 sqft in fact. But with two bedrooms, a kitchen, bathroom, living room and hallway to overhaul, renovating on a budget was going to be tough.
Thankfully, the six weeks we spent living in the space helped me to make a real plan of action and work through the Home Design Lab, creating a clear sense of what I wanted for each individual room, and as a whole.

Renovate your dream home, within budget
If you’re keen to learn how to create dream results without your costs spiralling, now’s the time to join the waitlist for our online courses. We’re opening enrolments imminently, be ready 👇🏻
The time also helped me to prioritise where the £30k renovation budget should be spent, slowly whittling it down to the following:
Partially rewiring and optimising the electrical layout for lighting and plugs
Replacing the old night storage heaters with efficient electric radiators (there was no gas supply to the house)
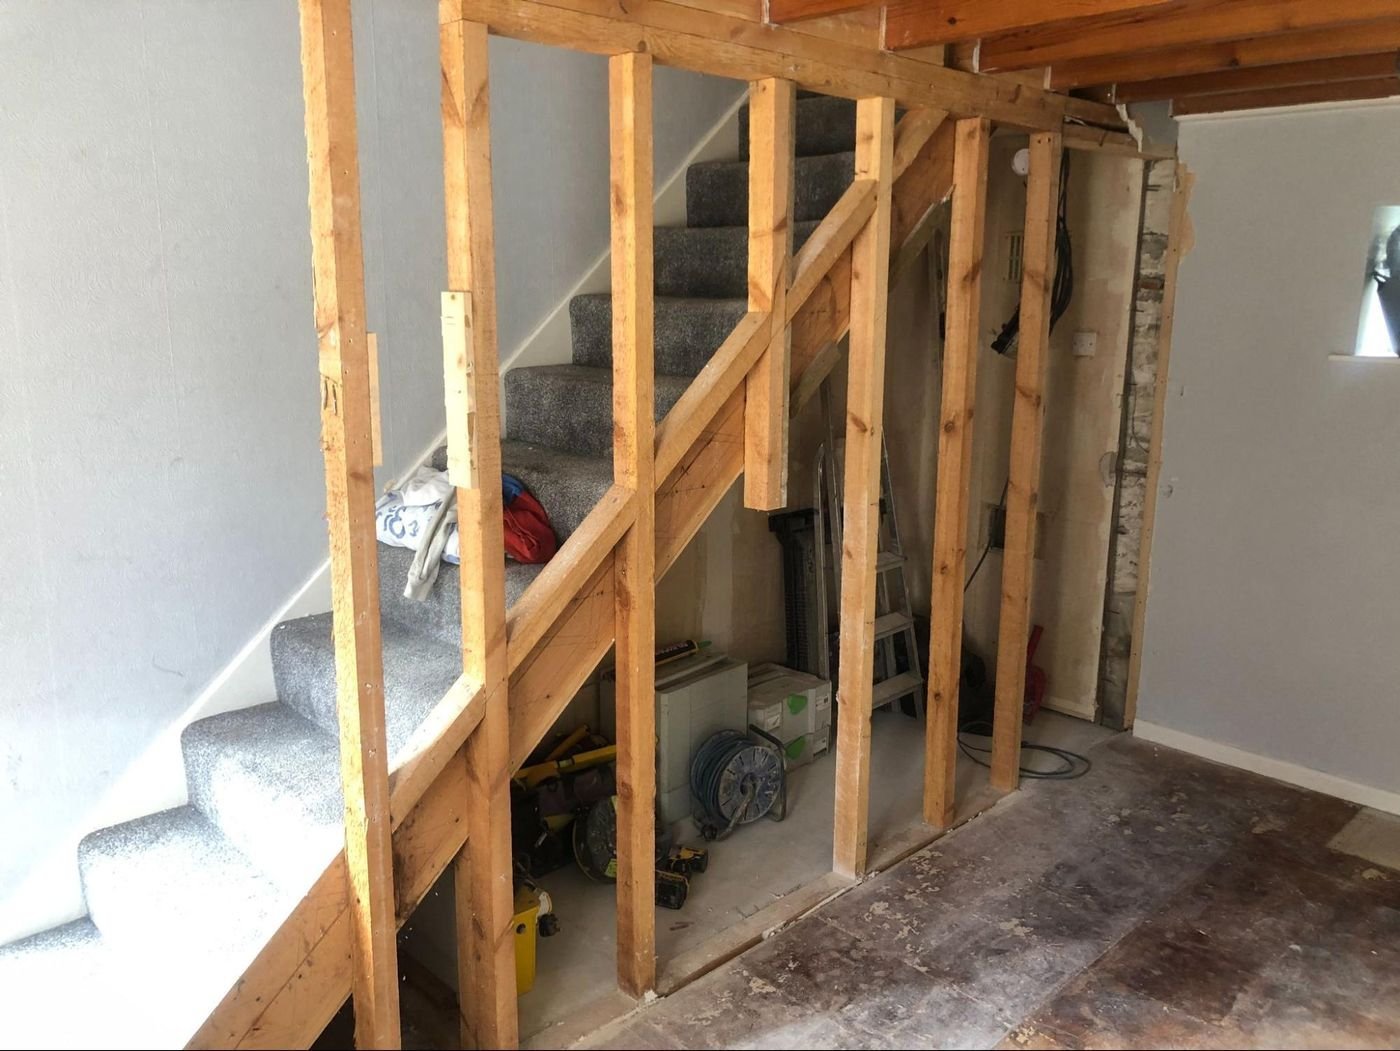
Opening up the downstairs space for a brighter, contemporary feel
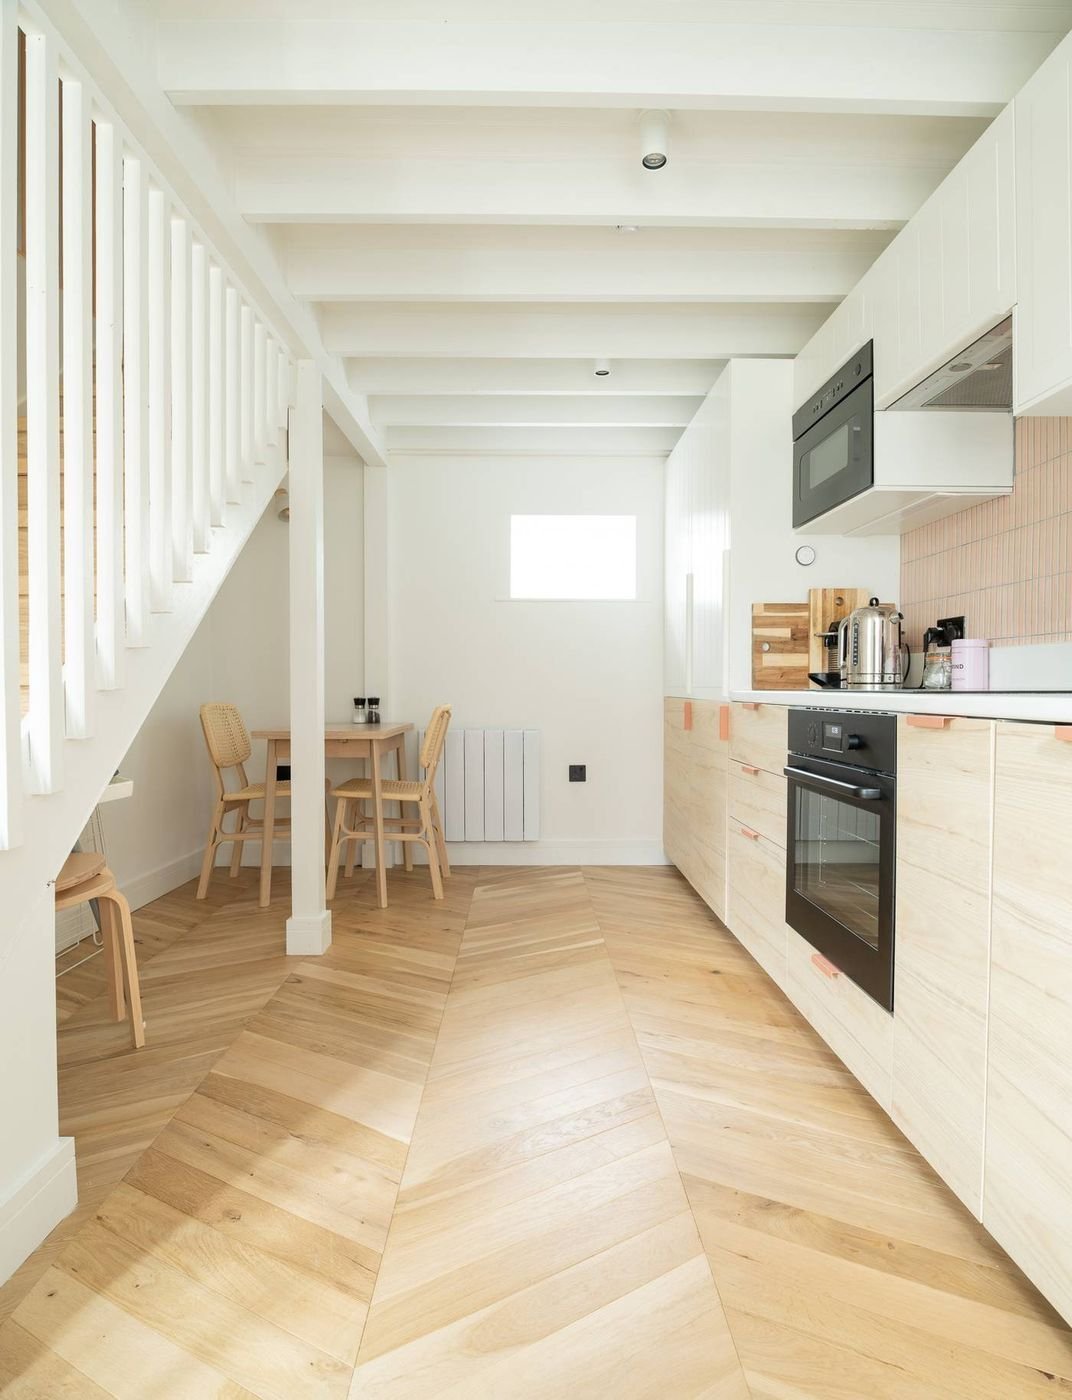
Fitting a new kitchen with a more intuitive layout
Laying new flooring throughout
Panelling walls and redecorating throughout
New doors, skirtings, architraves, fixtures and fittings
Finishing the house with quality furniture and well-chosen accessories to pull the scheme together
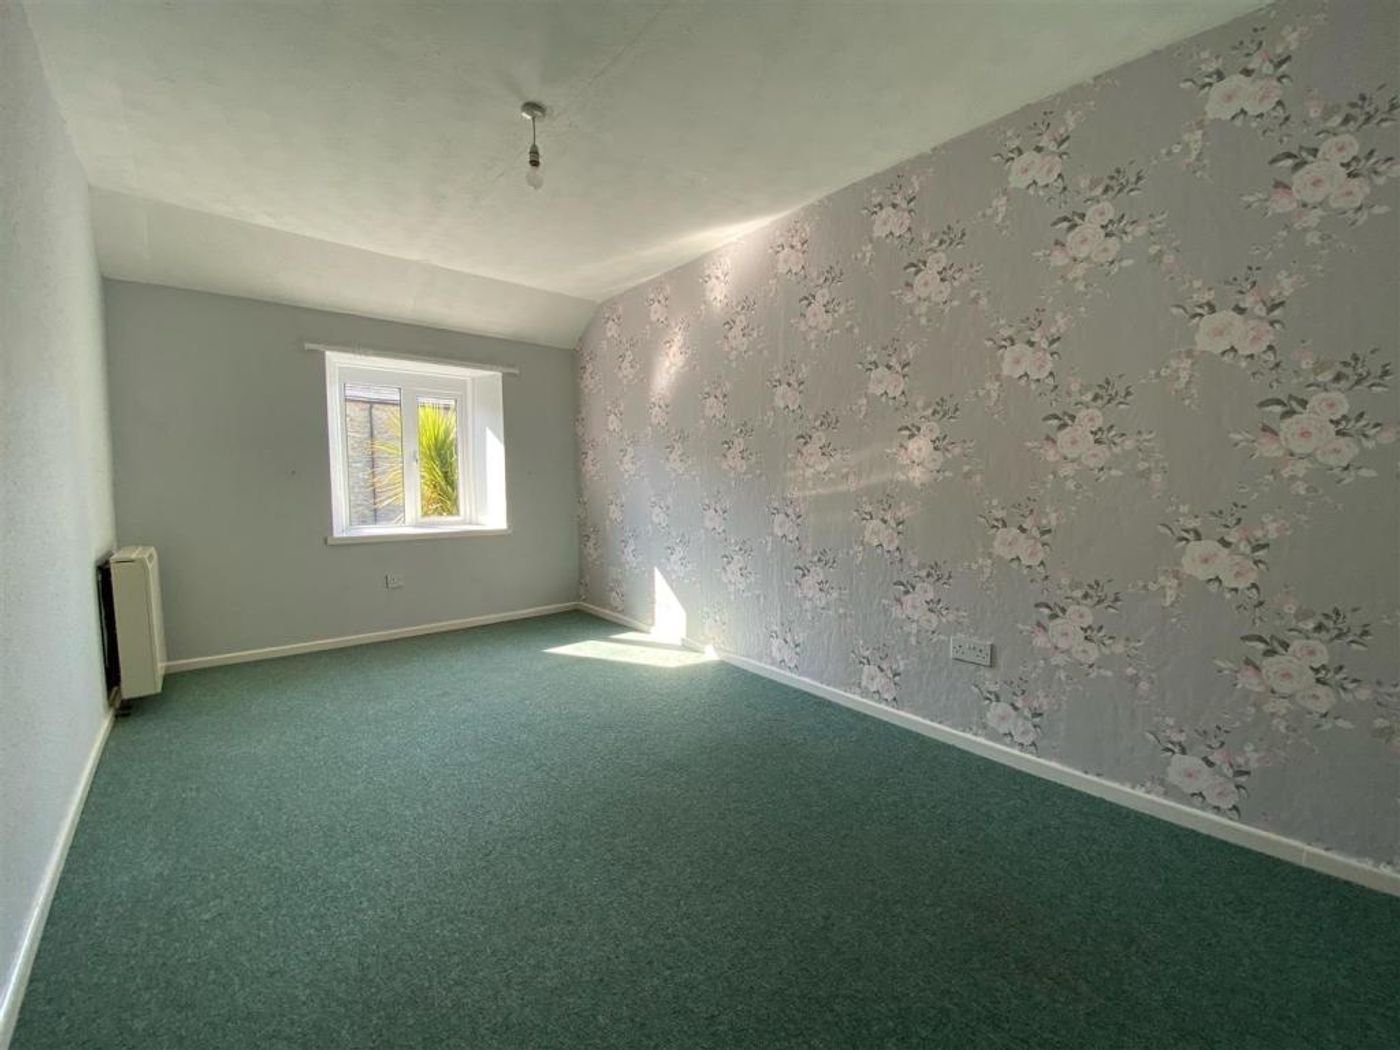
As you can see, I was in the fortunate position not to have any structural issues, roof concerns or damp problems, which would have set the budget back. In fact, the house was in pretty good shape from the start.
Yes, it was tired and a little unloved but it was clean, warm and mostly in working order. It meant I could focus on the design without too many surprises* (more on those later).

If you’re renovating somewhere that hasn’t been touched for a while, here’s the process I’d go through before committing too much of your budget to the cosmetic side of things:
Take a look at your survey and consider the essentials: is your roof leaking? Is damp getting in? Does asbestos need removing? Do structural issues need attention? These really need to be done first, or you’ll probably end up renovating again in the not-too-distant future.
Electrics and plumbing are next but having a clear idea of where you want lighting, sockets and radiators to go will really help in the long term. Home Design Lab really helped me on this one, so I’d advise you plan this sooner rather than later.
For a more comprehensive guide to which order to do stuff, check out the How to Renovate a House course.
If it needs plastering, this gets REALLY messy. Please do this before you lay new floors or fit any lovely carpentry (I’ve learnt this the hard way in the past). It’s also one of the most physically demanding jobs and super hard to get right if you plan to DIY so I’d definitely budget for a professional if you can.
Budgeting for tradespeople vs DIY
If you’re on your second, third or tenth renovation, chances are you’ll have a rough estimate of how much tradesmen will charge, but what if it’s your first? There are plenty of ways to get a better idea, from online cost guides (not that reliable in my opinion) or local Facebook groups to meeting tradies in person.
I’d always advise the latter. Not only will you get an exact cost for the job, which can change all the time depending on their availability, the cost of materials and the location you’re renovation in, but it means you can meet them in person, look into their eyes and get a pretty good idea of whether they’ll do a decent job or not. I like to trust my intuition on these things!
Lots of renovators in the How to Renovate a House online course community swap details on trade costs too which can help with ballpark budgeting in the initial stages.
Being on site that summer meant I was able to oversee some of the early work and really put my mind at ease knowing I had the right team on the ground when we left again in September.

Tips for finding tradespeople:
Ask for local recommendations: we became friendly with the neighbours very quickly and got their recommendations for local, trusted tradesmen, who they’d used in the past.
Check out online reviews: we found most of our tradesmen this way and found reviews to be really helpful.
Compare at least three quotes: to make sure you’re not being totally ripped off or paying too little, make sure to get a few different quotes. You’ll meet the tradesmen this way too and will normally get a gut feeling about who’s right for the job.
Find your Harry: Harry was the jack-of-all-trades we met that summer and consequently renovated our place almost single-handedly. He became part of the family, knocking down walls, fitting both the kitchen and bathroom, plastering throughout, laying floors, fitting panelling and skirting and coming in at the reasonable price that only a one-man band can offer. He was a gem (despite frequently disappearing to go surfing whenever the weather was good!)
There were a few jobs I was happy to take on myself, such as the painting and decorating, styling and overall project management. In hindsight – and if I had the budget – a project manager would have been a great investment. Living 300 miles away meant I couldn’t just pop in to see how the work was going so had to rely on irregular Whatsapps with Harry, which he often went days without responding to.
That said, the rule I had to keep reminding myself of was that you can’t have great quality, great value and great speed all at once. With Harry, I chose quality and value, sacrificing a couple of months on the timeline and taking a few solo trips down to crack the whip!
Breaking down the budget
Let’s rewind a little. I’ve made the timeline, set my priorities and found my tradesmen. But where did the money go? Here’s where I got to that summer:
The electricians were first in, setting me back £5,493.38 for a partial rewire. This was more than I anticipated but I’ve scrimped on electricians in the past and regretted it so felt this was money well spent.
They also removed the night storage heaters and installed smart electric radiators throughout for £1,890.73.
Harry opened up one of the internal walls for £500, recycling timber from the joists to make new staircase spindles (recycling timber is a great idea when you can right now – the cost it going through the roof!)
Panelling and plastering came next at £2,268.40 for labour and materials. Prior to this, the whole house was covered in artex and woodchip wallpaper so (even though I kept the woodchip in some places and grew to kind of love it) it was good to create a more modern finish throughout.
He then quoted just £1,930 to install the kitchen, which I ordered almost exclusively from IKEA for around £4,000, appliances included.
I chose a beautiful engineered oak chevron floor with underlay, which cost £1,924.19 and Harry laid it for £1,100. The upstairs carpet set us back £956.74 and oak staircaps (the bits we fitted over the original staircase) were another £590.96.
Doors, skirtings, architraves, fixtures and fittings were fitted for £941.83
Remaining budget = £8,403.77
It’s getting tight now considering I haven’t even started to think about the furniture.
But what I hadn’t factored in at this point (and it’s something I mentioned at the start) was how much I could save throughout the renovation itself.
My budget was based on the money I had available when I offered on the place in March. Six months later and the stars have aligned. I was freelancing for a tech giant at the time, earning more than I’d ever earned before and able to put aside an additional £10k contingency over the course of the renovation.
Increasing the scope for a beautiful finish
You might have noticed that my original priorities didn’t include things like the bathroom, new windows or any other issues we might come across along the way. That’s because renovating on a budget always means making compromises. At the beginning, these seemed okay to leave for a later date but as the rest of the place was coming together, they really started to let the place down.
Once I realised we COULD afford to do them, I ordered the windows and booked Harry in for the bathroom, extending the time it took us to open as a holiday let but again, helping us to charge more when we did (it was also low season so not such a missed opportunity).
Dealing with window salesmen: my top tips
As anyone who’s ever had a cold call will know, window salesmen are perhaps the most persistent of them all. We went with one of the nation’s most recognisible firms. Not necessarily because they made the most beautiful windows (although as far as UPVC goes, their flush casement ones look pretty good) but because we knew they could probably help us with renovating on a budget.
Why? Because they can ALWAYS give you a better offer. Aside from the always-on mega discounts they shout about all the time, you can haggle them down without too much of an effort and without feeling the guilt that you might do with an independent contractor or small business.
Here are some tips for getting the best price with these guys:
Simple one first. Just ask for a better offer. They know how low they can go and will always have something better up their sleeve.
Shop around and create competition. Everest and Anglian will always compete. If you get one down, the other will likely offer a better deal.
Wait until the end of the month/quarter. Salespeople will have targets they need to hit by this point and chances are they’ll be on a last minute push to get their figures up.
Quote for more than you need. They’ll see a bigger job and think they can offer bigger discounts because of that. Tell them you’ll take that 60% discount (thank you very much) but actually you only need two windows done.
Offer to post on social media/write a review on Trustpilot. I saved a couple of hundred pounds that way.
Three new windows ended up costing £2,887. These were the flush casement style, which fitted the era of the house and were painted in a dual colour agate grey on the outside and white on the inside. The slight woodgrain effect also helped them stop looking so UPVC-y.
Problem now is that I really want to replace the front and sliding doors so they all match, but that’s definitely a job (and cost) for another day!
Bathroom renovating on a budget
At this point, Harry was probably a bit sick of me and my perfectionist tendencies, so he upped his price a little for the bathroom, quoting £2,000 for the install. I would imagine this is a much smaller job than a kitchen fit (remember he charged just £1,930 for that) but to be honest, it still felt very reasonable and as we knew him and his working style by now, we were happy to let him crack on.
To make sure we were getting the very best bang for our buck, I also ordered each of the bathroom fittings separately. This was inconvenient, as it meant multiple deliveries to an empty house most of the time, but it saved a shed load of cash.
Our shower, for example, had an RRP of £519 but after shopping around, we found it for £238 at B&Q.
The tiles were probably the biggest expense here at £790.33. This was partly because I was keen to create a sanctuary-like, wet room vibe with full-height tiling, partly because I just fell in love with the more expensive ones in the first place and partly because, after realising we were one box short, had to make a 500-mile trip to pick them up from the warehouse as they wouldn’t arrive on time otherwise! That said, by colour matching the bathroom paint to the tiles (for the ceiling and two walls), I was able to envelope the space in a consistent colour palette that saved a bit of money and created that wet room look too.
All in, the bathroom came to £4,121.82, which was I thought was very reasonable considering some of the quotes my friends are getting for the same work today.
At this point, my remaining budget from the original plan was £1,394.95.
Every budget’s secret weapon: DIY
Whether you’re savvy with a saw or a dab-hand at decorating, renovating on a budget will always mean there’s a element of DIY. I actually take great joy in popping in some headphones and zoning out the world while I prepare and paint rooms. I find it almost meditative to literally watch paint dry but maybe that’s just after seven years of parenting have taken their toll!
My other cost-saving tip would be to colour match your favourite paint. Who doesn’t love Farrow & Ball paint colours? But their prices? Not so much. This time round, I went for the trend-led challenger brand Lick, whose buttery thick, eco-friendly colours hooked me in with their brilliant branding and sustainable supplies.
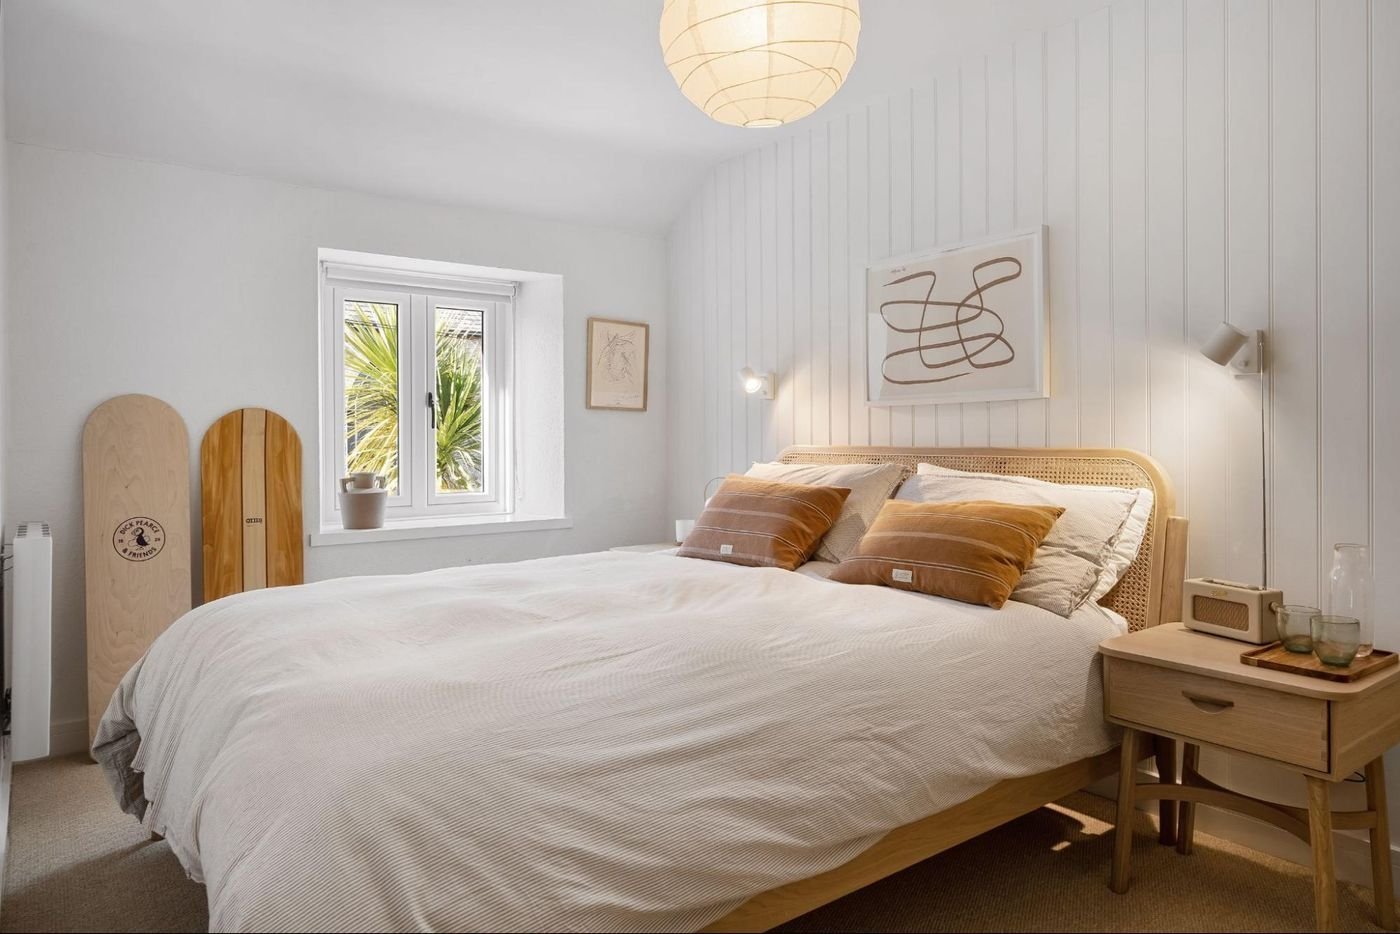
In the lounge, I opted for Beige 03 and loved every second of its application (although I have to admit, painting panelling takes AGES). As the rest of the house was essentially white, I couldn’t justify the higher price point and colour matched their White 02 with Valspar at B&Q. Their premium matt emulsion is brilliant and I’ve just used it again (matching different colours) to redecorate my oldest son’s room and our living room at home.
Furniture, accessories & styling: the icing on the cake
Before I started the Home Design Lab, I would put moodboards together in Google Drive, picking out furniture and accessories to furnish my hypothetical home. But what I loved about Fi & Neil’s course is that it gets you to really consider the style you want to achieve.


I quickly came to the conclusion that I wanted The Old Coach House to feel like a ‘Japandi surf shack’, which meant that even though I love mid-century furniture and playful, quirky touches, this wasn’t the place for that.
I was designing a home for my family and others to unwind. As such, I wanted a relaxed, thoughtful, contemporary space, free from the clutter of everyday life and with plenty of elements from the natural world.
This translated to natural wood tones, neutral colours and layers of natural rugs, cushions and throws to pull the scheme together. Surf-related photographs, prints and accessories were also key to bringing that love of the coast inside.
Quality vs cost: it’s a balancing act
Furnishing and styling the two bedrooms, hallway and living room ended up costing £11,430.16. This could have been done for a lot less but as I mentioned at the start, I wanted to buy a few key pieces that would warrant a higher-end rental price.
The Oliver Furniture bunk bed was probably the most budget-blowing piece at £2.7k but as the dimensions were absolutely perfect too, it felt like it was made for the space and I just couldn’t resist.
Solid oak furniture from John Lewis and Tikamoon helped to elevate the cheaper pieces and likewise with the textiles. I managed to offset £50 cushion covers from Danish designers with £4 H&M ones, knowing the overall look would work if the quality felt balanced throughout.
This is something I’d highly recommend if you’re renovating on a budget but can’t spend it all on the finish. In fact, it’s a life hack in general. It’s the equivalent of a designer handbag elevating your high street look.
The final budget: where I ended up
All in, I had £260k in the end and here’s where I ended up:
Purchase costs – £220,354.40
Renovations – £30,252.95
Furniture, accessories and styling – £11,430.16
TOTAL - £262,037.51
(*And actually £966 of that was a last minute decision after everything was done to upgrade the hot water system, as there was zero pressure in the shower/kitchen.)
So I would say, that’s pretty close to the budget. I also had the house revalued since the work was finished and the estate agent who sold it to me has estimated that it would now go for £275k. It means that every penny I spent could be fully justified and there is zero guilt on my part for the whacking amount of money I invested in the process.
I guess with the uncertainty of what might come in 2023, nothing is guaranteed but it’s been an absolute joy to work through this project and create a home away from home that we can enjoy time and time again.

My final thoughts when renovating on a budget
If you’ve got to this point, you’re probably pretty serious about taking the next step with your renovation. It’s a huge investment in both time, energy and money and I hope the tips I’ve shared with you through this piece will go some way to giving you the confidence to succeed.
If there is one place I’d recommend heading next, it’s Fifi McGee’s online courses. The renovation course is a comprehensive guide that will take you through the process from start to finish, keeping you sane and in budget throughout.
If it’s just the finishing touches you’re after, head to the Home Design Lab and get your inspo ready for the glow up your home has been waiting for.
While the process has many ups and downs, it is without a doubt one of the most fulfilling projects I’ve ever had the privilege to complete and I hope that when you’ve made your way through the dust, sweat and tears, you’ll feel exactly the same way.
Happy renovating to you all.
Anna
Do you want to create your dream home on budget too?
Look out for our online course bundle coming very soon… ✨
Join over 1000+ UK renovators, achieving superb results within budget!
