Our Home Office Design – Before + After! | Office ideas
/
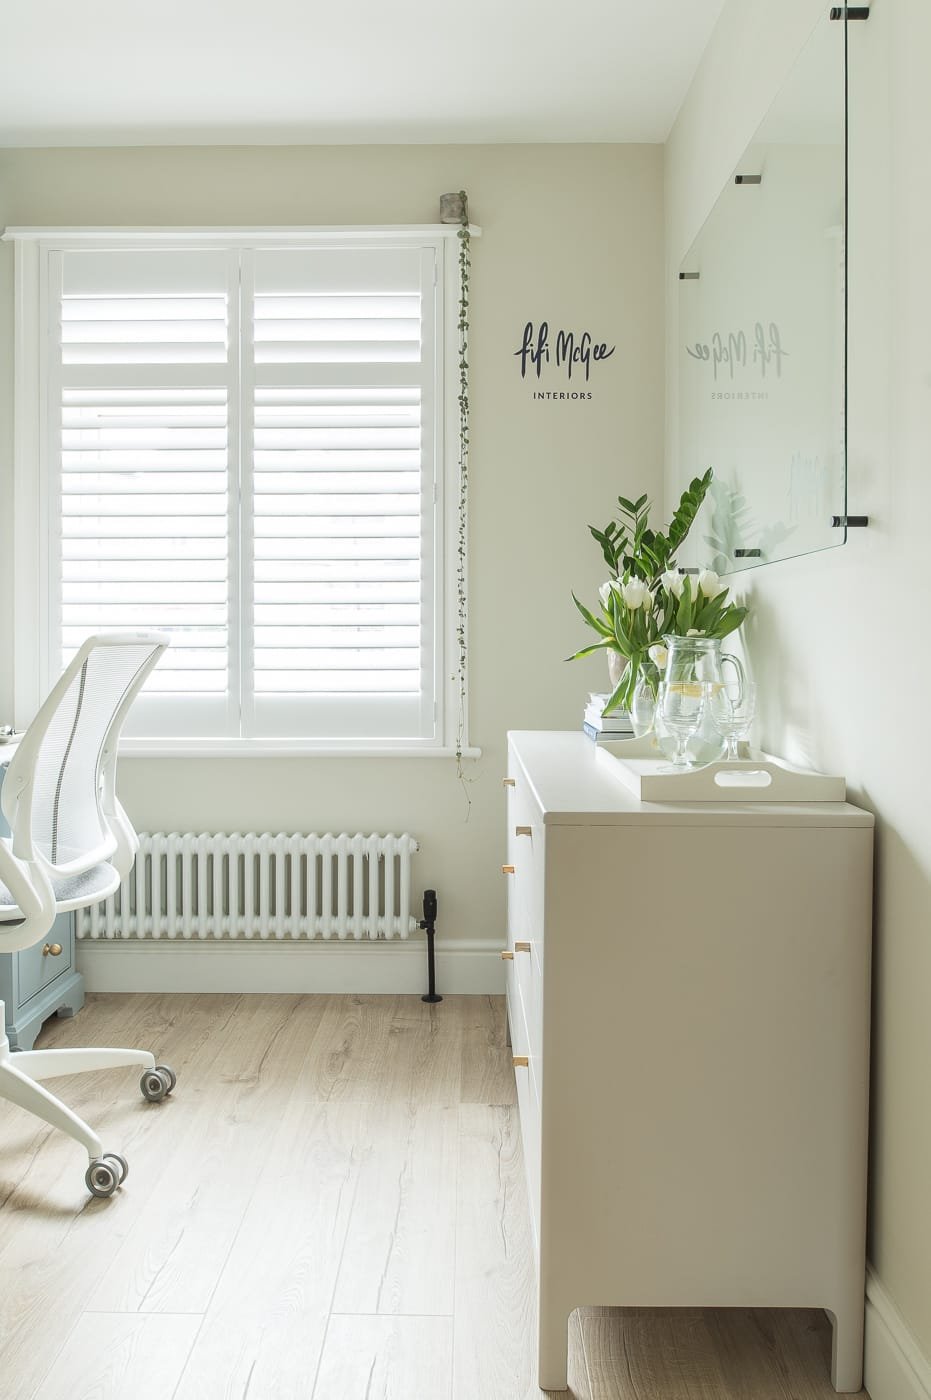
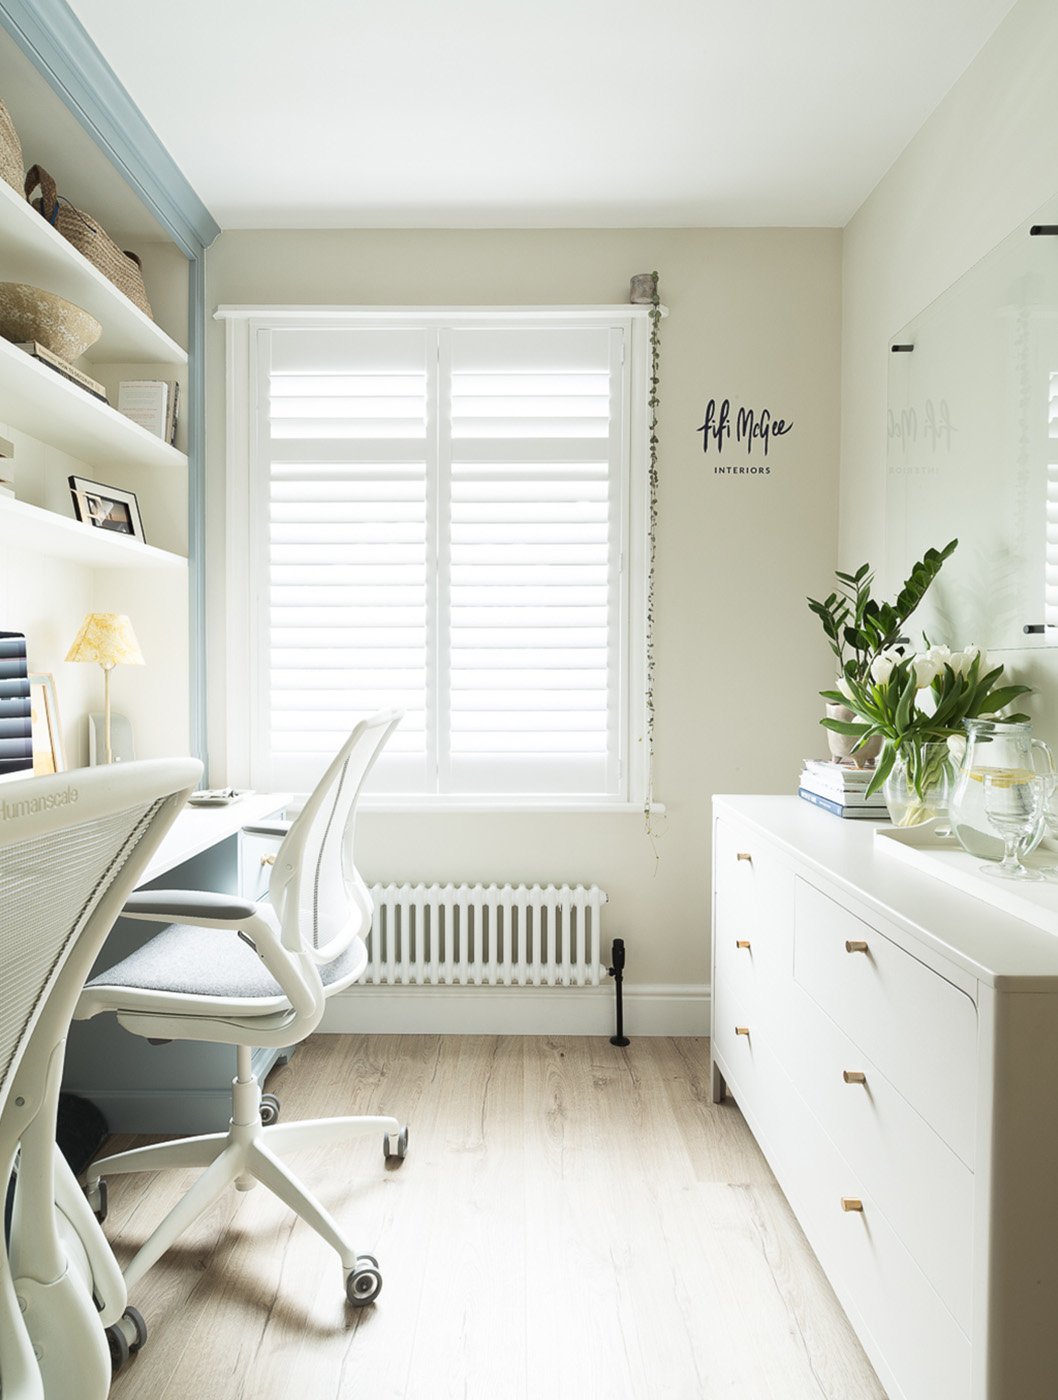
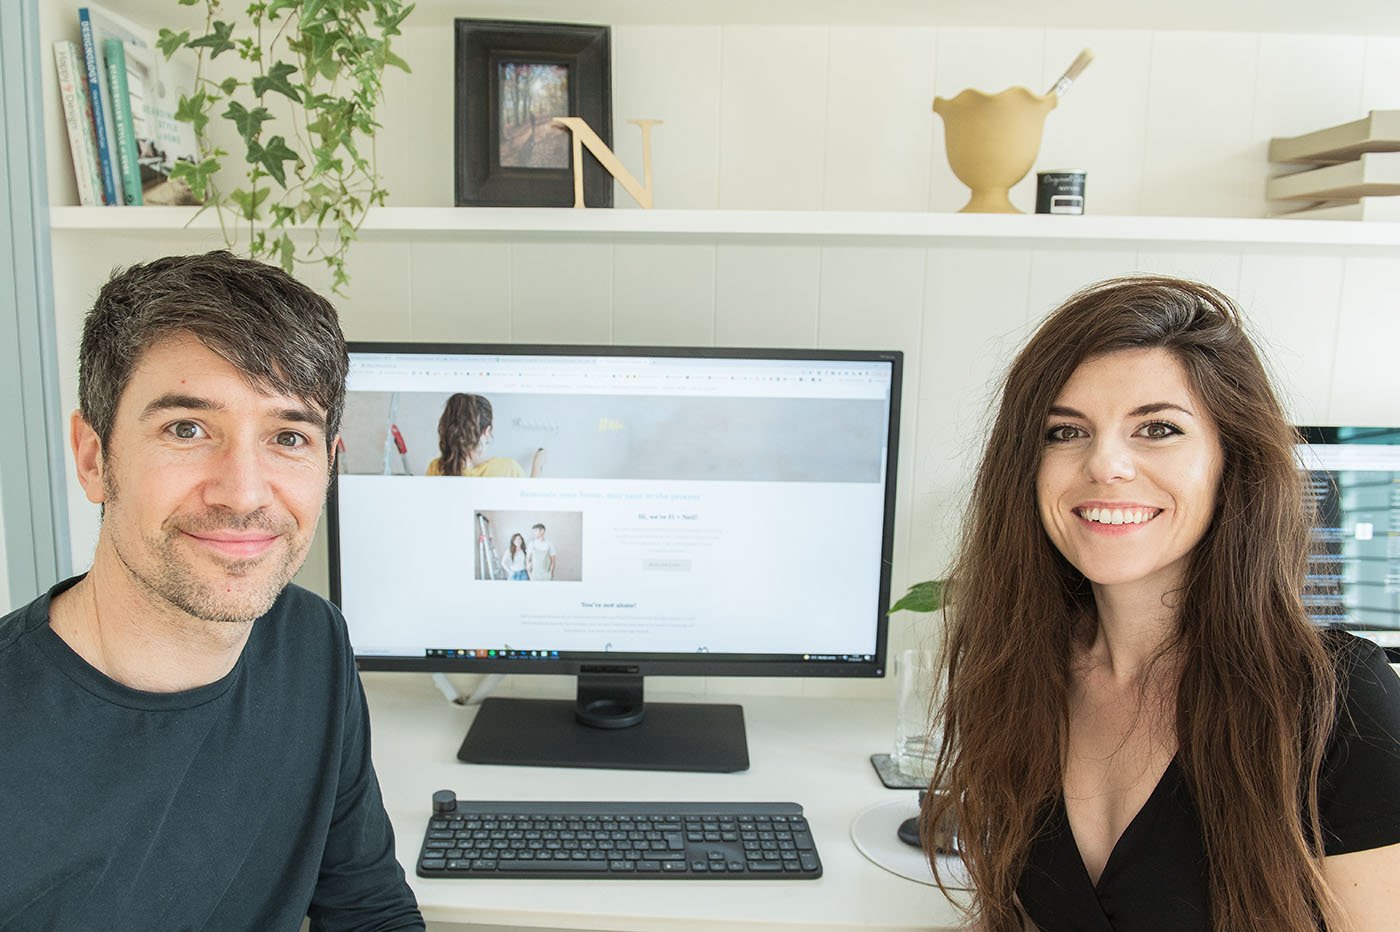
I can’t believe it. We’ve finished our home office design. Fifi McGee HQ is here 😍
I have to say, it’s been one of the most rewarding projects Neil and I have worked together on. We began forming office design ideas almost a year ago – don’t be fooled into thinking this happened overnight 😅 We had a lot of planning and saving to do to get this right.
In a lot of ways, this home office design has been extra special to us. It symbolises the coming to fruition of our own house renovation and our business, both of which we’ve been building since 2013.
And let’s just say these four walls have witnessed a rocky ride. Ups, downs, tears, laughter, tantrums, failures and high fives…
Post contains gifted products + affiliate links
How our home office gave us our freedom
This tiny room has been so important to us over the years.
Years ago, Neil and I both worked in corporates that sucked the life out of us every day. Literally.
I used to come home from my long commute and stare at Neil with that glazed-over look on my face, as he asked how my day was.
I’d respond to him with grunts – I was that fried.

This room saw some pretty bad times
Looking back, my mental health got critical, but at the time I just thought it was normal and powered through. I’d break down in tears and panic attacks most days.
I’ll talk about it in more detail someday, and I’ll get Neil to tell you his story too, he had his own battle going on too with his 14 year corporate career.

Neil calls this his “grey era” for obvious reasons!
This tiny office was where we would lock ourselves away, night after night, weekend after weekend to work on Fifi McGee and commit any energy we had left after our day jobs to creating content, free guides, tools and resources to support fellow renovators who were completely new to this and needing guidance on where to start.
Over the years, this room has heard us discuss, analyse and navigate the huge mental and financial risks involved in starting a business that could support us financially whilst continuing our support to the renovation community we were building. And although there are still plenty of worries and fears, we’re a world away from the panic attacks, tears and doubts of our old corporate lives.
Our lives have done a 180, and this office was where it all started.
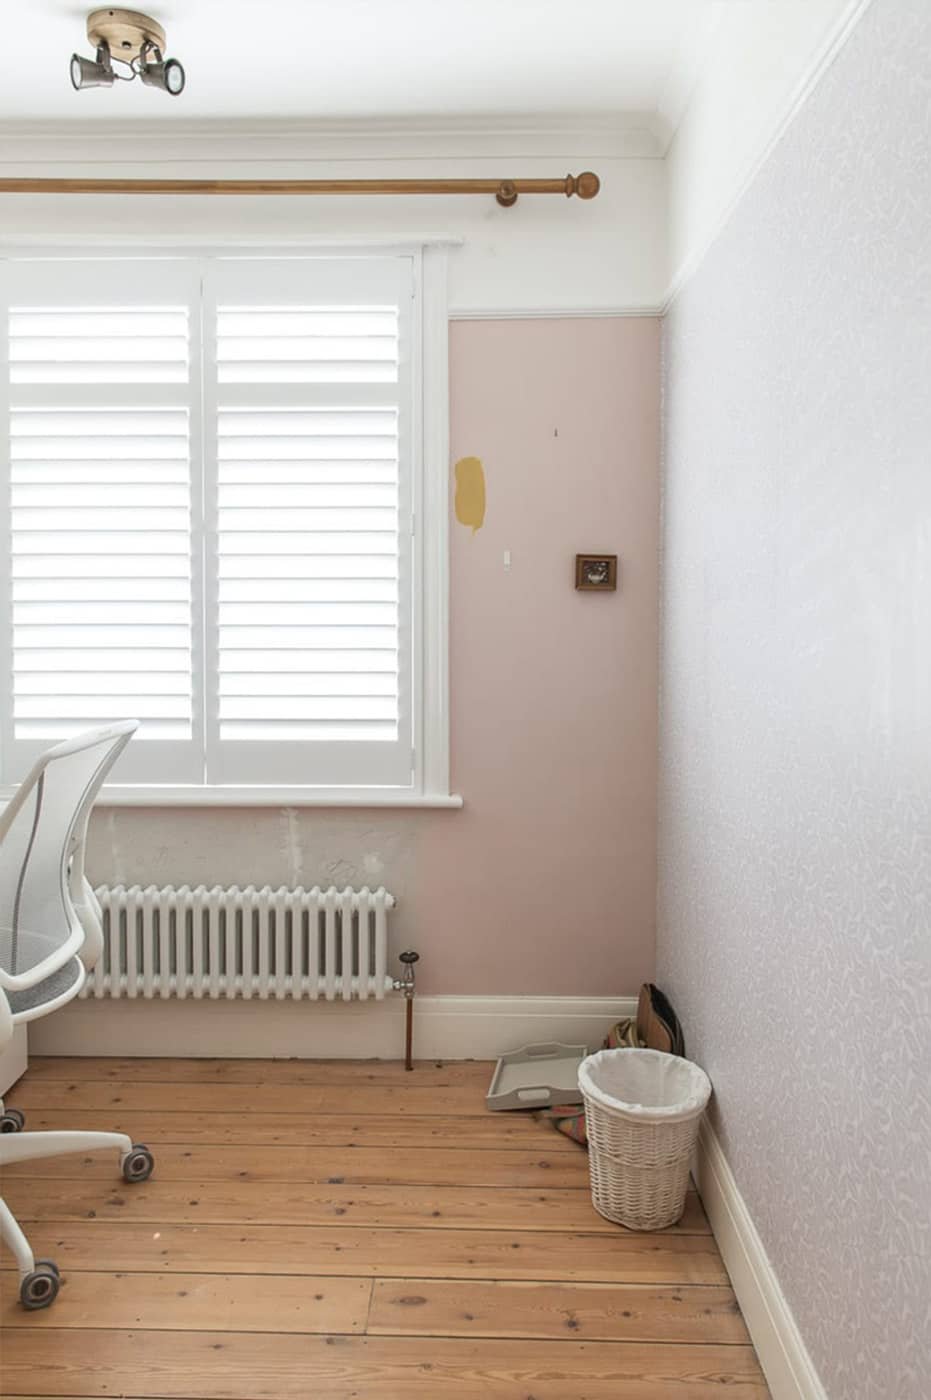
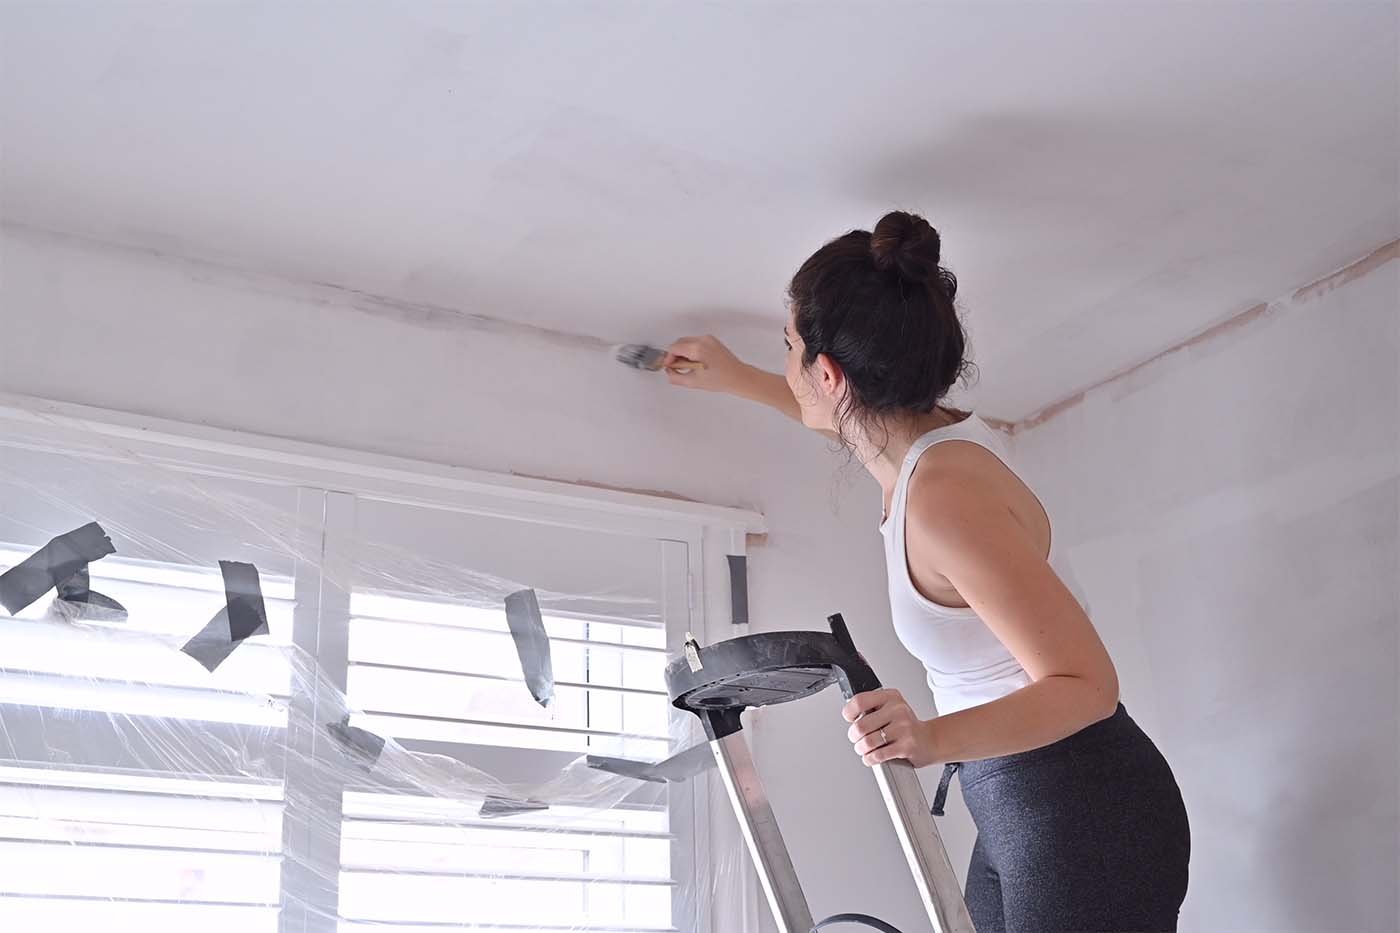
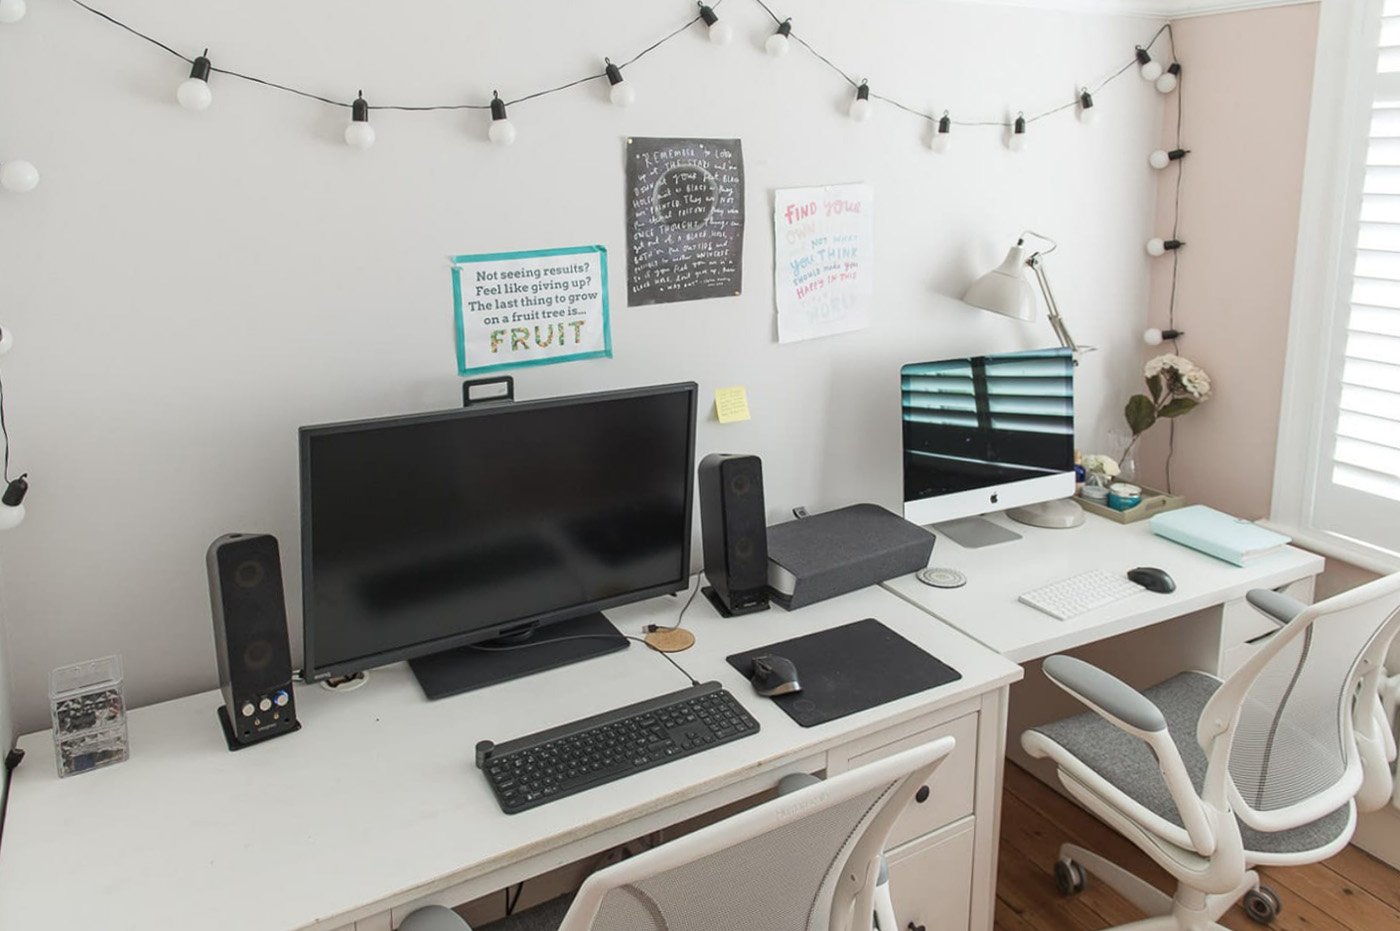
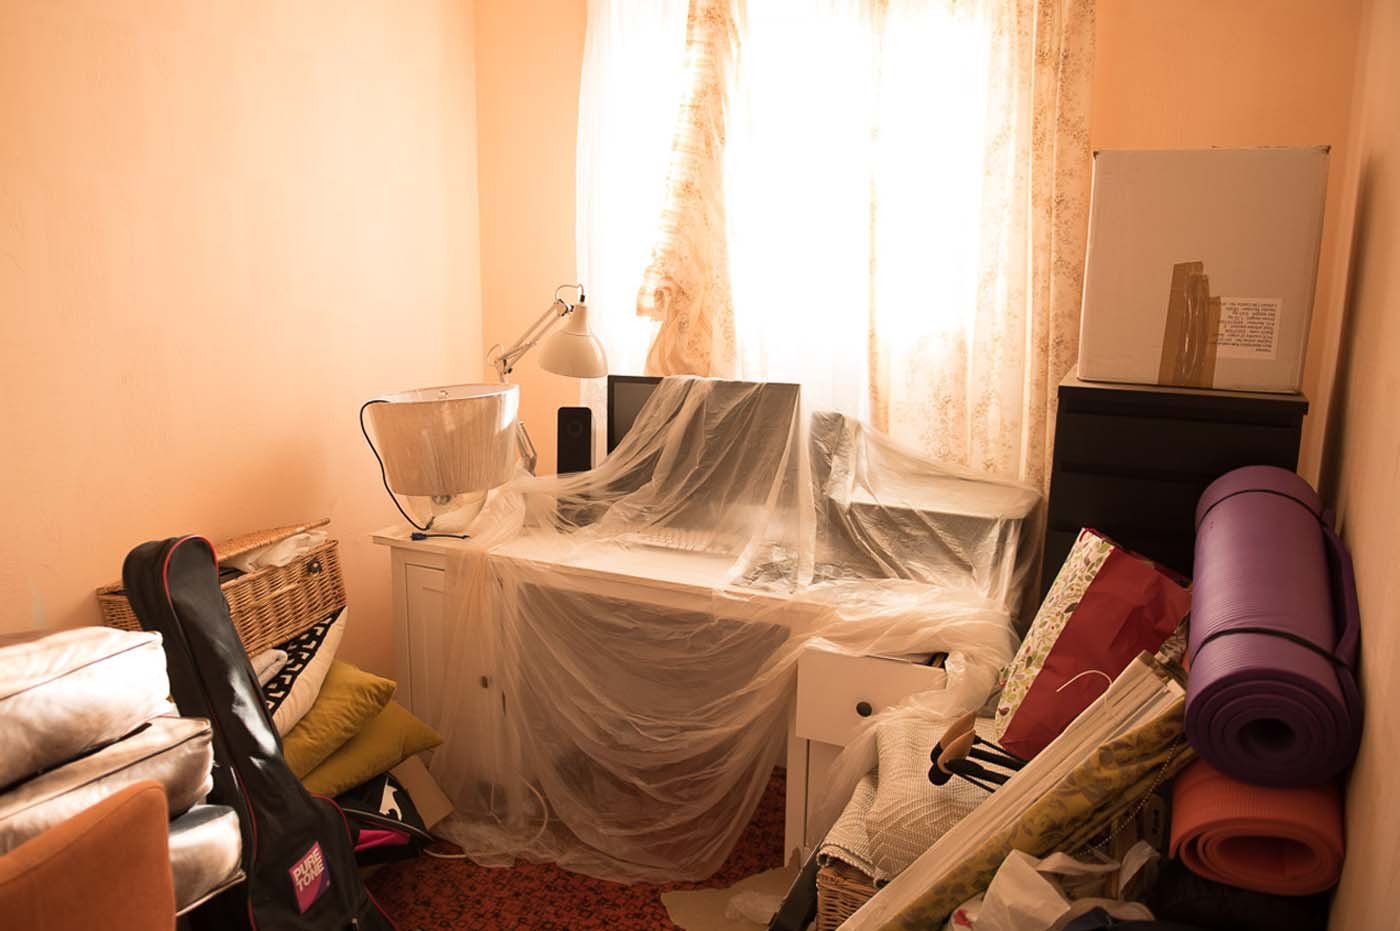
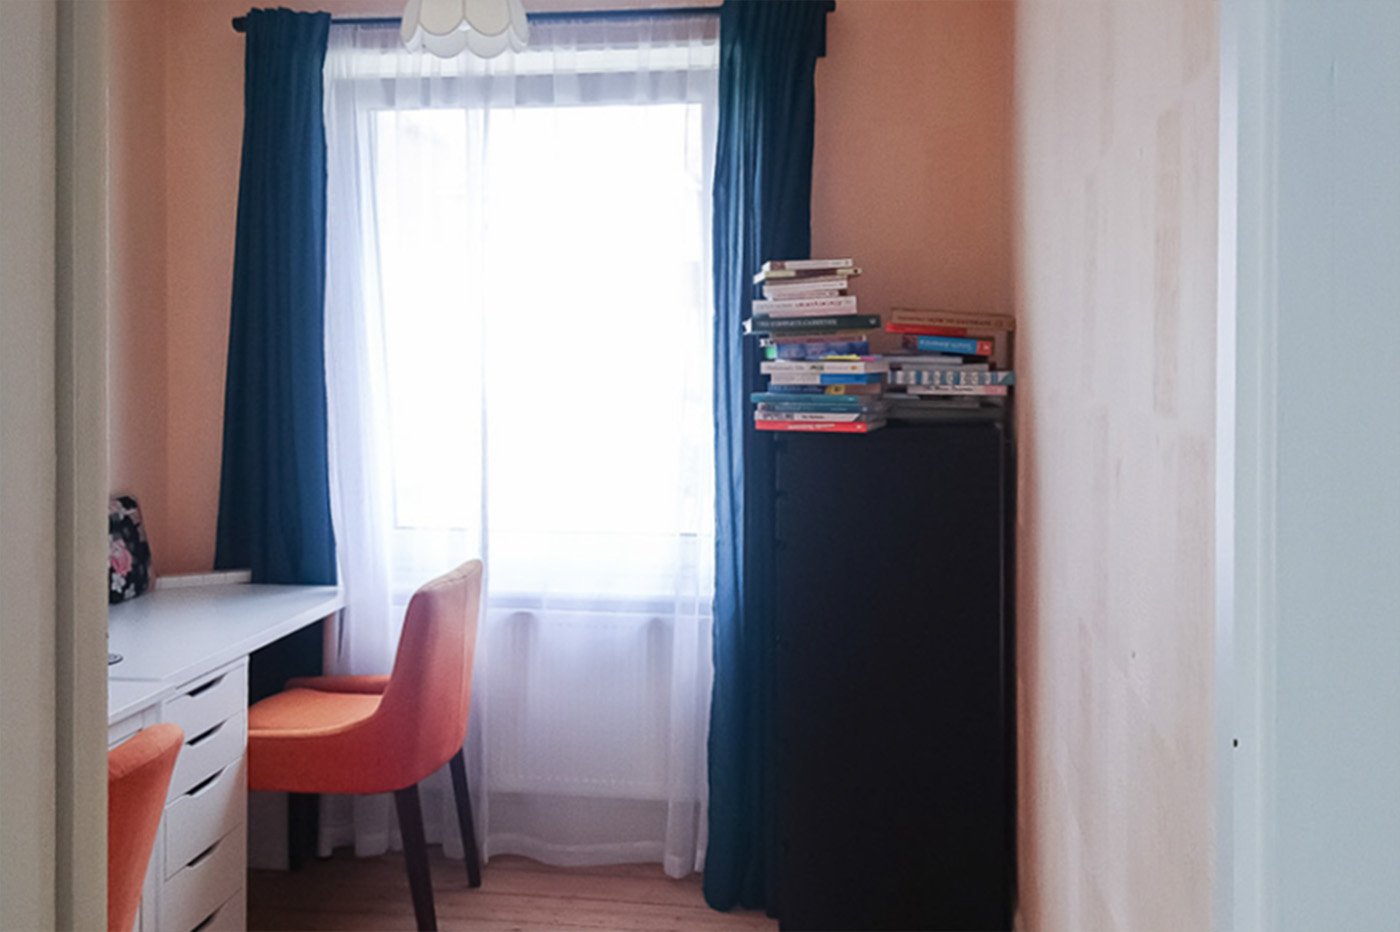
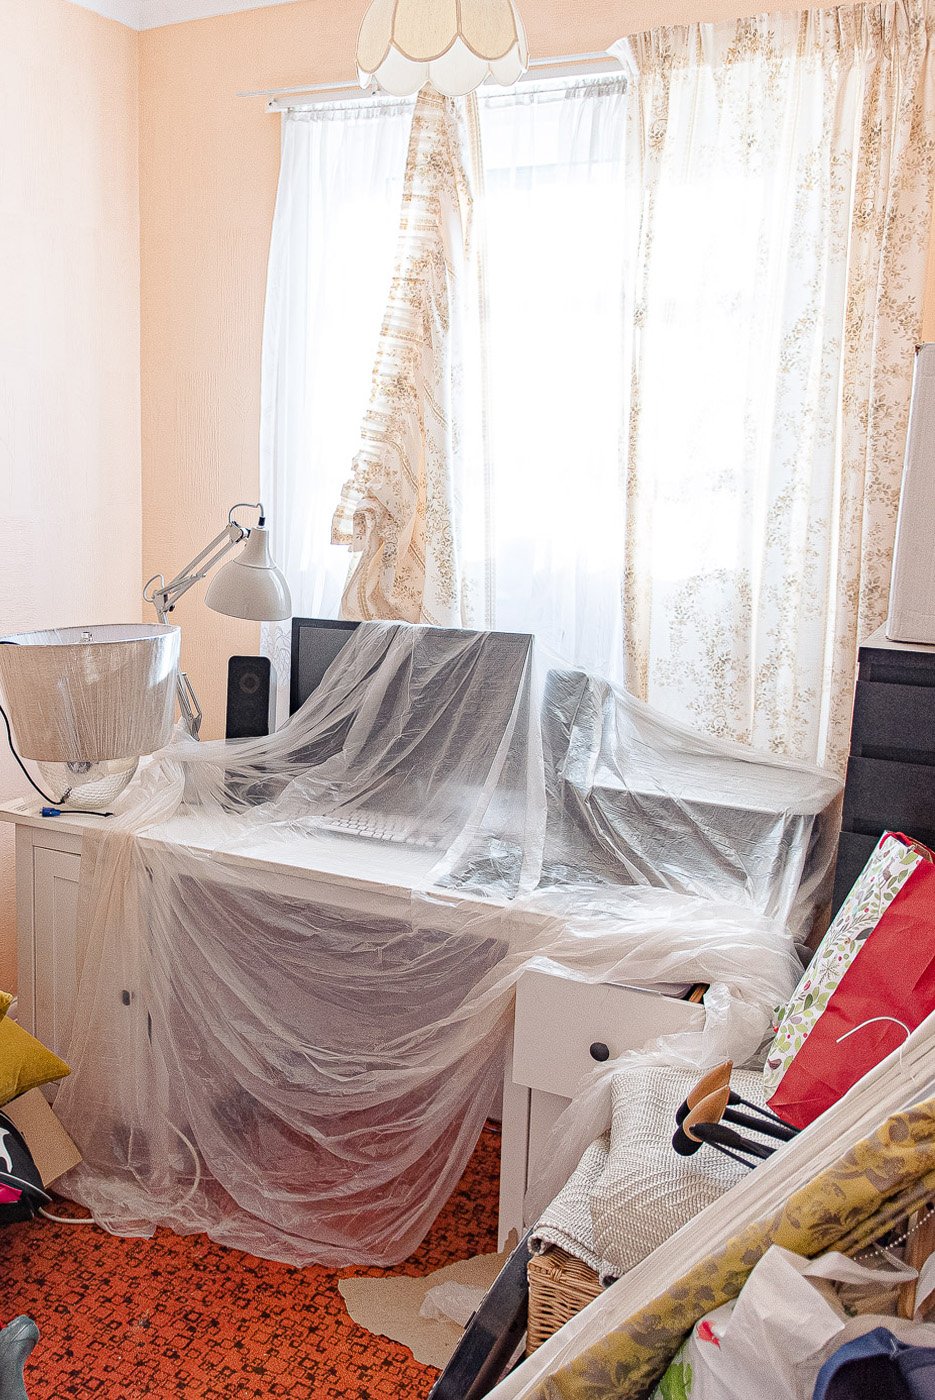
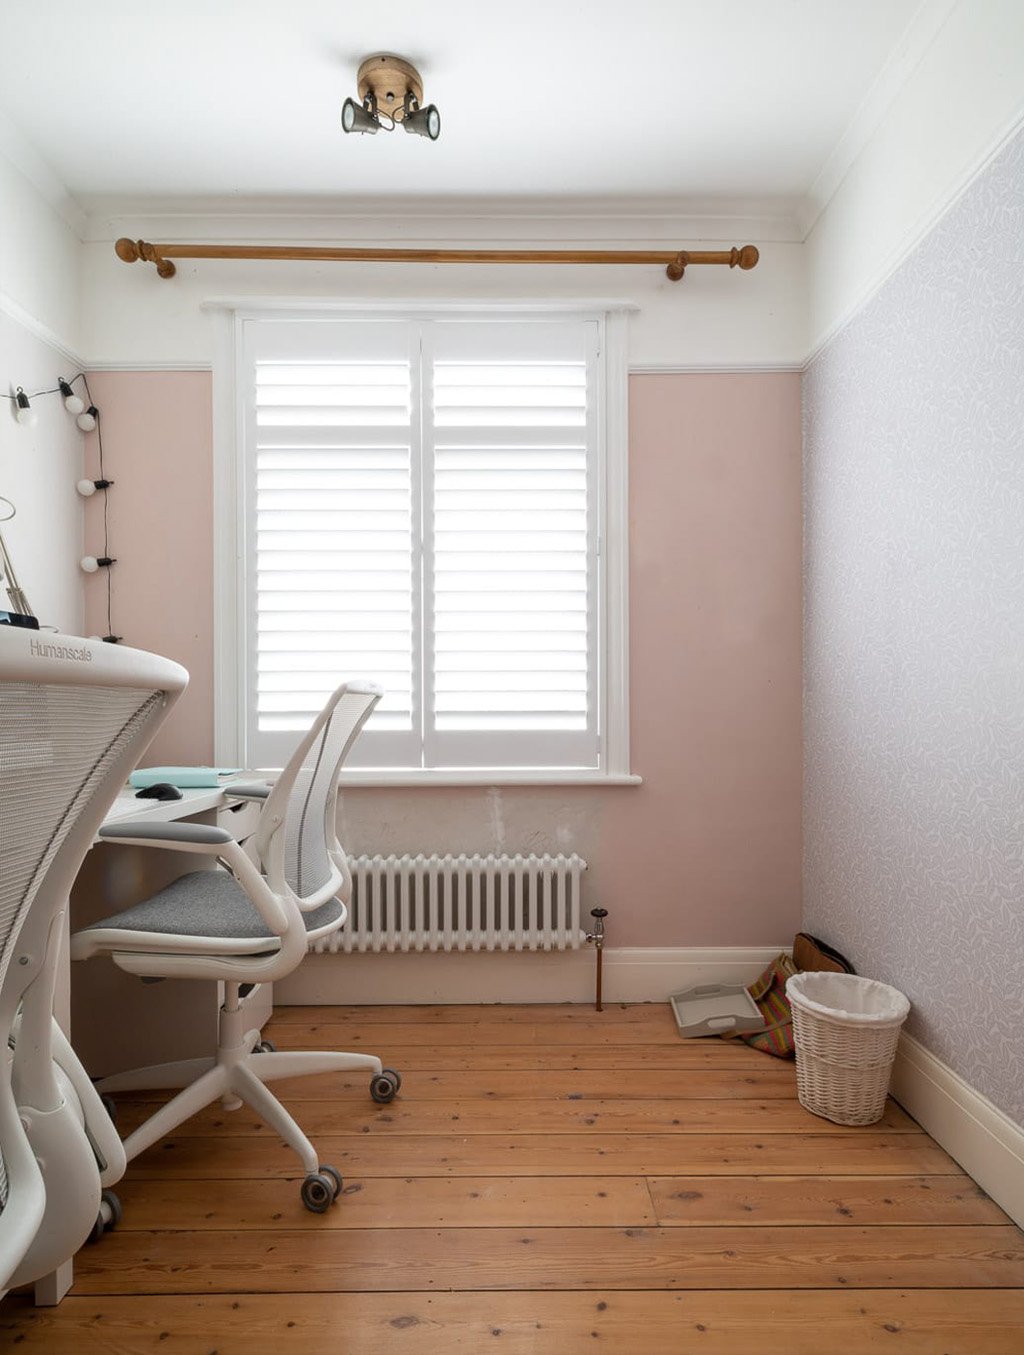
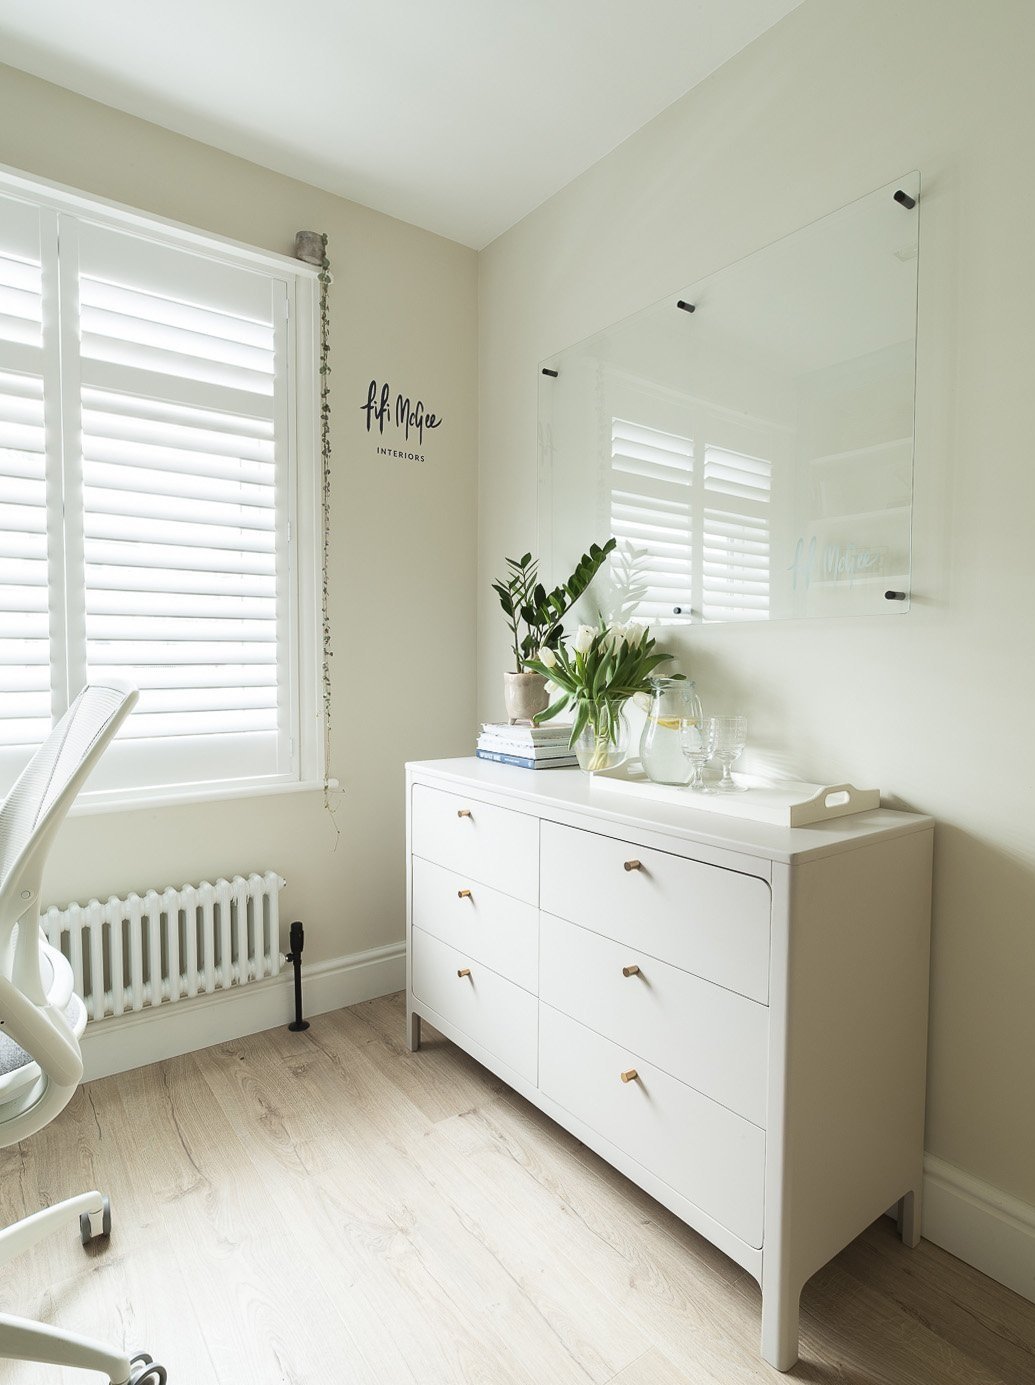
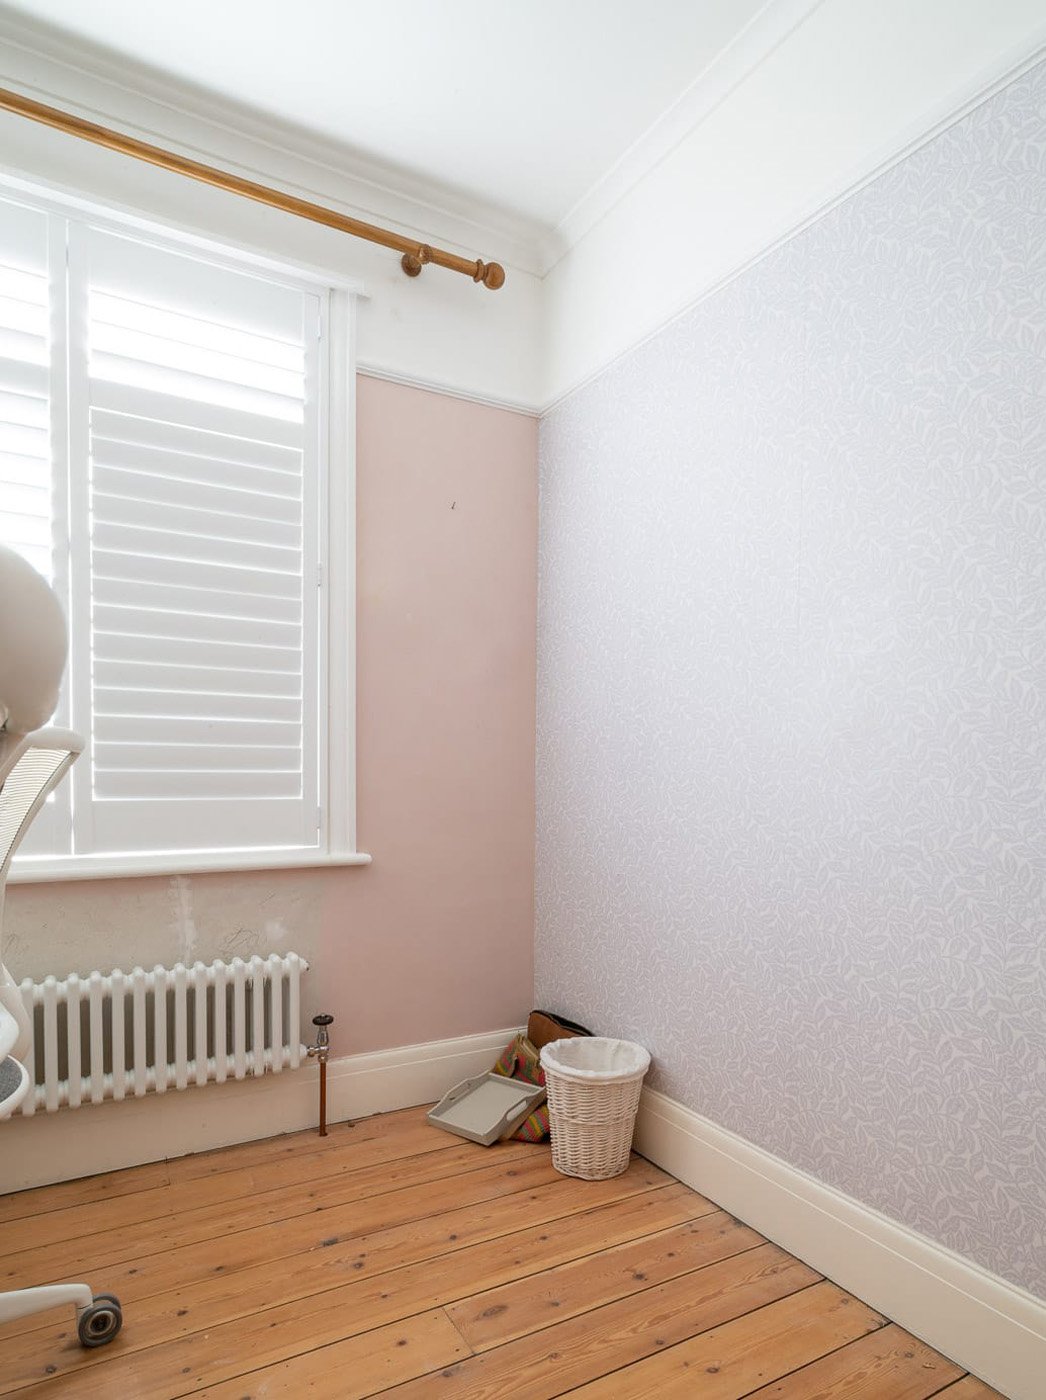
Our home office – before
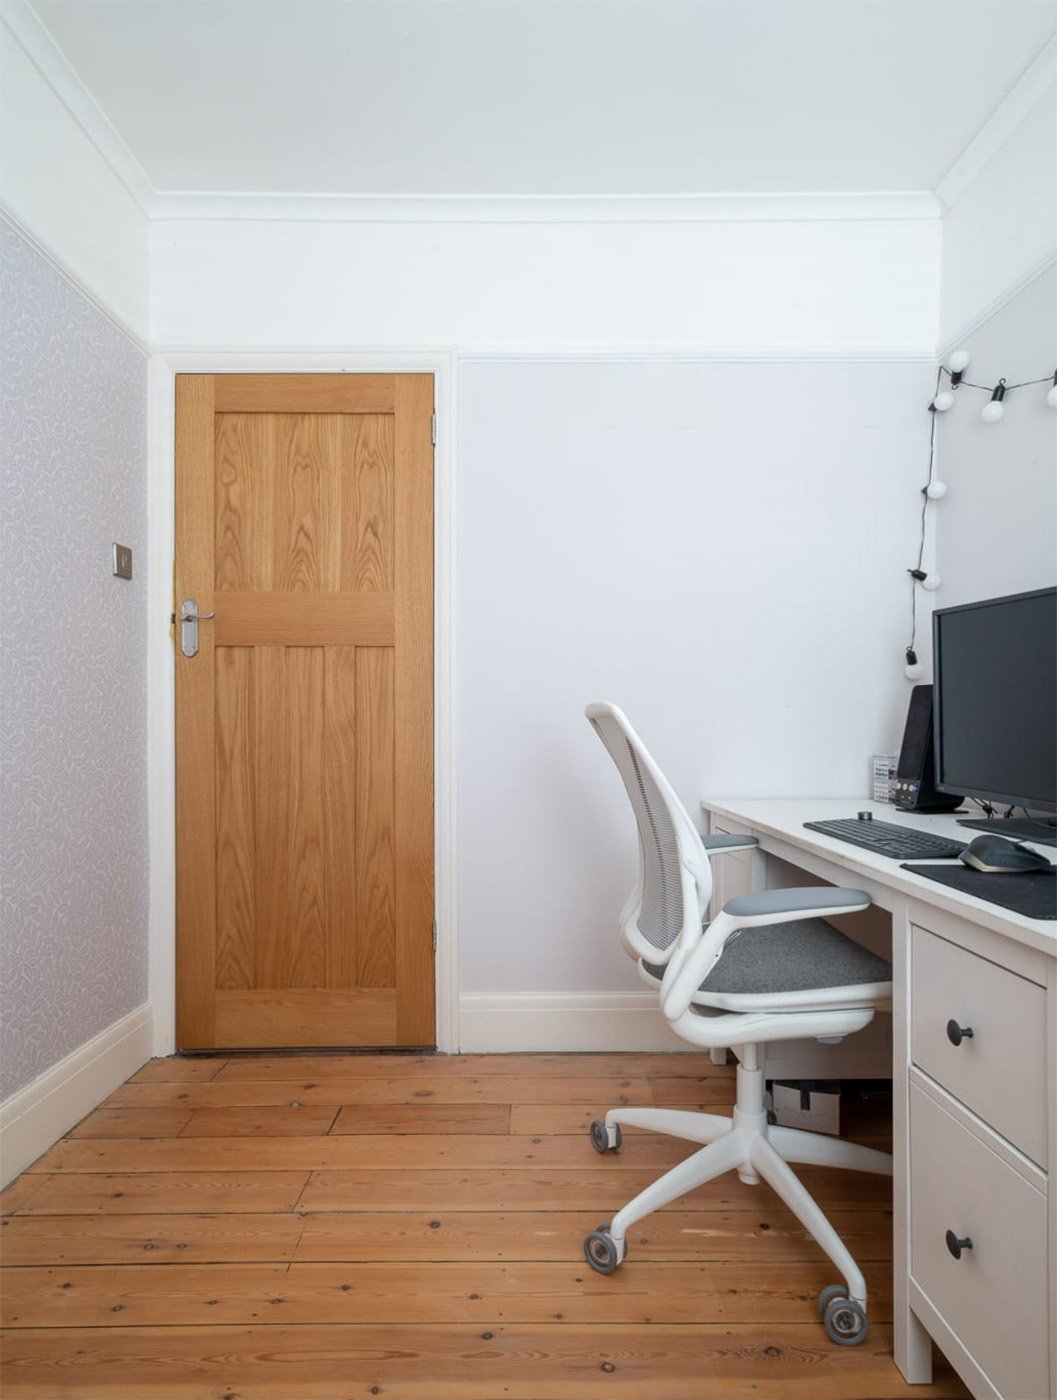
This is what the room was like when we first got the keys, years ago…
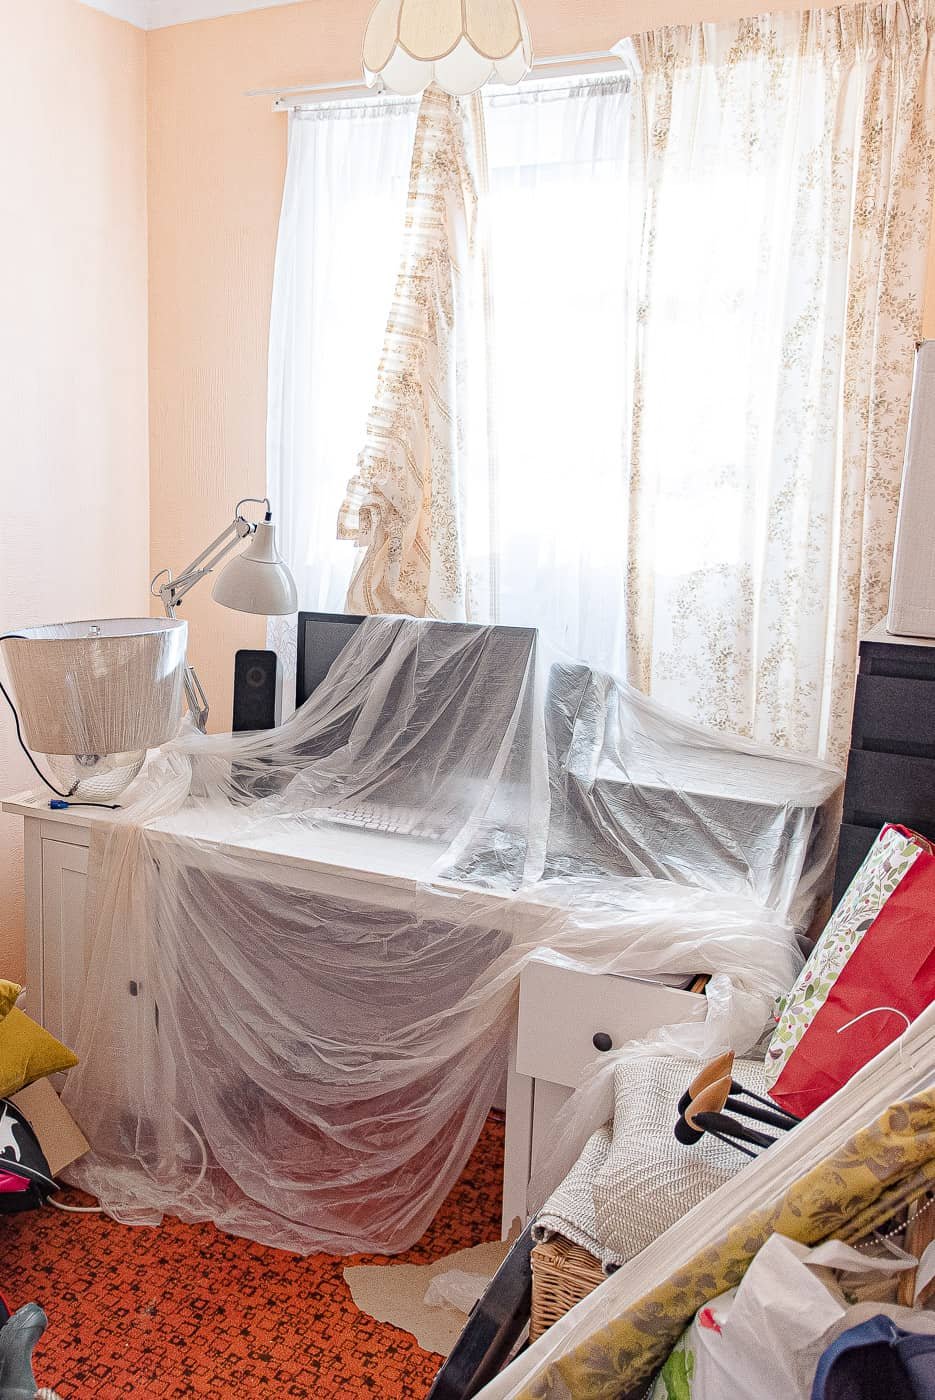
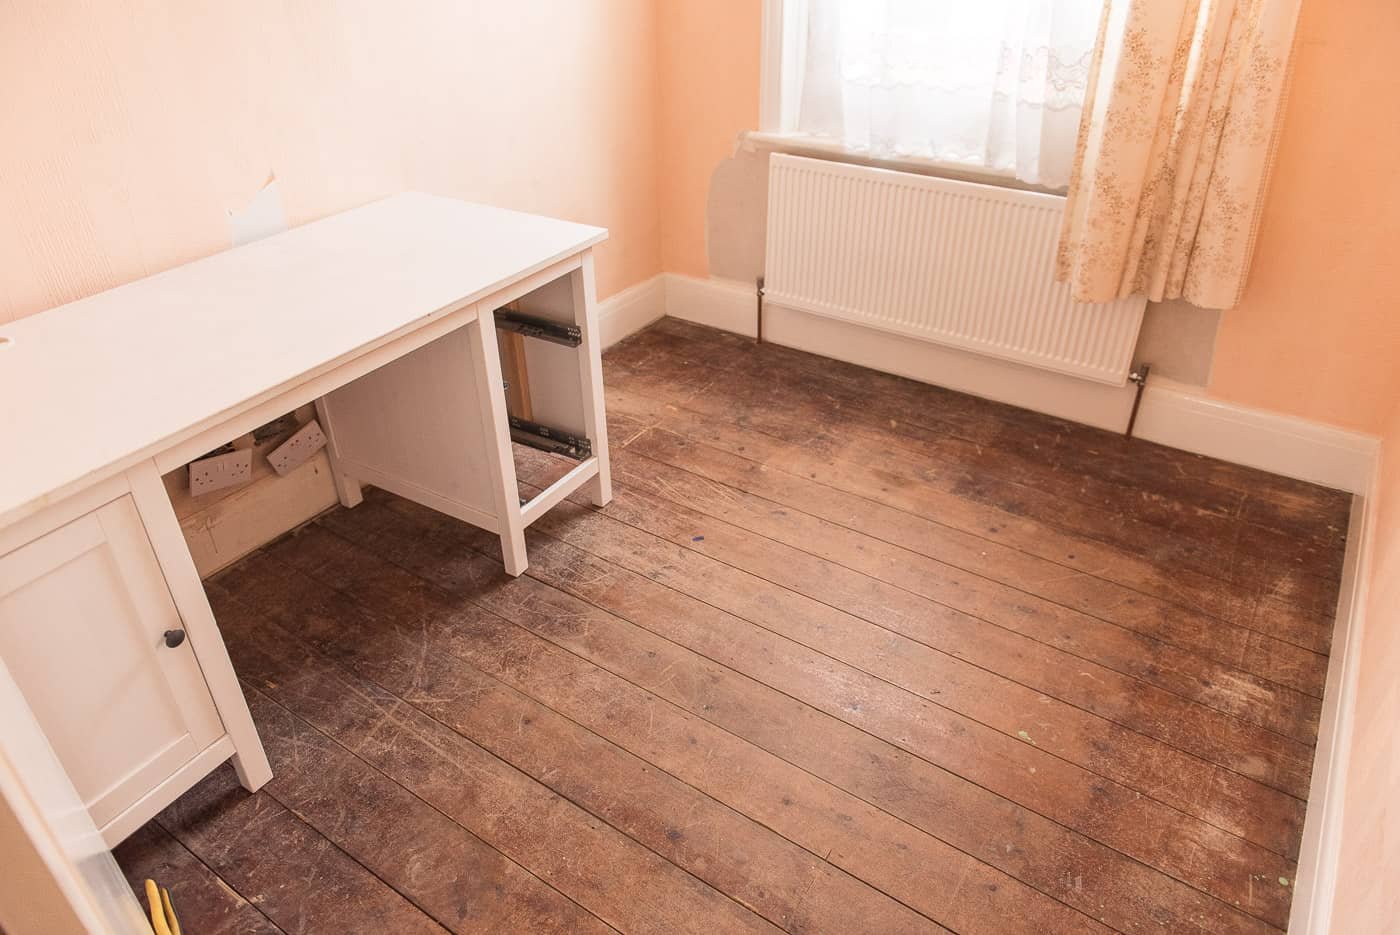
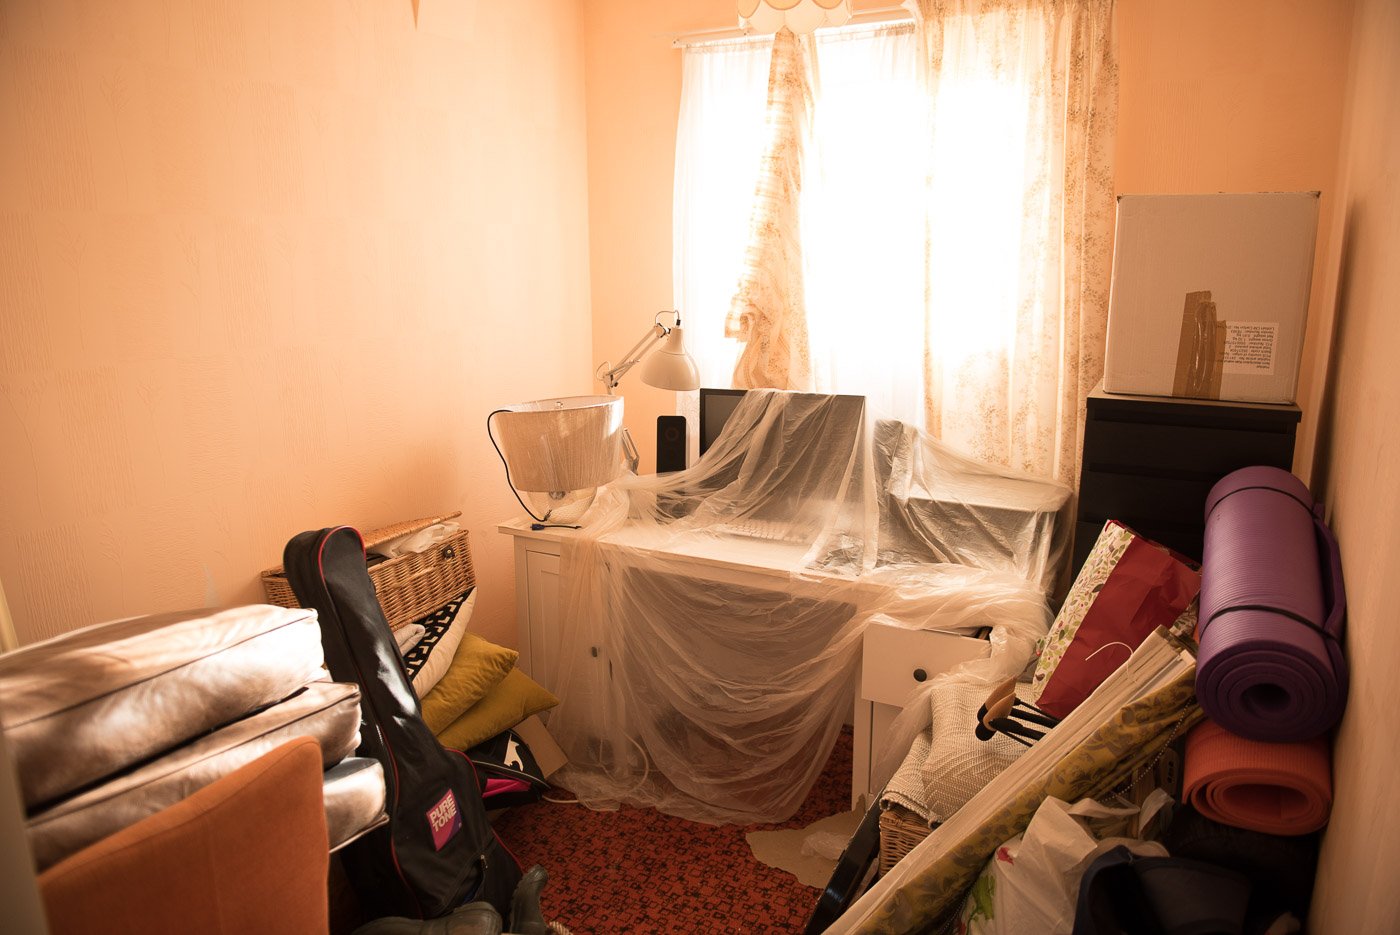
It’s the awkward, tiny, box room estate agents like to call a ‘bedroom’ but in reality you can barely swing a cat in it 😅
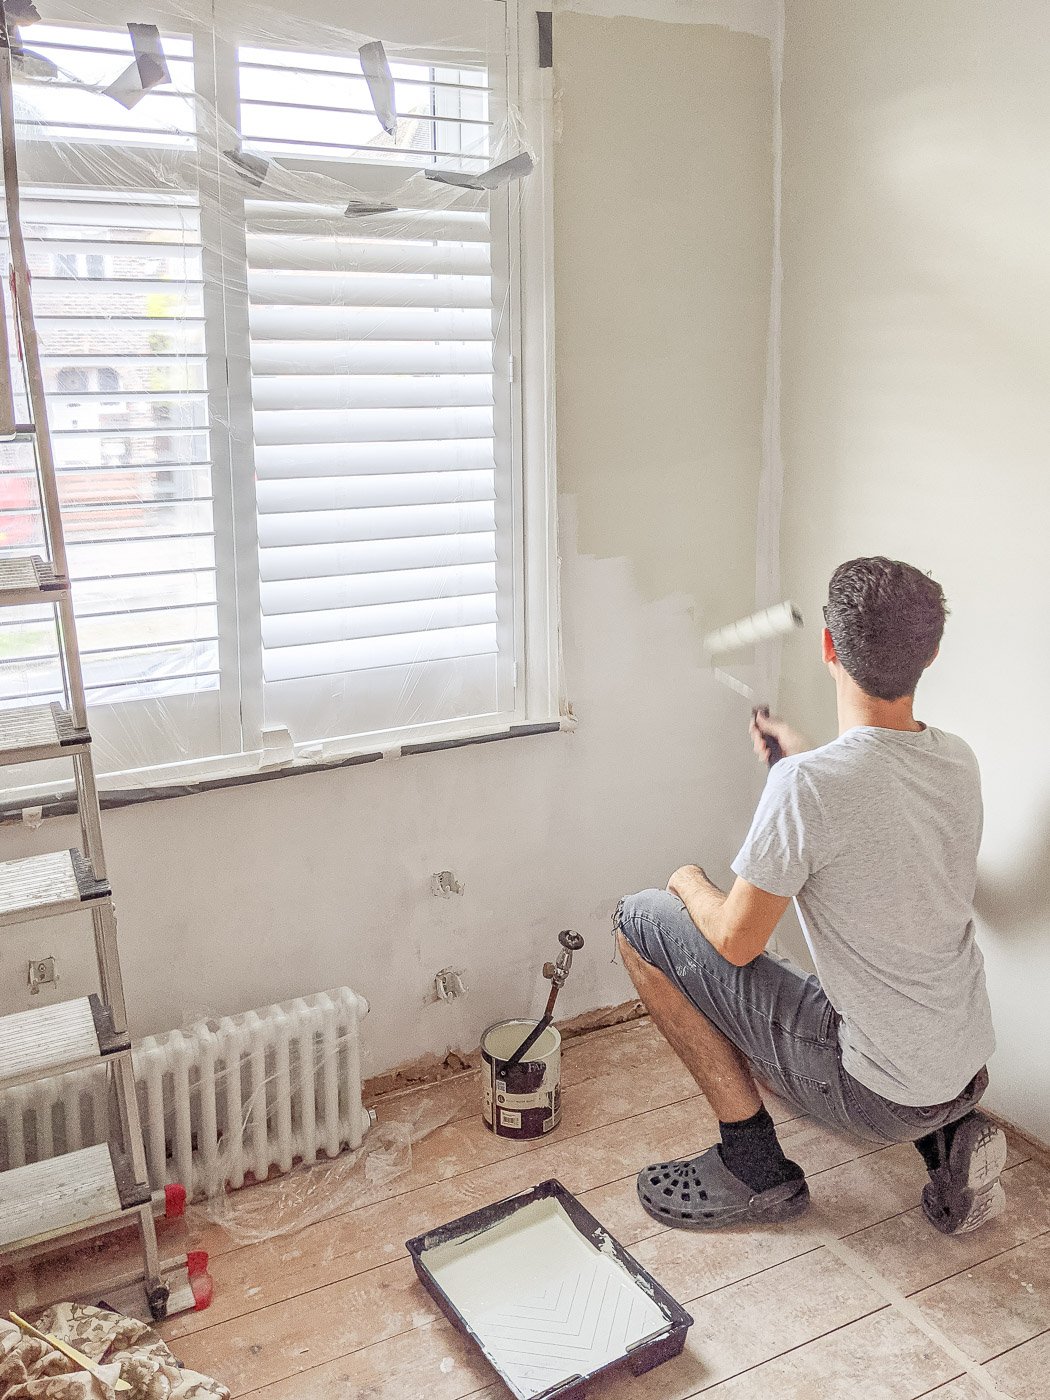
We made basic updates really early on to freshen it up while other work in the house took priority and lived with it for years before we developed a vision for what it could become.
Pretty bland and uninspiring, right? Neil would go from grey corporate office, to grey home office in one commute!
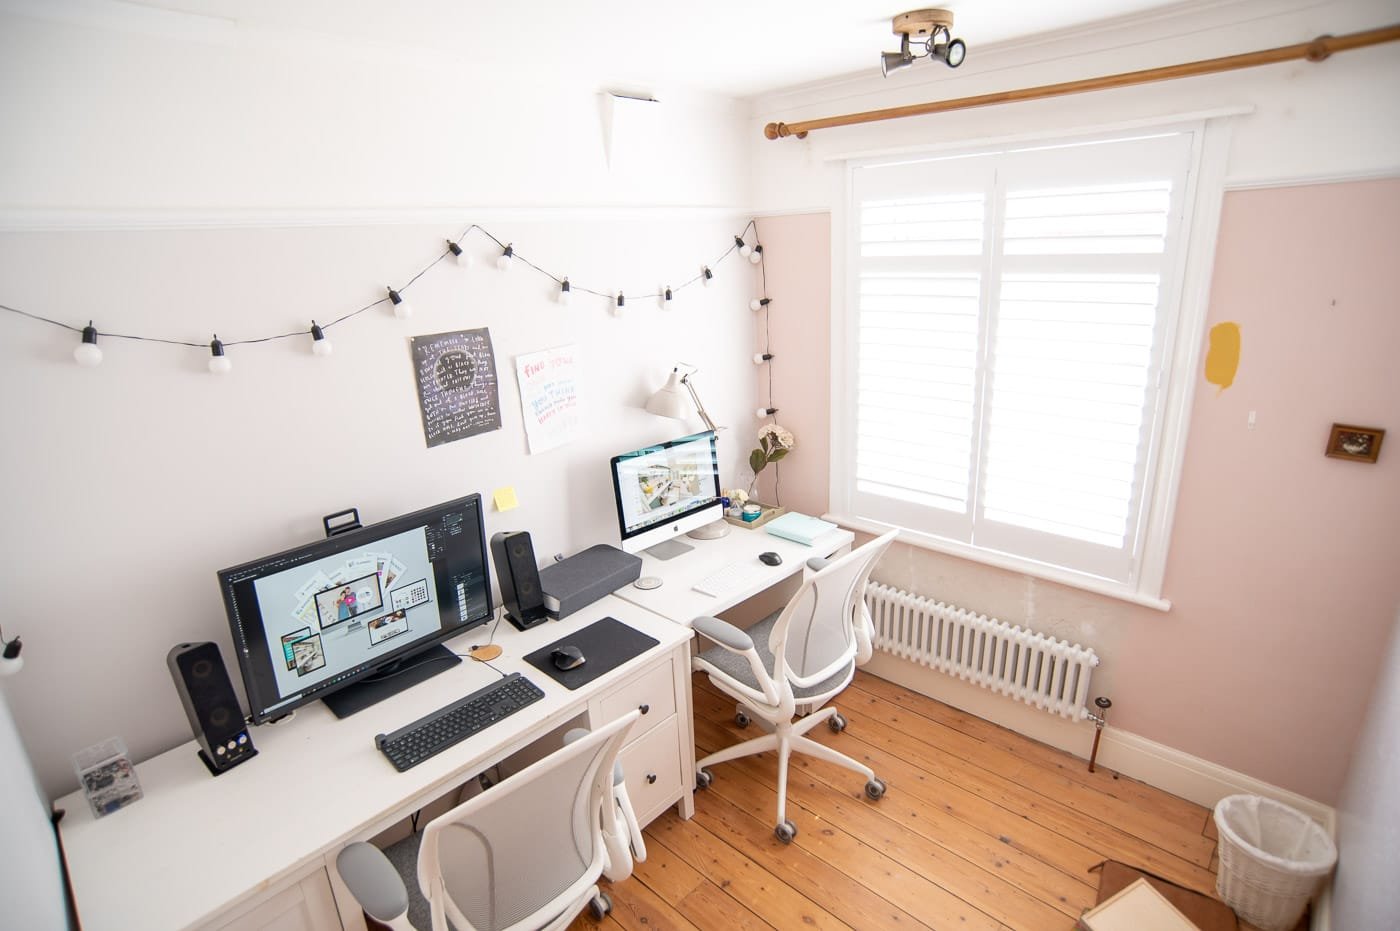
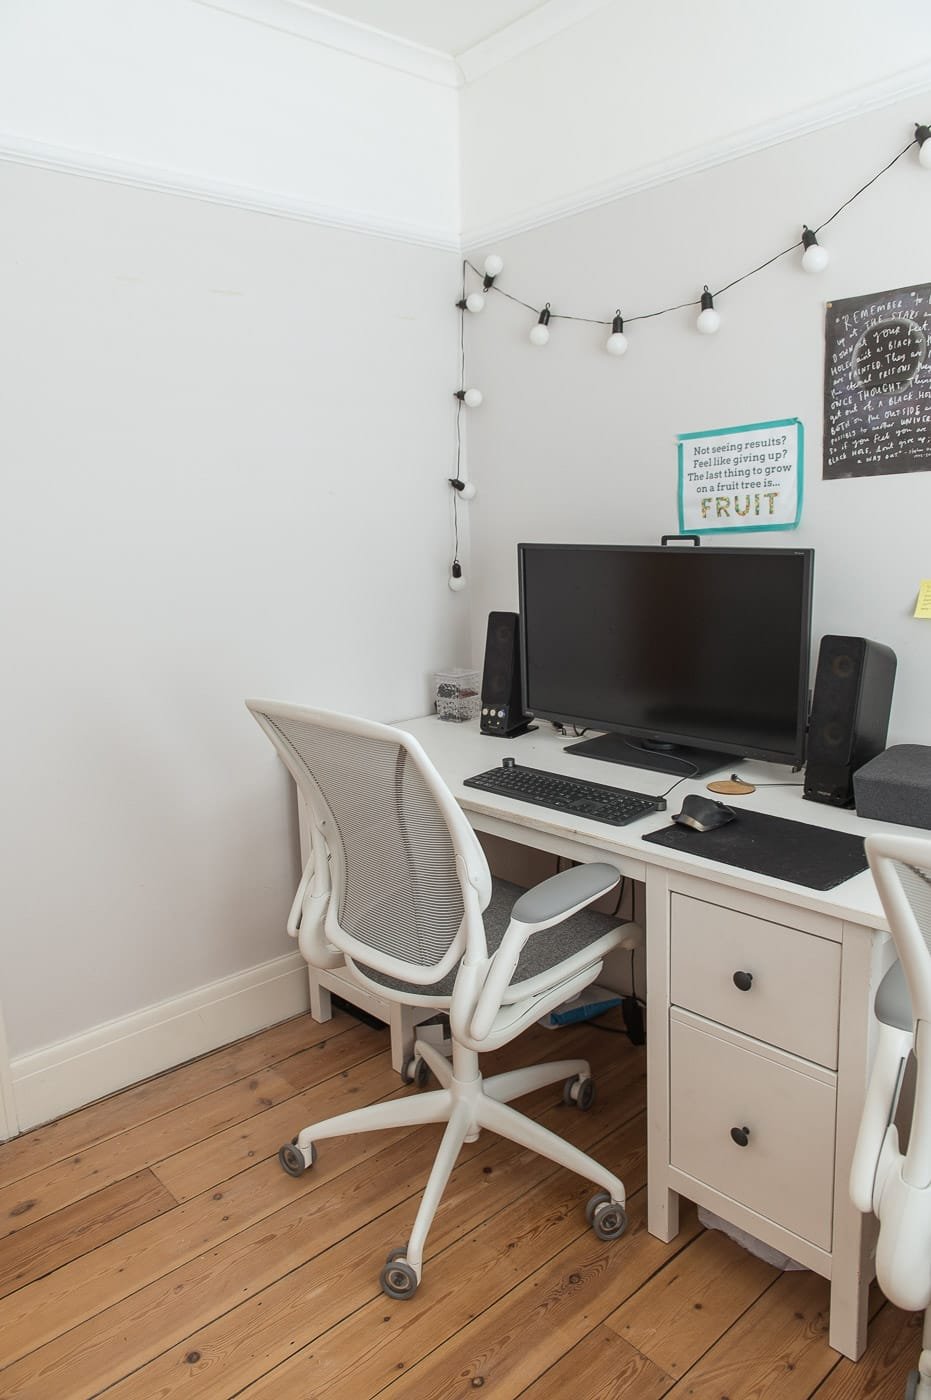
…after a lick of a paint to make it slightly less depressing
…and some hastily stuck to the wall inspirational quotes! We made a few minor tweaks to make the space slightly more liveable whilst we renovated the rest of the house!

Our home office ideas + the design brief
When we started forming ideas for the home office design about a year ago, we had big ambitions for such a small room.
First and foremost, the design had to enhance how we work and make us feel inspired. It had to be practical and make us feel inspired for a day of interior design work.
If you have an organised, inspiring area, that works on a practical level, the chances are high that you’ll do far better work in it than if you’re living in a disorganised area that makes you feel kinda low.
Studies back this. Environmental psychologists tell us time and time again that you can make your life happier by making design choices that are aligned with your needs and tastes.
I bring this theory into every project I do, no matter which home or room I’m helping clients design, and it’s woven through the guides I share and the online courses I teach. This is what we strive for in our own home:
Constant life enhancements through design.
So, given this is the space we operate from 7–10 hours most days, we decided we had to invest well and get it right. It would benefit our lives and work if we did.
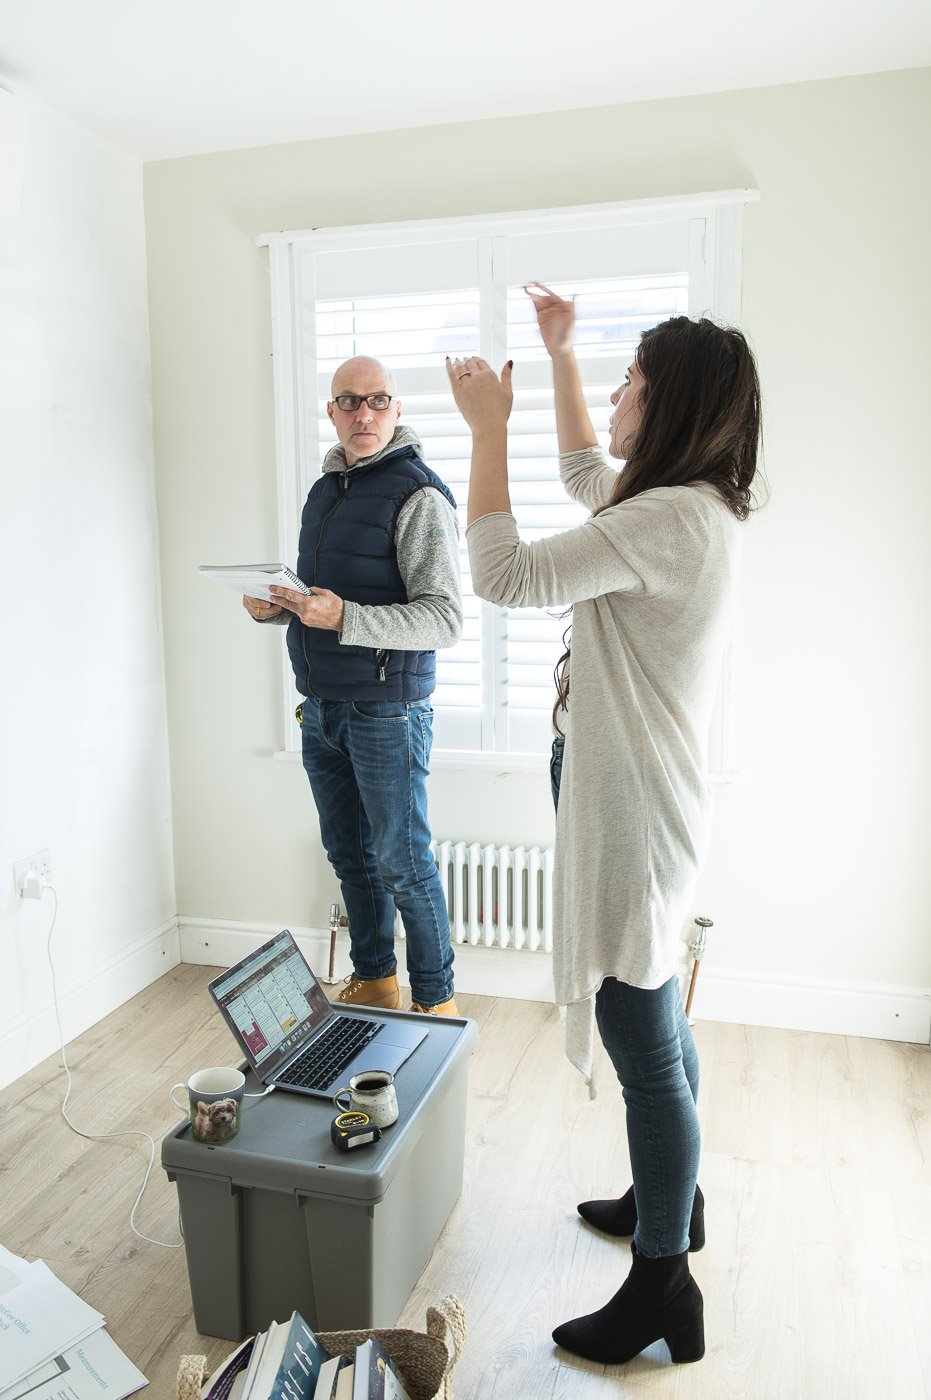
Our home office design brief looked like this:
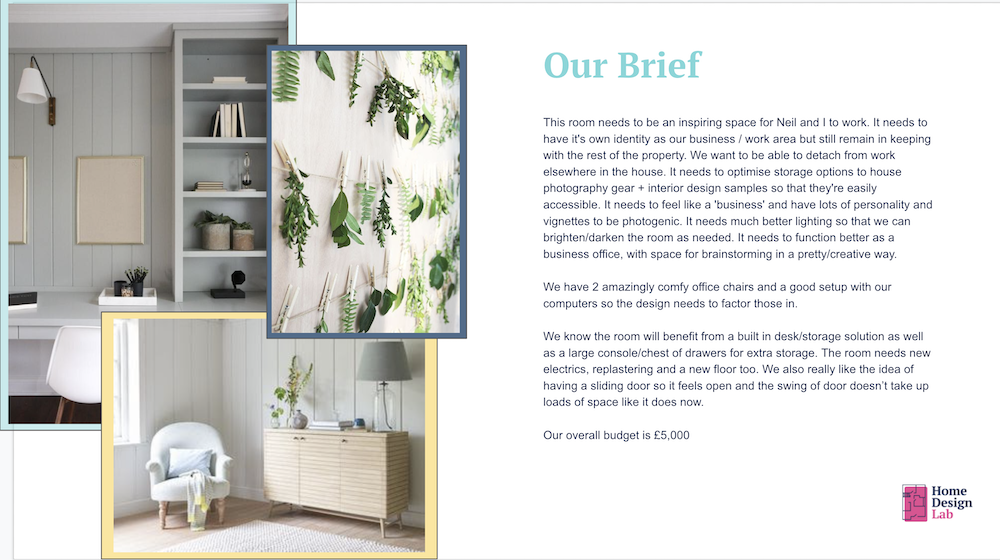
I sat down with a cup of coffee, asked Neil some core questions (the same we share in the Home Design Lab program) and we began to form this brief. It’s hard to read in the image so I’ve copied it below:
The space needs to:
Be an inspiring space for us to work
Have it's own identity as our business / work area but still remain in keeping with the rest of the property. We want to be able to detach from work elsewhere in the house.
Optimise storage options to house photography gear + interior design samples so that they're easily accessible.
Feel like a 'business' and have lots of personality and vignettes to be photogenic for content opportunities.
Have better lighting so that we can brighten/darken the room as needed.
Have space for brainstorming in a pretty/creative way.
Plus:
We have 2 amazingly comfy office chairs and a good setup with our computers so the design needs to factor those in.
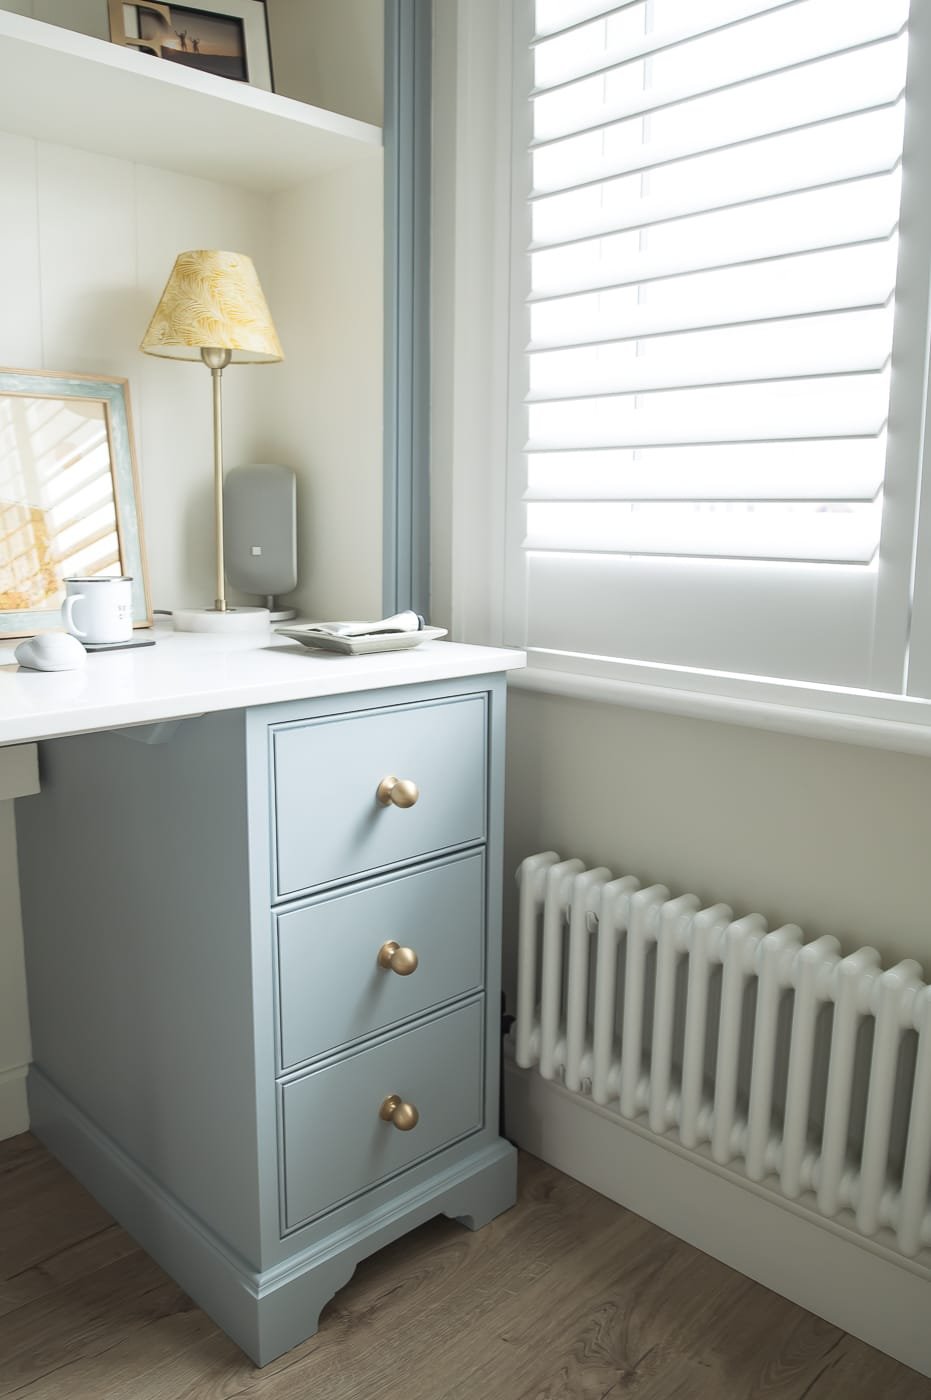
We know the room will benefit from a built in desk/storage solution as well as a large console/chest of drawers for extra storage.
The room needs new electrics, replastering and a new floor too.
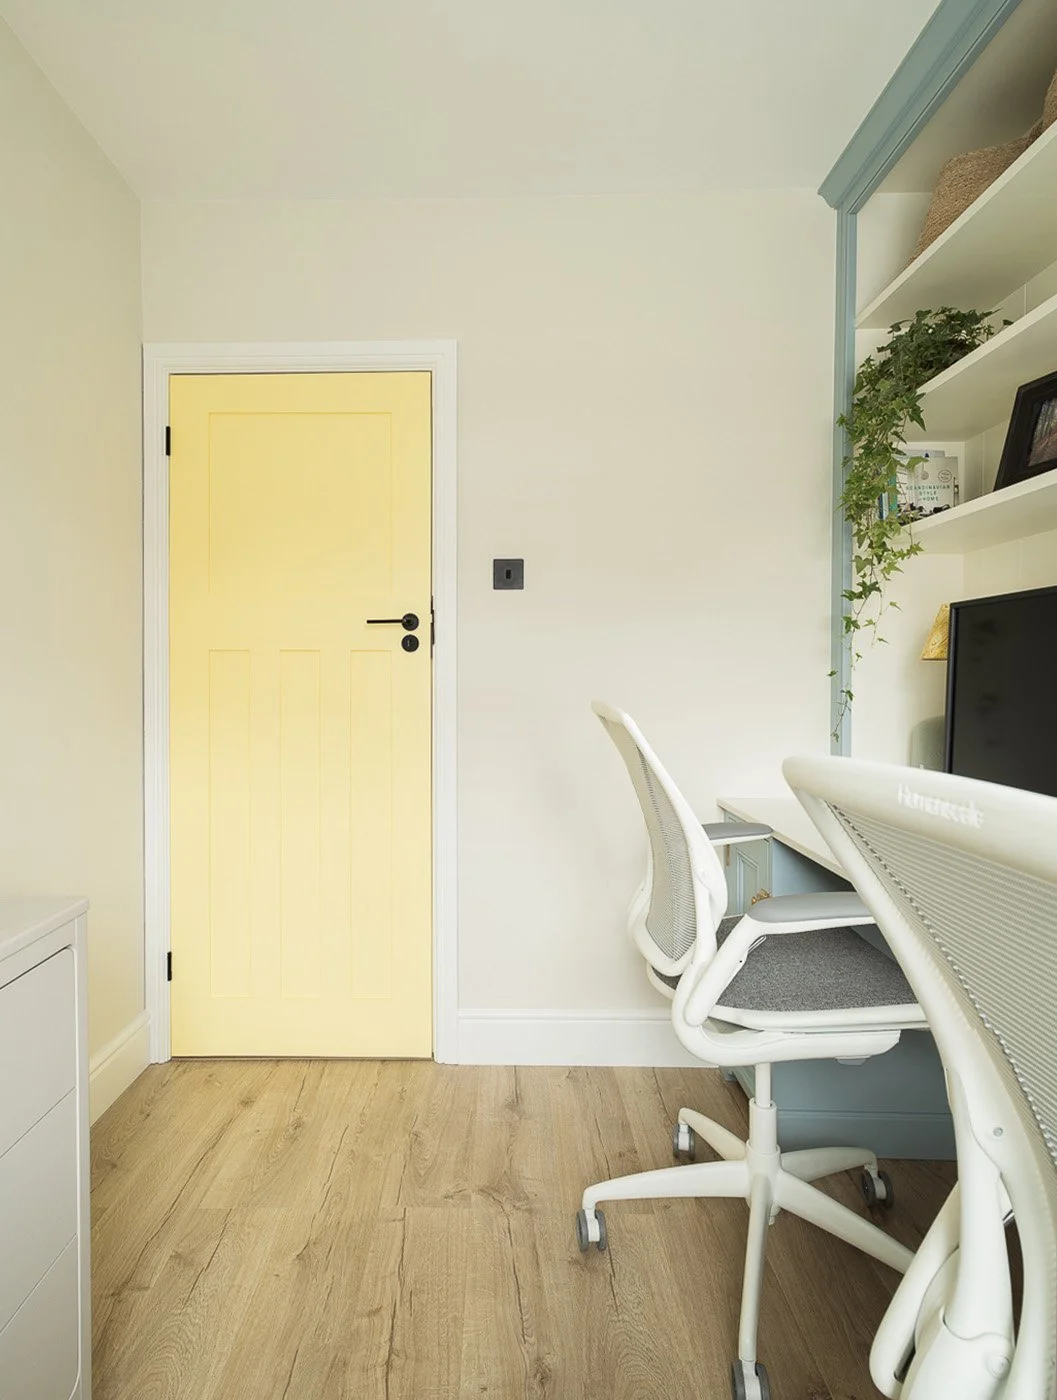
We also really like the idea of having a sliding door so it feels open and the swing of door doesn’t take up loads of space like it does now.
Overall budget £5,000
The room itself needed all new electrics, flooring, bespoke storage, plastering, lighting and more and we were grateful to work with some key suppliers we know and trust, like Quick Step for the flooring, Hillarys for the shutters, and Armac Martin for the high quality brass handles – which kept us within budget.
Behind the scenes – planning the home office makeover
Some people are surprised when we tell them we tackle our own projects with the same approach our students work through in our online courses.

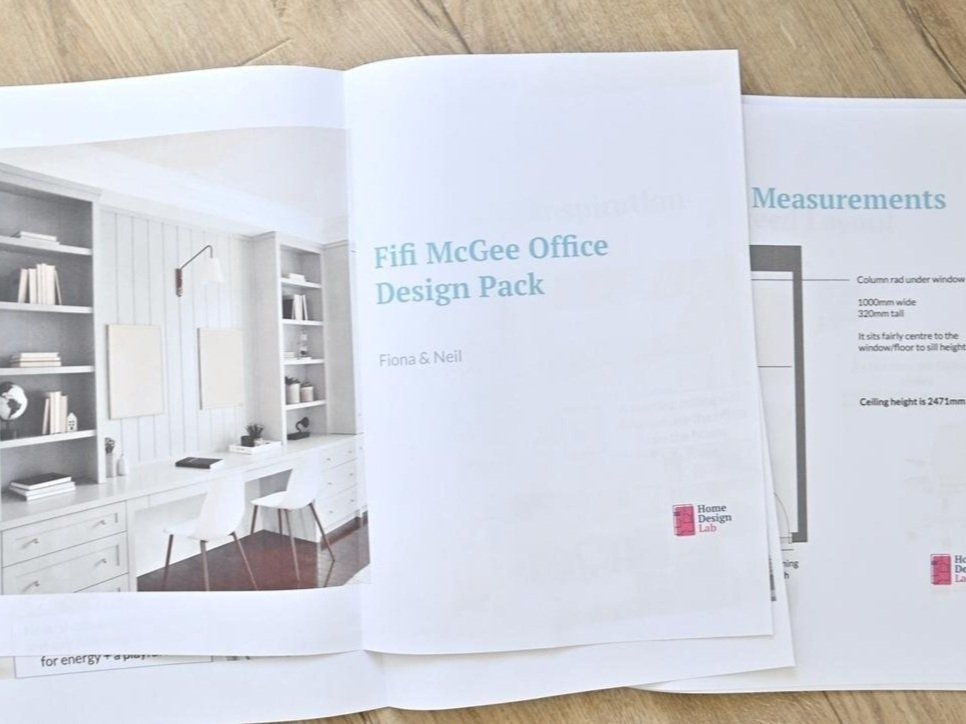
Using our home design course to create a design pack
We needed to ensure this design would reflect both our tastes and practical needs. The design had to remain cohesive to the rest of the house and come in on budget. So for this project we used the exercises and tools in our home design course to plan every detail.
This entailed me creating a full home design pack, as I would do for a client (the same pack our students are creating through the course) which supported us in many ways:
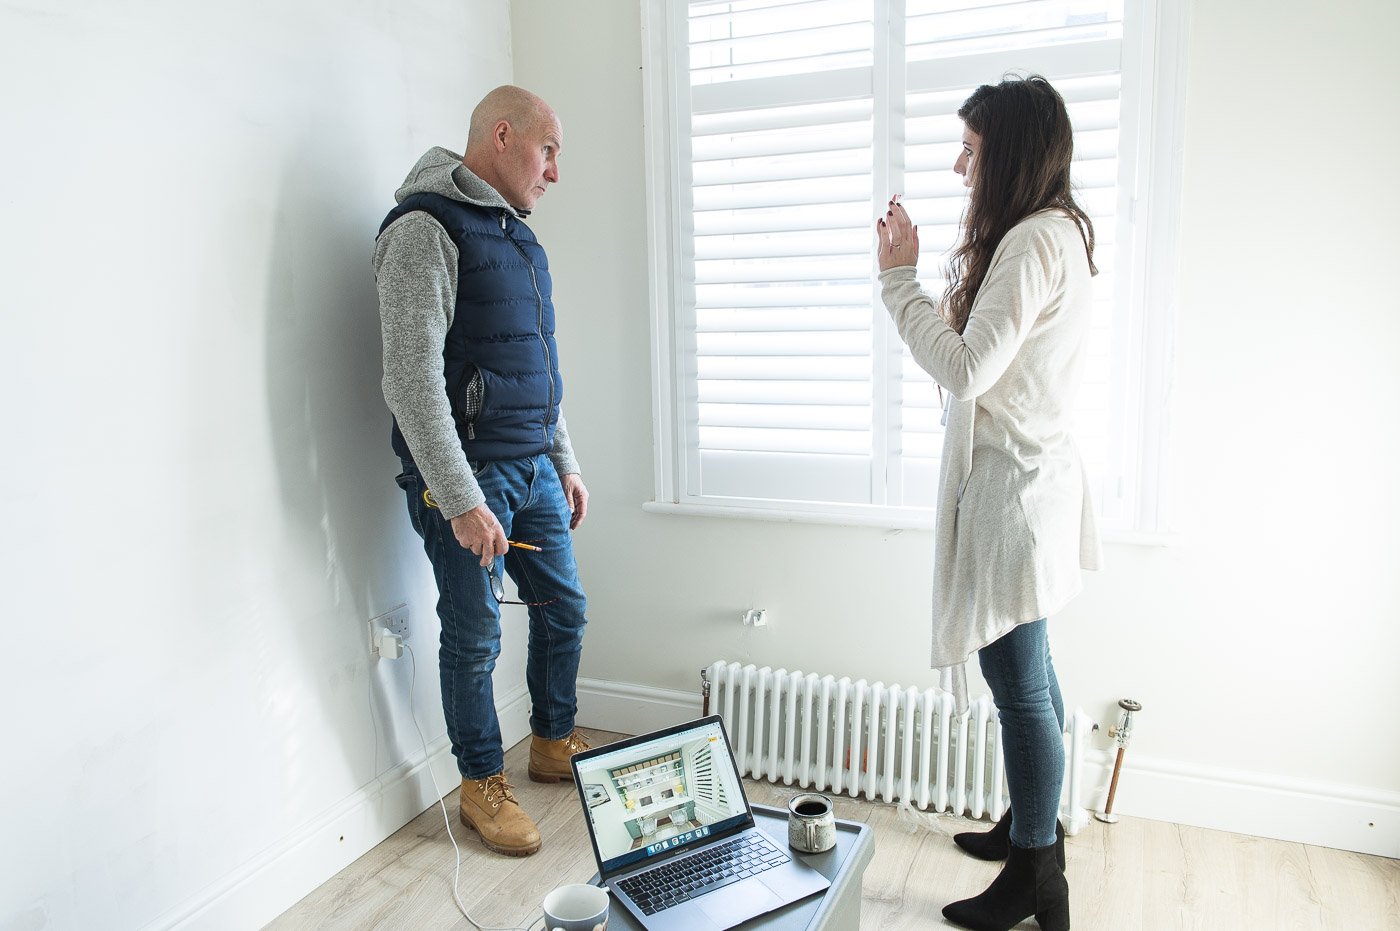
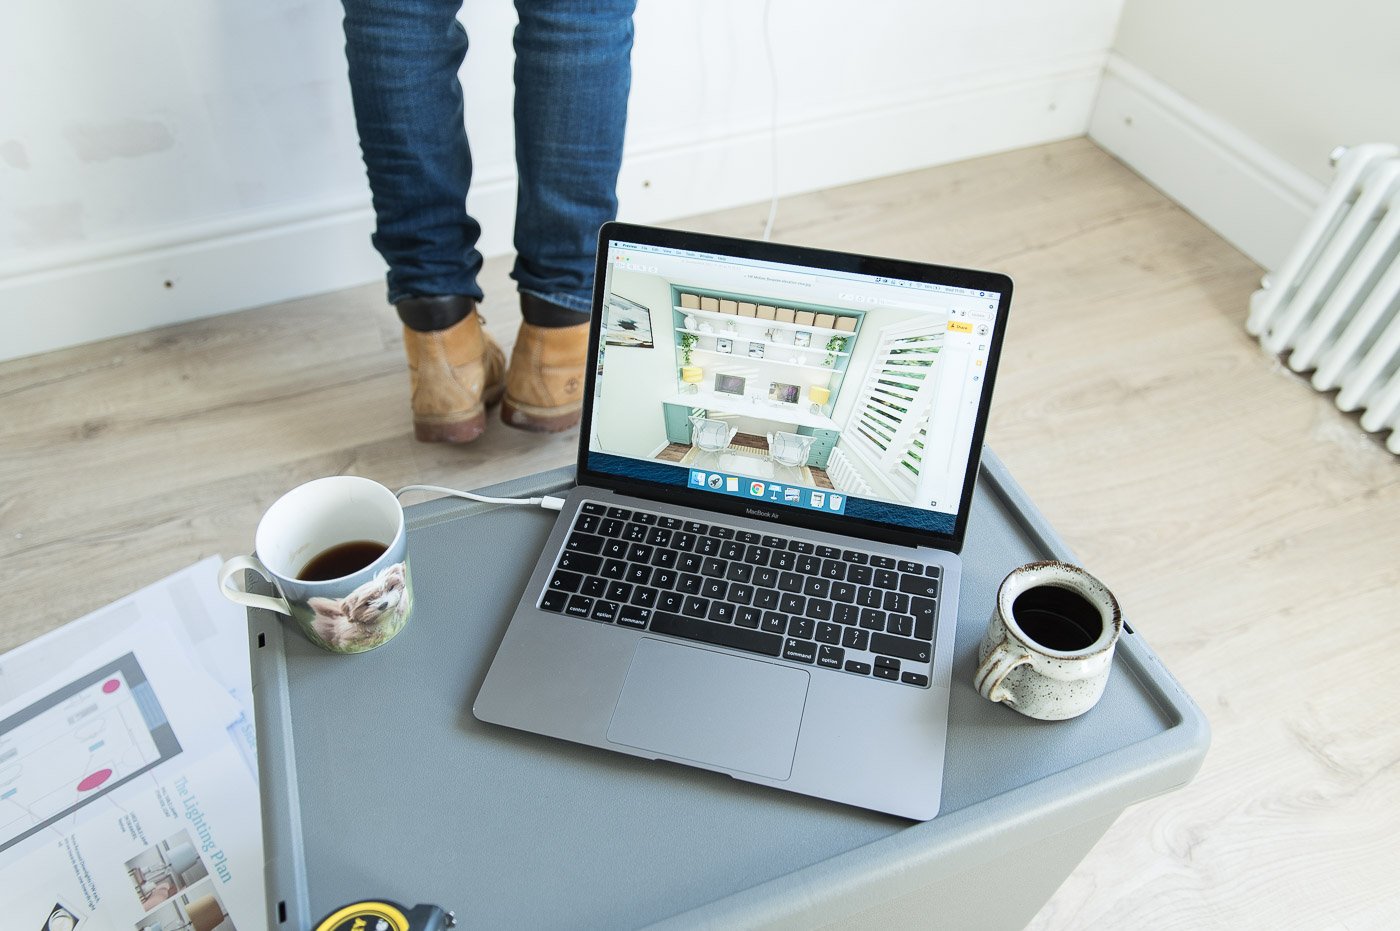
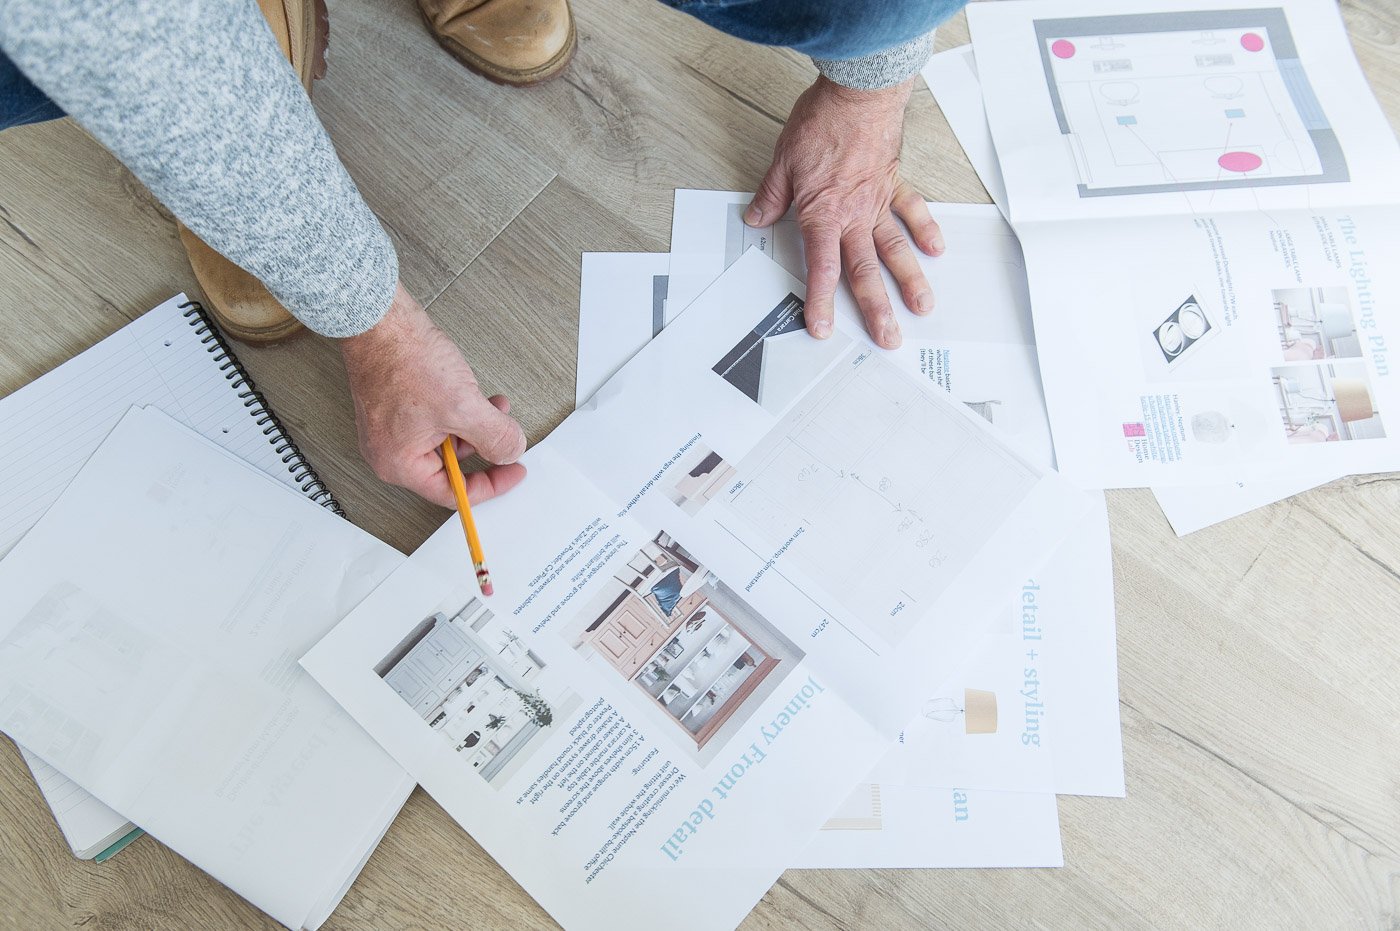
The pack allowed us to visualise how the home office design would look – before spending lots of money on it
I was able to share the plan with our joiner to communicate design requirements clearly. I’m certain this clarity prevented expensive hiccups when it came to installation.
It gave us a process for Neil and I to agree every detail of the design. Both our needs felt like they were being met which made the renovation less stressful
It got us understanding costs early on so that we could set up a savings plan plus contingency to make it happen

Planning carefully, before any work starts, proves to us again and again that when you consider elements of your renovation in the right order, and you ask yourself the right questions, you’ll get results that enhance your life.
We’re filming a video about how we tackled this project from a design and project management perspective – so if you want to be added to our mailing list for announcements when that goes live, just add yourself to the free Design Your Home – the Right Way 3 day email series and you’ll get on the list… (and get lots of design advice for your project too).
Compromising on home office design ideas
I wanted to mention this because every project I’ve ever worked on has had to face compromises and they can often be tough calls to make.
Trust your gut, explore back up plans, and make informed decisions with confidence, if you’re in this predicament.
Some of the choices we made in this room, for example turning it into a built in office rather than a bedroom, could be thought as foolish. We sacrificed a bedroom to give us our ideal workspace. But we entered into the project fully aware of drawbacks, and weighed up our needs as a household. This allowed us to storm ahead confident that we need our home to work for our lives, while also making a backup plan if we ever come to sell.
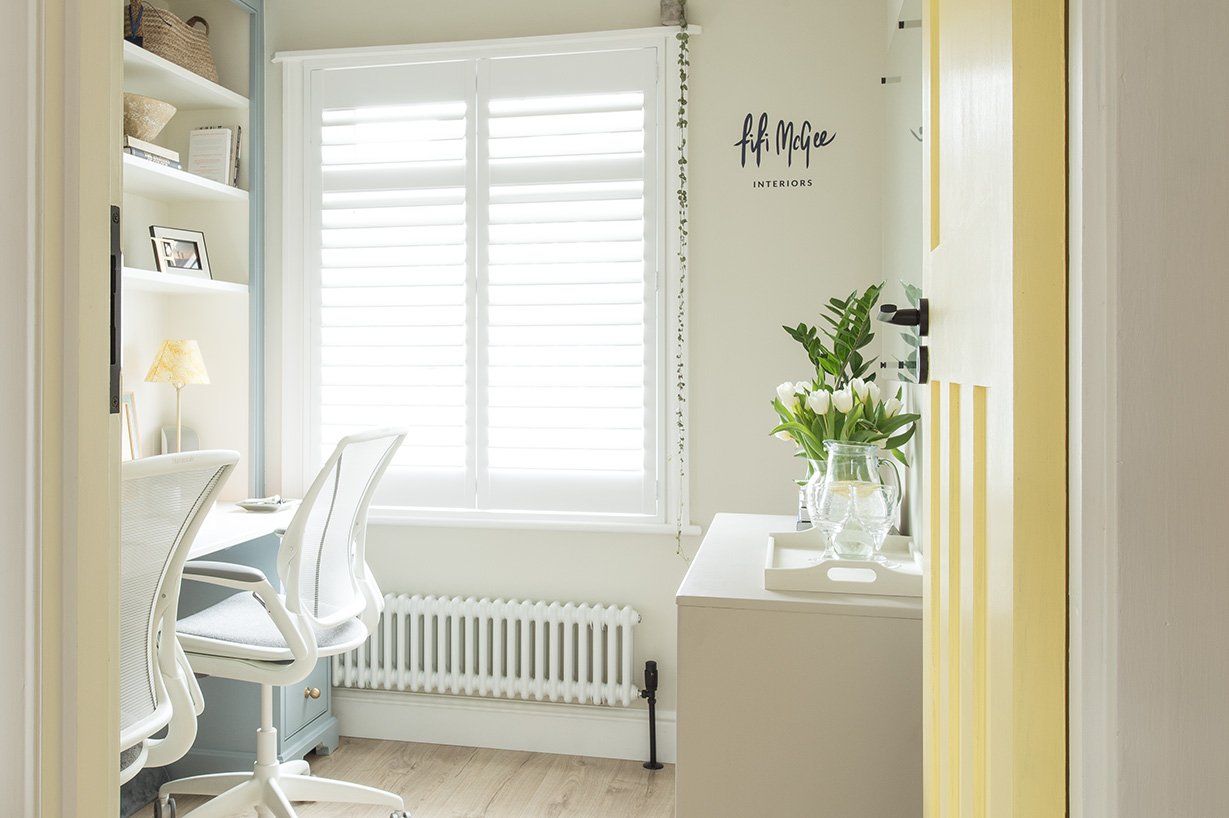
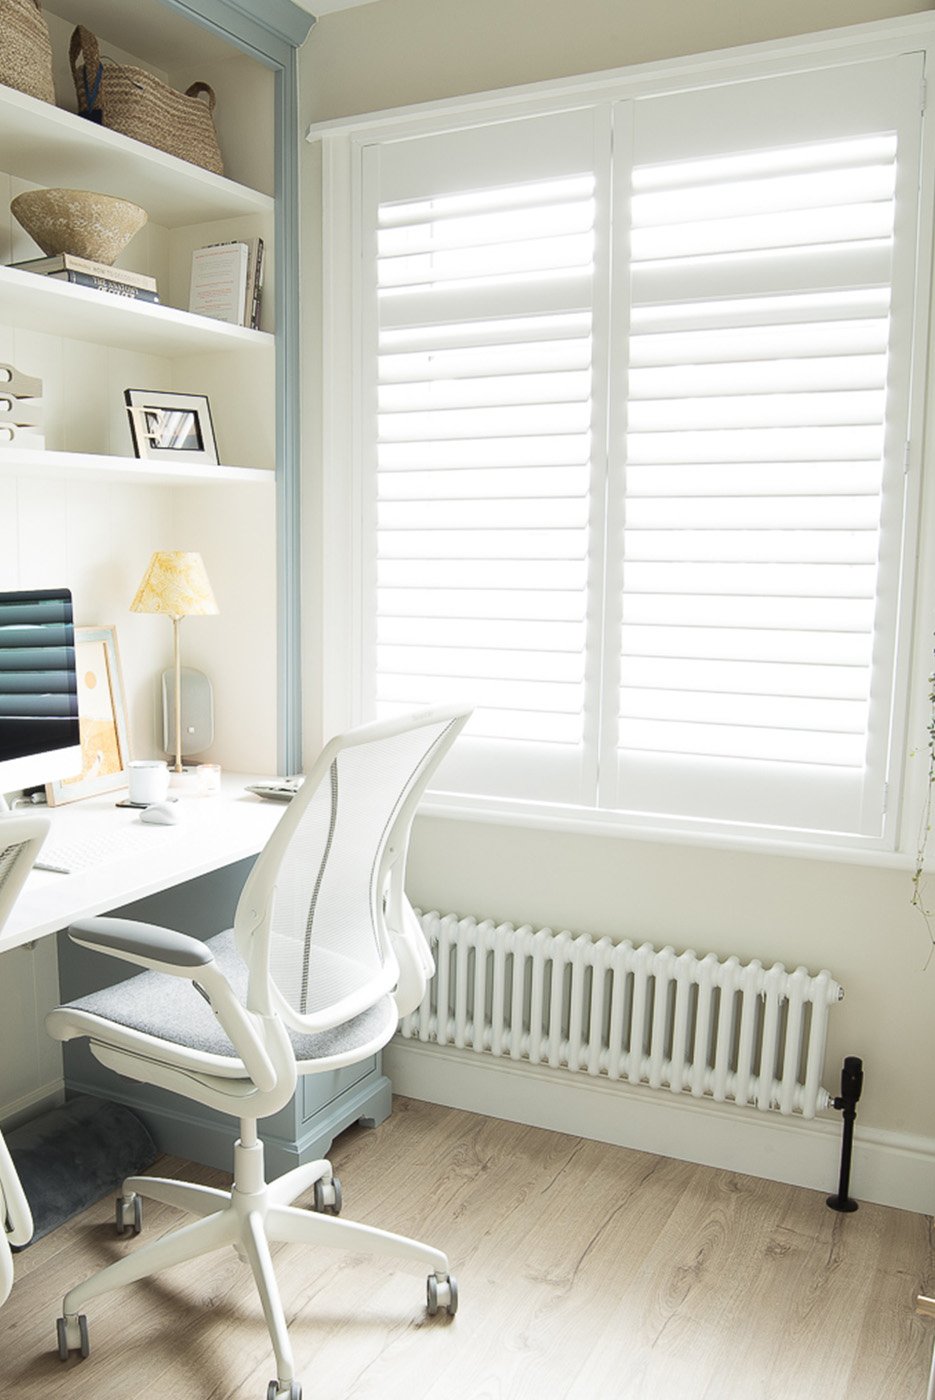
Getting the shutters installed
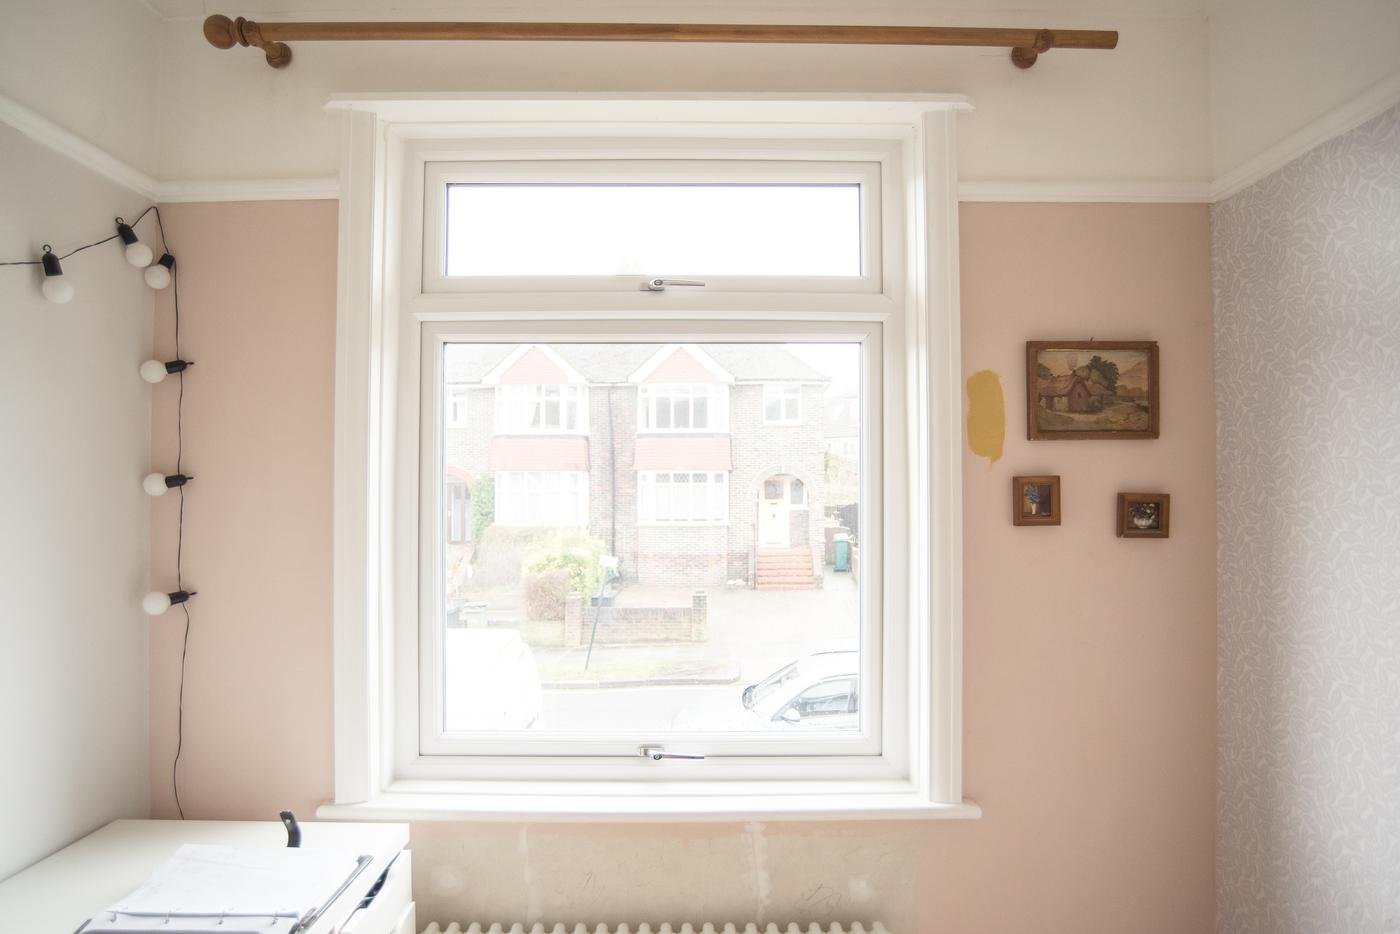
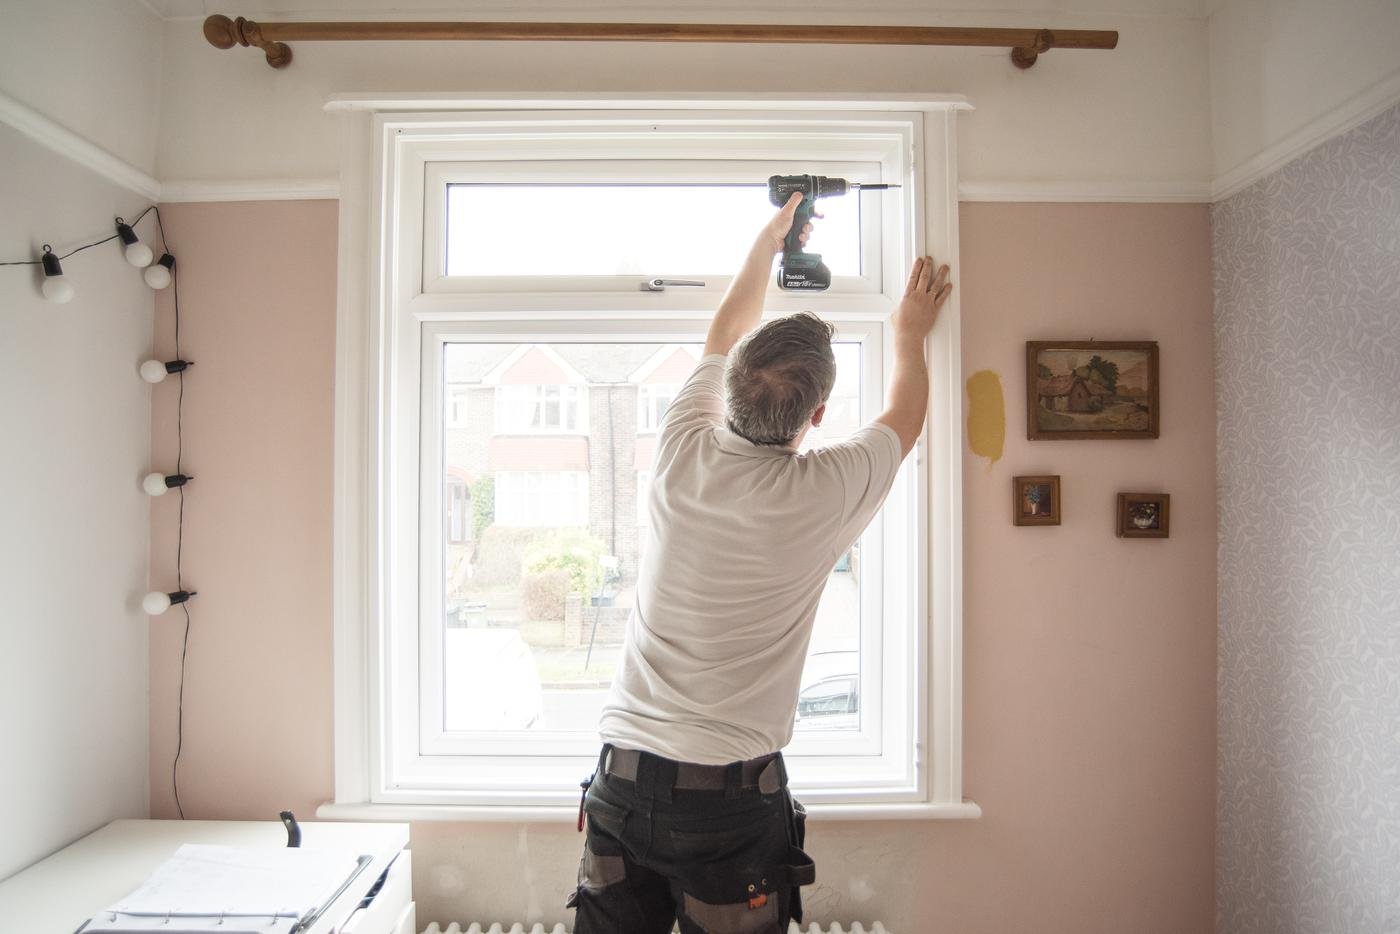
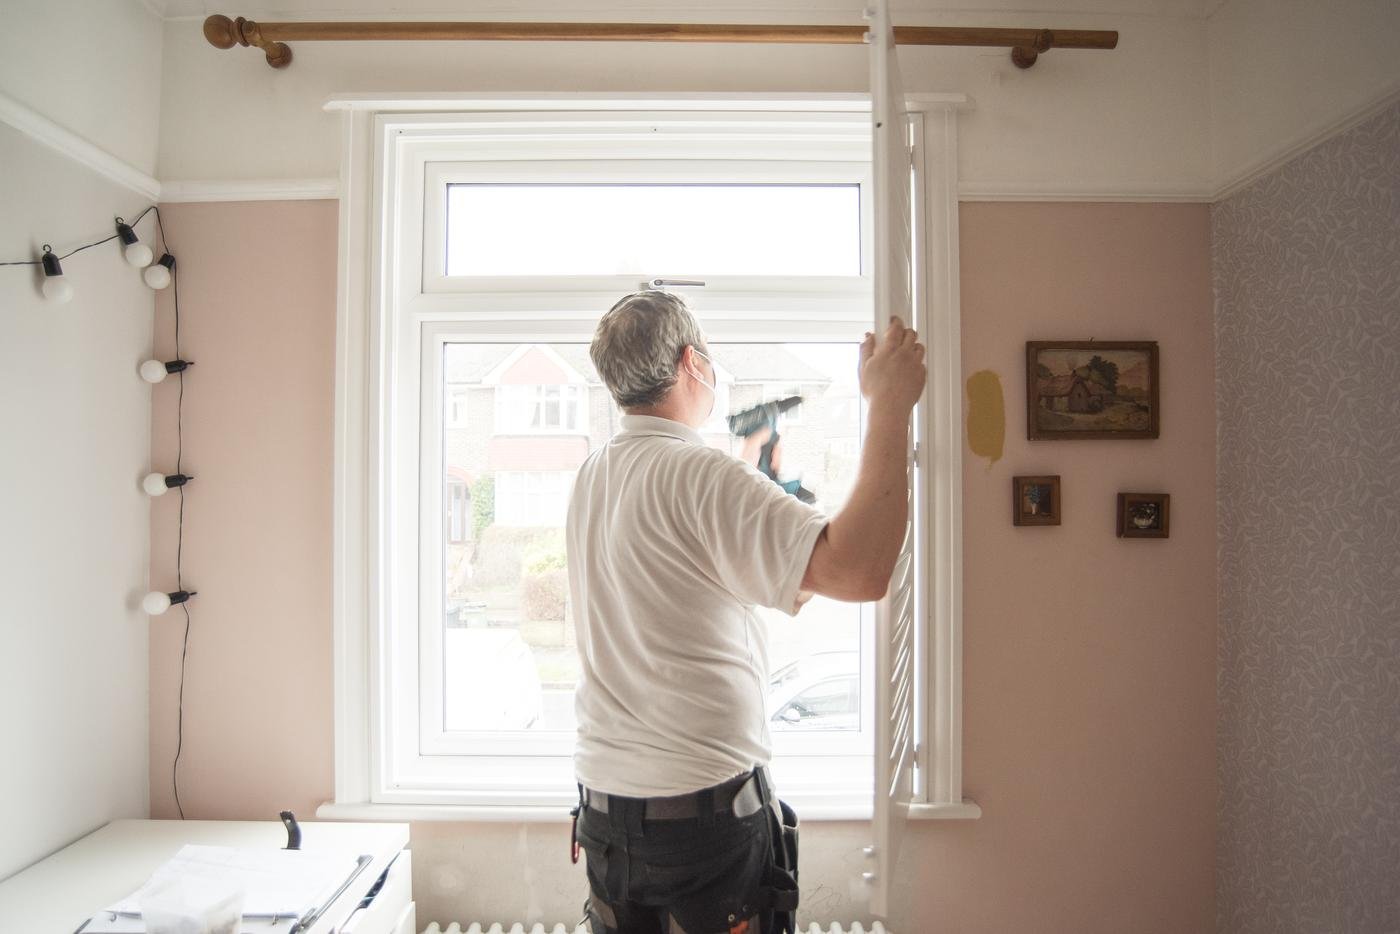
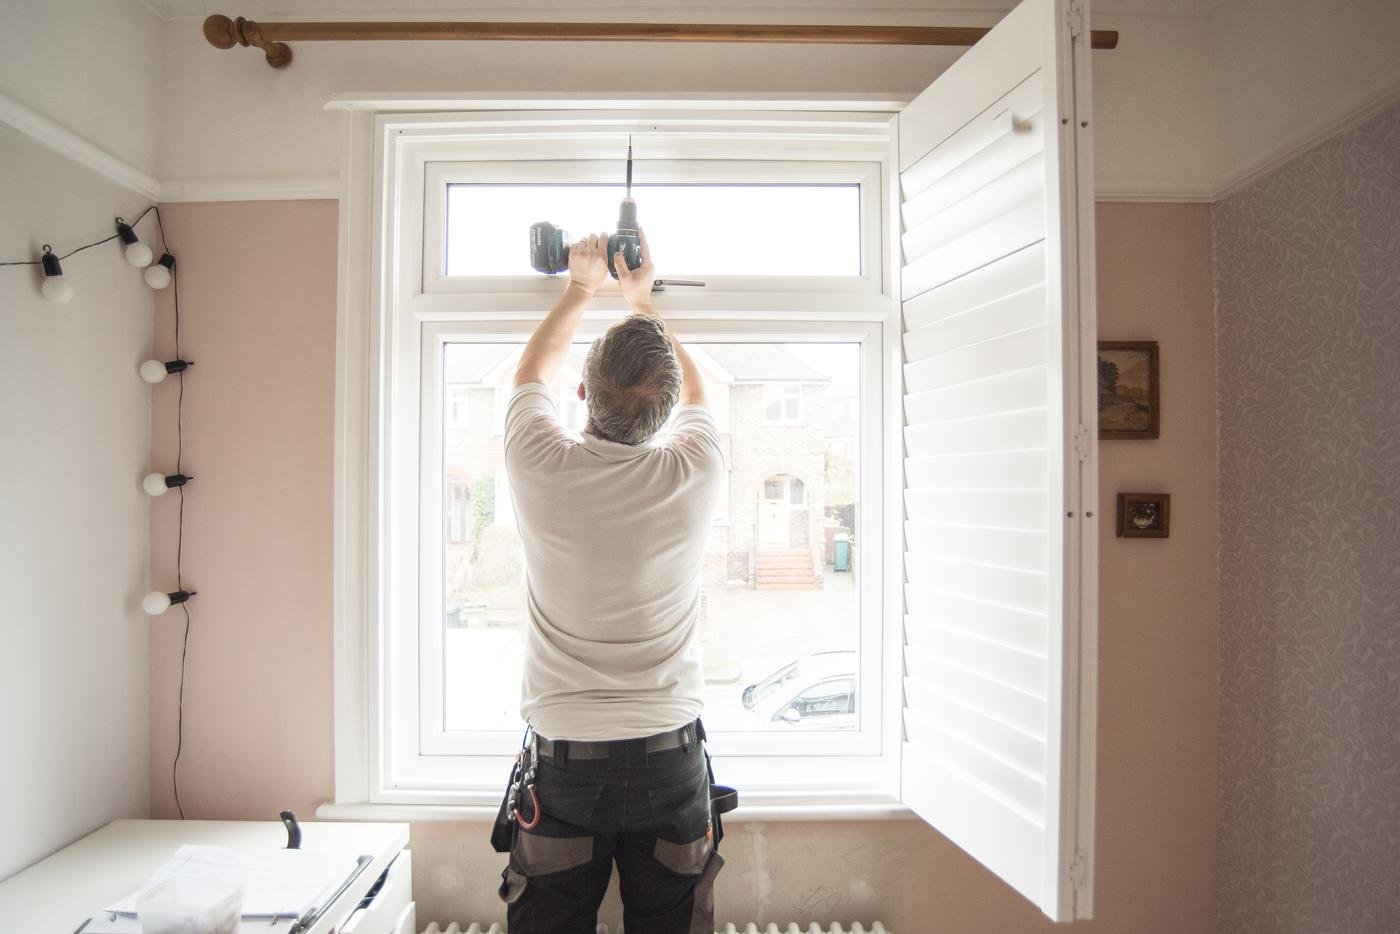
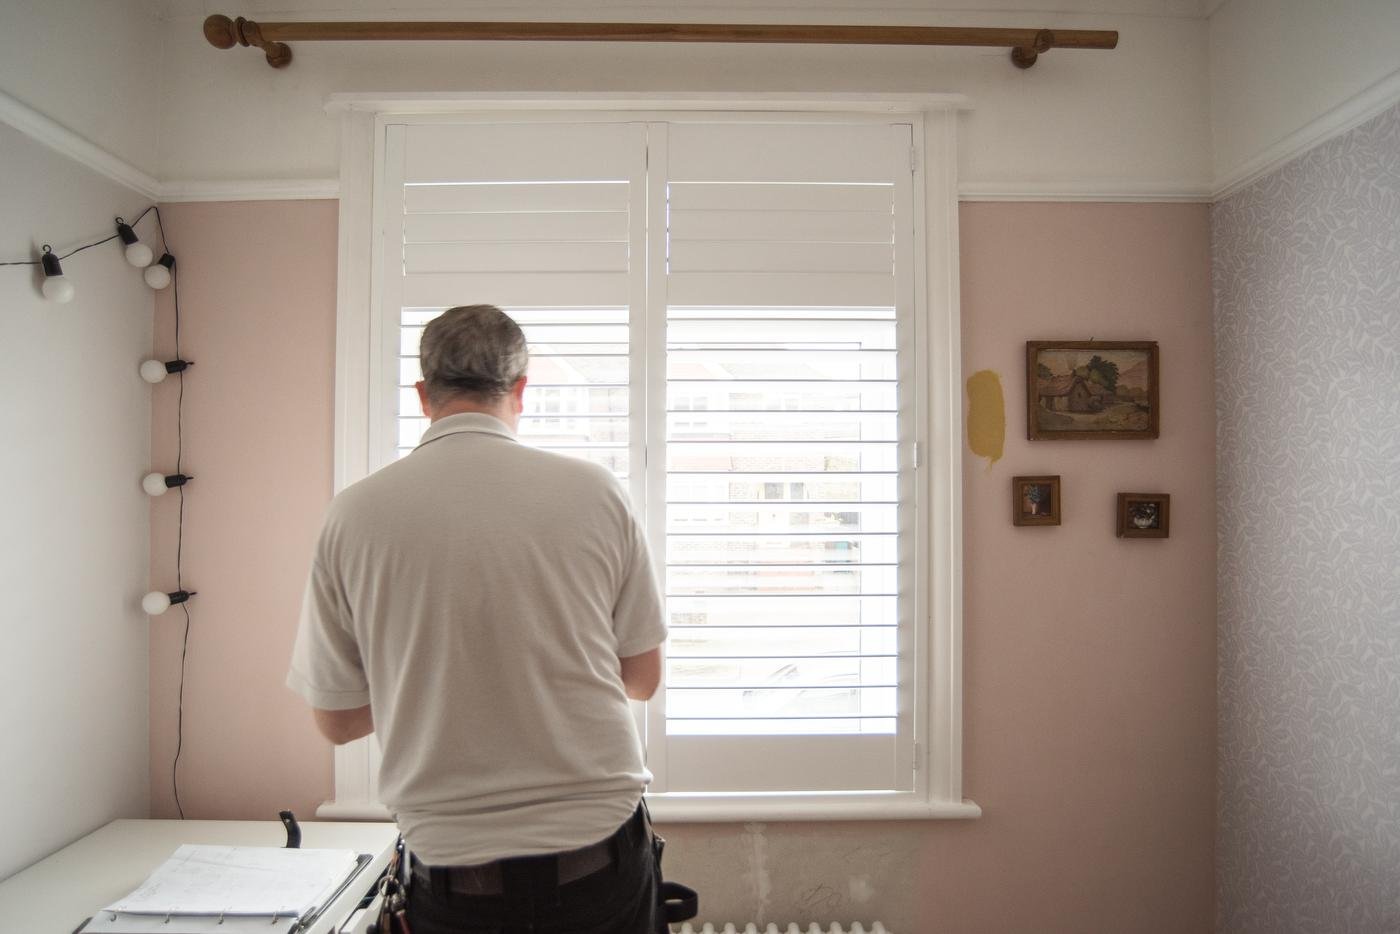

It’s our mission to enhance the front of the house with all matching window dressing. In our master bedroom we installed shutters to the bay window, and at the same time we got this small window done too. They bifold to the right, clear of the desk area and are perfect for adjusting light on screens.
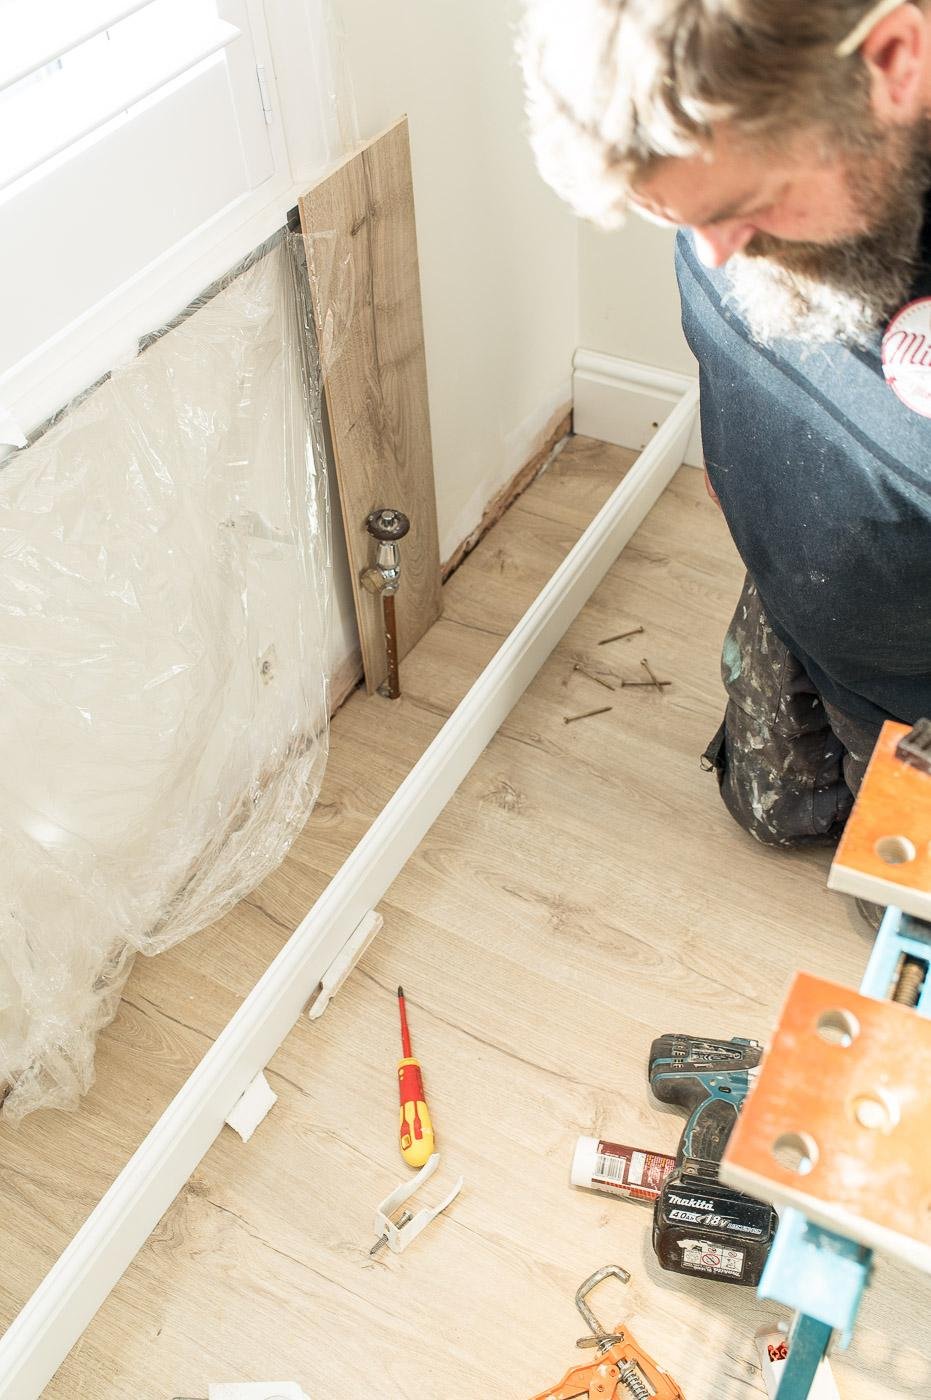
Installing the flooring
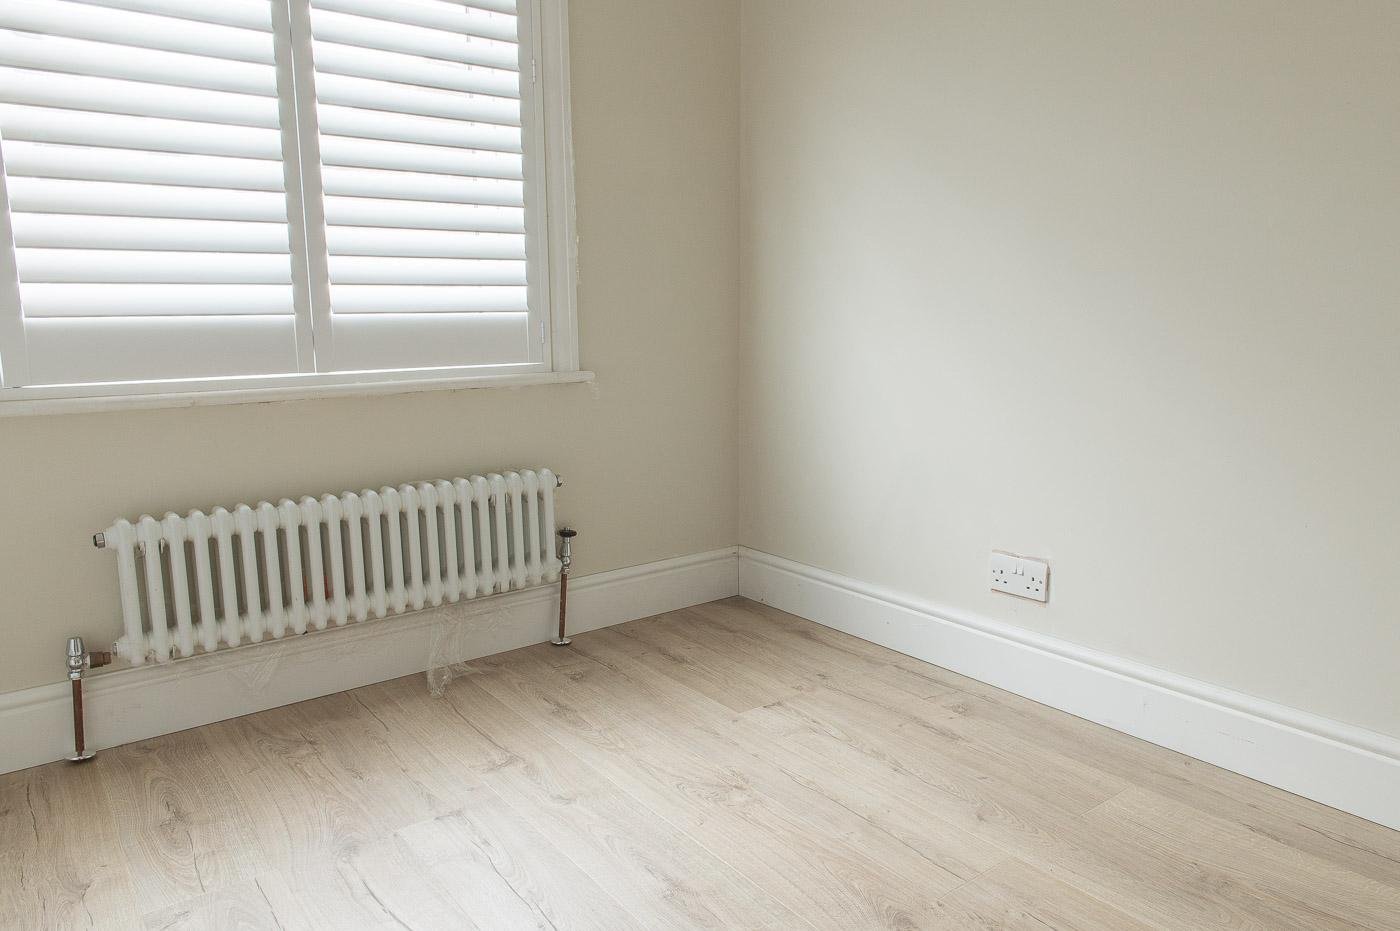
Flooring was gifted. it’s the Classic oak beige by quick step
Laminate flooring is underrated in my opinion. When you want a durable wooden floor, you don’t always have to spend thousands on engineered wood. Laminate floors are more practical in some rooms, they’re more affordable, and they can look nearly like wood!
Because our office chairs are on castors, an engineered (real wood) floor would never have worked. We’d have been paranoid about scratching it up every time we wheel around to leave the room and we wanted something practical.
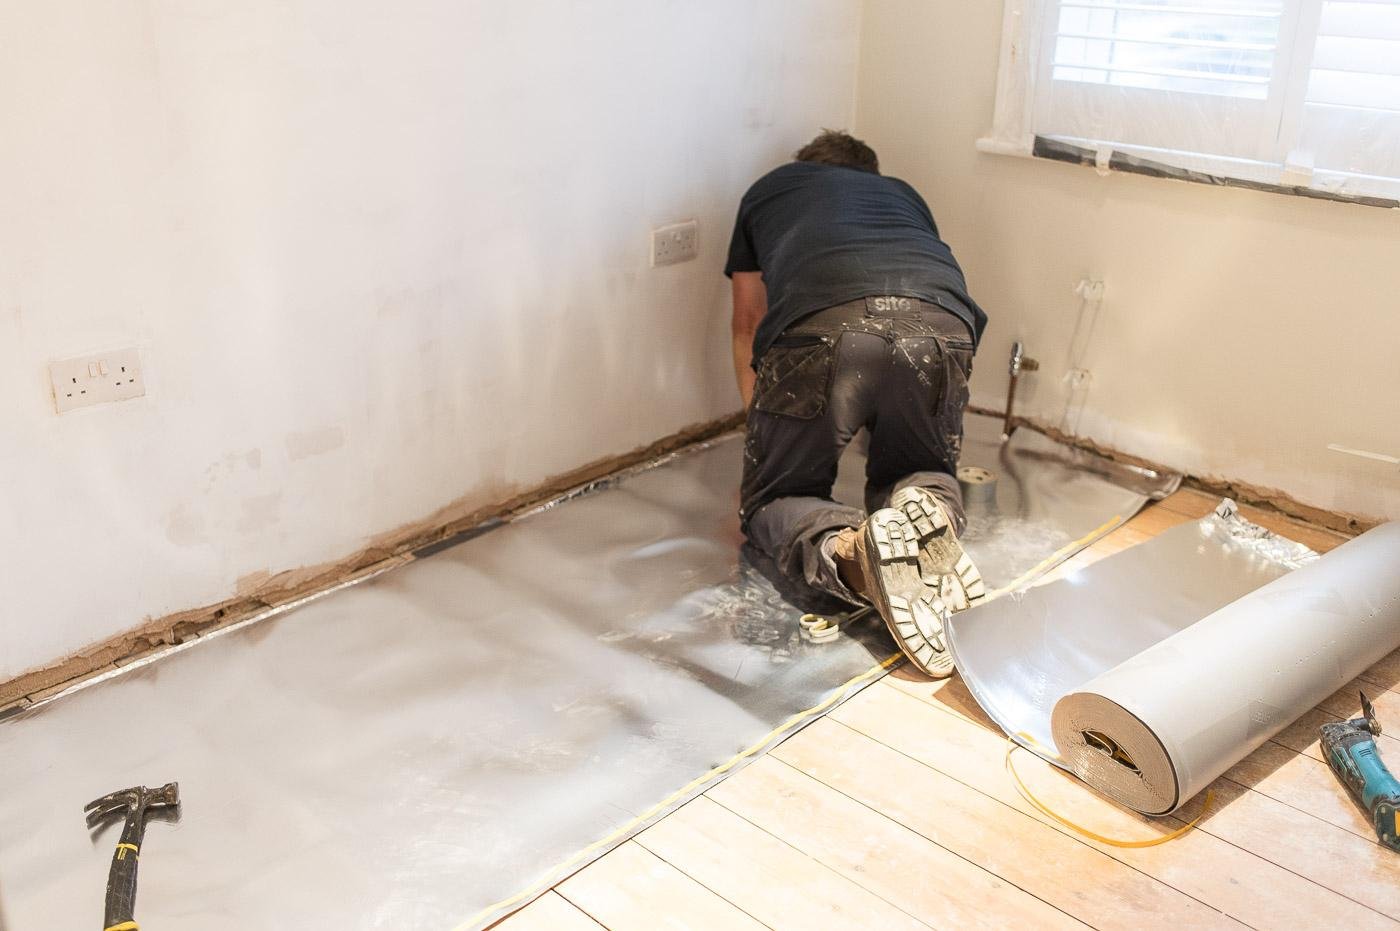
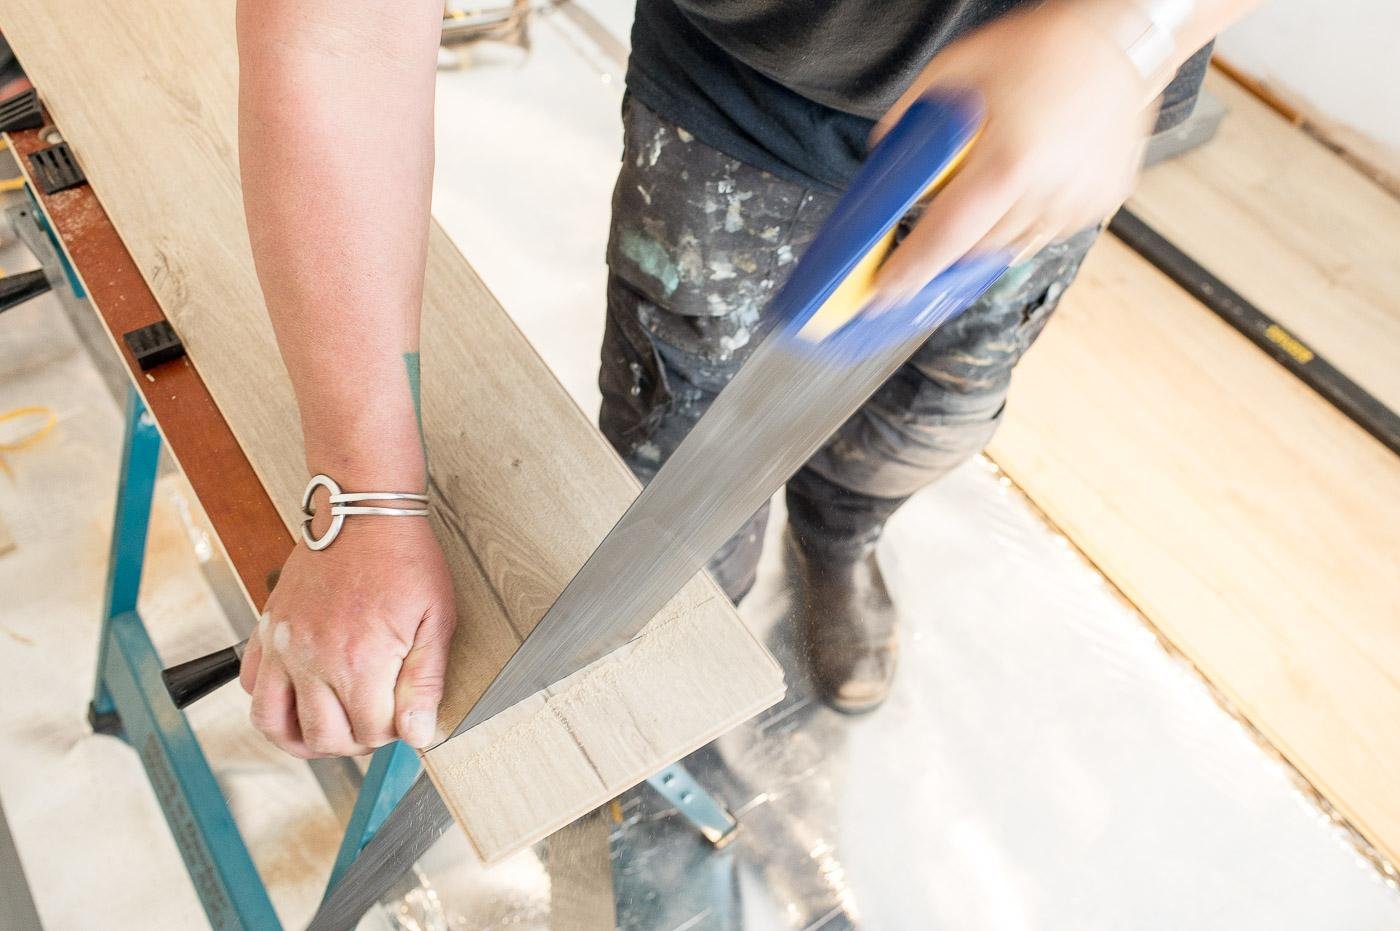
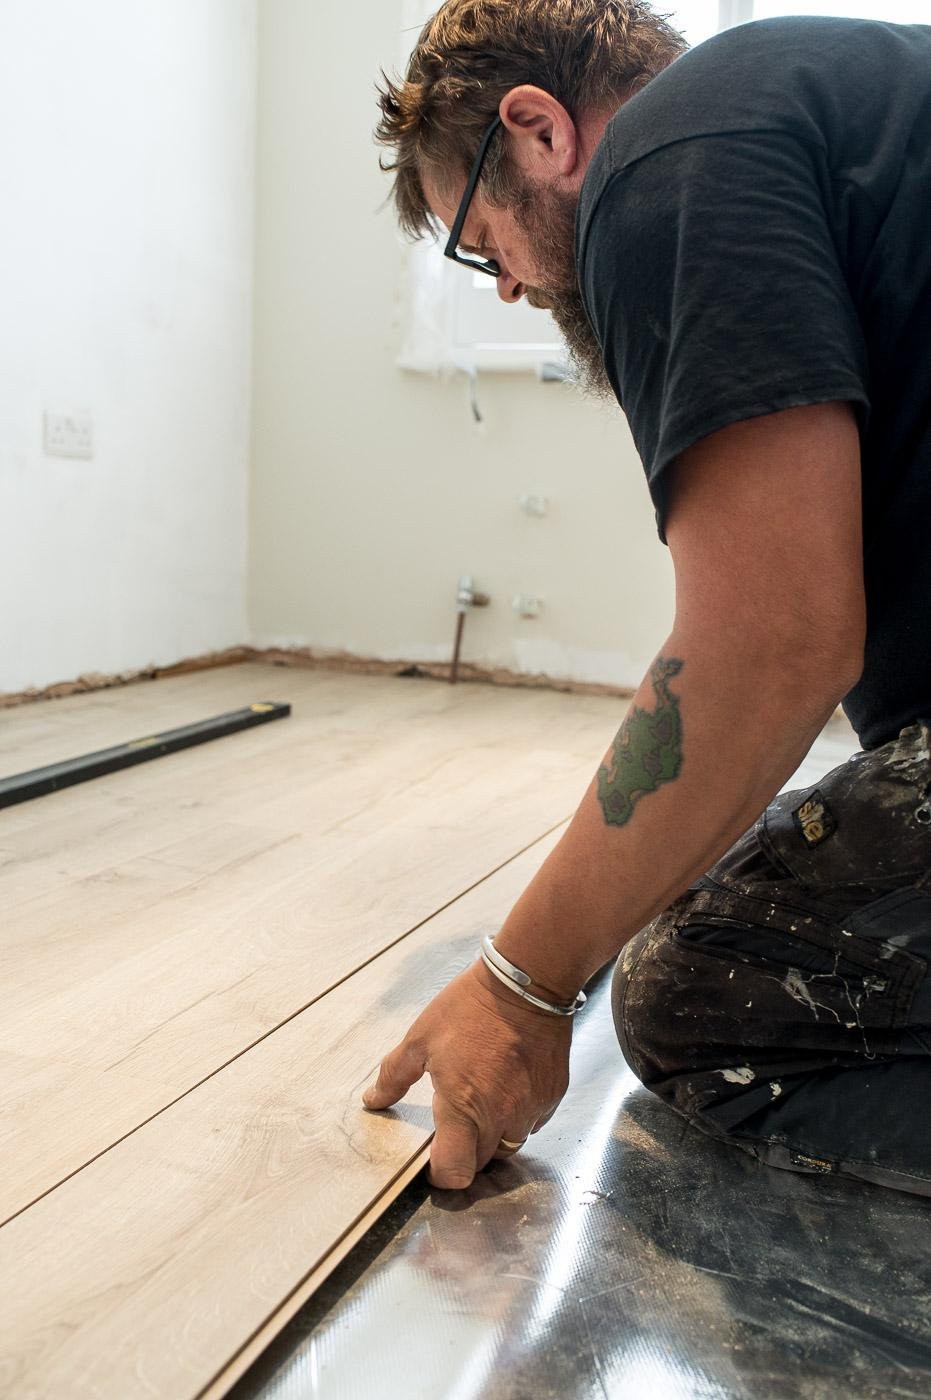
We worked with Quick Step Floors for this makeover who supplied us with one of my favourite floors that I previously used to recommend to clients before getting this ourselves. It’s the Classic Oak Beige Ultra laminate laid on top of the Quick Step Basic Plus underlay.
This flooring creates the perfect blank canvas that allows the colour and design in the room to do the talking.
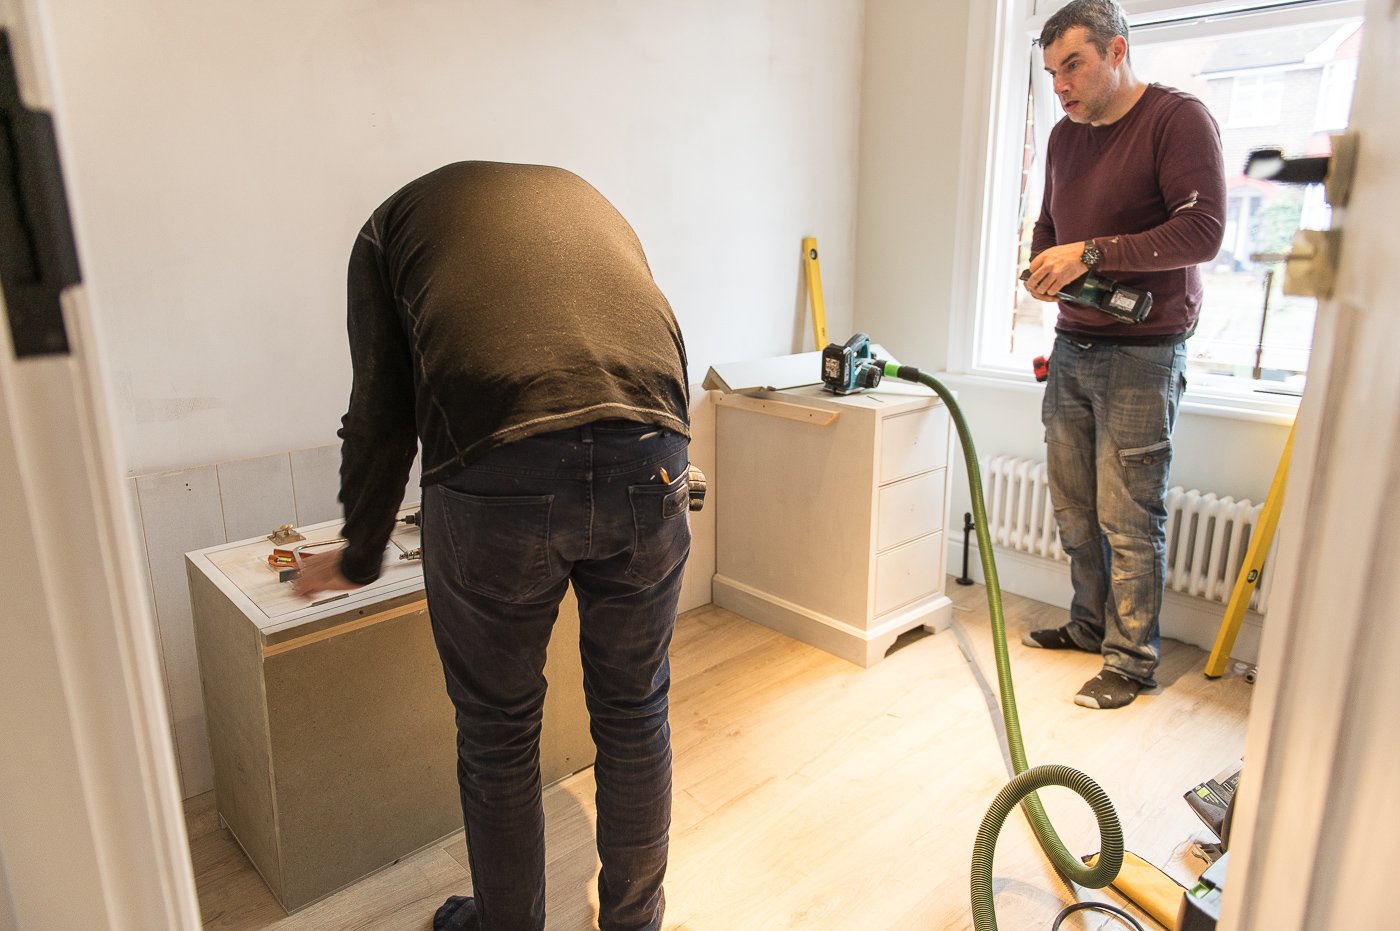
We got our hired hand in to fit the door, floor and skirting, which took just under two days. Judging by the huffs and puffs from the door fitting, this particular door furniture was a bit tricky for our man to fit (a separate lock was included too for a little added security).
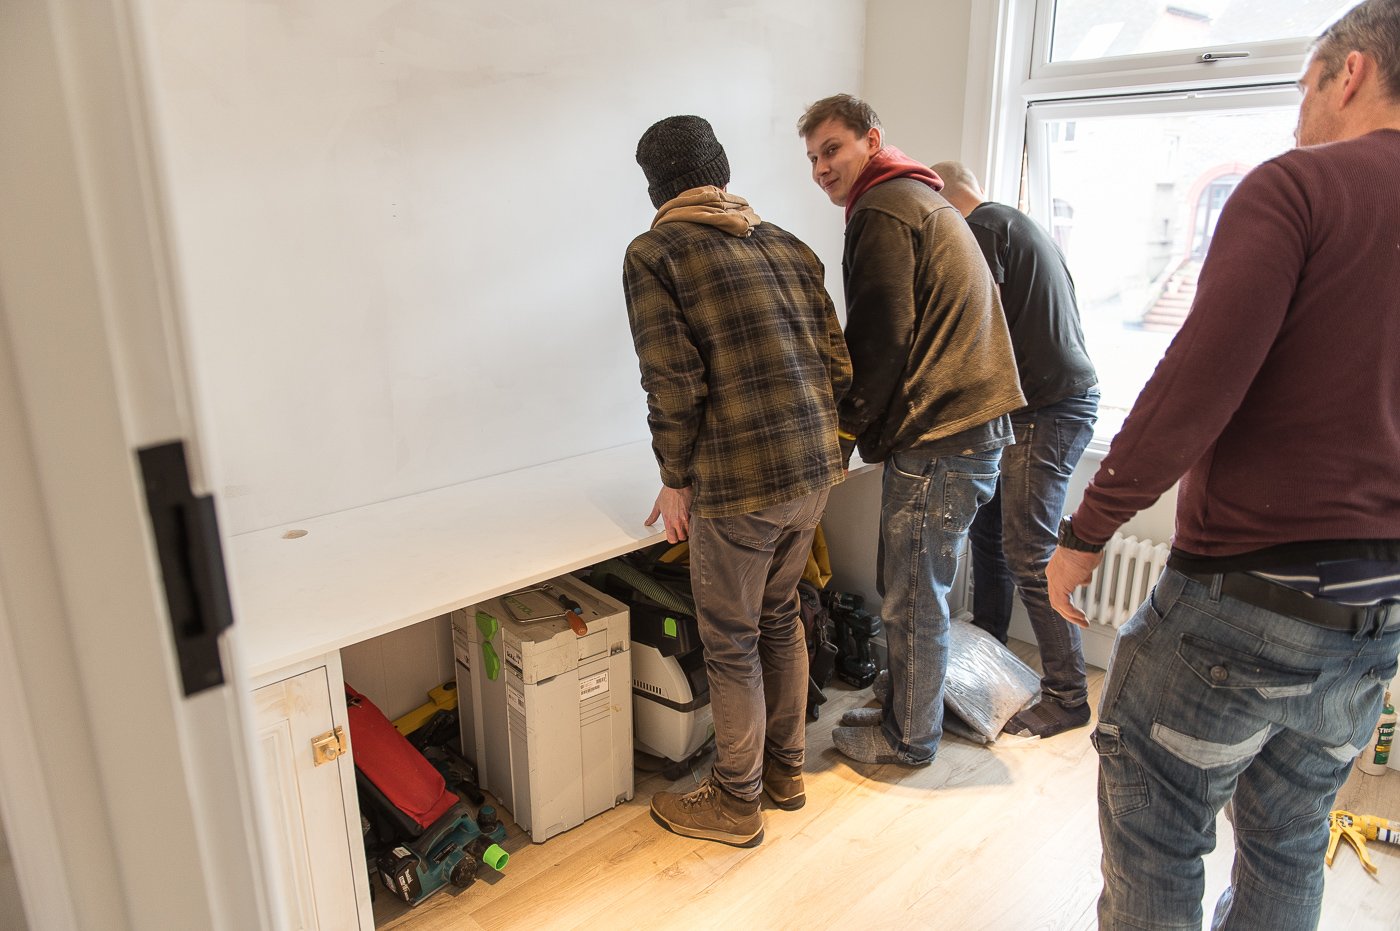
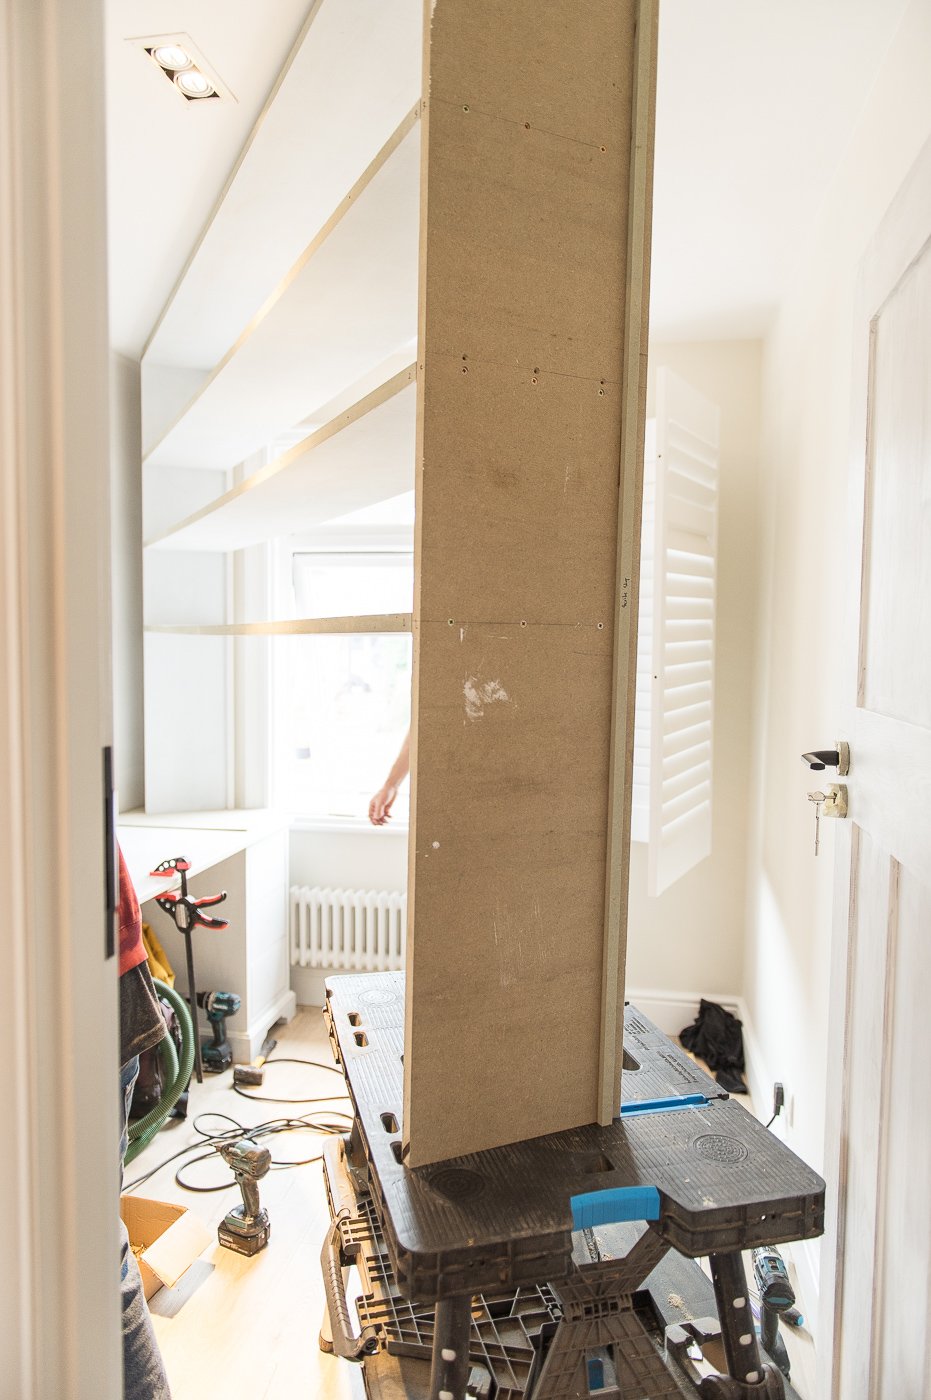
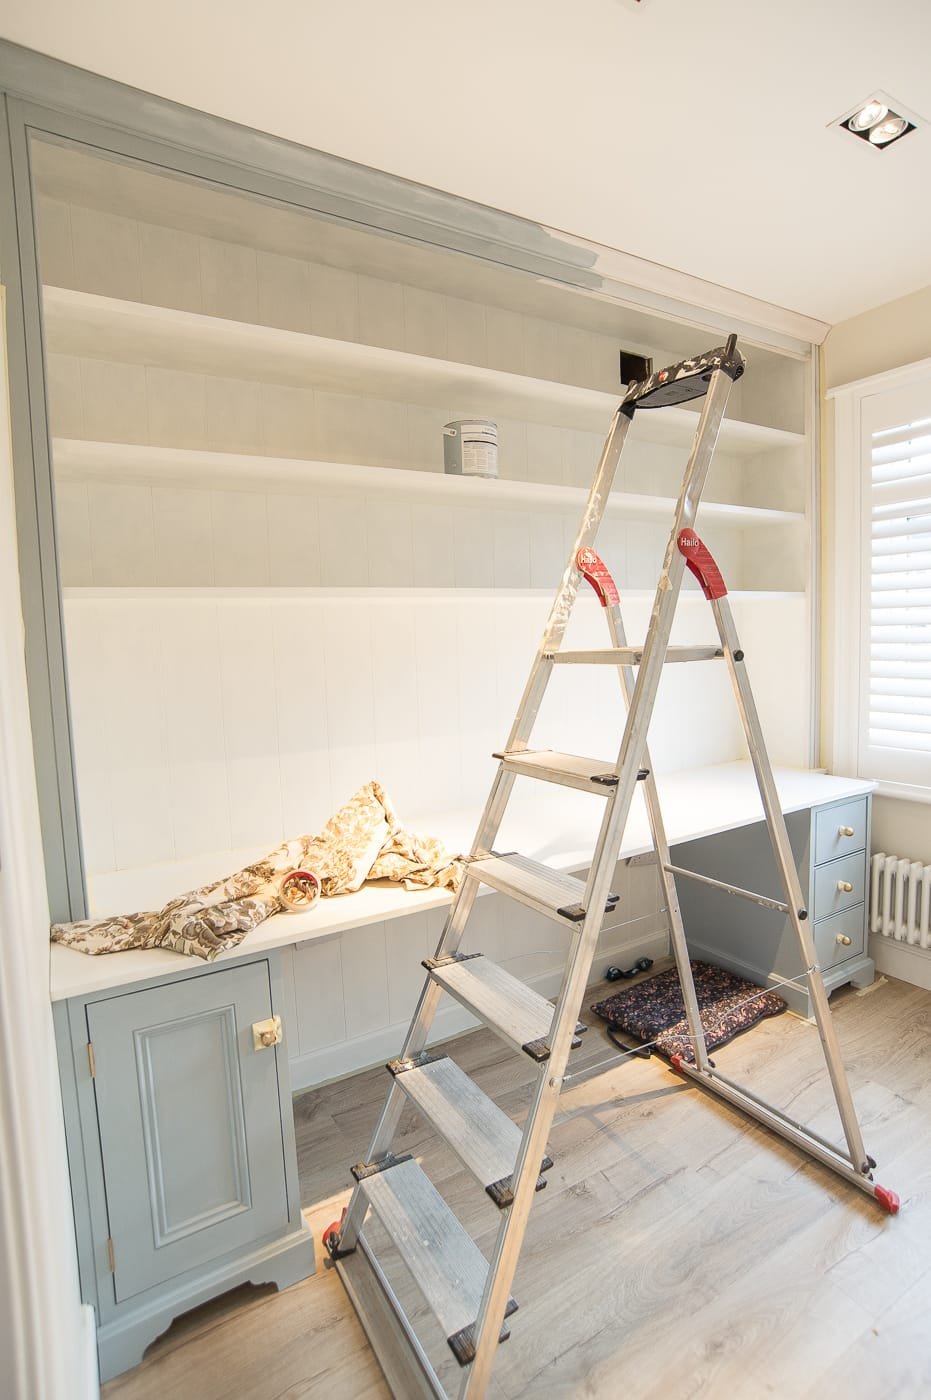
Built in office cabinetry and shelving


The colour scheme + paintwork
Renovations are tough going because you need to be a strong all-rounder in order to get a finish you’re pleased with. What I mean by that is, you need to give all your focus to design, all your focus to budgets, and equally give all your focus on execution. Drop any of those balls and problems can start to unravel, you can end up with mediocre or rushed jobs. It’s intense.

Luckily for me, I work with Neil so we split the intensity. I give the intense focus on the design side, we both intensely focus on budgets, and he intensely focuses on the execution.
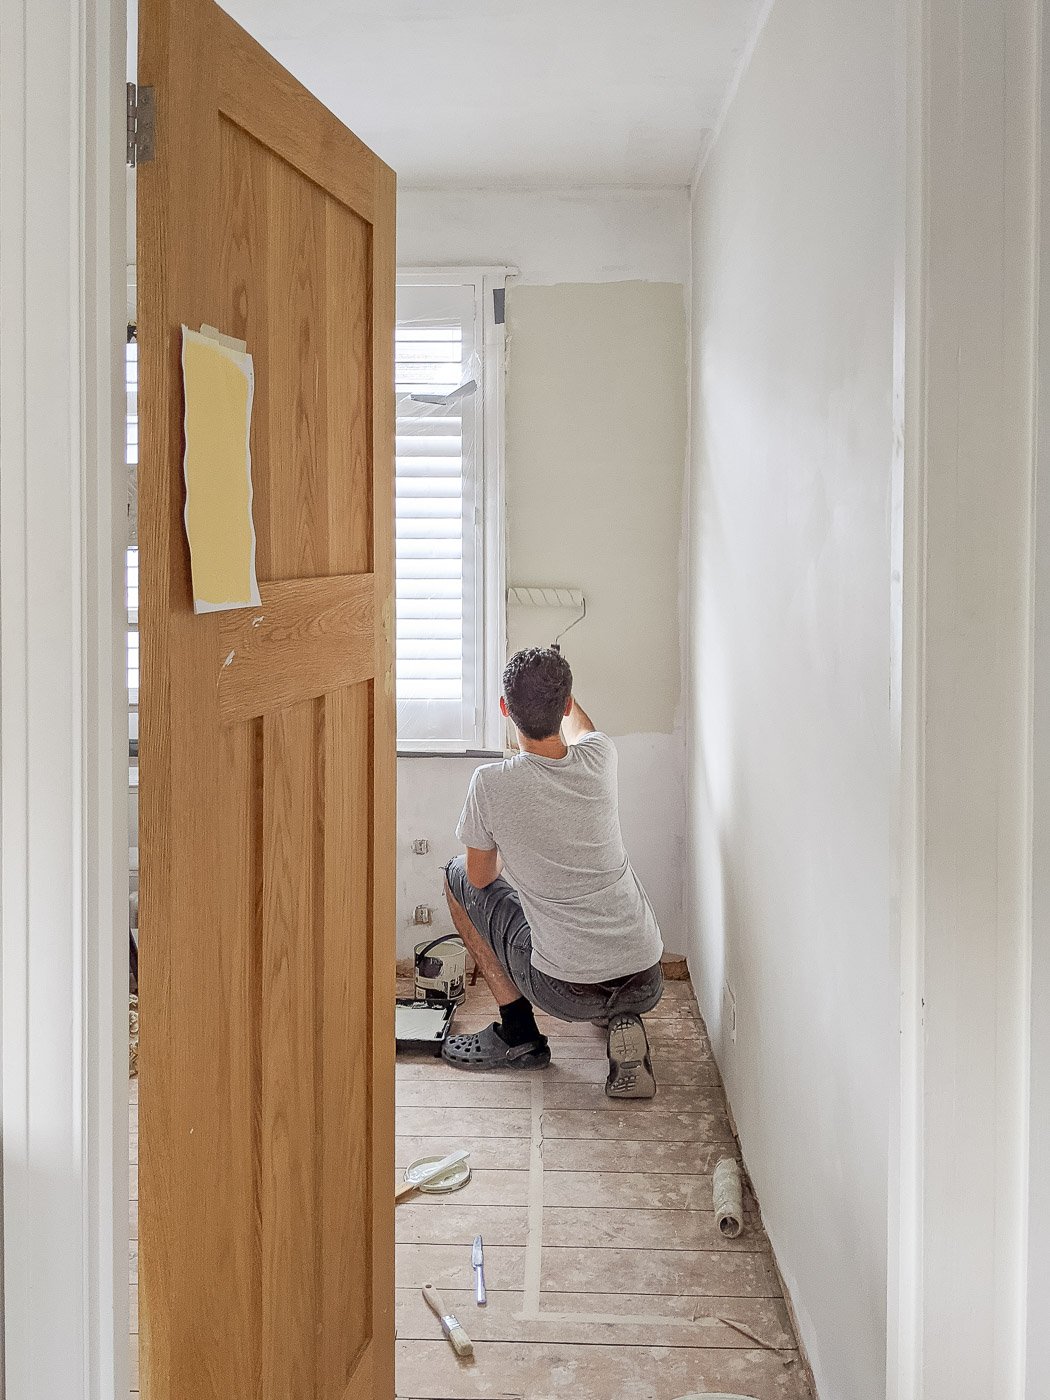
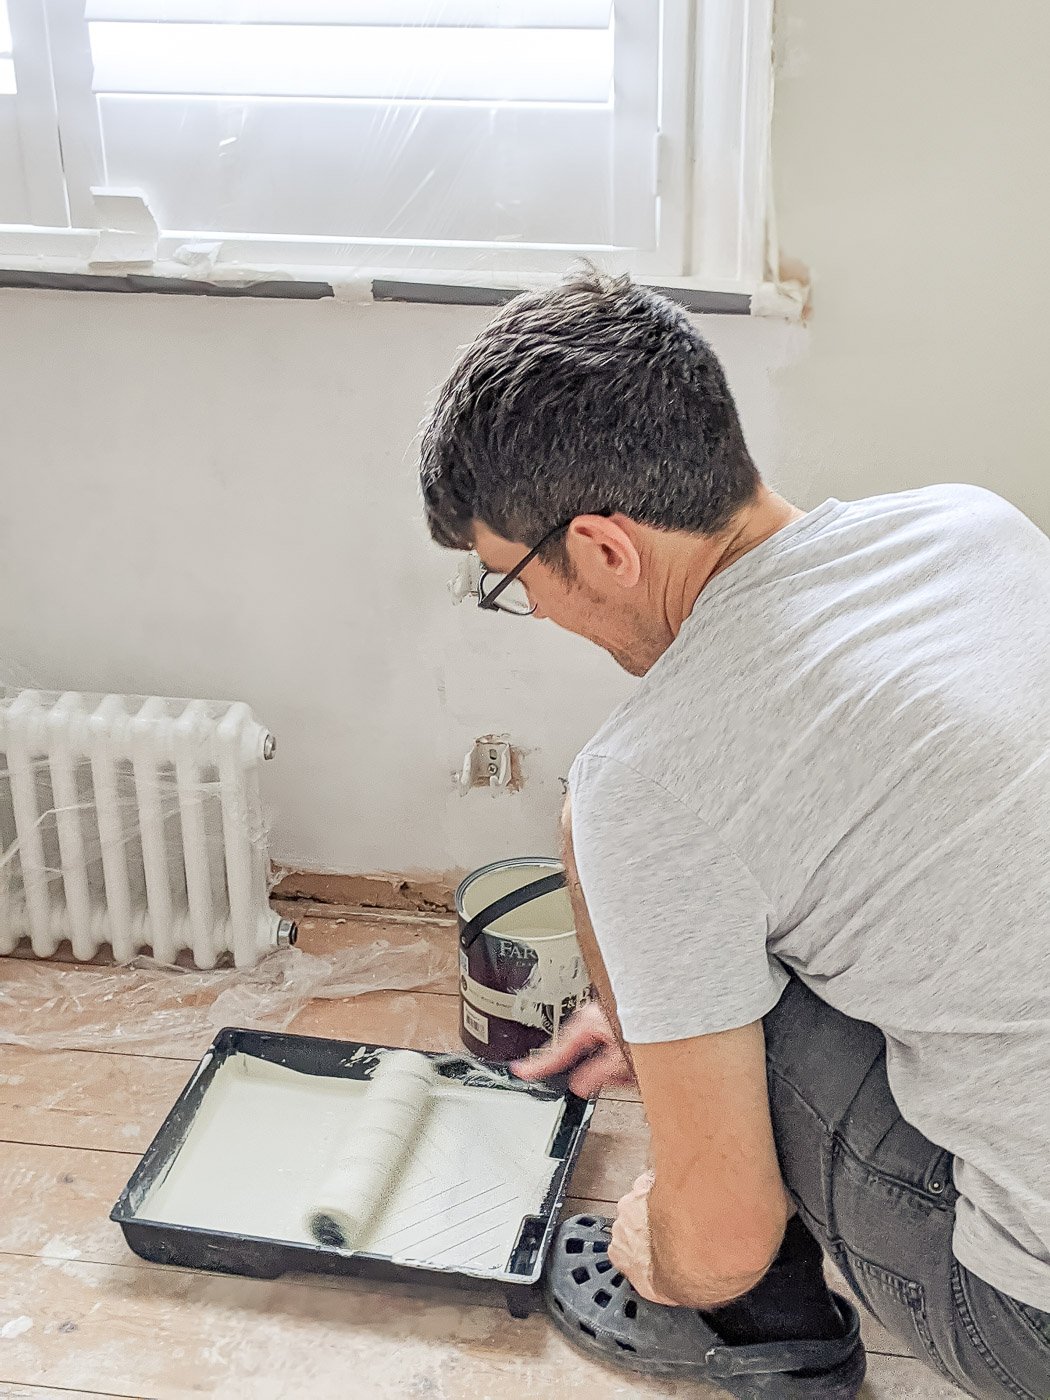
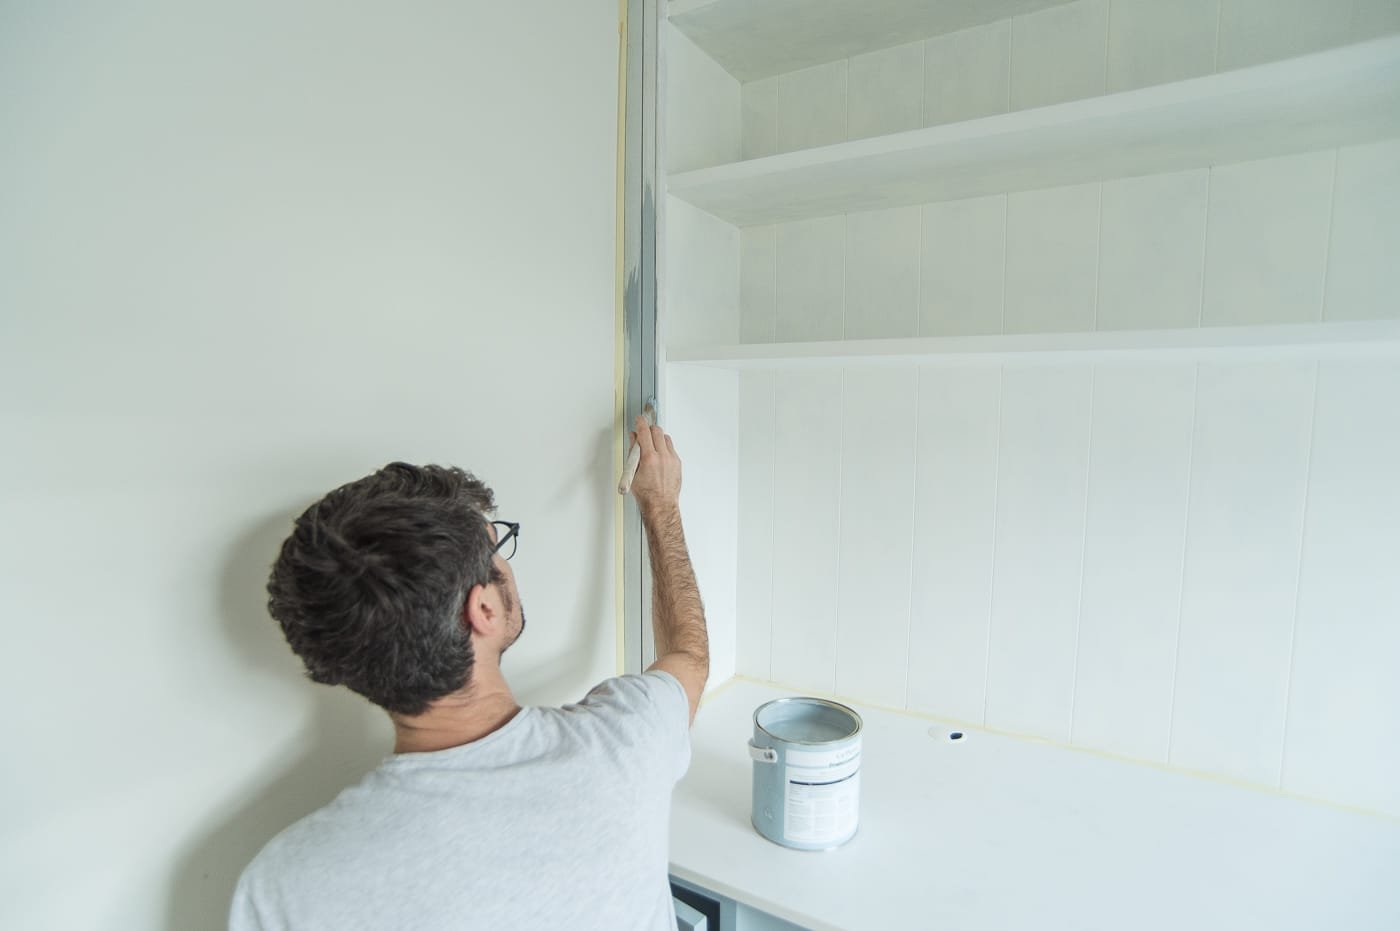
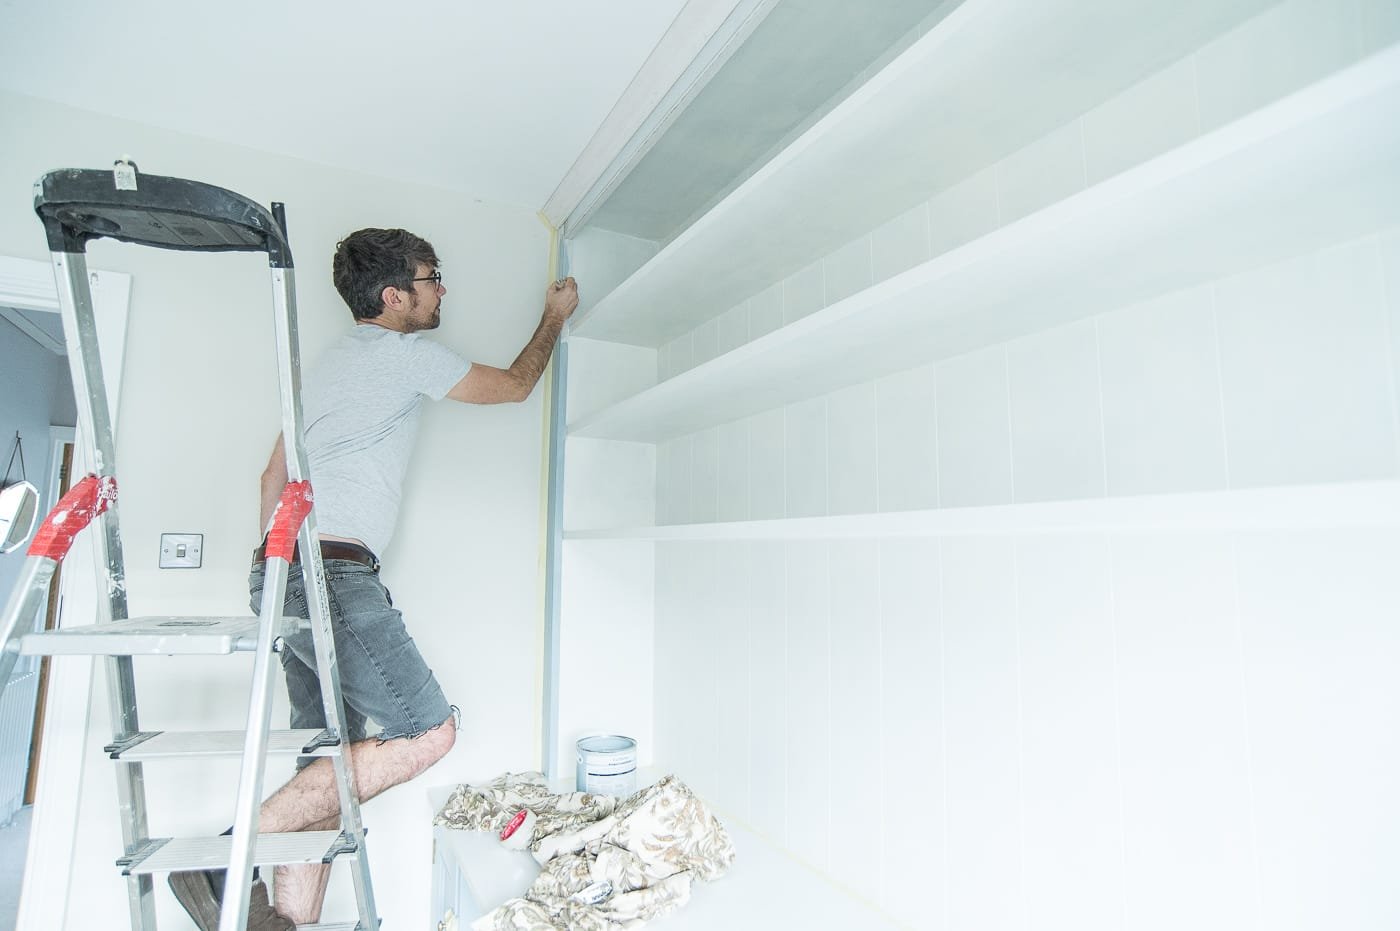
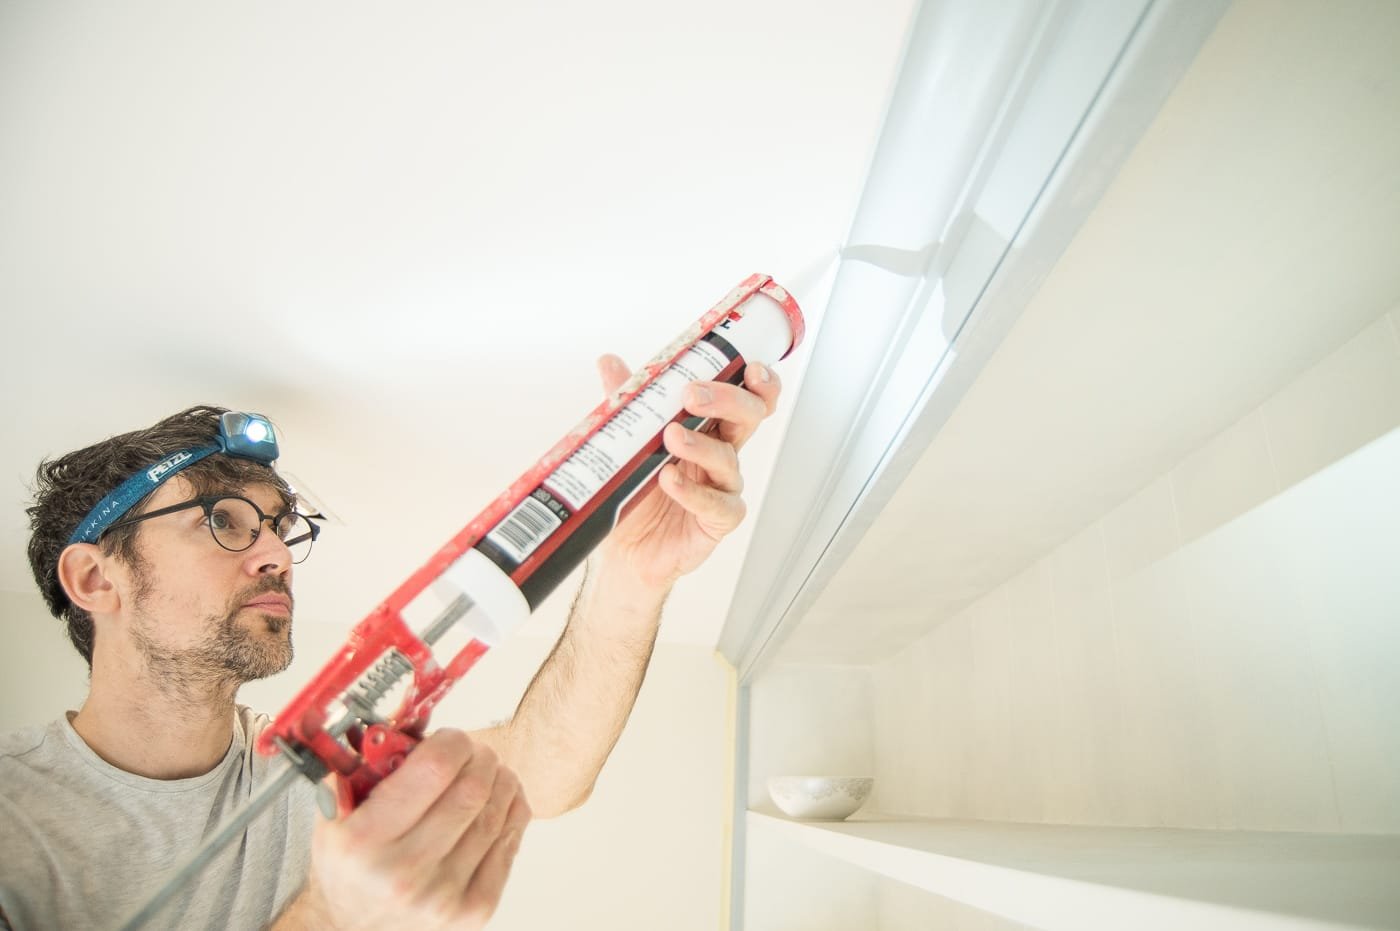
This room would be nothing without Neil’s determination and perfectionist eye with the painting and DIY. He’s sanded, filled, caulked and painted every inch of this house himself, the walls, woodwork, ceilings, bar a few small areas and you can see how his skills have developed over time.
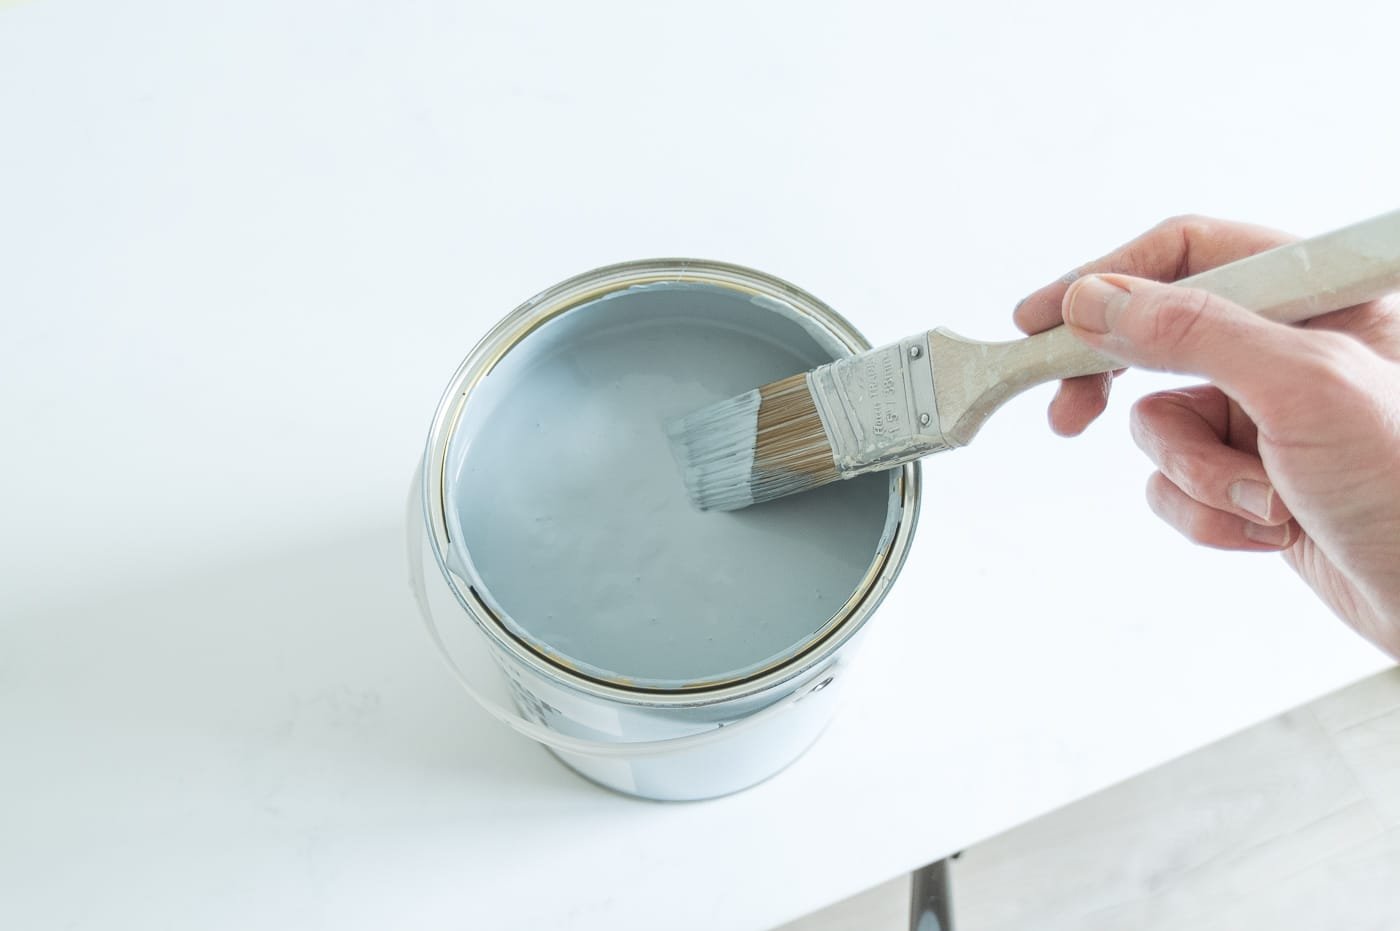
He spent days painting this unit alone. It took 3-4 coats of Wimborne White for the backing and shelves… can you believe that?!
It’s the second time we’ve worked with Farrow & Ball white using a brush on large areas of primed wood/MDF panelling, and we started to debate whether Farrow & Ball was worth it. Some painters we’ve spoken to in our industry don’t like working with it and on this occasion the coverage wasn’t great for the woodwork, but actually it was excellent on the walls. That said, it is a stunning, creamy white and the finish is superb. So if you have the patience and the funds, it could be worth it.
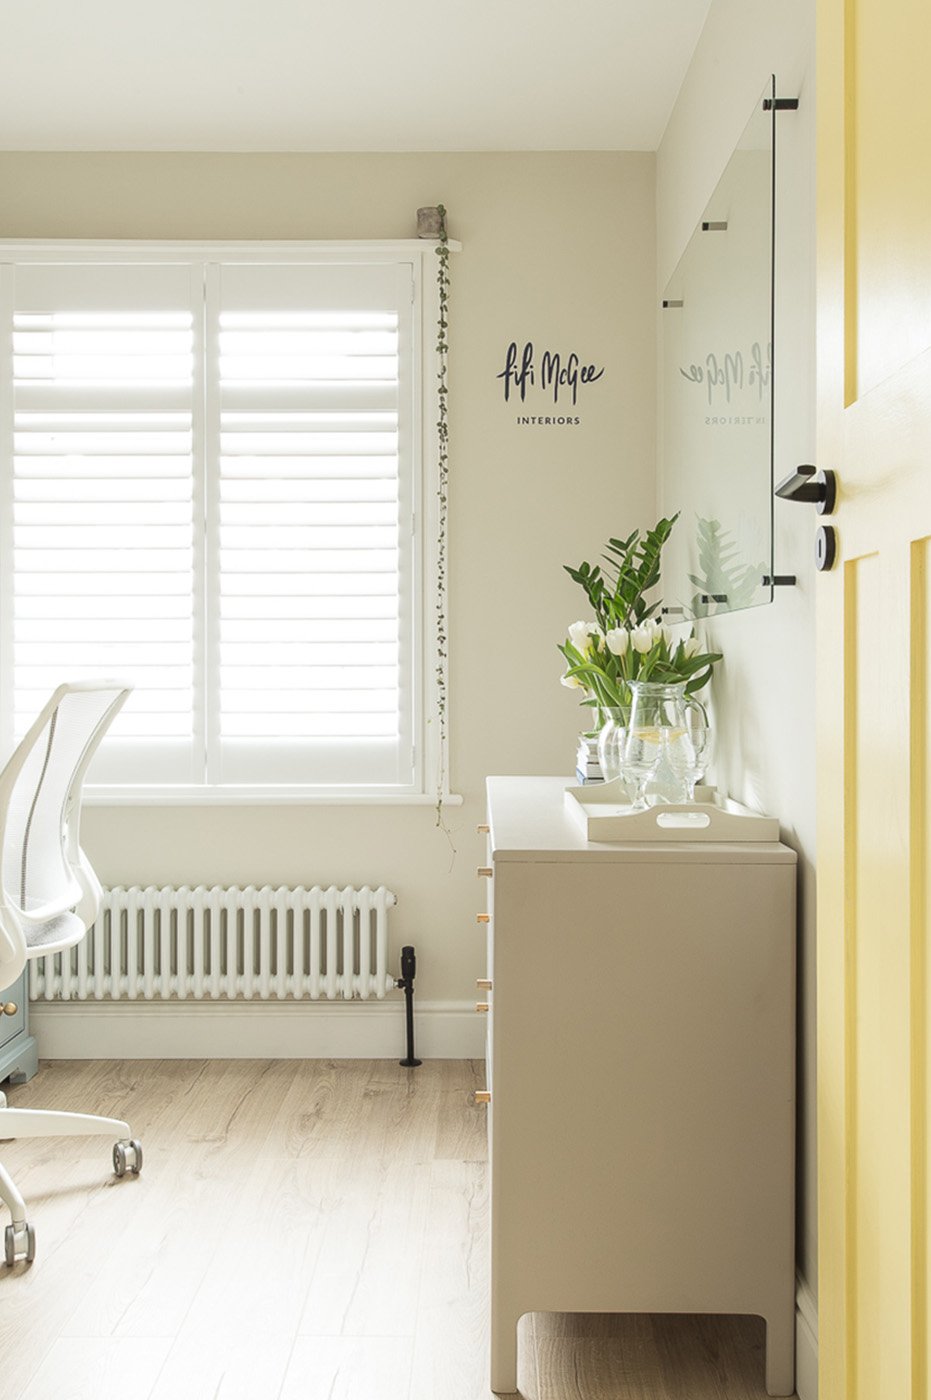
The colour scheme throughout the room is a nod to the Fifi McGee brand colours. We remained loyal to the ol’ business, but chose more muted tones to remain cohesive to the rest of the house. The door (I know, a pretty out there choice for us!) is a bit of fun and creates the feeling of separation between our home and working life
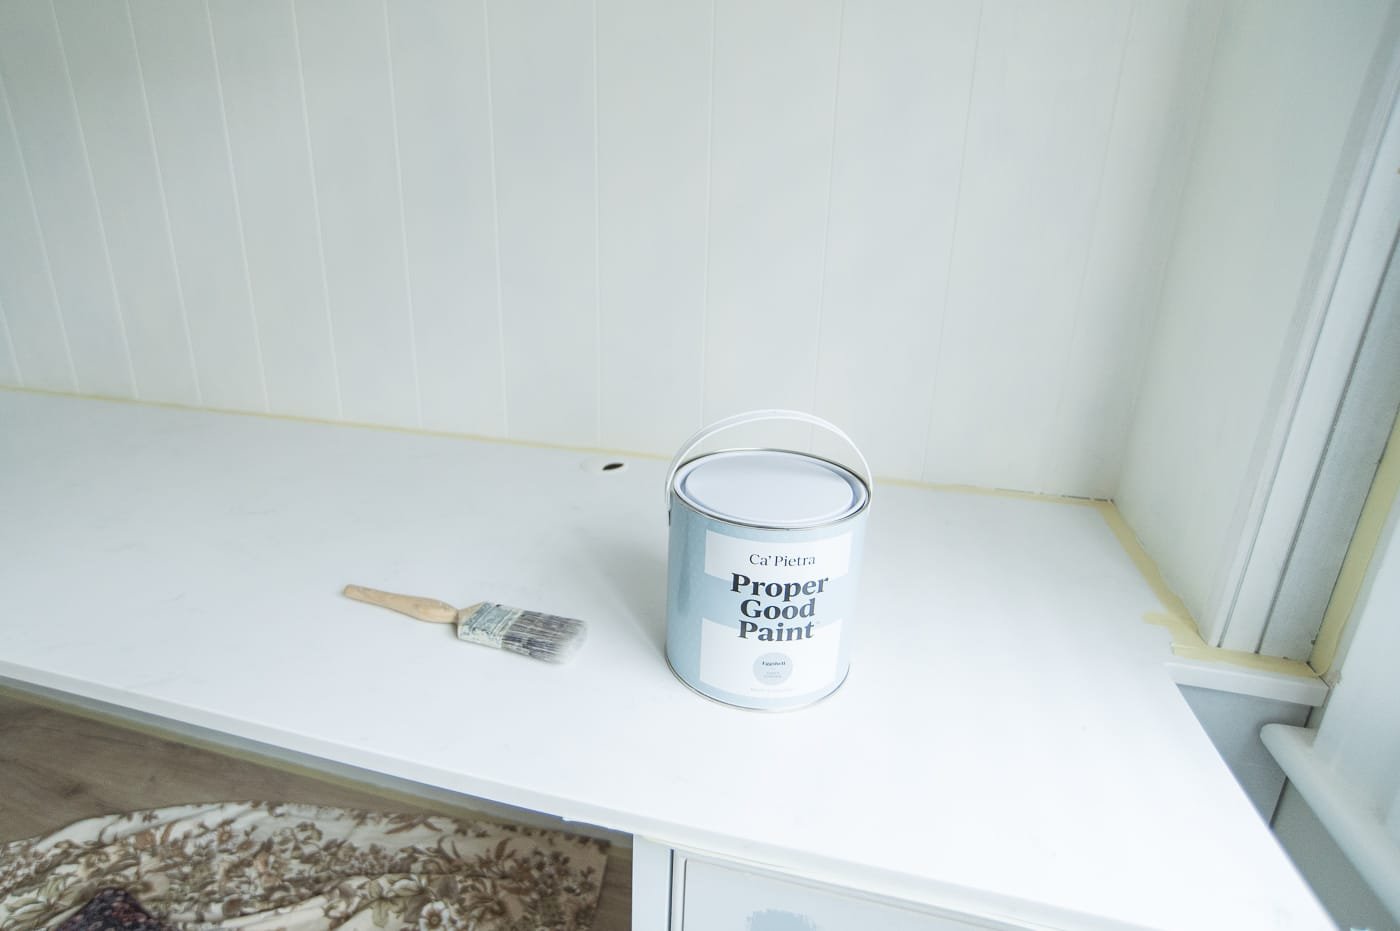
The built in office unit is Zale’s Powder by Ca’Pietra and Wimborne White by Farrow & Ball
The walls are School House White by Farrow & Ball
The door is a muted yellow Frites by Valspar
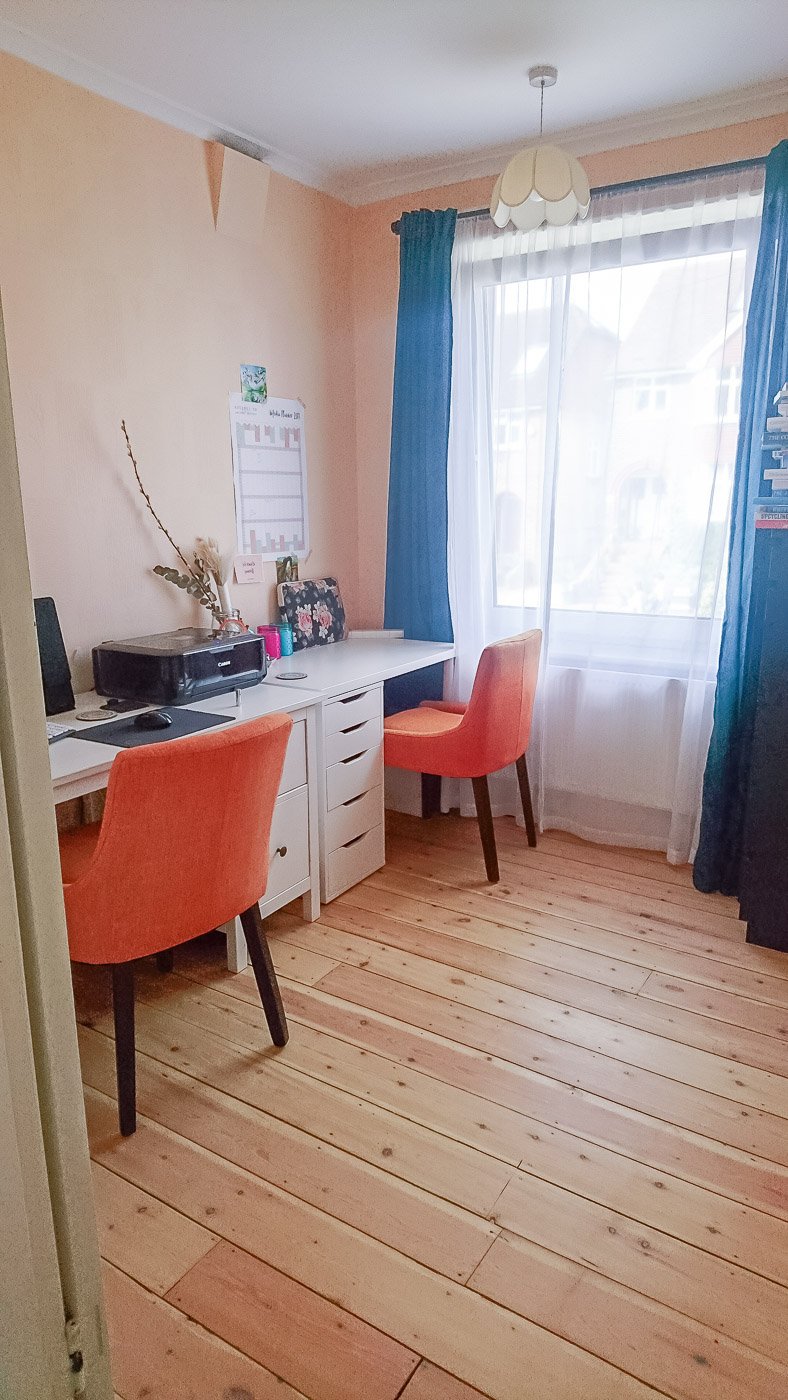
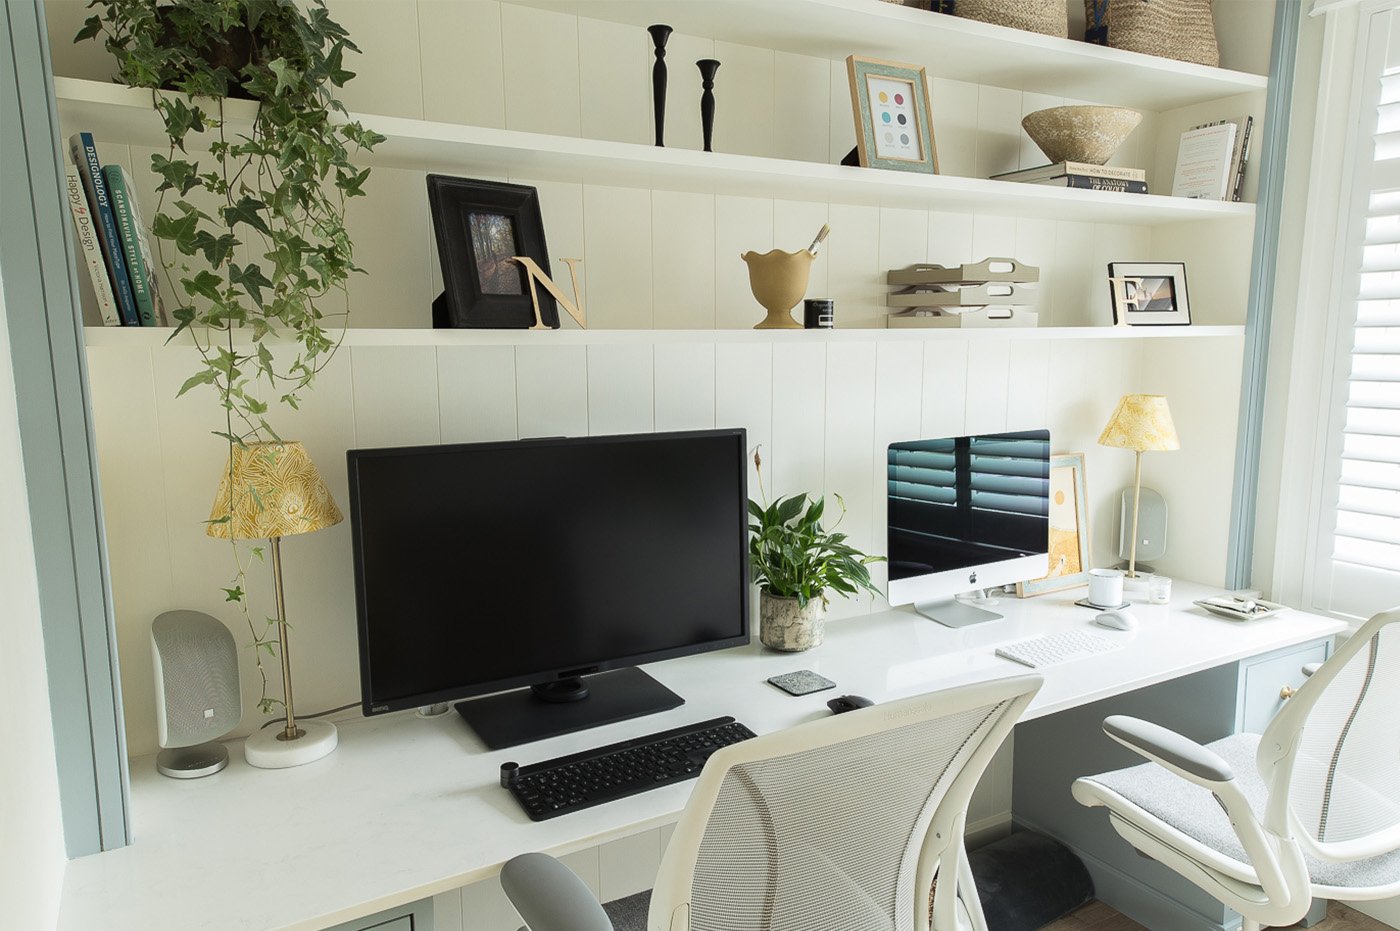
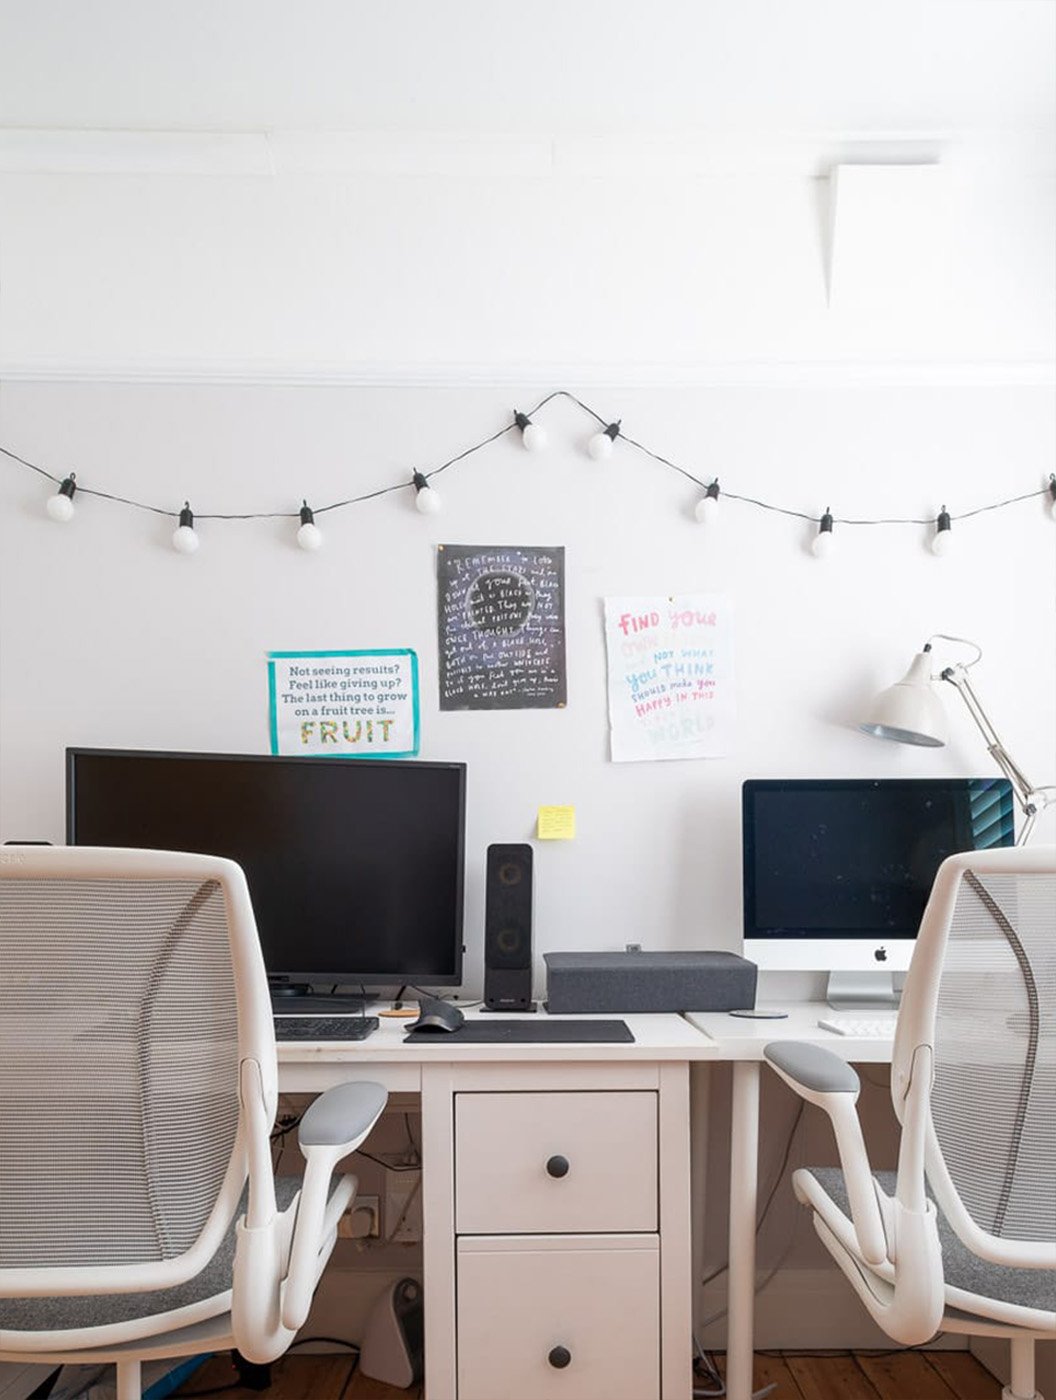
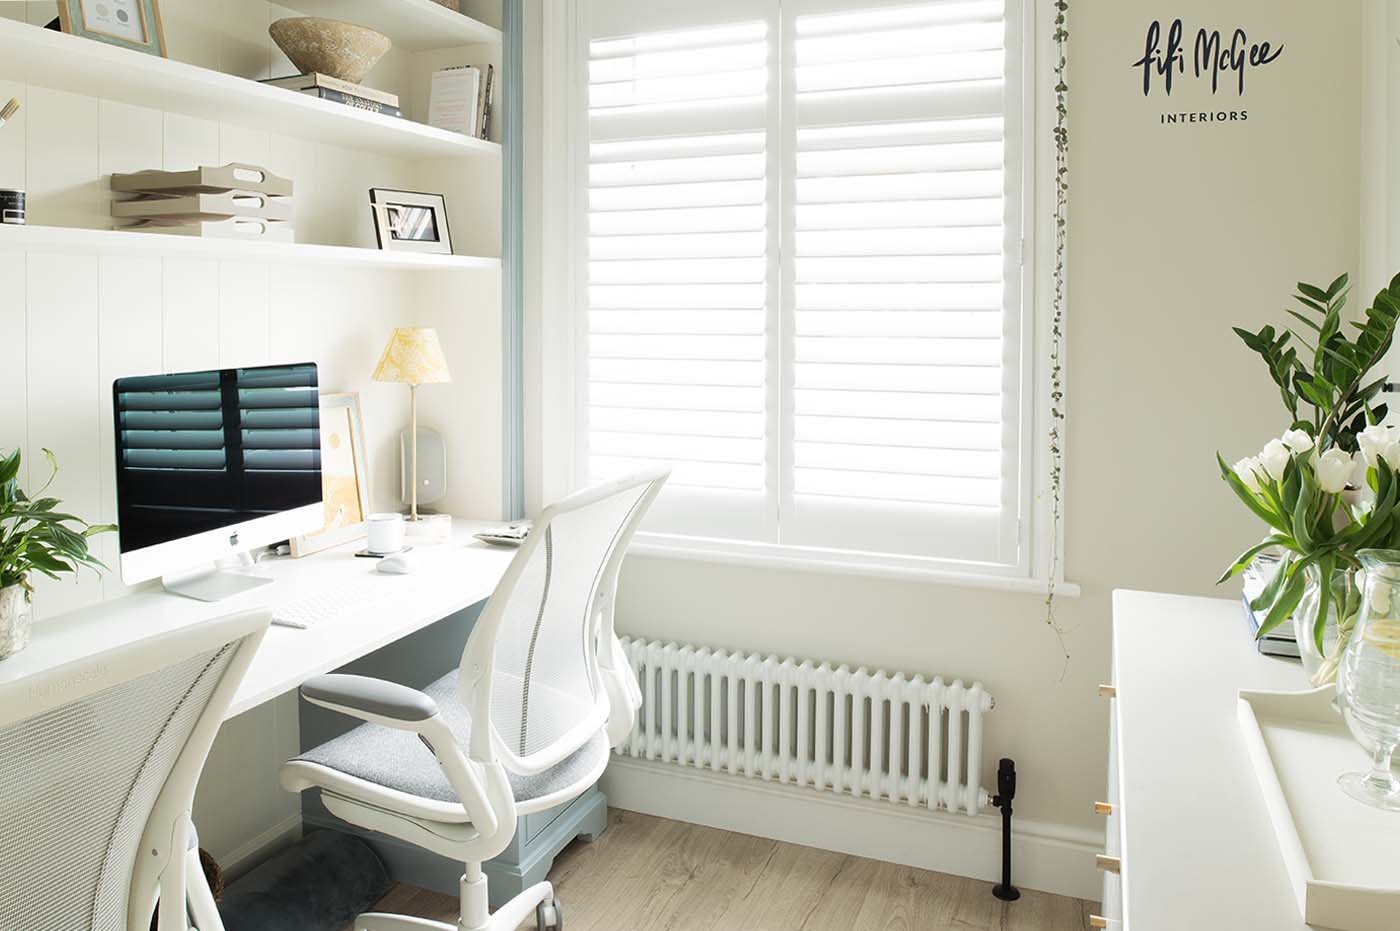
Our home office design – after
It’s honestly such a joy to step into this room every morning and get started on the day.

Every office design idea we had, we applied techniques to visualise the ideas first, and our final 3D renders ensured that we stayed true to the original vision.
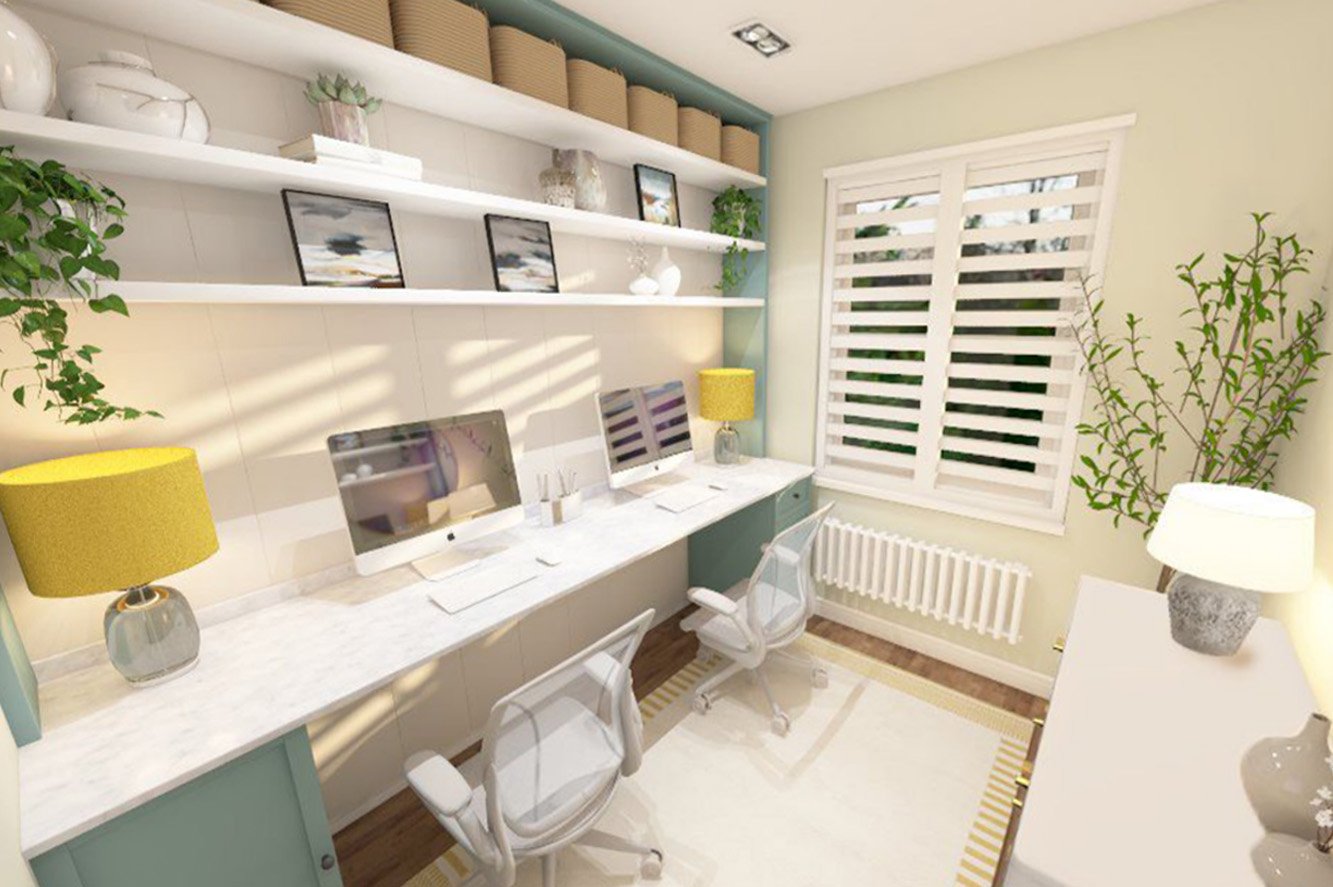

As I always find myself saying: visualising ideas gives you confidence with your home choices. If you’re planning a renovation of any kind, it’s so important to learn visualisation techniques so you can tackle your projects with happiness not overwhelm! I share many techniques in my free Design Your Home guide.
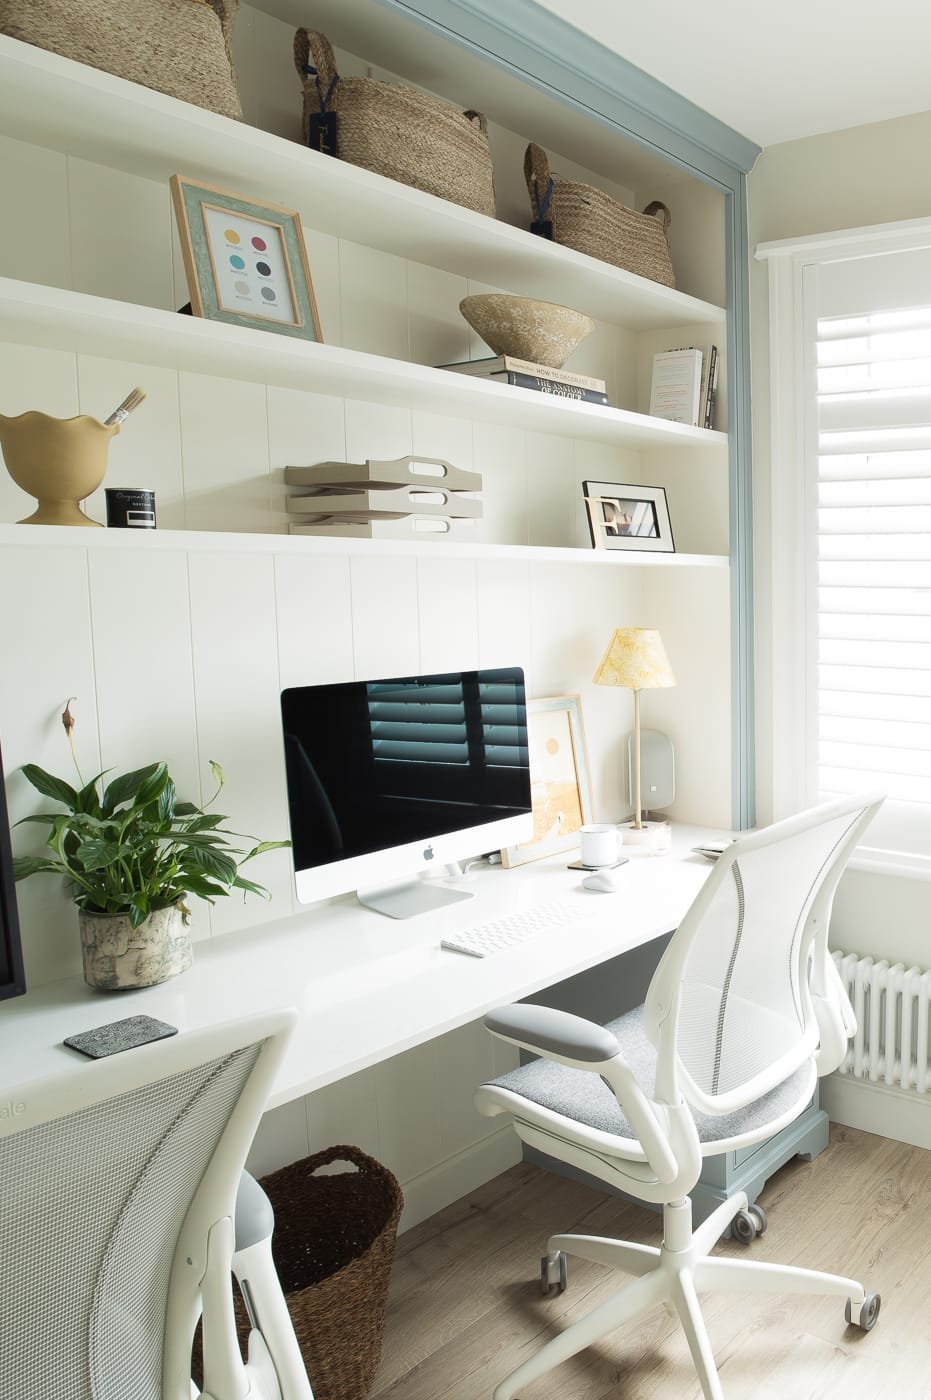
The home office built in desk

As you can see, the main focal point of the room is our bespoke home office shelving unit. It was an expensive investment, but the alternative was trying to source two desks that were the right measurements (impossible), and then install office shelving above… We’d have been looking at the same costs as it was to build this unit so that was the decision made.
It has utilised every inch of space from the floor to ceiling, and provided purpose in the design. It gives me the right storage for my interior design samples all along the top shelf. I have foldable steps to access the higher shelves (or a taller Neil!).
It was a joy for me to design this joinery and put my design skills to the test. I measured up, drew possibilities and elevations, then passed the full home design pack over to our local joiner to build it who did an exceptional job. If you’re local to the Sussex area and would like his details, email us and I will introduce you.
The design details + handles
I love practical, high quality and timeless design and for me, this bespoke unit encompasses all three. I chose a subtle tongue and groove back, rather than a plain finish to bring texture to the room, and chose Satin Brass Unlacquered Armac Martin handles in their Cotswold collection to bring a touch of charm and luxury.
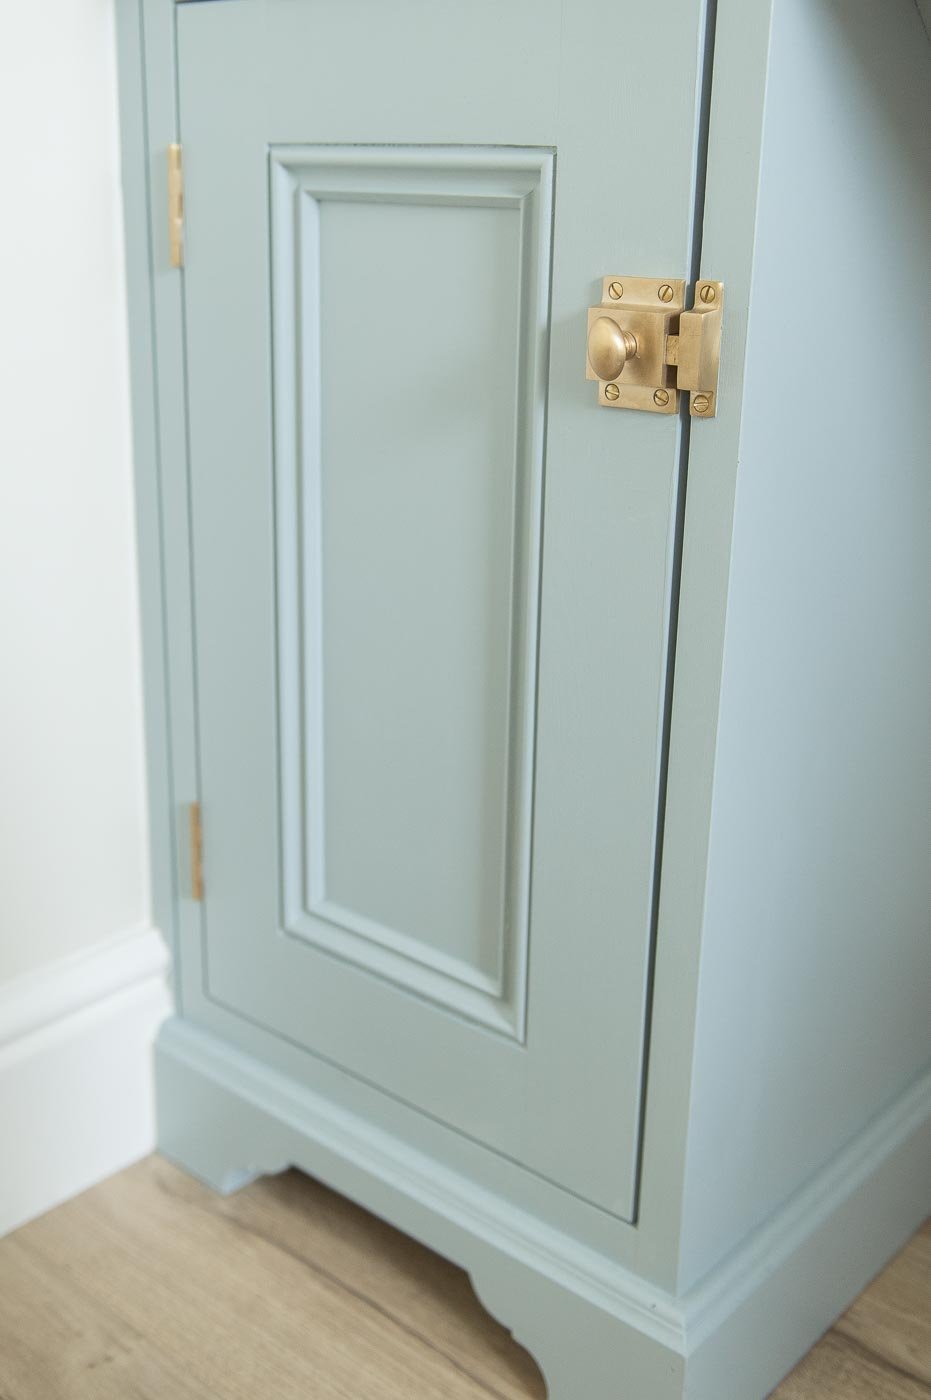
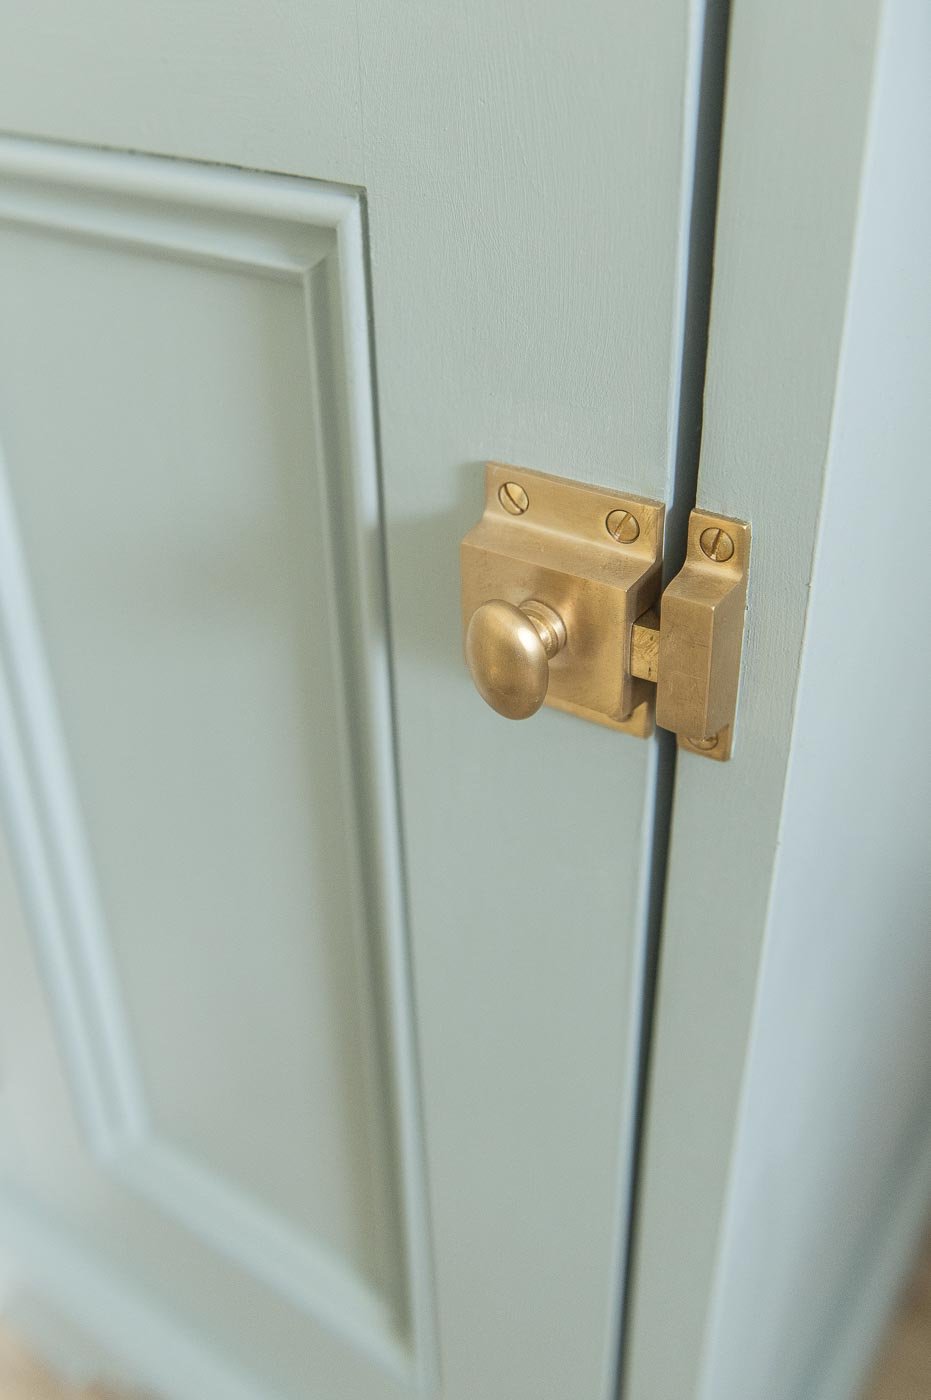
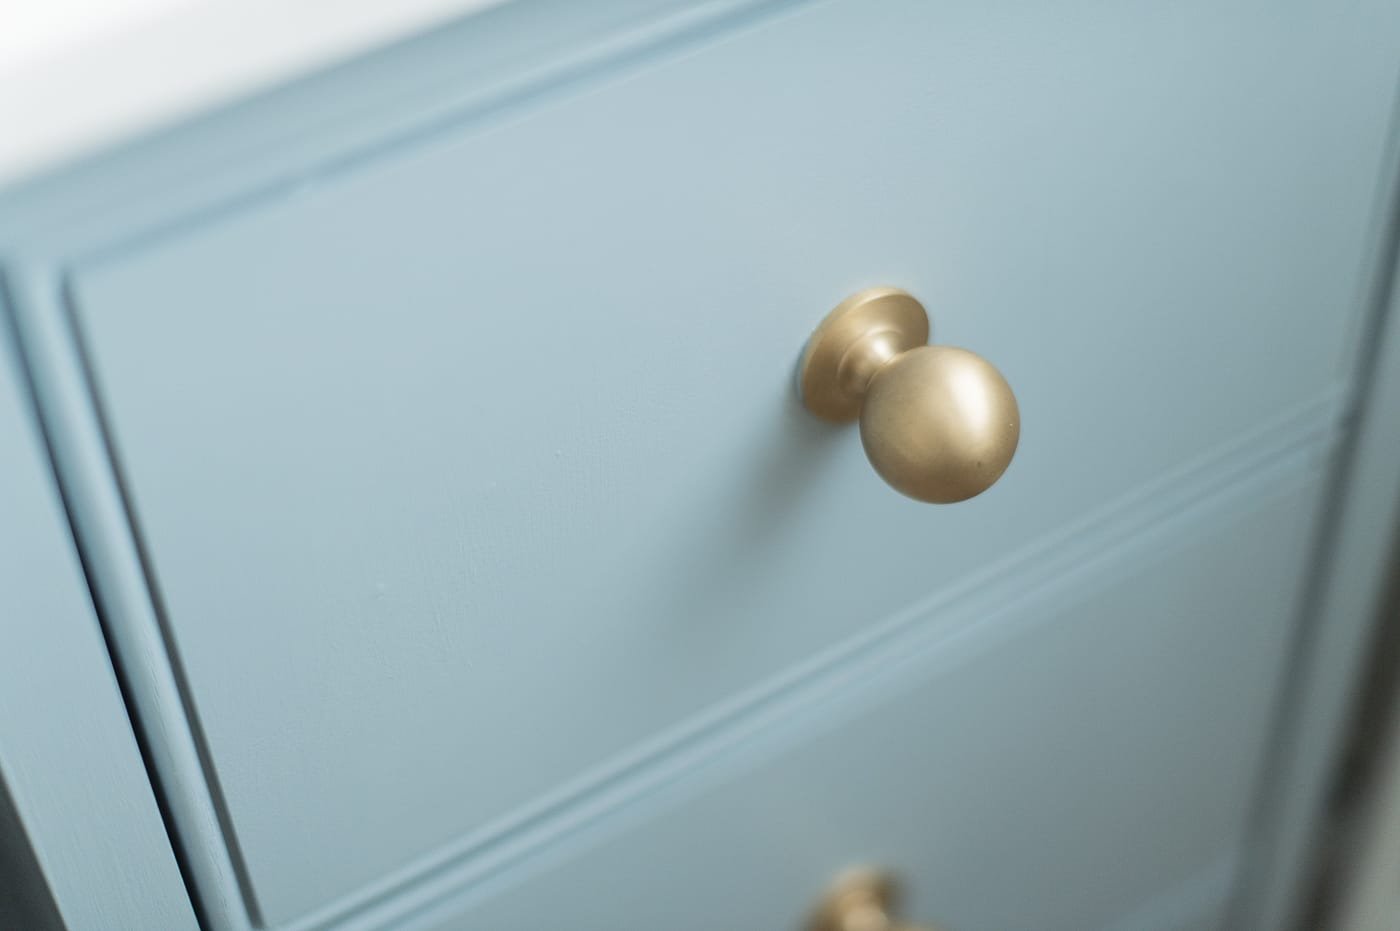
Armac Martin are known in our industry for being one of the most reputable handle suppliers, so if you’re searching for luxury handles make them your first stop.
The details we ordered are:
I’ve also got my eye on more of their handles to update our living room alcove drawers soon.
I have so much more to tell you about, but before I continue, are you finding it difficult to pin down your vision for your home? My home design email series could be a good place to start. I cover…

👉 How to avoid common design mistakes that will be expensive to correct
👉 Bring cohesion to your home with these easy techniques interior designers use
👉 The three home design curveballs you need be ready for!
The worktop
It’s a privilege working with clients on their home designs for many reasons but one of the perks of my jobs is constantly learning about new materials that I can experiment with in our home.

This solid surface worktop we ordered from Worktop Express, and it looks near identical to Carrara Marble but thinner (20mm) and requires less maintenance. It’s a little cheaper than the real deal, too.
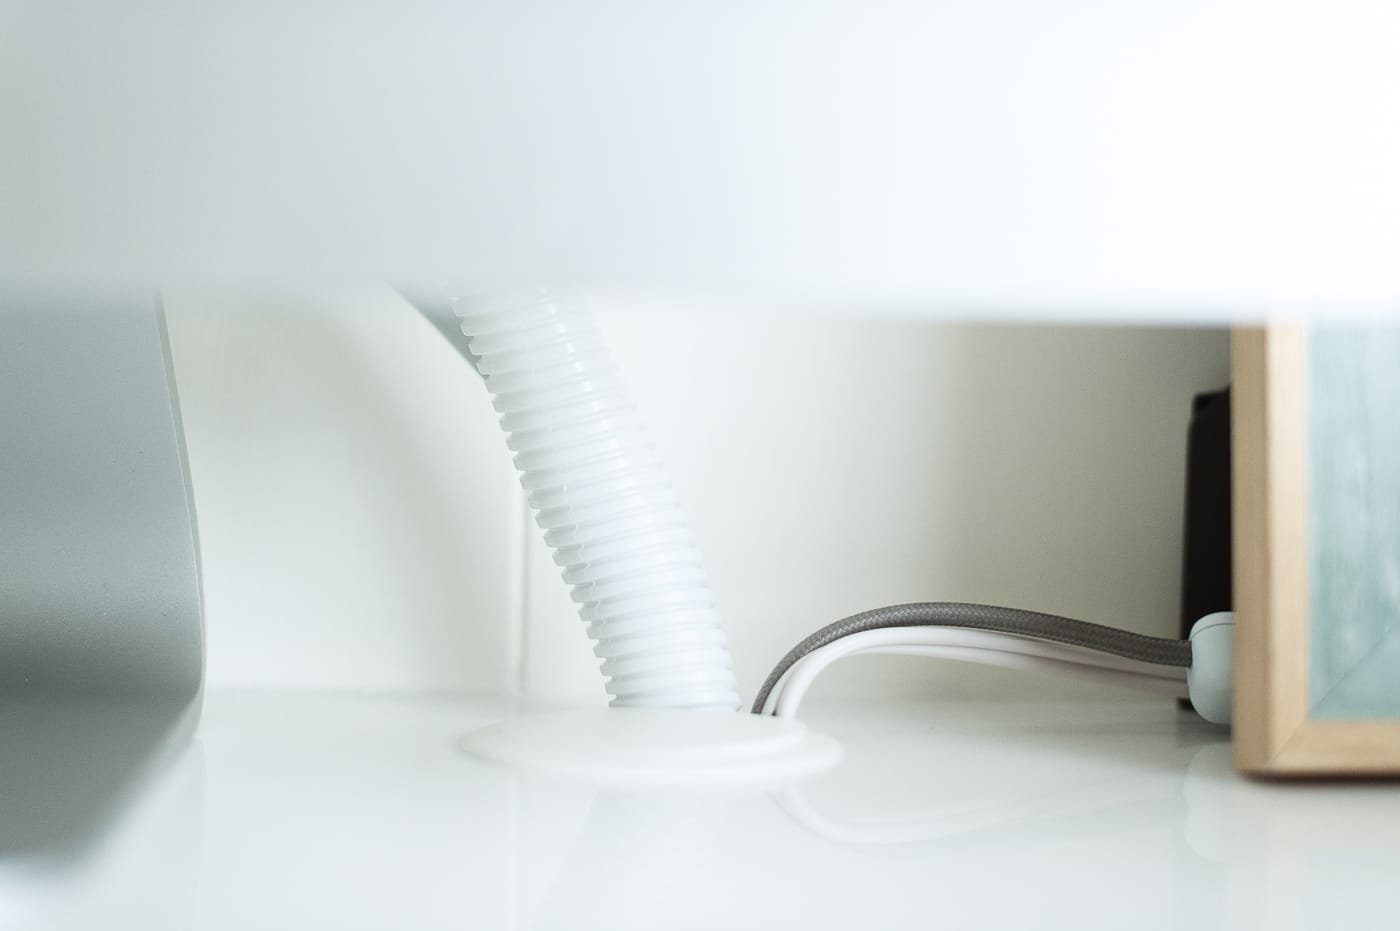
We bought one 3m length and the team templated and cut it to size, including rounding off an area near the radiator and drilling 50mm holes for computer wires to be fed through on either side.
I thought it would be lightweight… wrong! It took 4 of the lads to bring this and the bespoke unit which was built off-site up the stairs. I made sure I was out that day and left Neil and them to it… 😂
Cable management + disguising computers
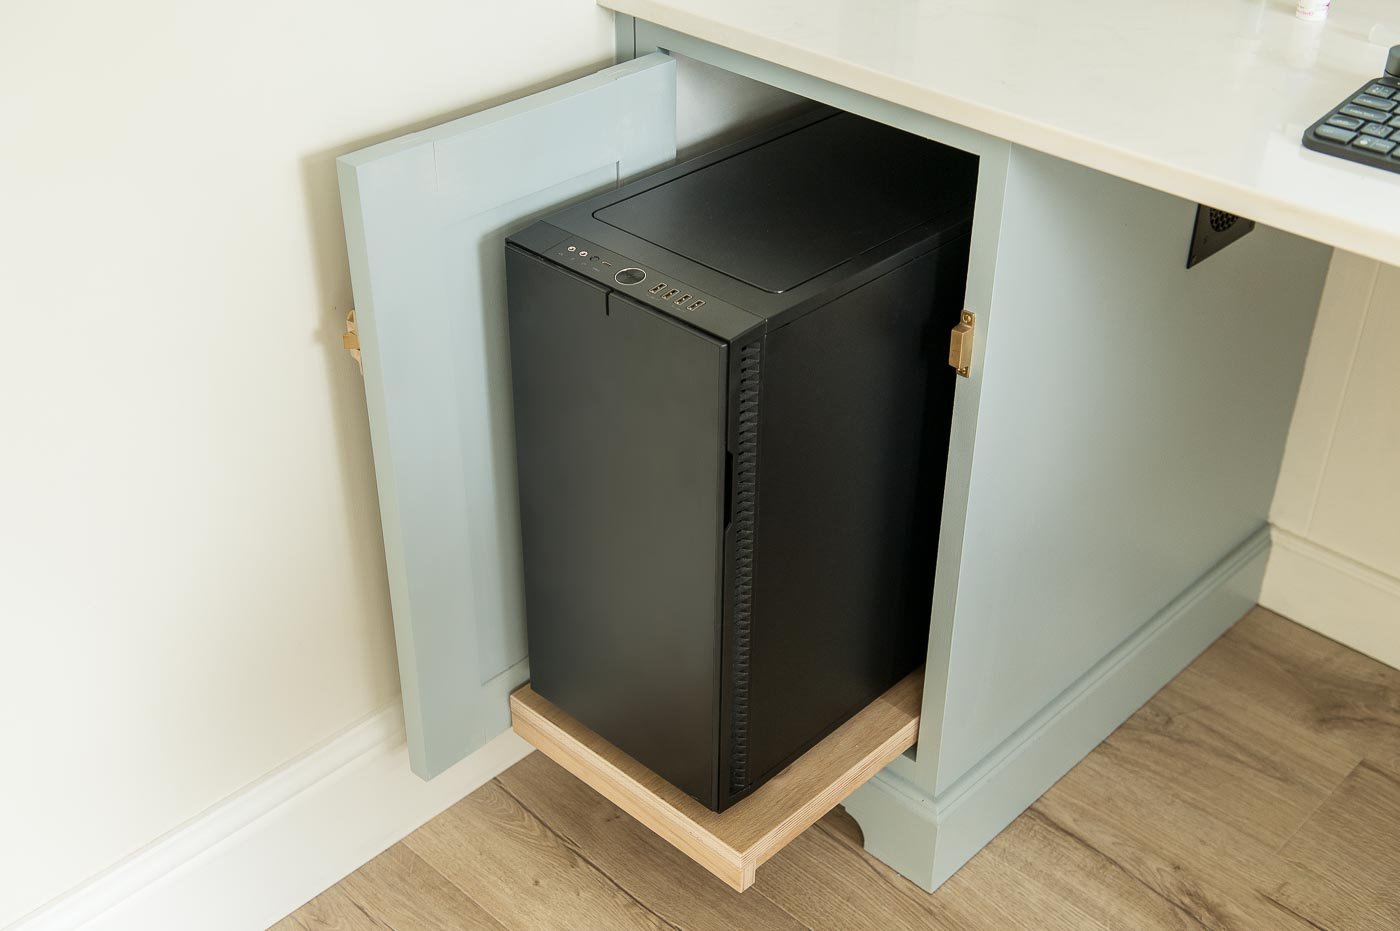
Neil has a pretty large and… sorry Neil… quite ugly set up with his computer screen and gigantic tower. I’ve spent years trying to get him onto the Mac train, but he’s not having any of it 😂
So a big part of the design had to soften or disguise the mountain of wires, his giant black screen and the large tower PC that are a necessary part of his job as a photographer + videographer and working with huge files – while not looking like an IT help desk from the 1980s!
We achieved this by…
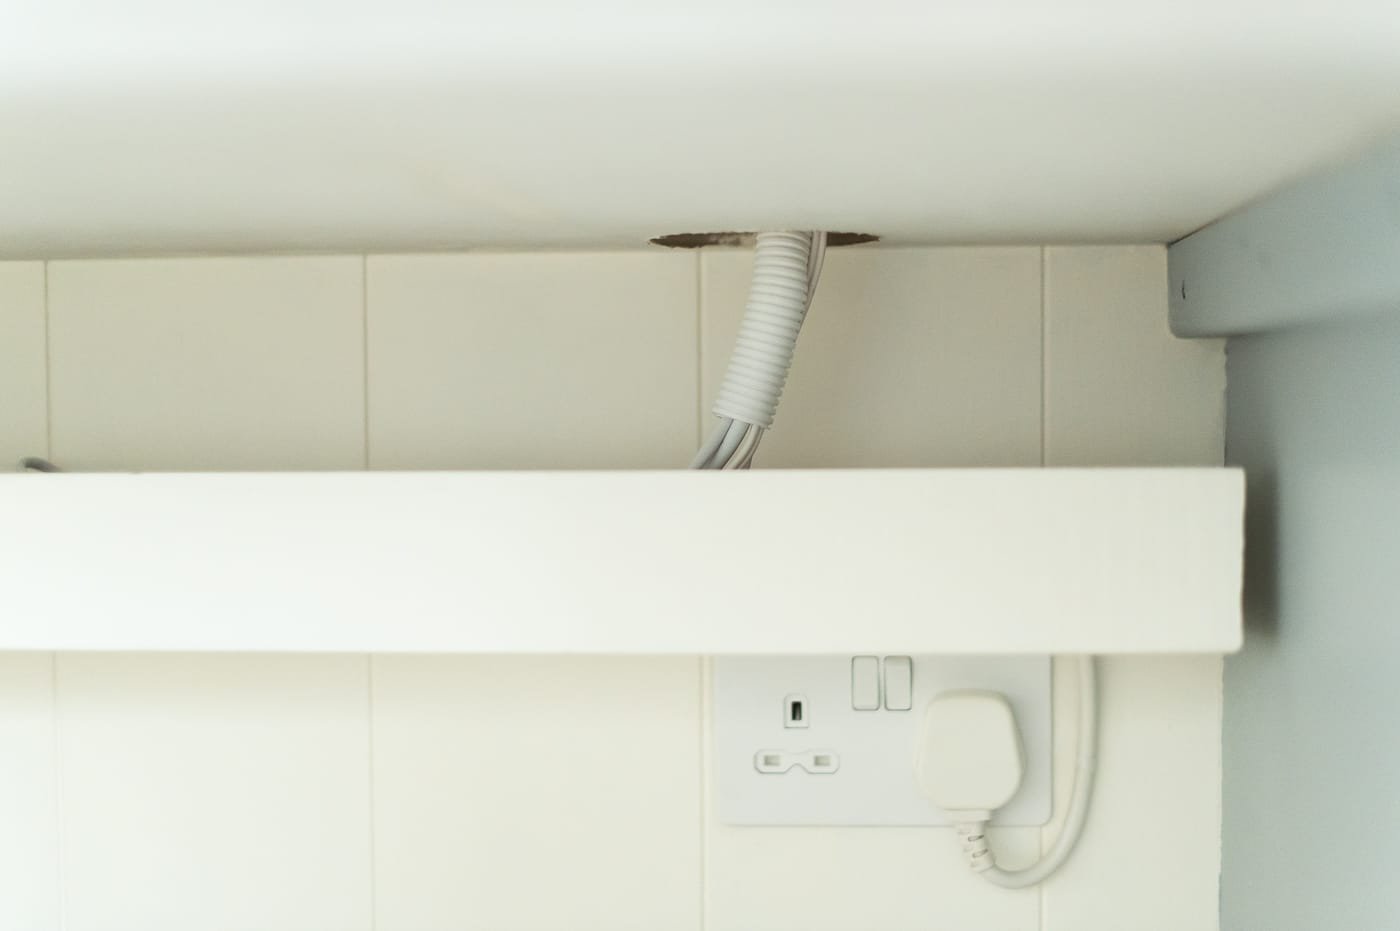
Feeding all wires down through a 50mm hole in the worktop
Covering wires with a smart white piping we bought on Amazon
Installing his PC inside a cabinet on runners with easy access to slide out and manage cables at the back
Creating a shelf underneath the worktop to neatly house a 5-way extension leads and all the computer and lamp cables on both sides
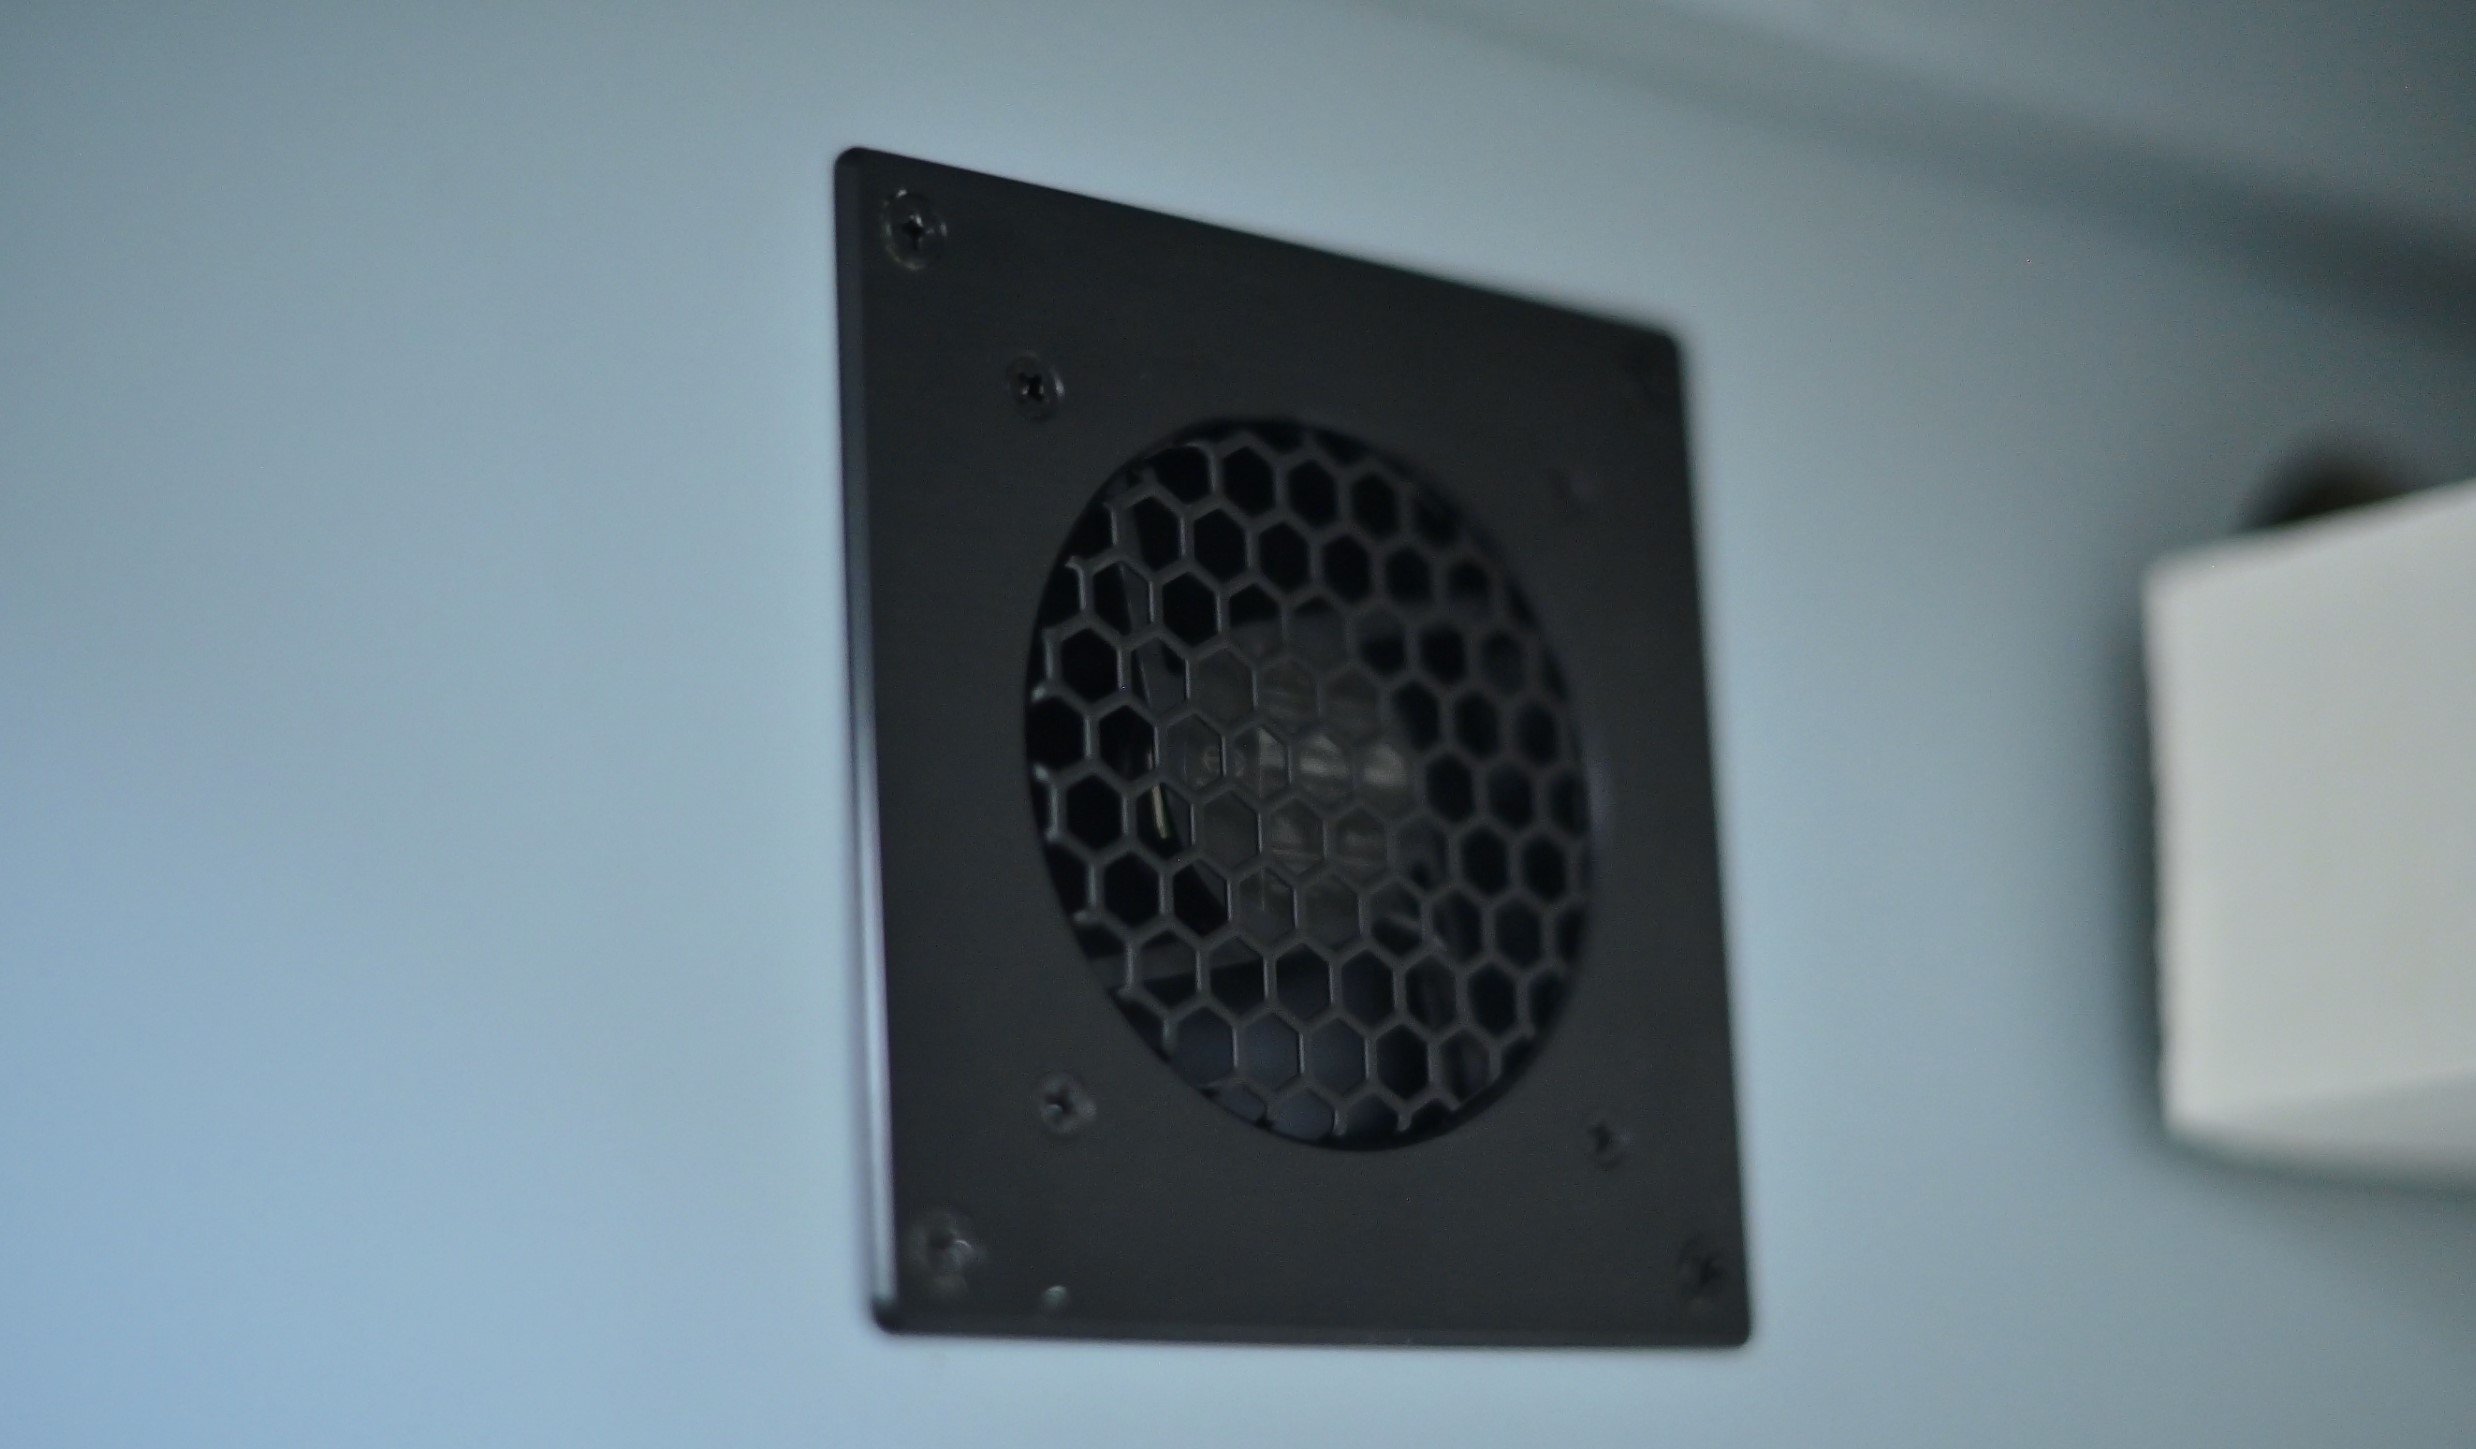
Installing this fan system to Neil’s cabinet which he retrofitted as a precaution to remove heat and prevent overheating the tower when the cabinet was all closed up (told you his PC setup is a pain in the arse! 😂)
I also swapped my mouse to a white wireless from Amazon
He swapped his disgusting black mouse mat to a neat white mouse mat from Amazon
…and we treated ourselves to an upgrade on speakers – swapping his unsightly black chunky monkeys for these sleek Bowers & Wilkins speakers that tuck in neatly to each corner of the unit and blast out our “Focus” playlists 😁
The office chairs
After having a bad experience on some IKEA chairs that resembled something you might torture your enemy with, we decided to invest in some decent office chairs.
We bought these Humanscale Diffrient chairs from John Lewis and yes they are fairly pricey, but when you’re sitting for 7-10 hours a day, you need to invest to get something right for you. Take it from us - with office chairs, go function over fashion. We’ve learnt the hard way.
It’s actually quite hard to find stylish office chairs that are also very comfortable and these chairs they are subtle enough that they suit our room, so if you’re in the market for a chair, we would definitely recommend them.
The glass white board

When we shared pics of the makeover with the Reno Club community, they really liked the glass white board we designed into the layout.
We often use post its when we’re planning, and I needed wall space for blue tacking large A3 floor plans (I find I can connect with projects more if I’m looking at it on and off screen).
I thought about a whiteboard, but they just get so scruffy and hard to keep clean it would annoy me. The glass whiteboard is from Amazon and I replaced the stand-off screws with a matt black finish to match the radiator valves.
It works so well for brainstorms. It’s easy to wipe off and I love that it unintentionally provides a natural reflection of the window which makes the room feel bigger.
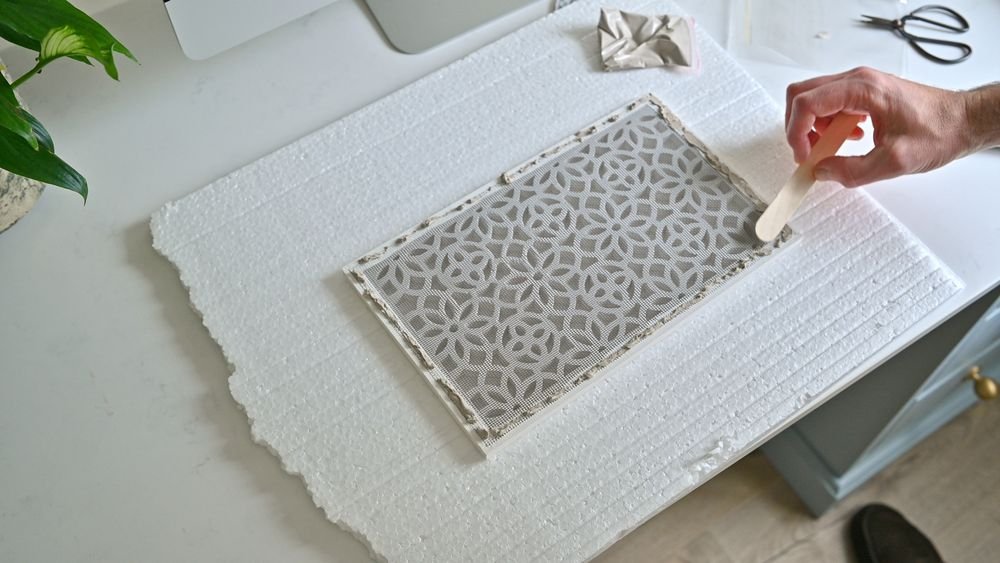
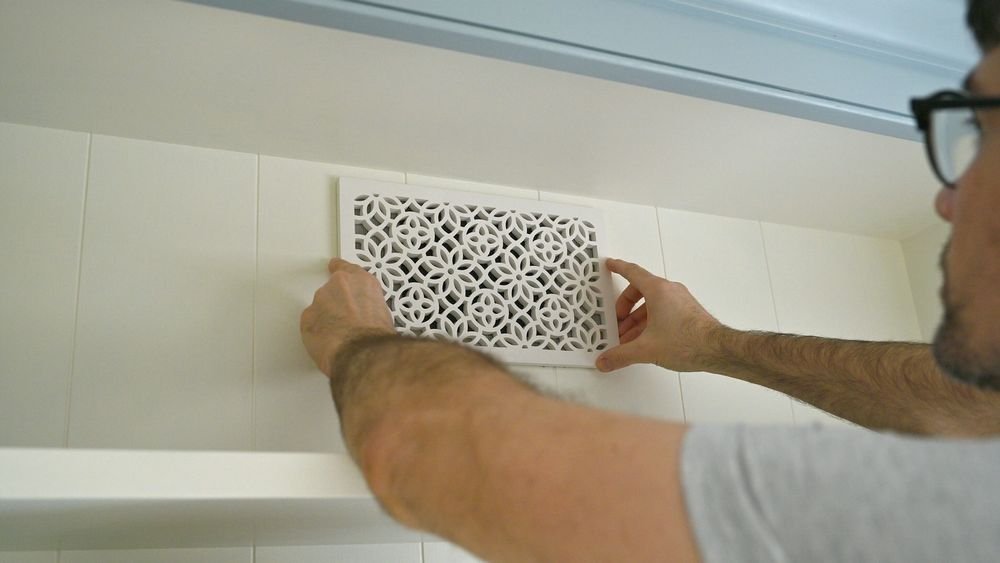
Decorative vent cover
Initially we weren’t really sure how we were going to deal with the weird little air vent or what would be underneath
We knew that we wanted the vent to remain operable. Those 1930s house builders put it the for a good reason i.e. ventilation.
It was a small problem but one that could easily compromise the aesthetic of the beautiful shelving.
When we had previously looked for air vent covers as few years ago the options were limited to say the least.
We needn’t have concerned ourselves now though! It’s incredible how much more is available on the UK market now versus when we first started renovating. An example is this decorative air vent cover which we bought from an independent seller on Etsy.


Support with your renovation project + design
Many instagram accounts and blog posts online make project reveals look like it all happened in the space of a few weeks with no hiccups! I wish this was the case.
This project was the result of a year’s planning, saving and executing on the vision. It takes such a huge amount of time to renovate a room.
So many of our community join our courses explaining that they feel overwhelmed by design decisions and paralysed by what to do first. And what I always say is…
Whether you have the budget to makeover a room right now, or it’s something you will need to save up for, start your planning now! Today! It takes a lot of time and care to develop your vision. Give yourself a head start.
If you’d like support, I’d love to help you so consider joining Home Design Lab. It’s my home design online course that provides practical guidance on how to create your vision, and bring it to life.
I also launched a brand new Design Your Home free email series you can get started on today and will give you some design advice I wish I knew when I first started out in the industry.
Thank you so much for following our home office progress and we hope you love the final look as much as we do!
Fi + Neil xx