10 of our favourite house renovation before & after shots
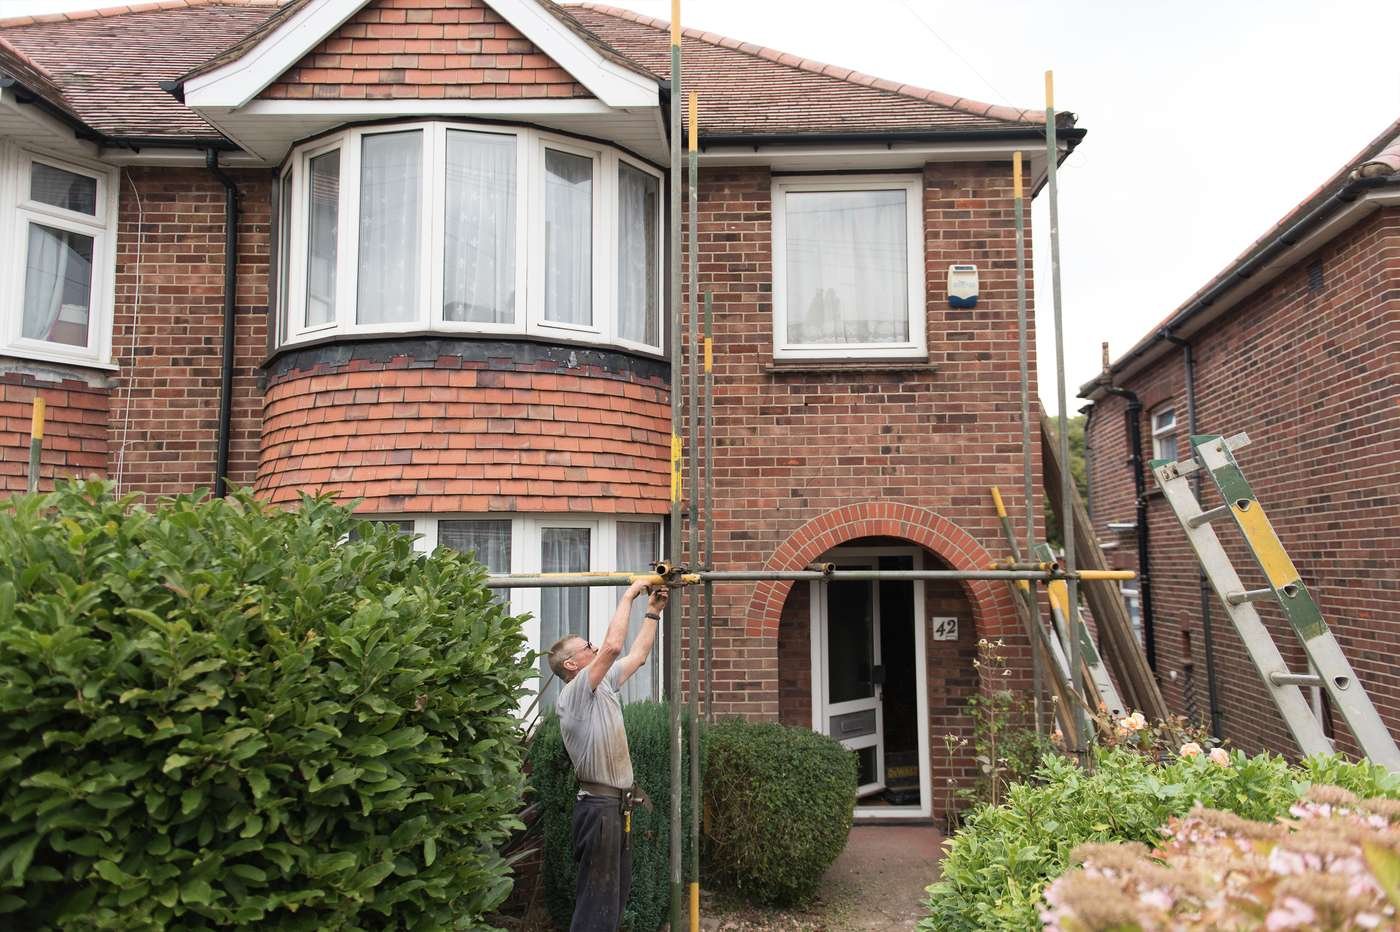
/Welcome to our house and ‘work-in-progress’ renovation project. We’re currently 90% the way through the mammoth task of dragging an extremely dated 1930s semi-detached house in Sussex kicking and screaming into the 21st century. We bought the house in 2016 and it’s been dust, sweat and tears ever since.
For those that are new around here or if you’ve already taken an interest in our house renovation we thought our blog readers would appreciate a tour done through the medium of GIFs, I mean we usually do our house tours through the medium of interpretative dance but we don’t think that works so well via a website (same tumbleweed as telling bad jokes).
Here are our favourite before and after renovation shots.
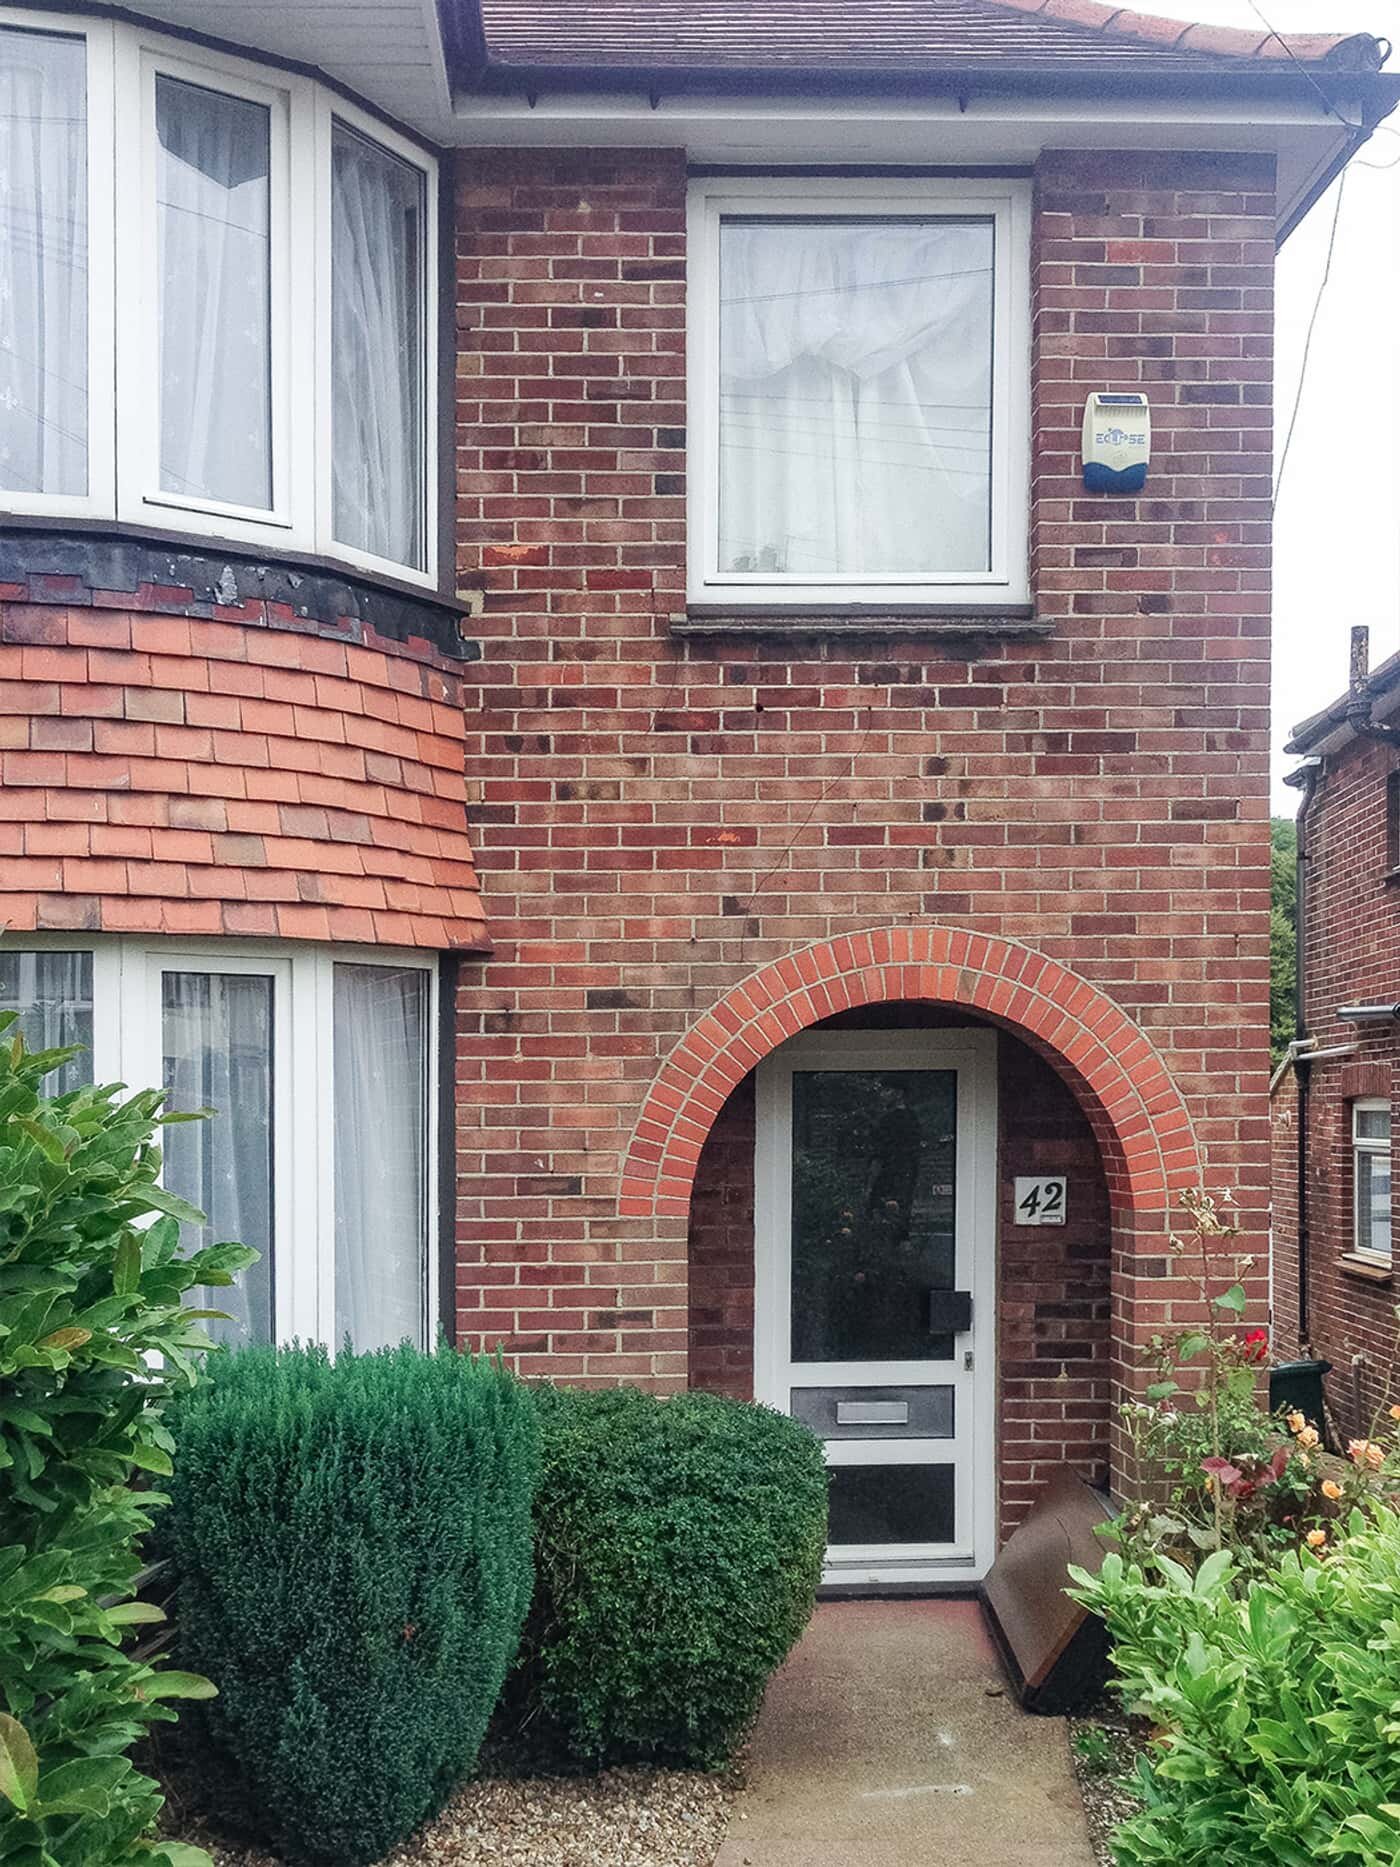
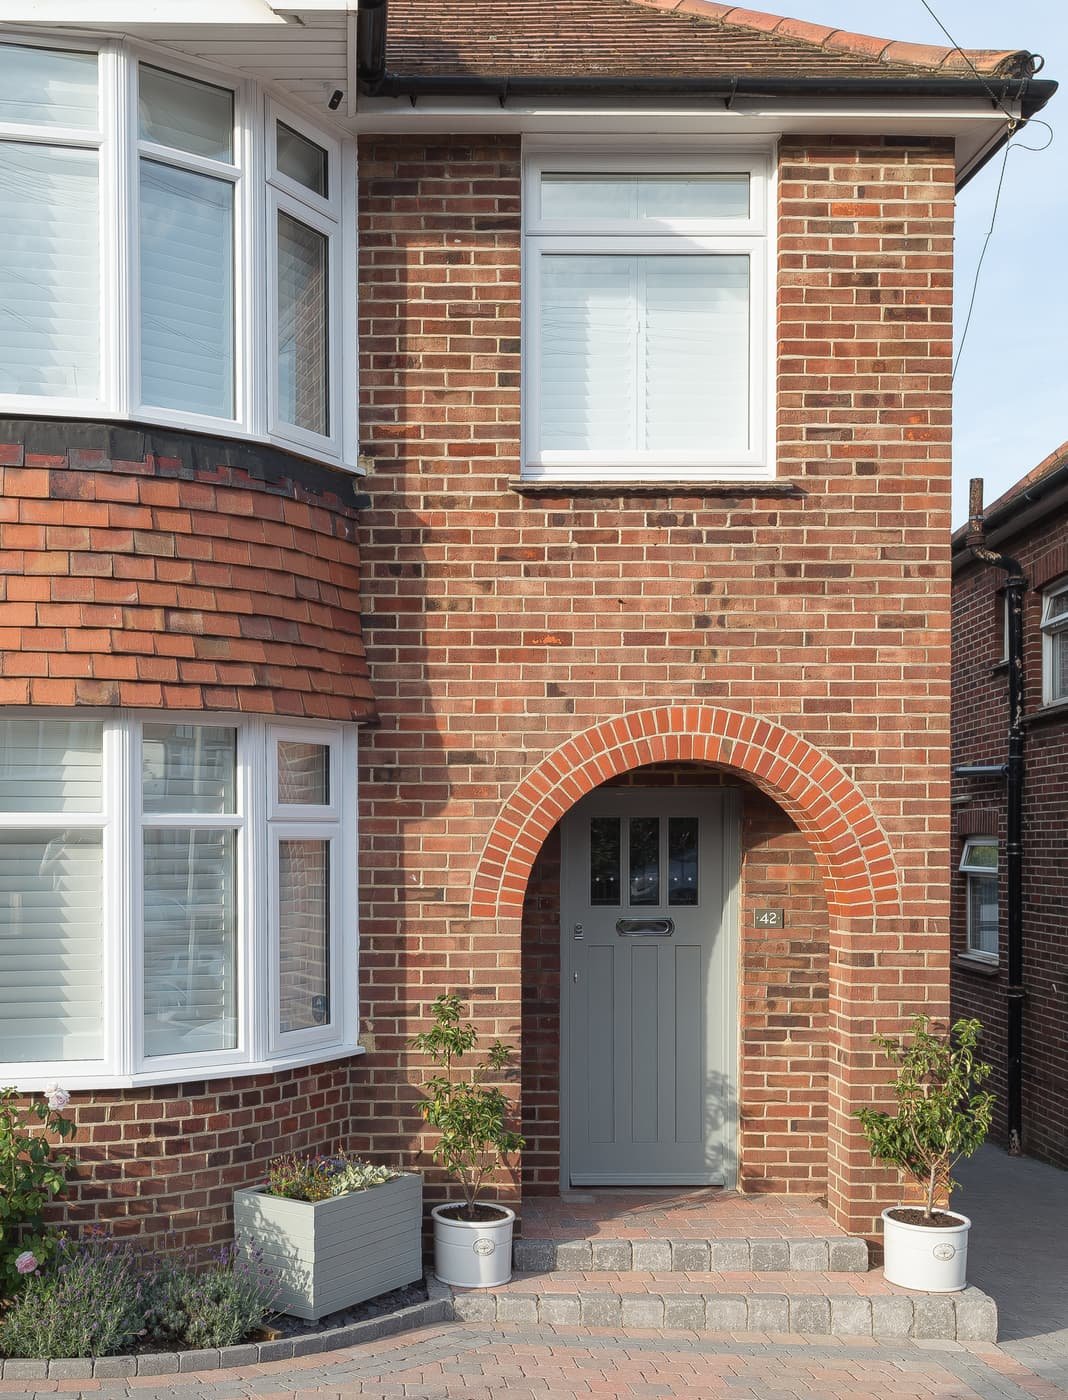
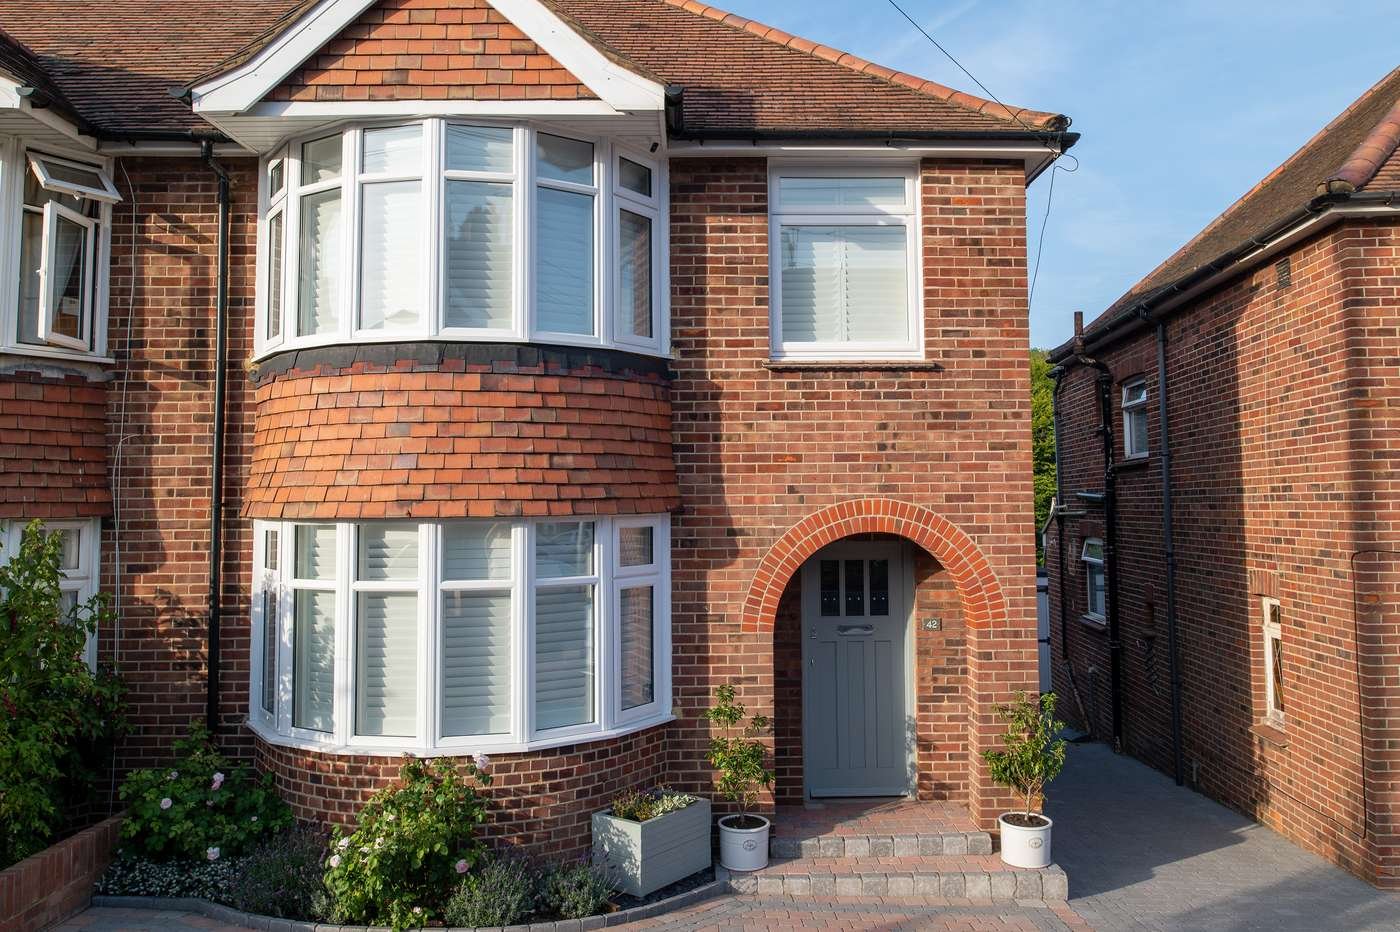
The Facade - Before and After
Welcome to our 1930s house in Sussex!
Elements that we updated that are evident externally are: driveway paving, a front door step, a new border/plants/planters, new office and bay window UPVC double glazing and of course our 1930s front door.
The house has never really felt quite complete until we made our garden into a driveway. Although it was nice having a front garden, it was just such a mess and our road is way too busy for parking, so a driveway it was.
The Hallway - Before and After
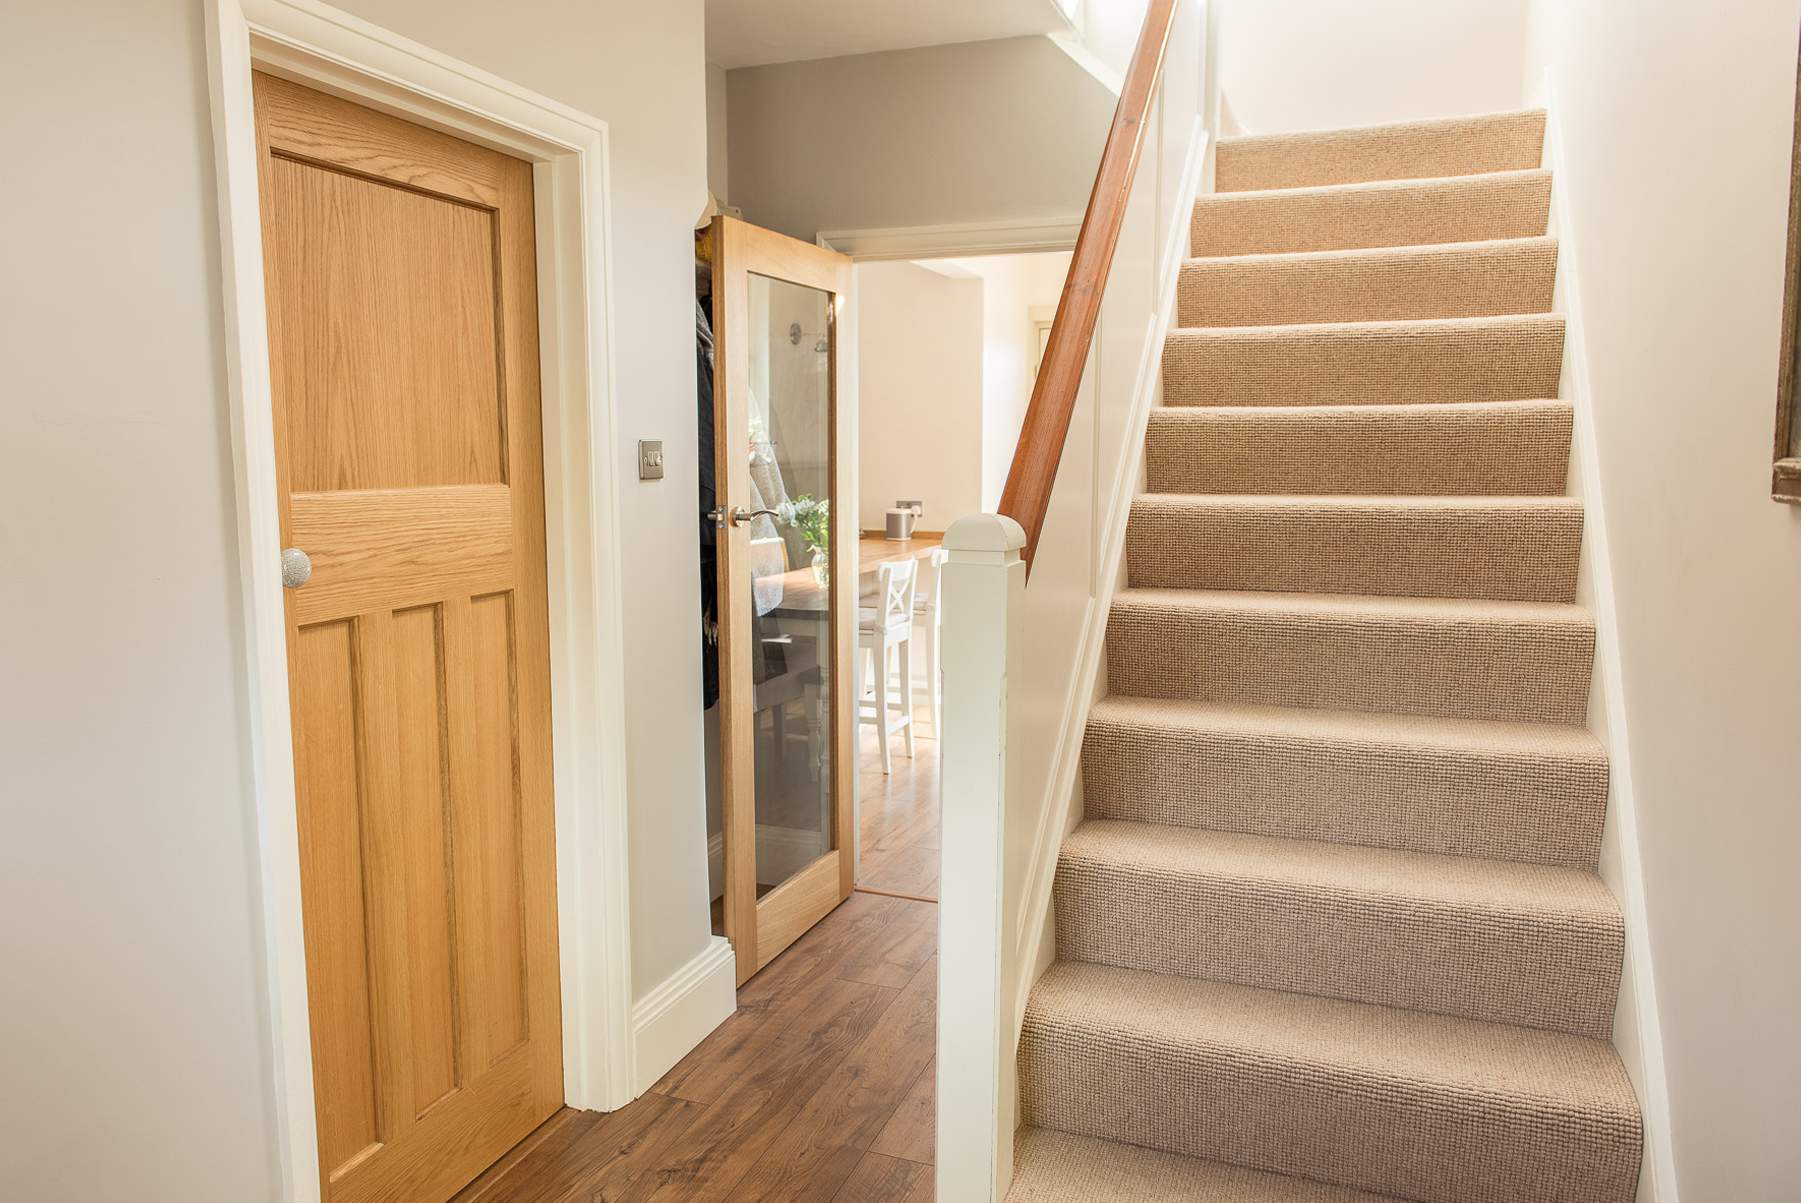

Next we’re in the hallway.
We swapped that psychedelic carpet for a durable, soft under foot cream number and never looked back. In one breath, we wish we’d kept some of the psychedelic carpet to floor the under stair cupboard, for the memories. But in another breath, when it finally got ripped up all we wanted to do was burn it! 😂
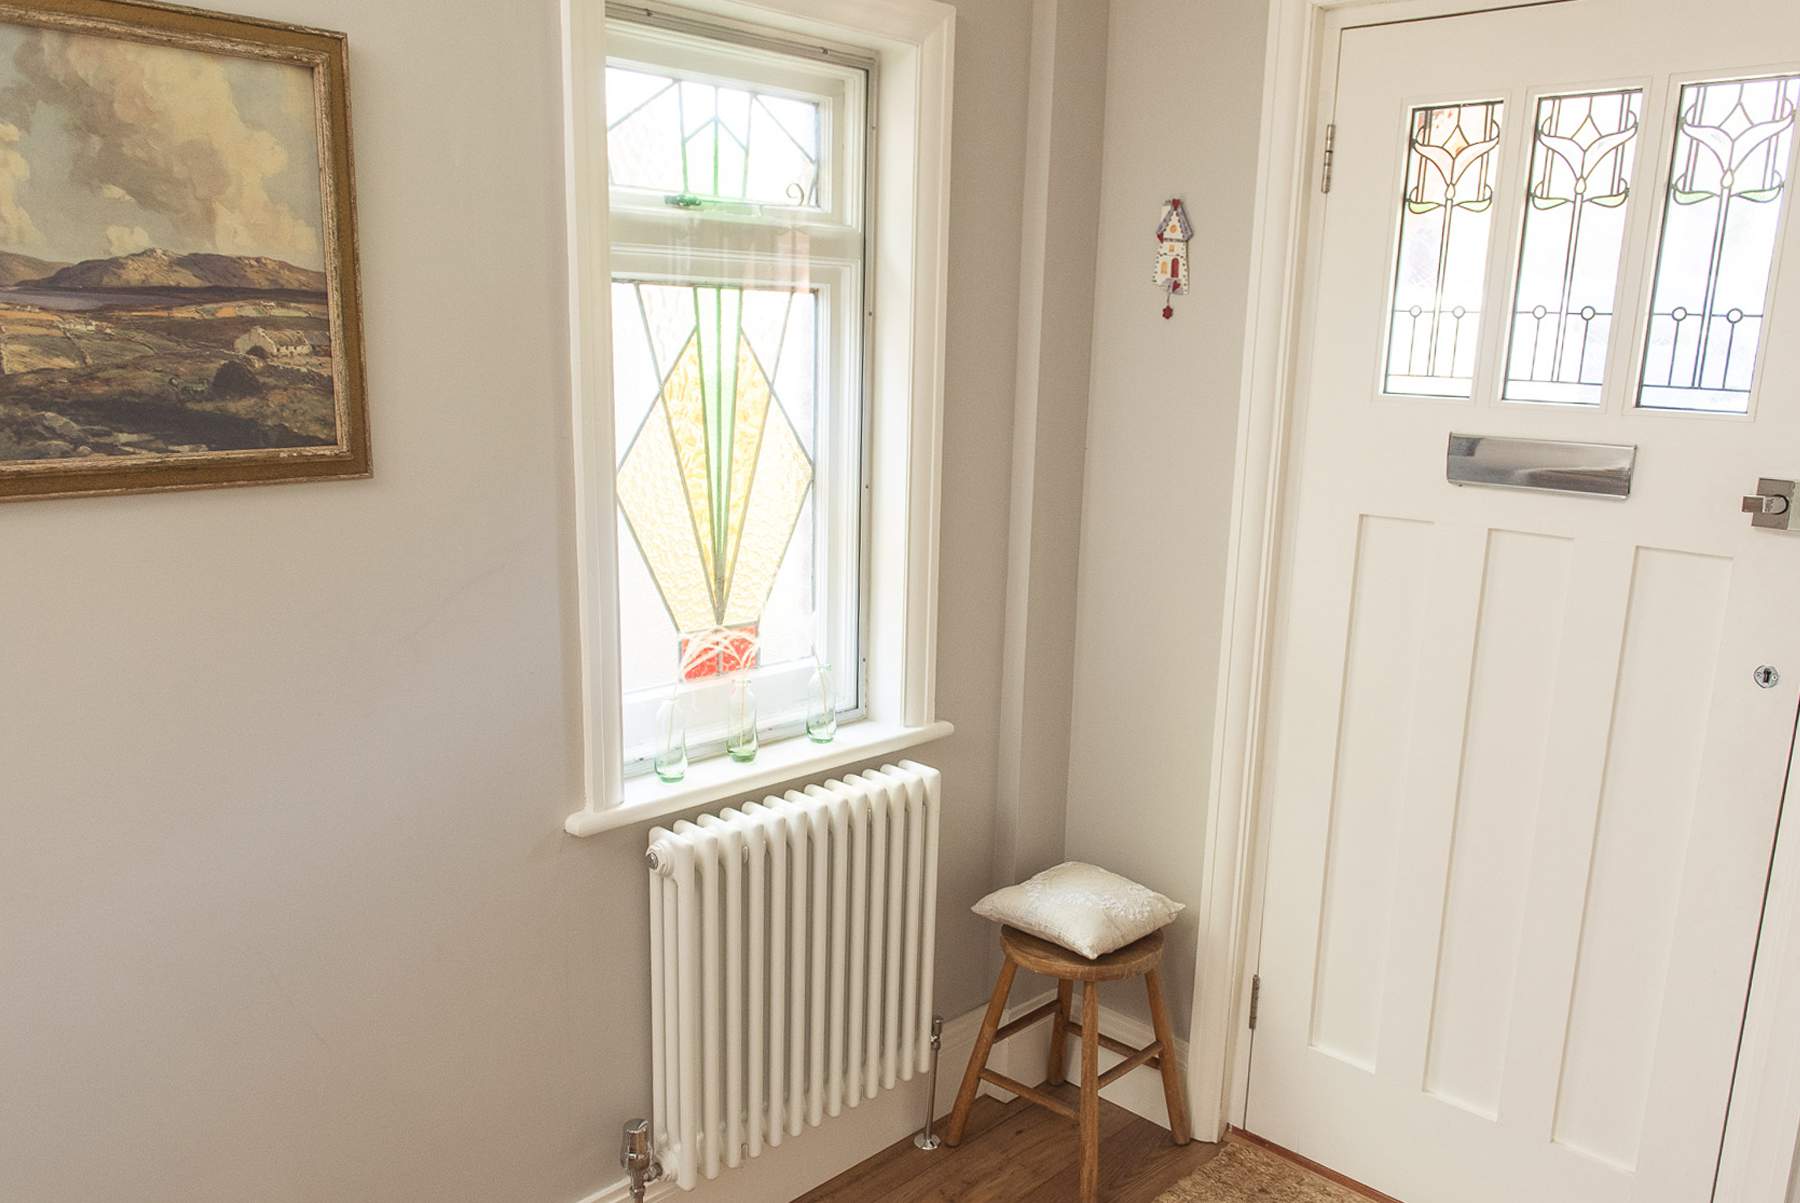
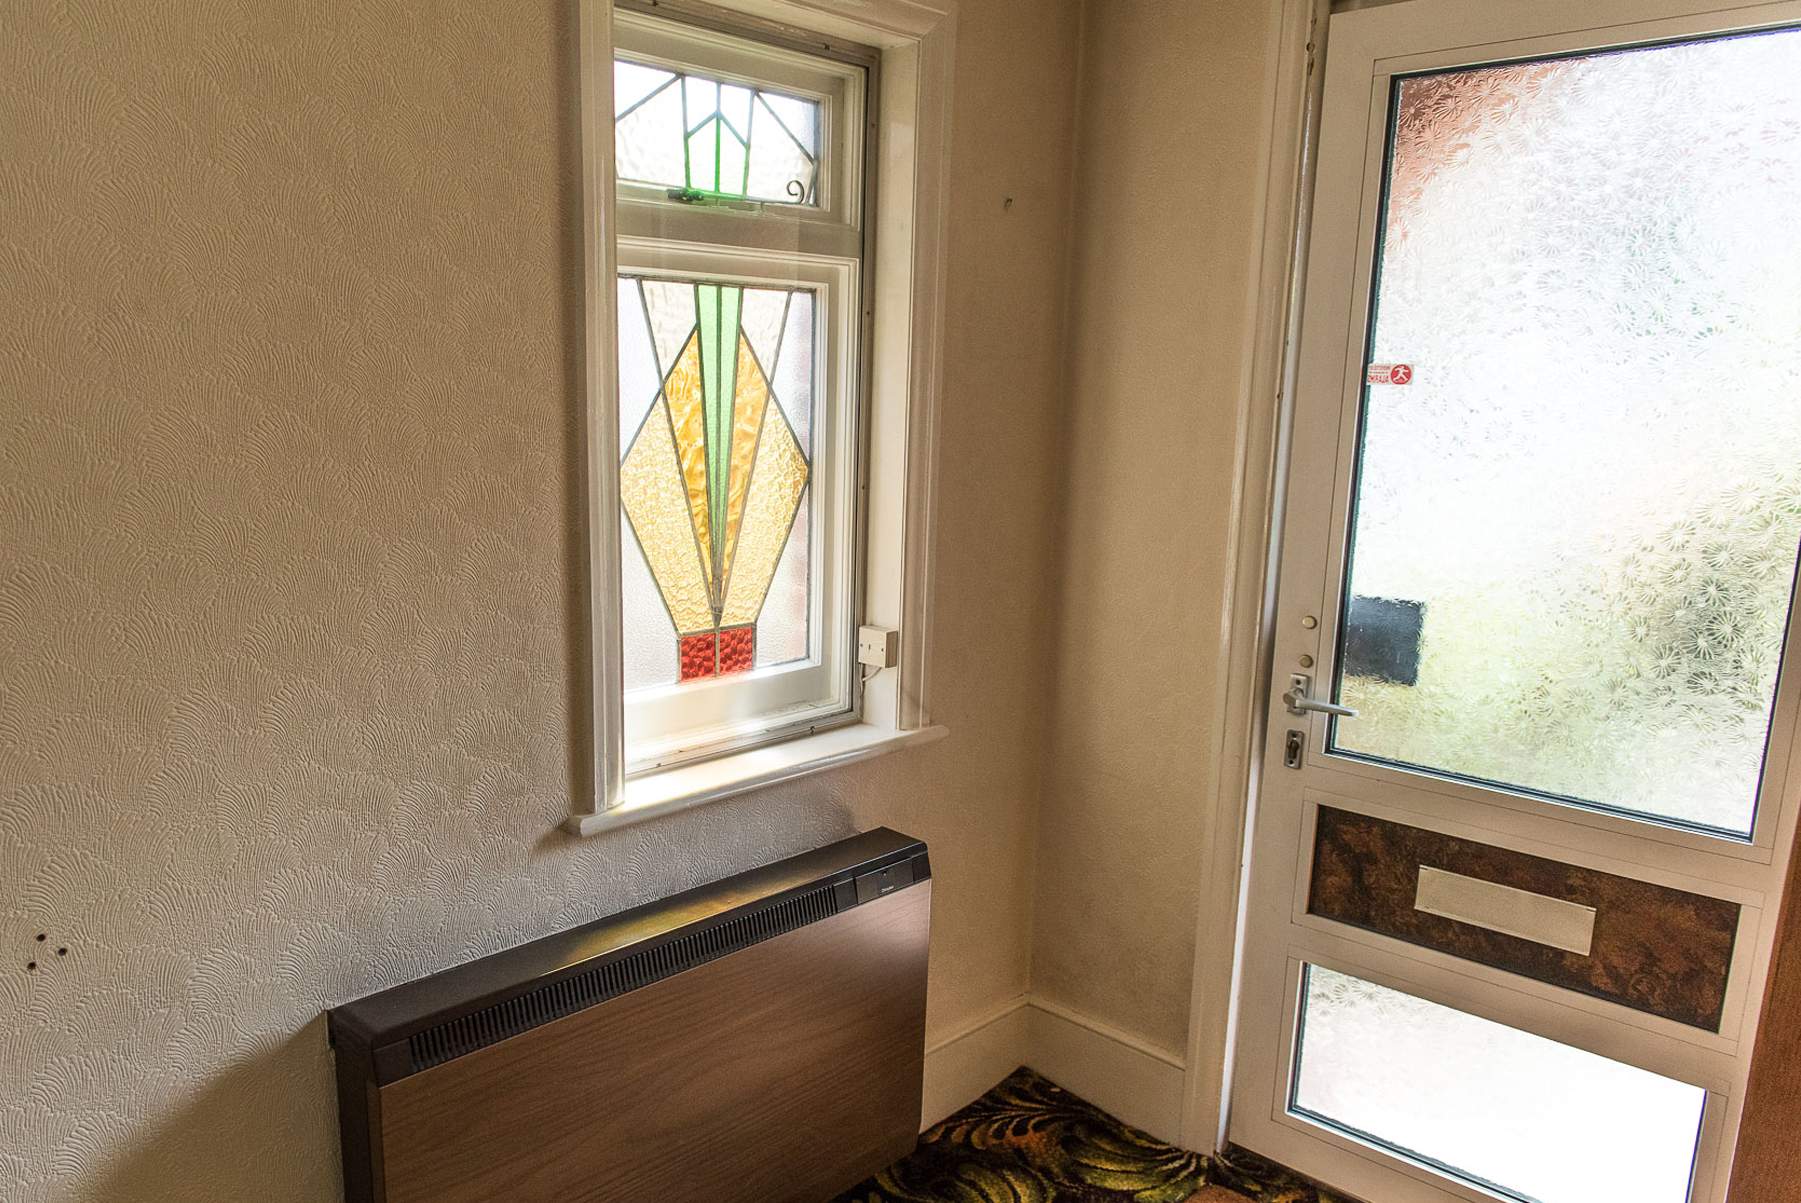
The plastic, glass and… wait for it… leather (!!) front door gave us so much grief when we first moved in. We had to literally kick it to open it. One of the first jobs we did was replace the front door with a sturdy oak and stained glass profile which did make the hallway darker, but gave us a lot more privacy. Shortly after we installed heating, and ripped out those god awful storage heaters which weighed more than my body weight!!
The stained glass window we inherited, and it’s perhaps the only thing in the house we’re keeping!
The Living Room - Before and After
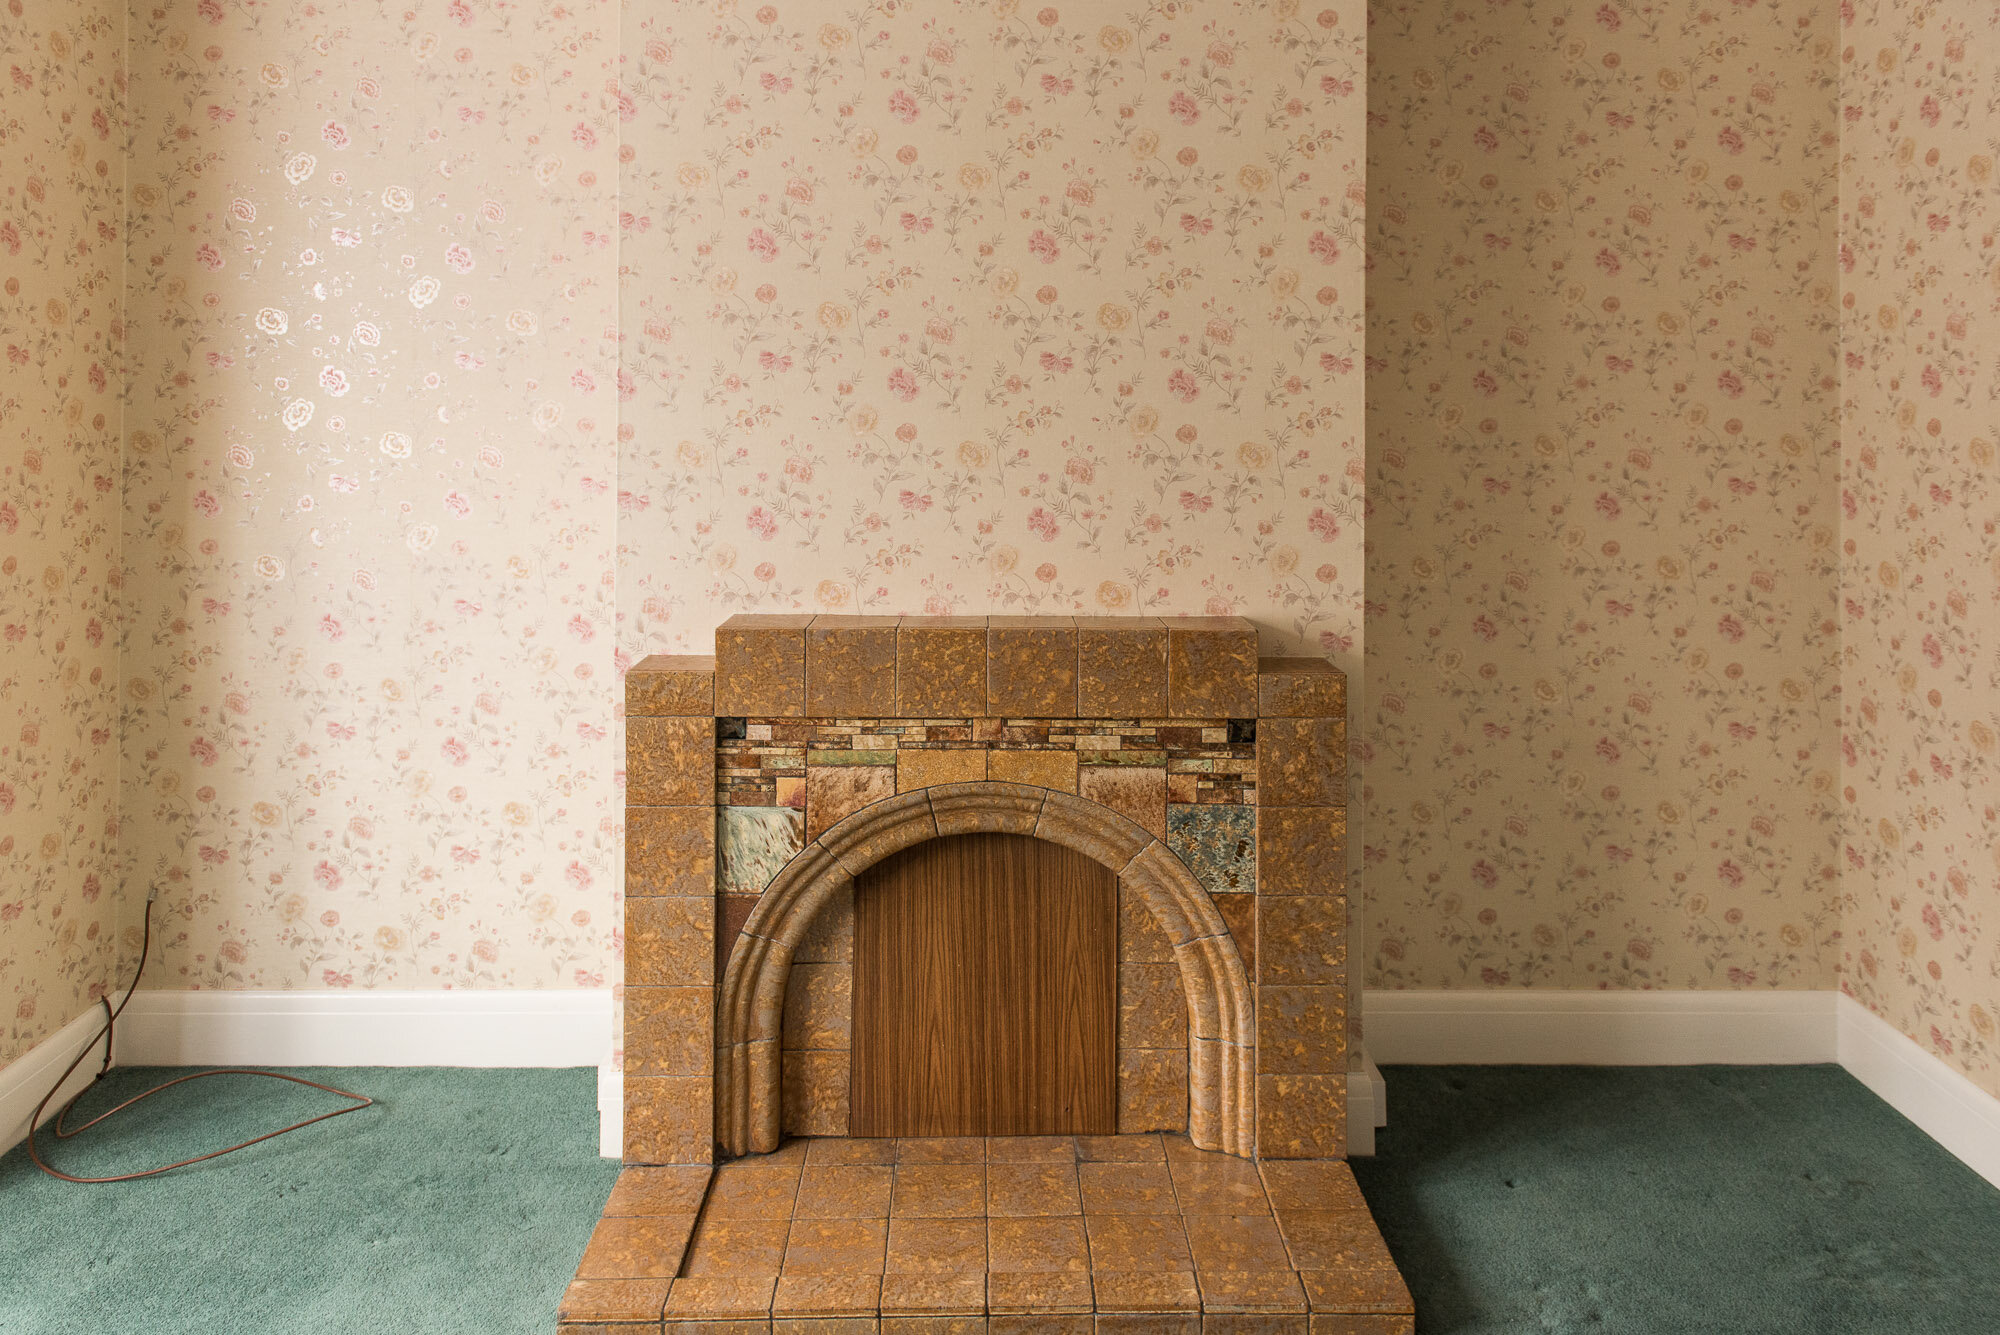
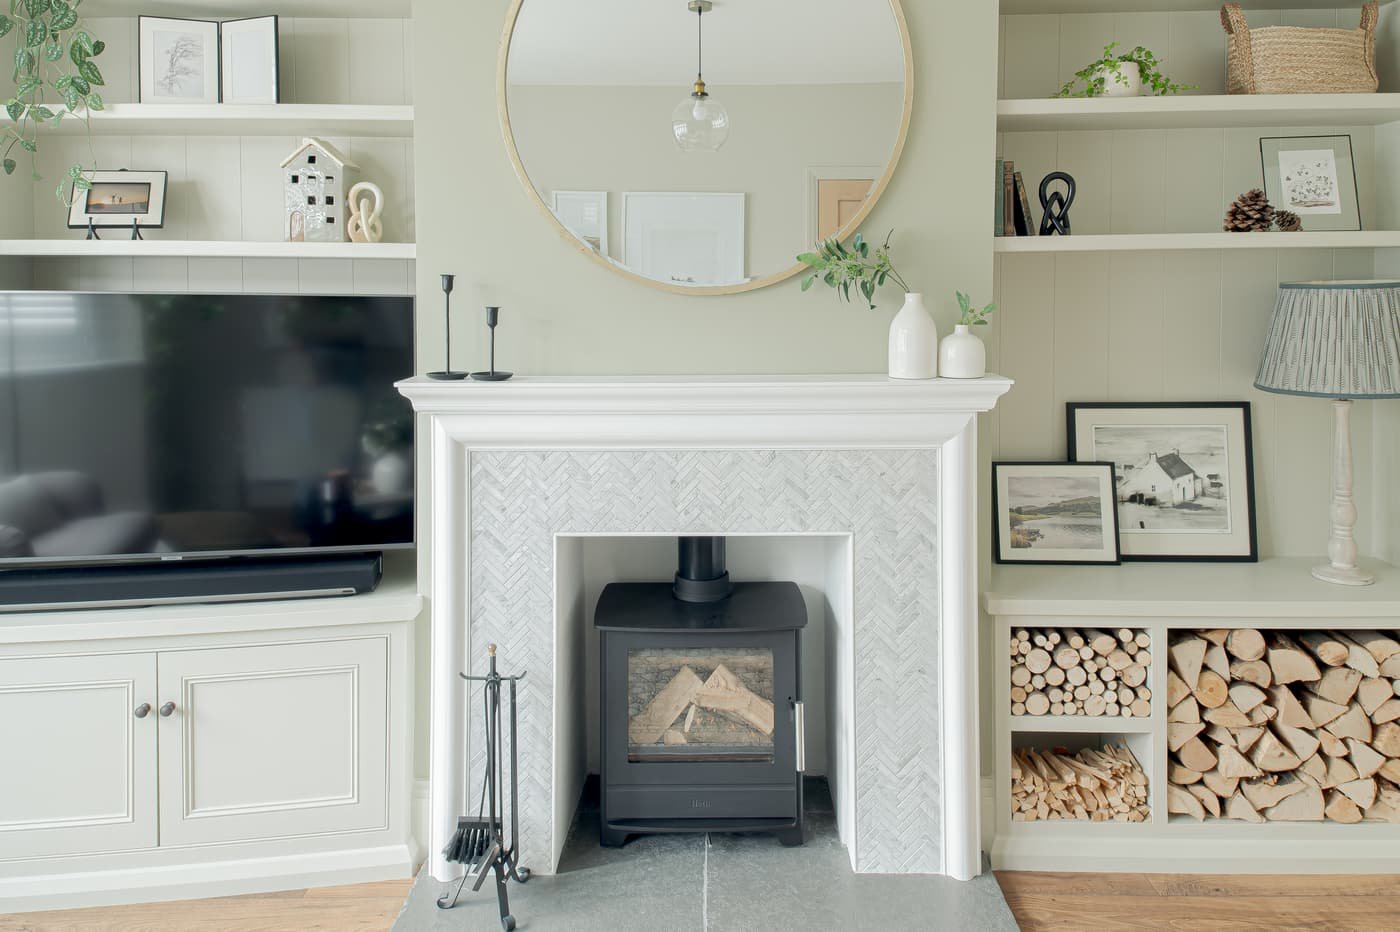
Now some before and after shots of the the living room. The living room renovation went through a few different phases and now it’s complete, we couldn’t be happier. It’s one of the areas of the house we wanted to focus efforts in built in storage - so we worked with a local carpenter to design bespoke alcove shelving to house our wood stack, TV, Sonos sound bar, and lighting.
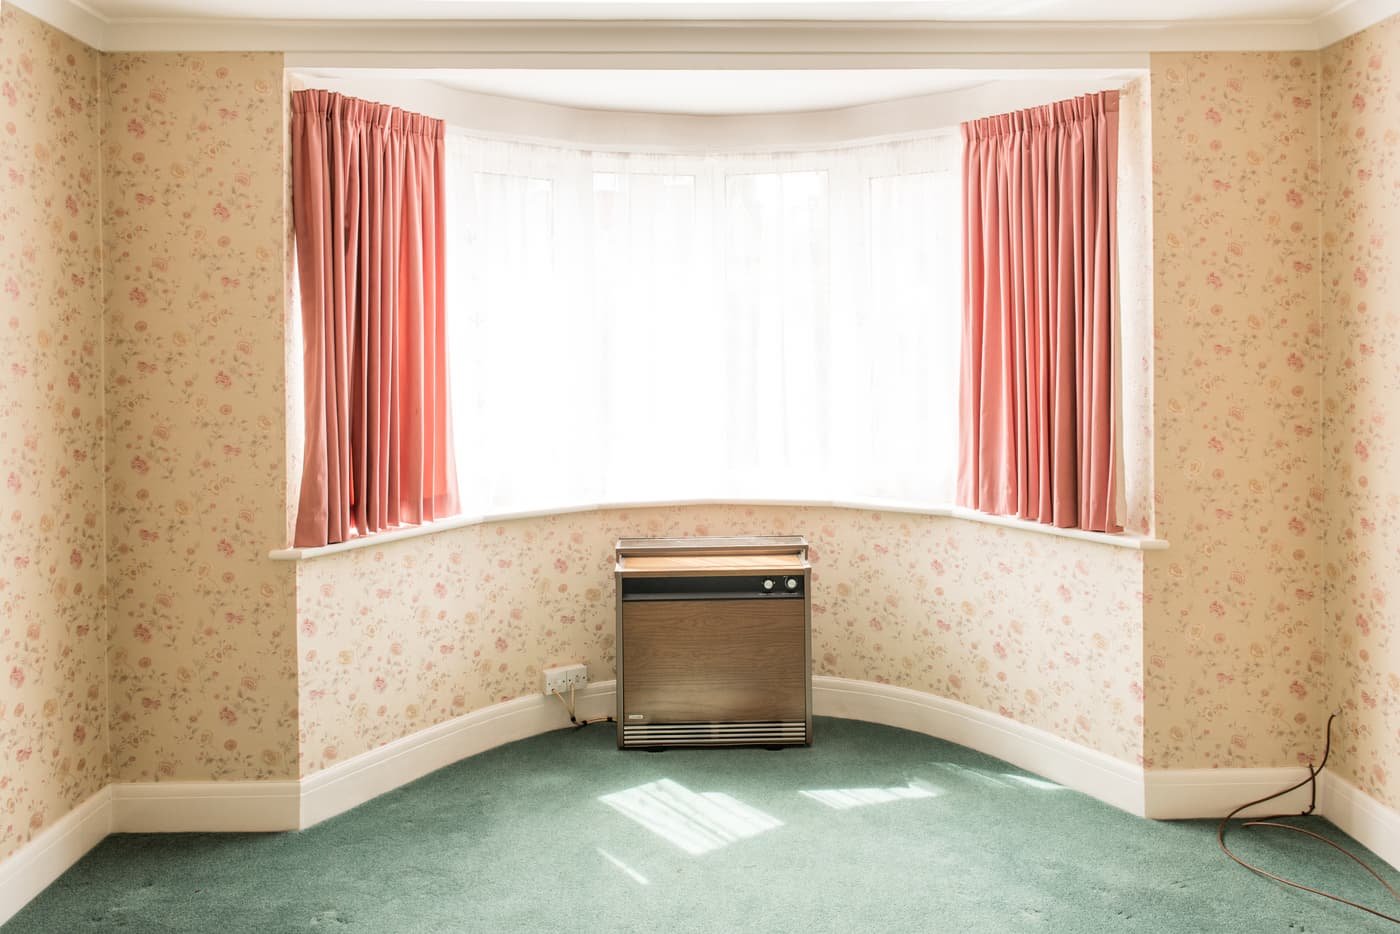
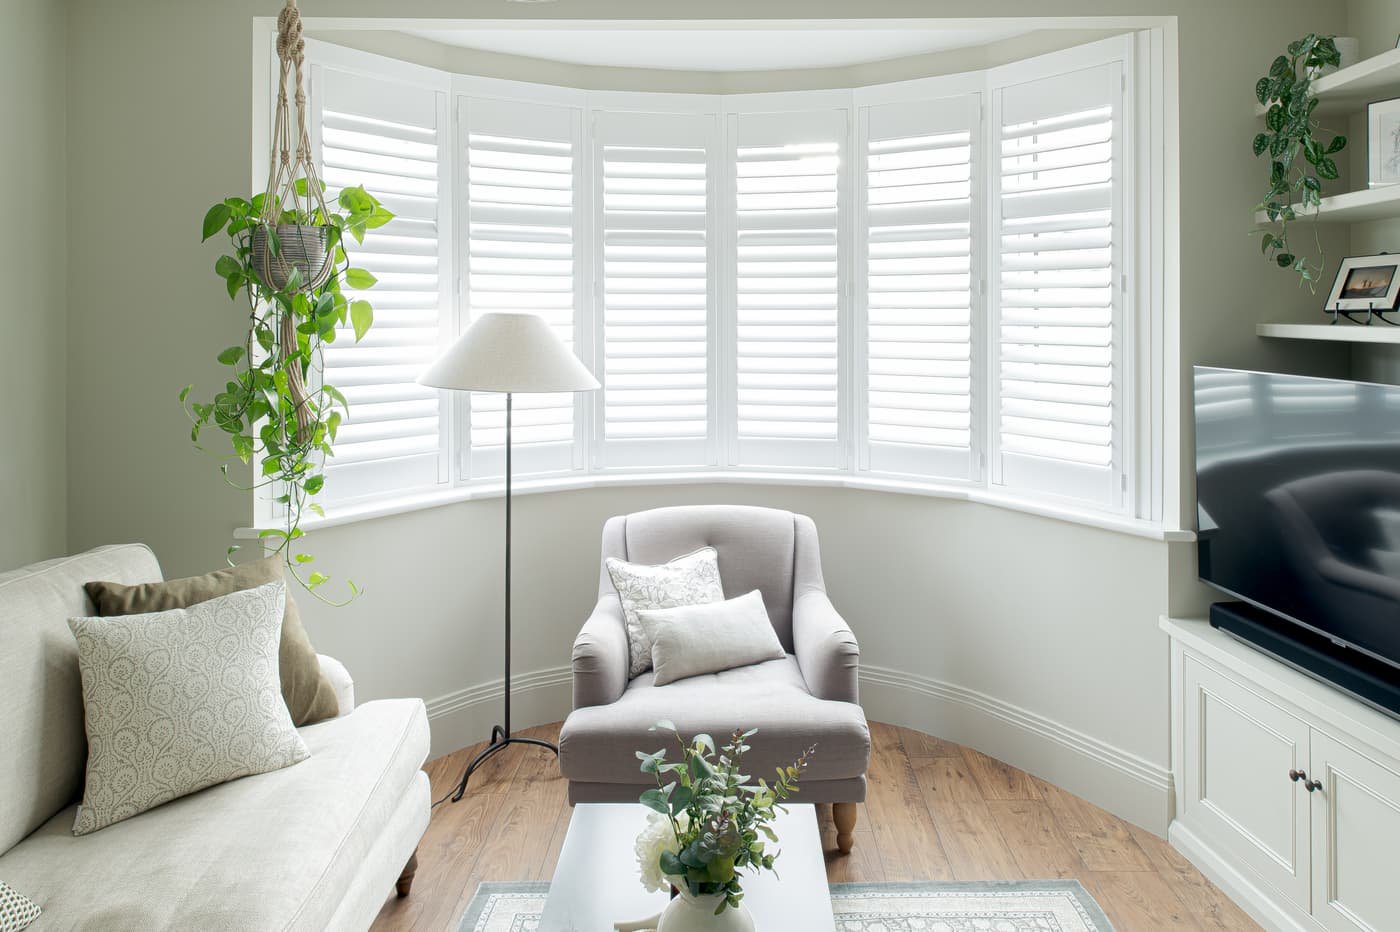
Over by the window, another storage heater got the boot and we decided to utilise the curved bay window area to put increase our seating. Shutters were installed as they serve as a really practical solution for privacy when it gets dark.
Make sure to take a look at loads more information and pictures of our living room makeover which we did in two phases.
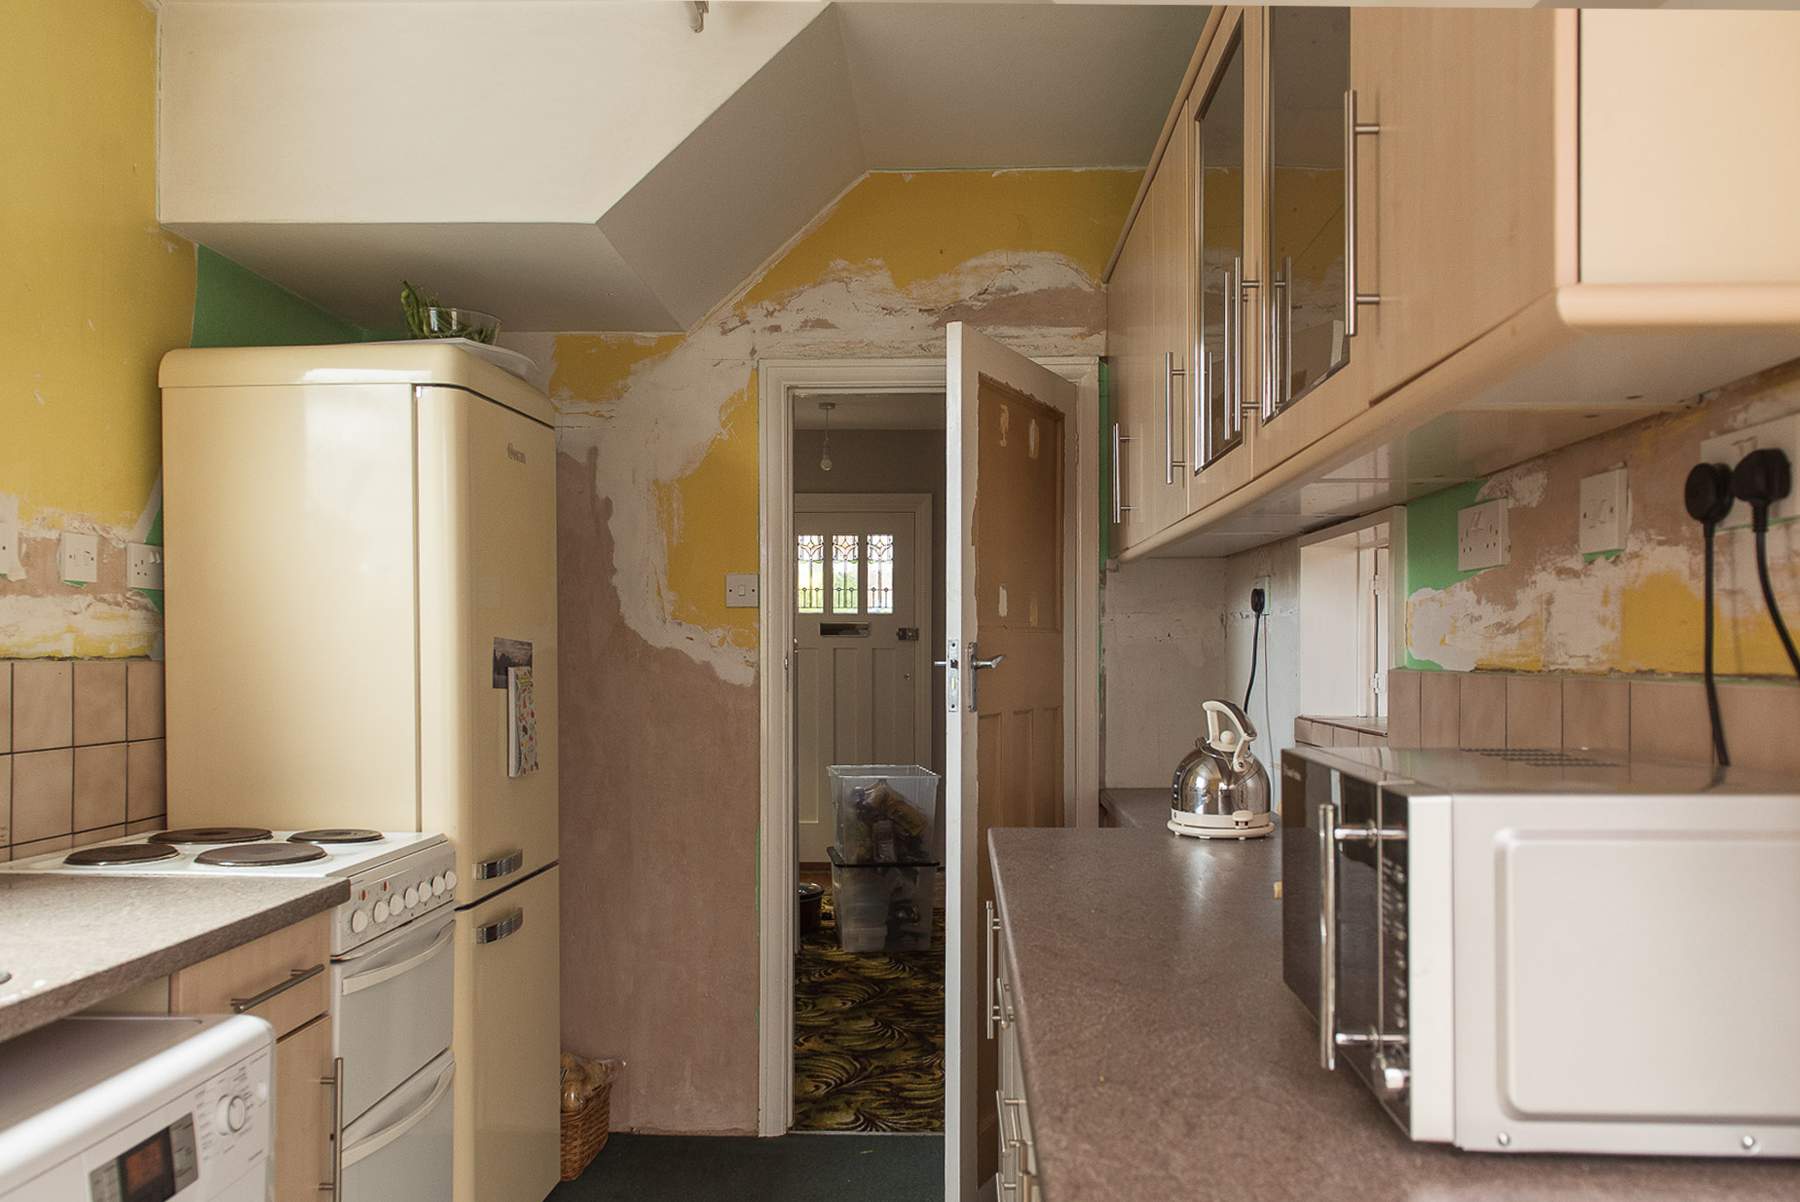
The Kitchen Diner - Before and After
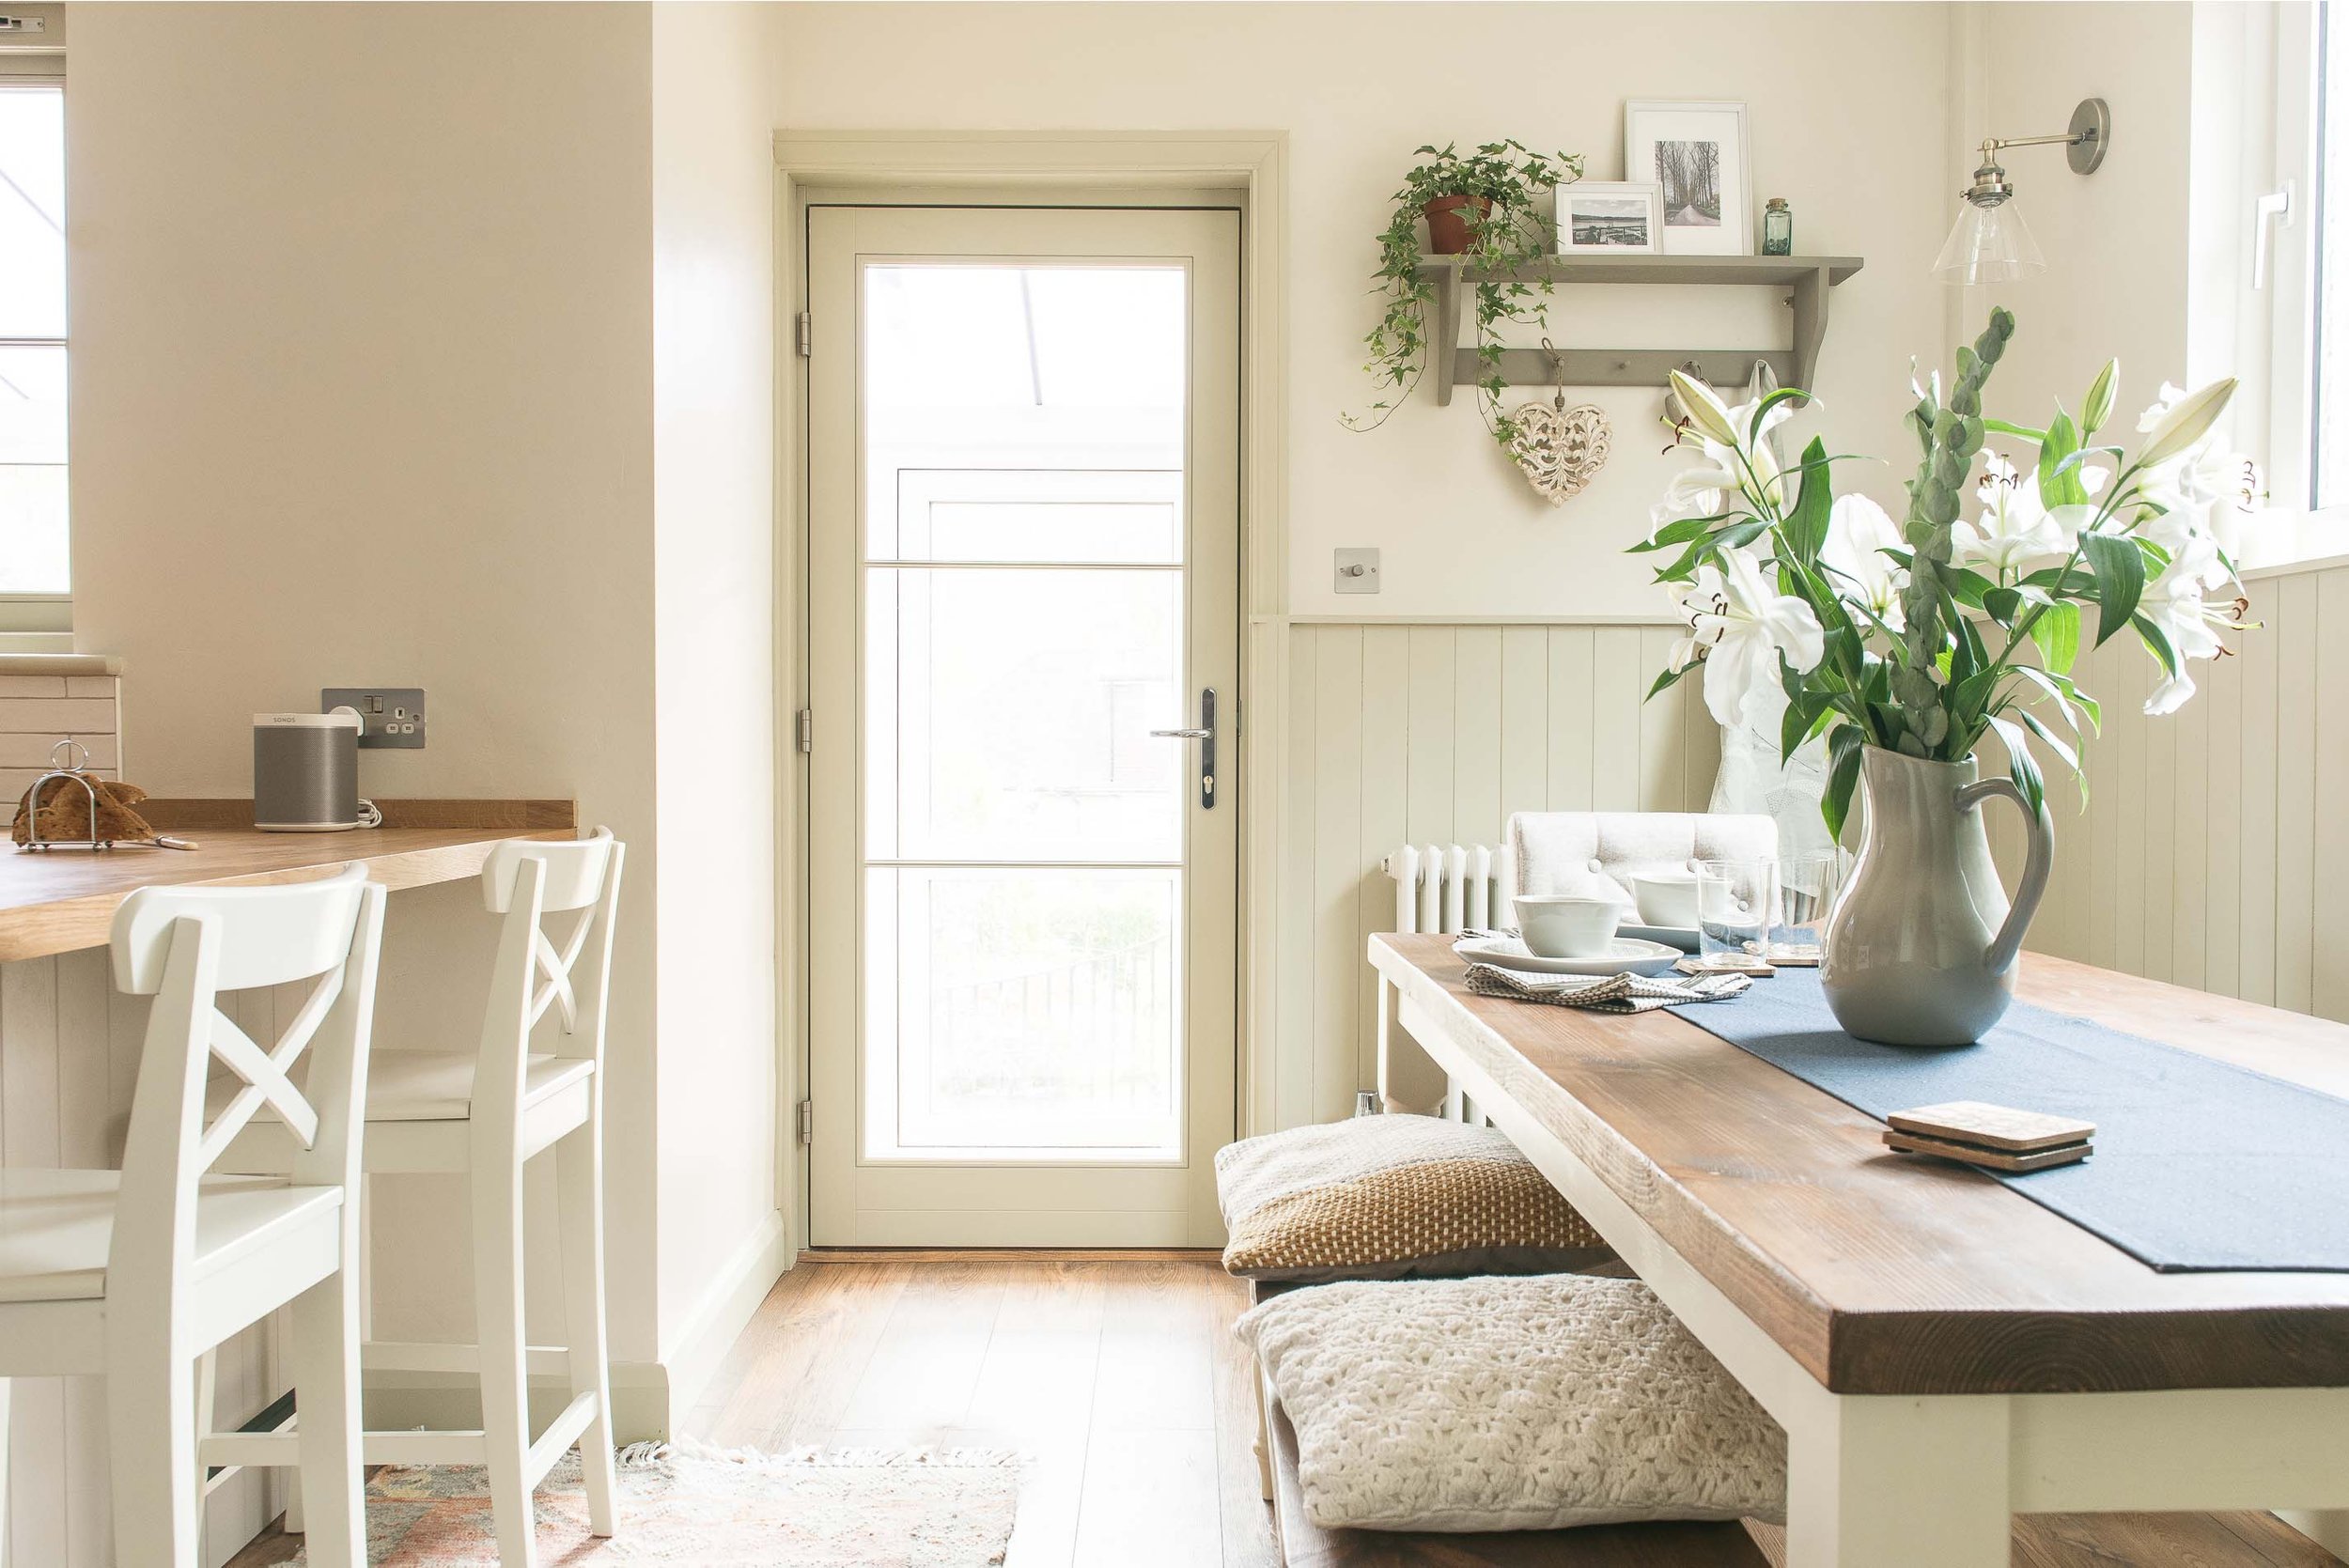
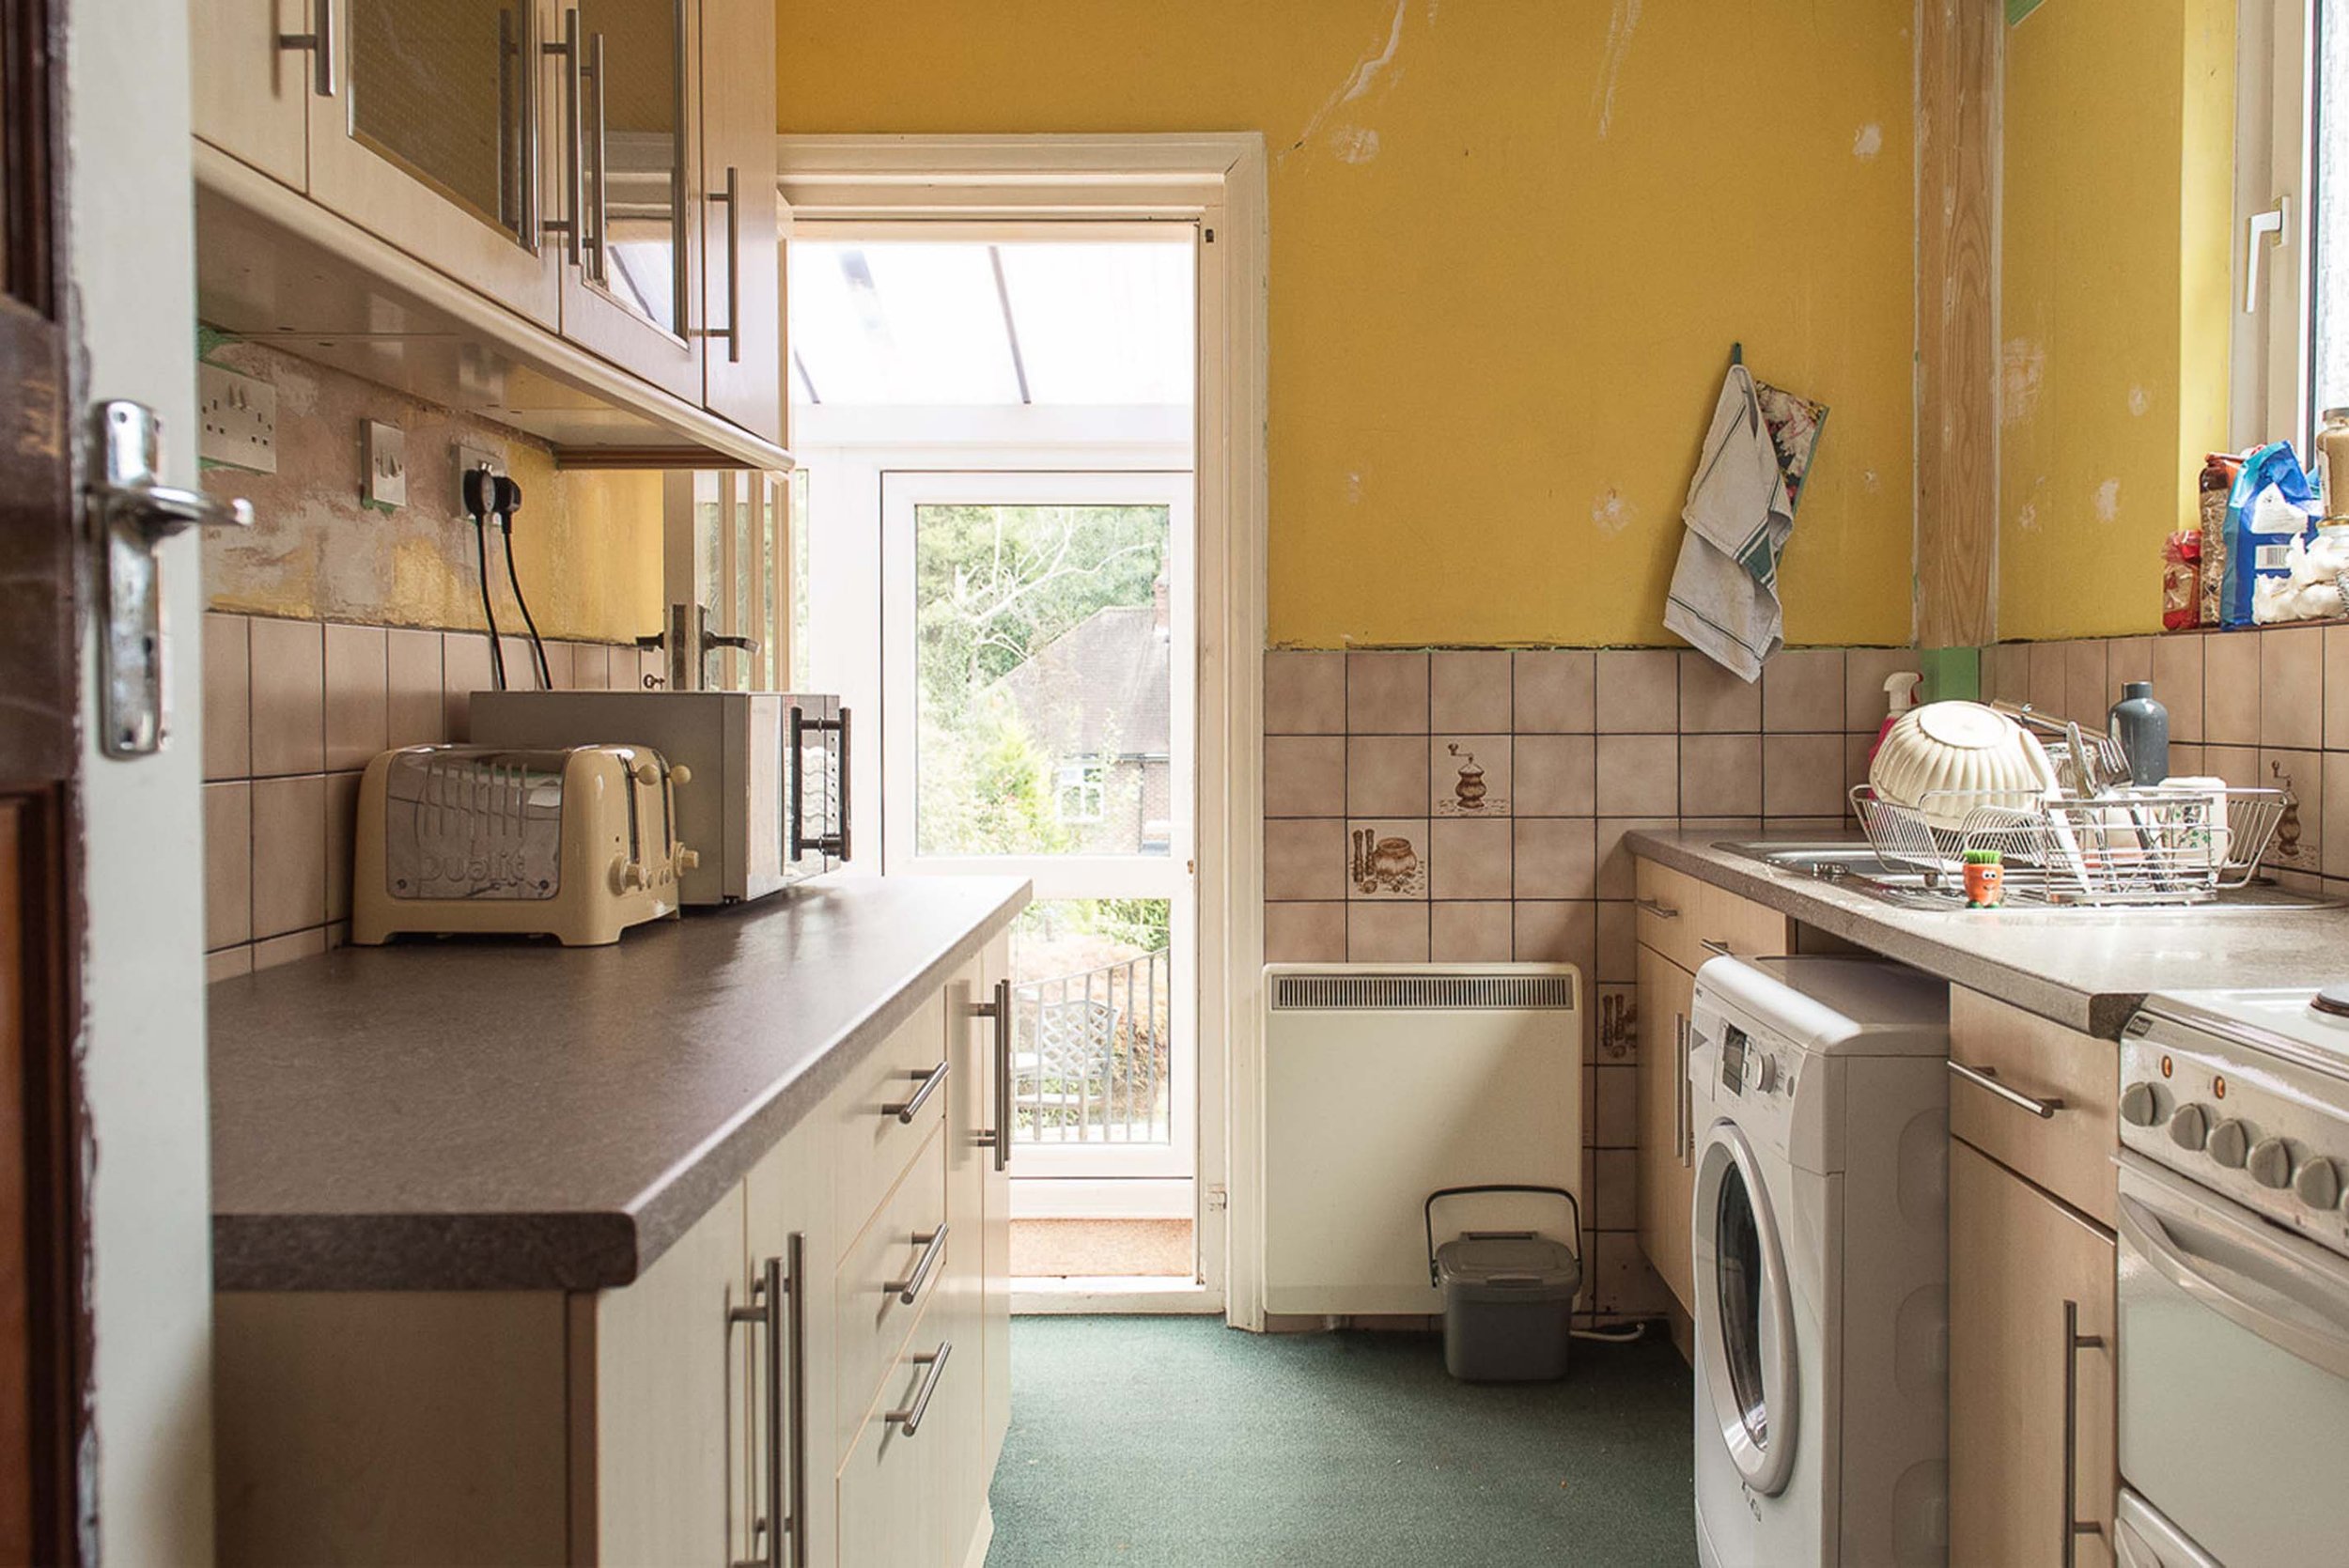
Moving into the kitchen diner. When we first started our open plan kitchen diner renovation (the biggest project so far on the house) we were adamant in keeping light flowing right through the house from the back door, to the right dining room window and into the hallway. We love this angle when we walk into the space and feel so proud of it. It’s a distinct reminder that all the dust, sweat and tears during the renovation was worth it!
Are you renovating too? Visit my shop page for a whole suite of digital products to help you with everything from budgets, to design.
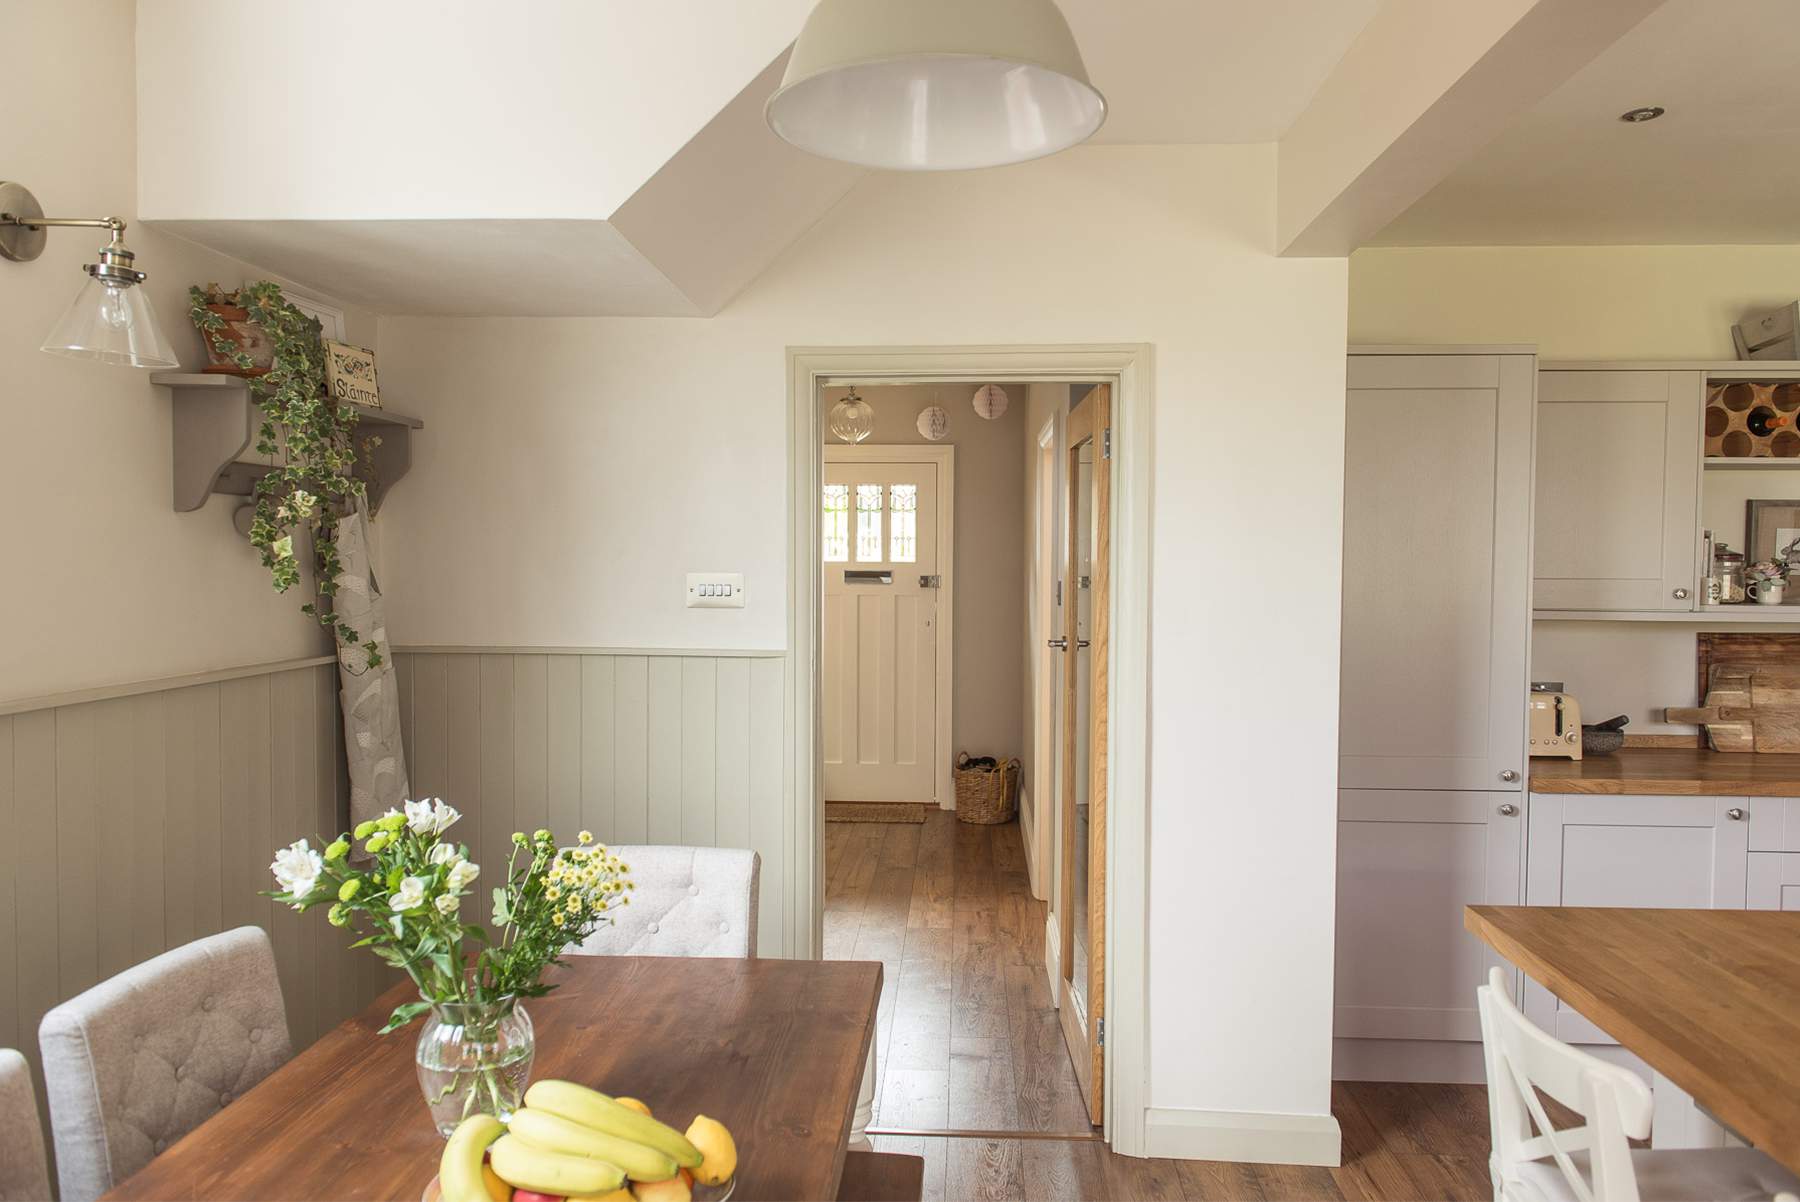
Another angle of the space, this time looking the opposite way. Crikey those walls went from bright, apple green, to canary yellow, and now (thankfully!) to a calming neutral Slipper Satin by Farrow & Ball.
Neil had the idea to wrap tongue and groove panelling all around the dining area to give it a bit more of a ‘focal point’ rather than just bare painted walls. Immediately, we knew it was a good idea. It gives the space a touch of shaker / country charm.
If you’re renovating and want to find out how to visualise your design ideas, we share step by step exercises in our renovation online course. We found throughout our whole renovation, that when you can visualise ideas clearly before you invest, it saves you a lot of time and money.
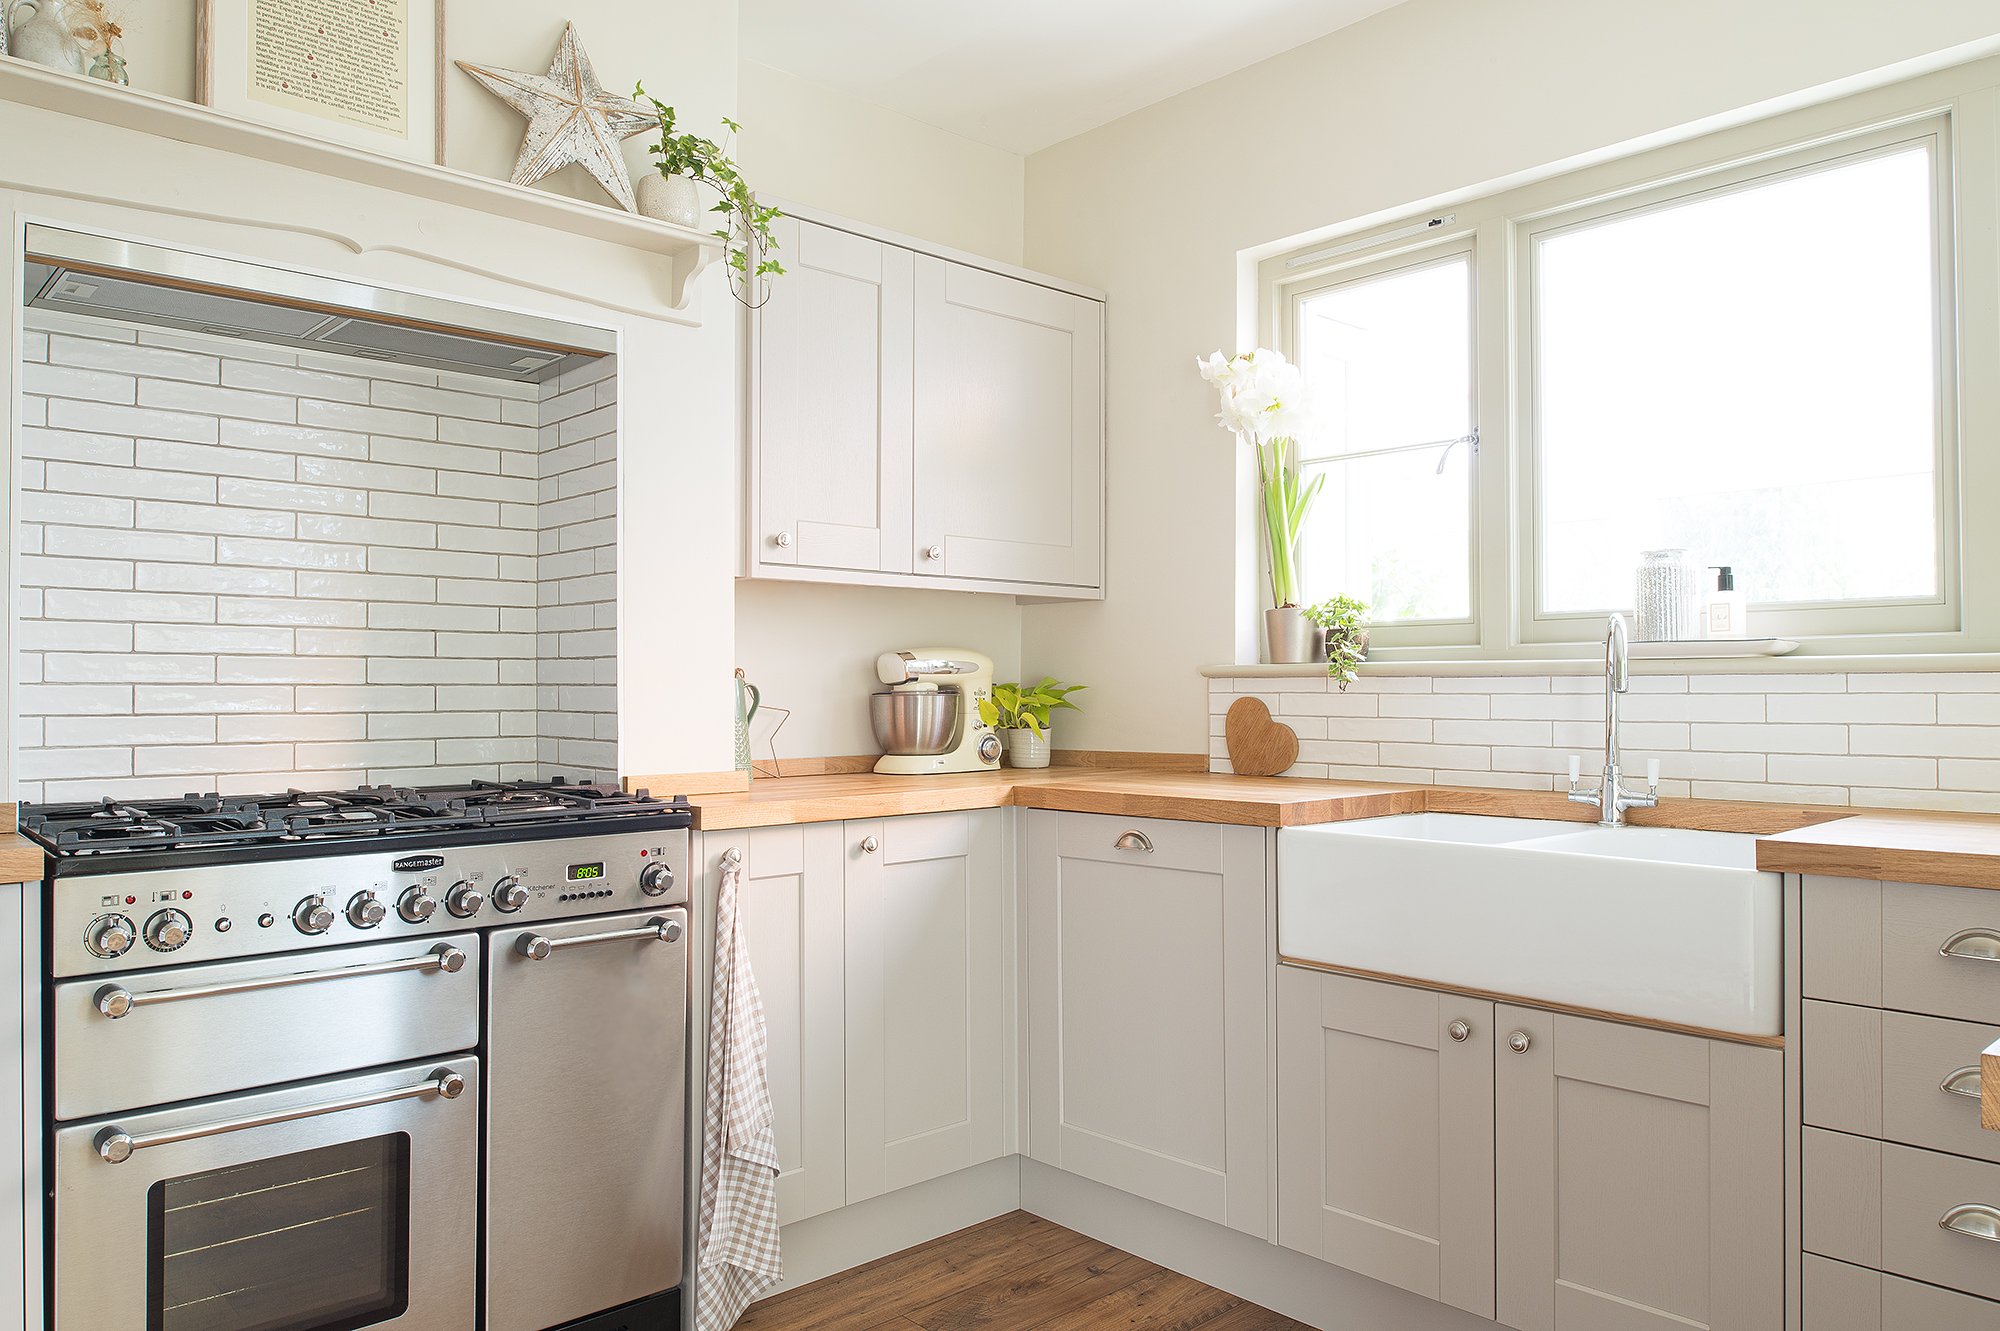
Last shot in the kitchen, and it’s where the magic happens. Getting optimum counter space for meal prepping, baking and spending time in the kitchen was key in here. We opted for a Howdens kitchen (read our Howdens kitchen review) in a G-plan, with a breakfast bar, to really utilise all angles.
Don’t ask what those horrible red patches are in the before shots. We spent hours wallpaper steaming in here, only to reveal them underneath, and it felt like an eternity we had to look at them!
Think you’ll agree it’s a far cry from the room it once was! We have a plethora of information on here about our kitchen renovation if you’re interested in learning more.
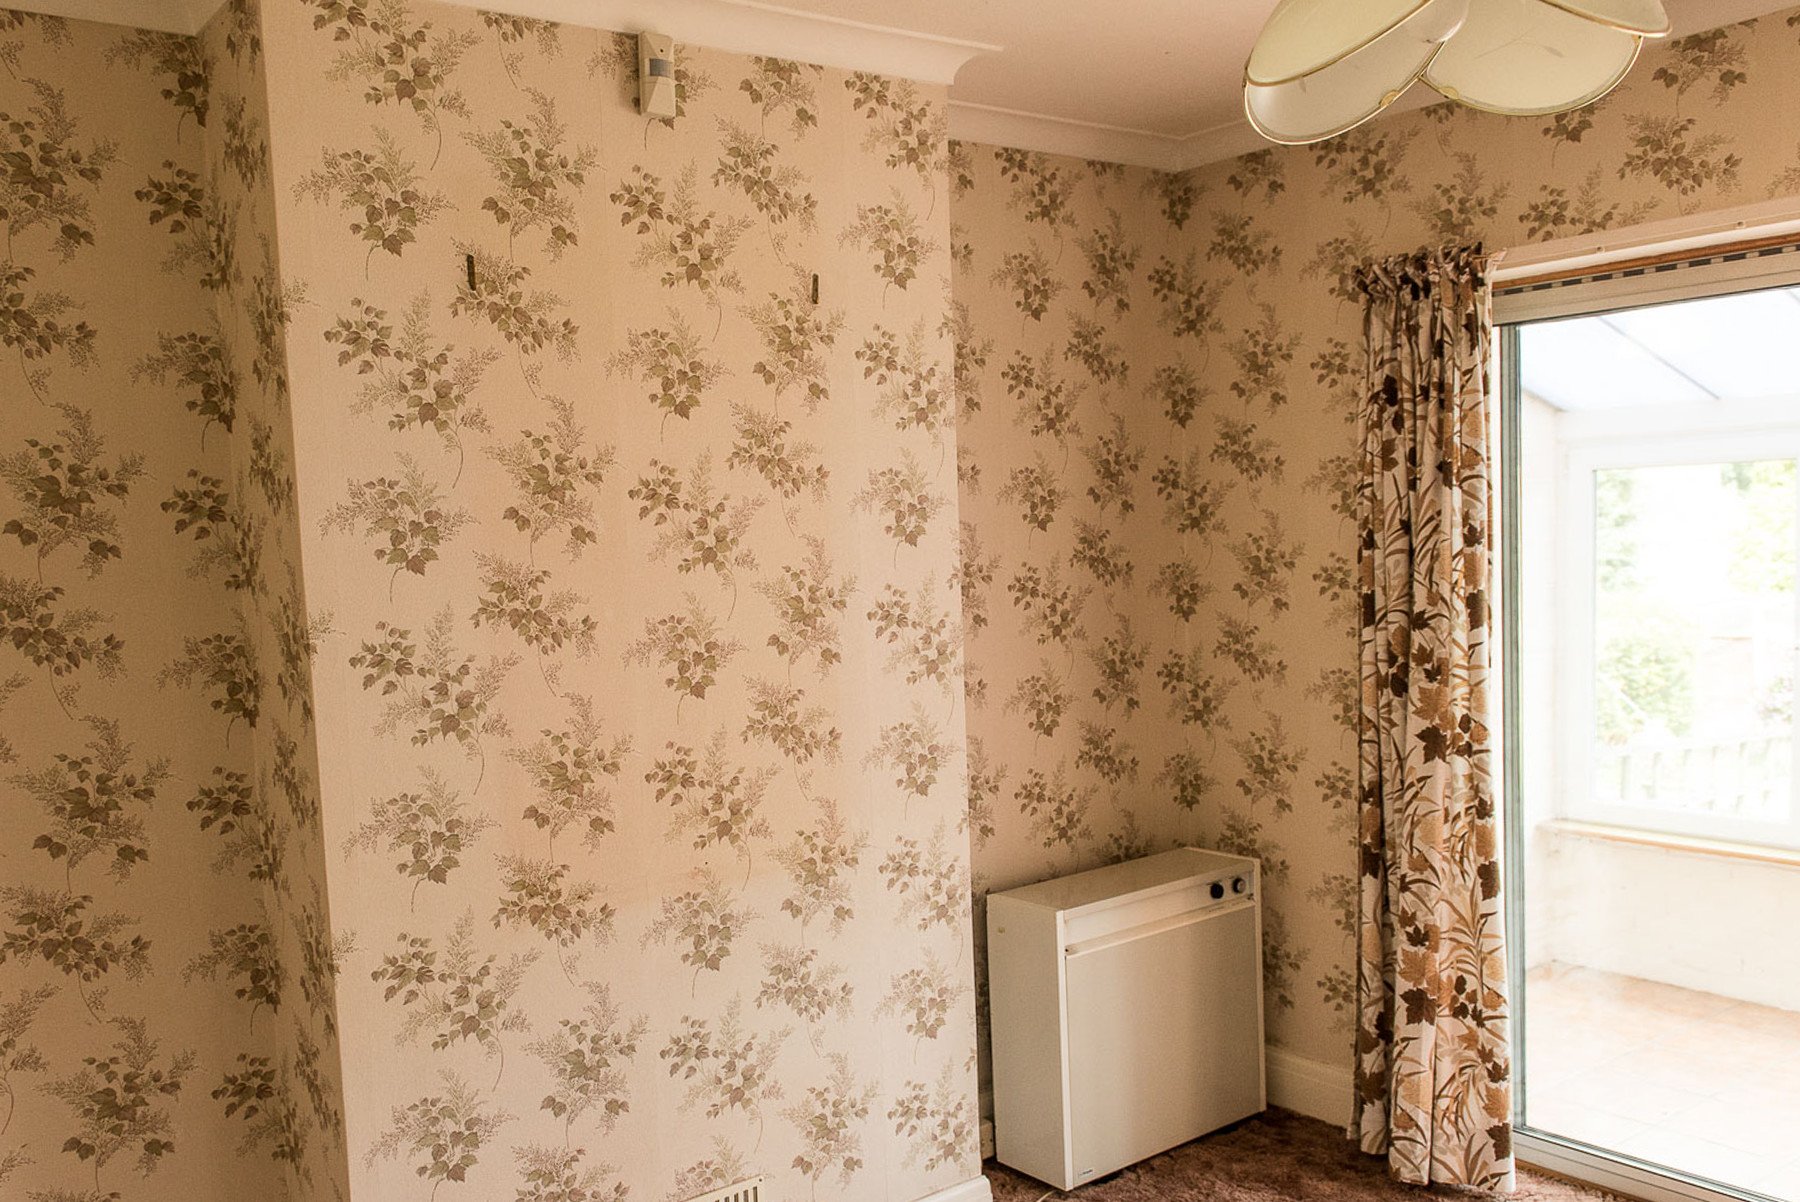
The Master Bedroom - Before and After
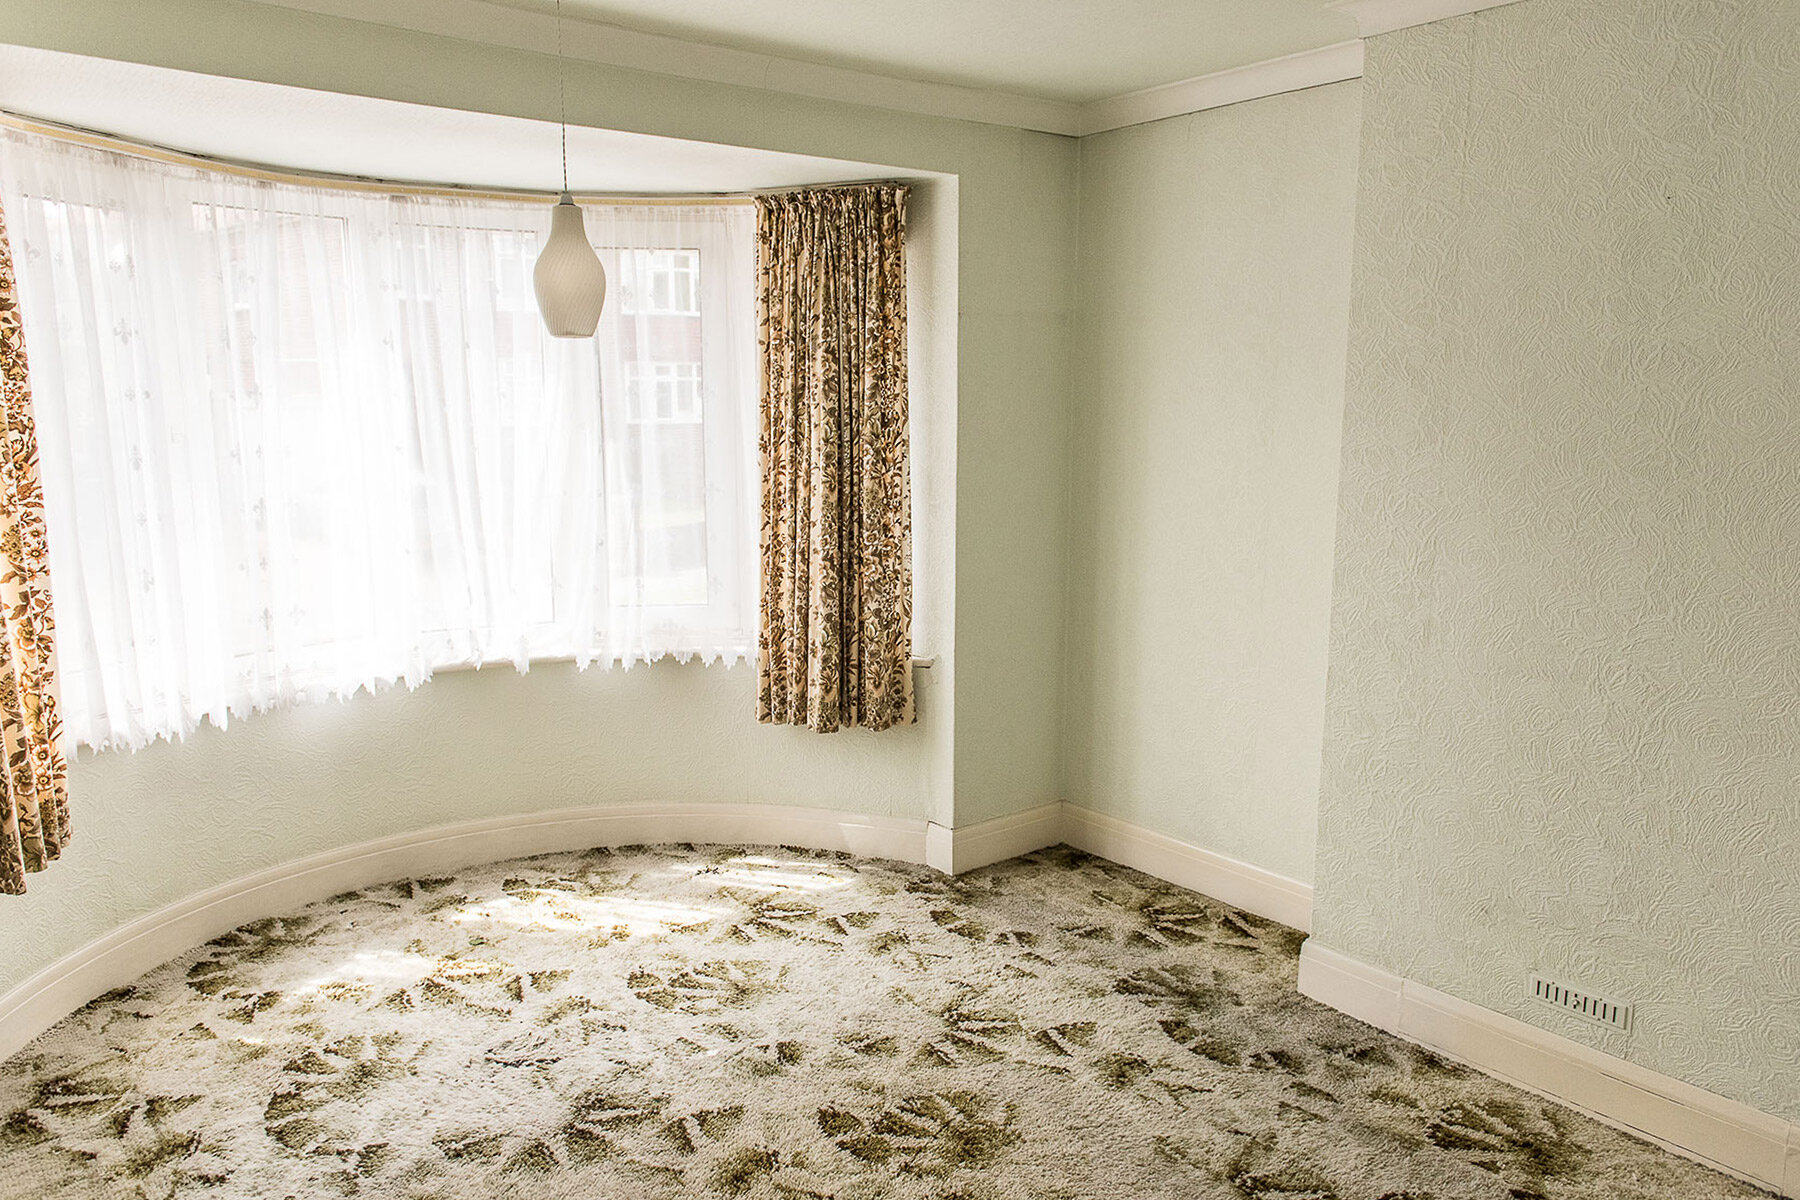
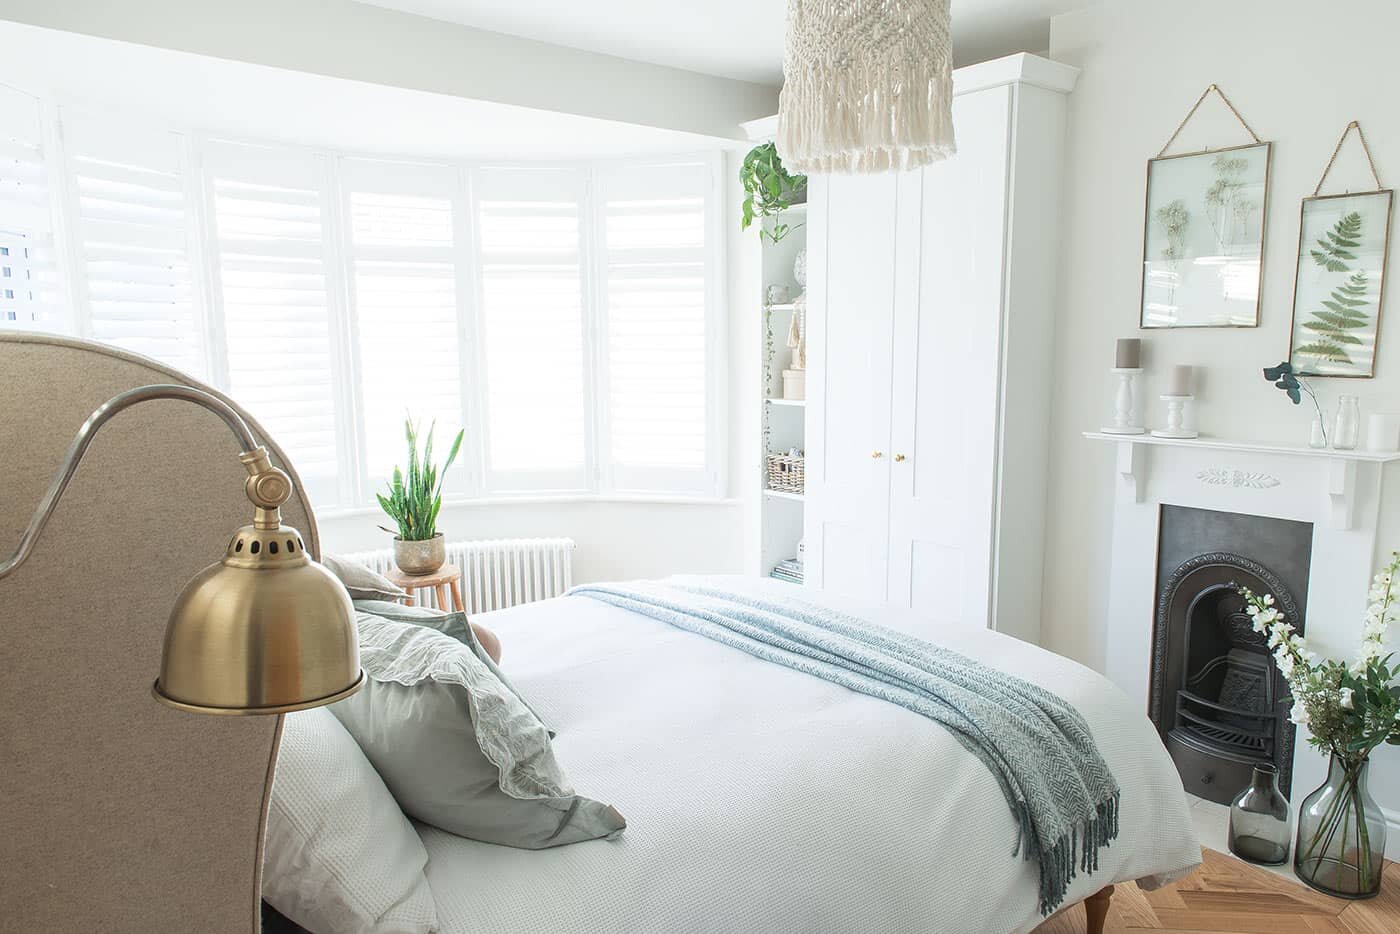
Our master bedroom had many challenges, but Covid-19 was probably the biggest bugbear, with disrupted supply chains and contractor delays. But we got there in the end and we are super happy with the result. The bay window makes the room the brightest and airiest spaces in our home. We achieved our goal of creating a practical and beautiful space with the use of fitted wardrobes, parquet flooring, shutters and smart electrics. Make sure to check out our master bedroom post.
The Bathroom - Before and After
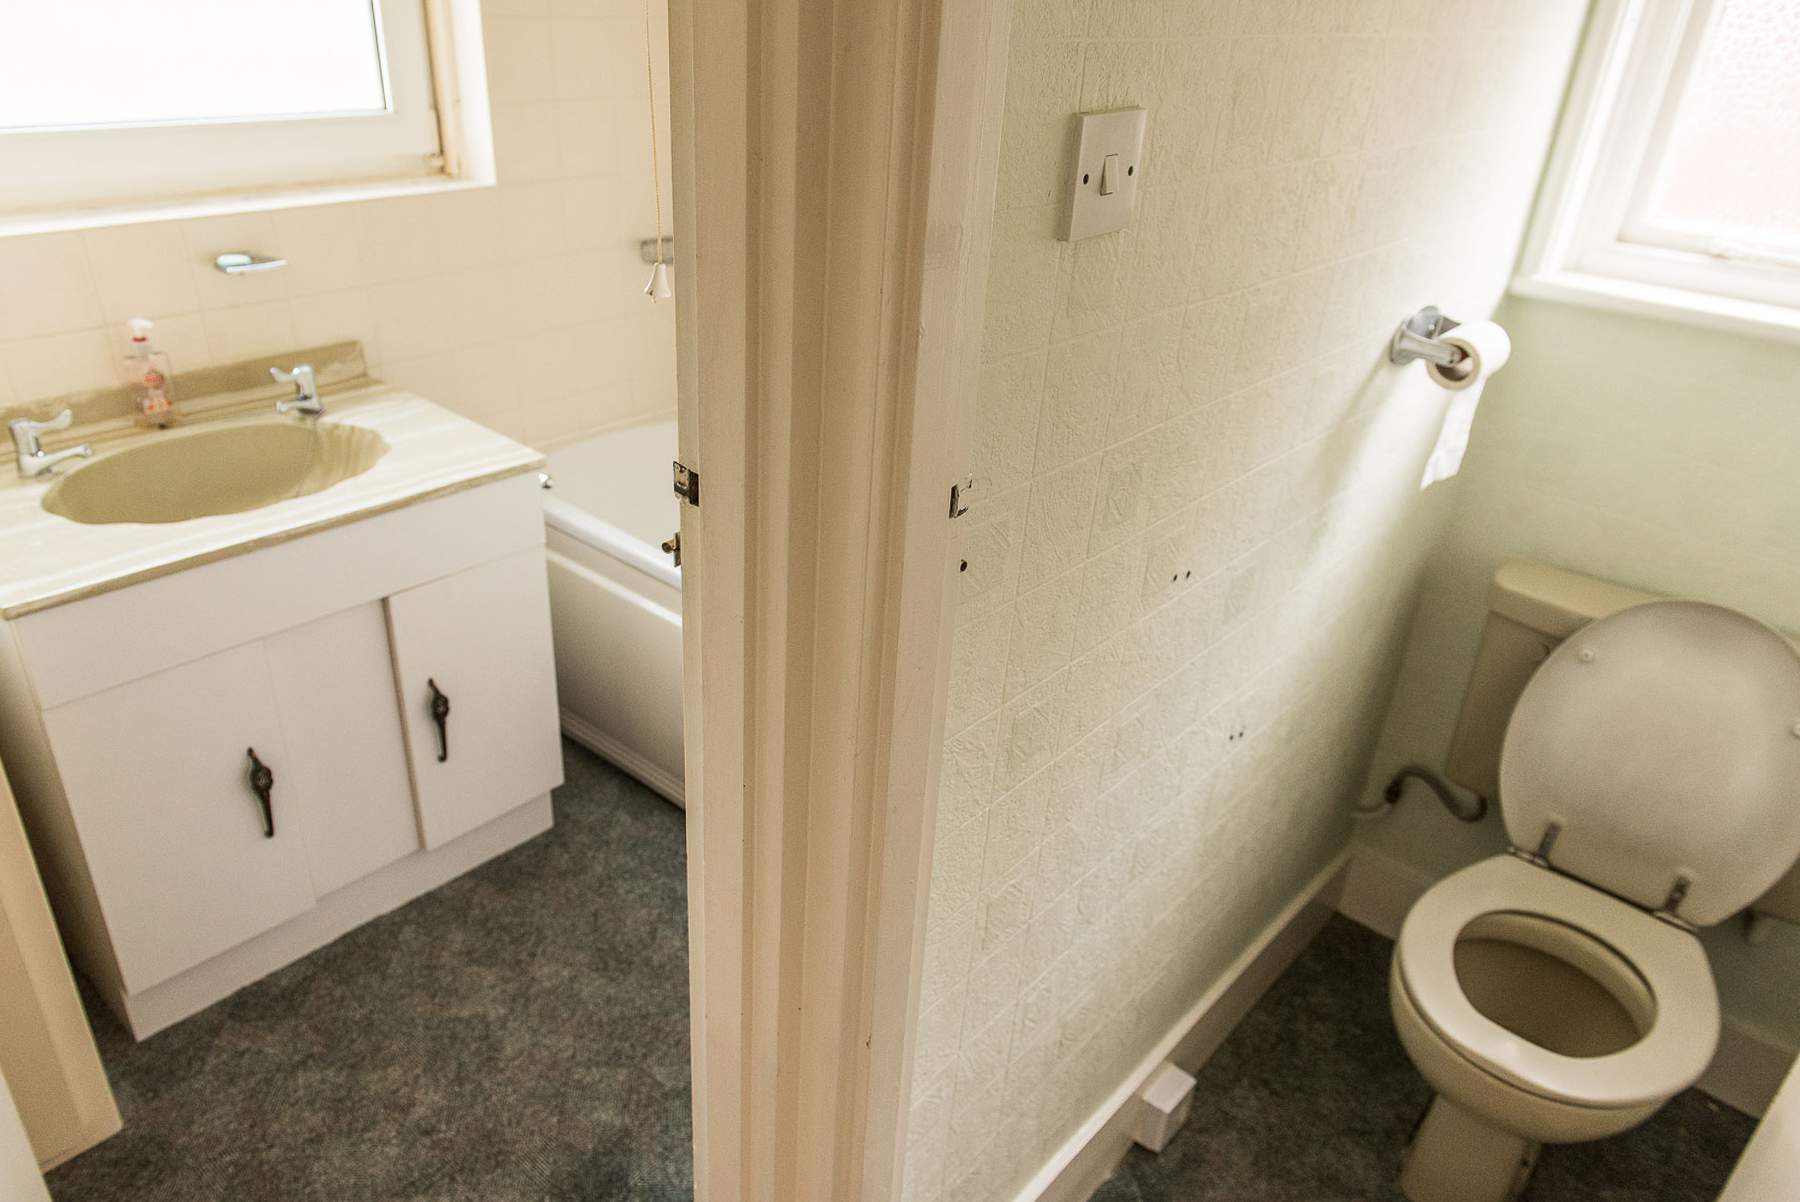
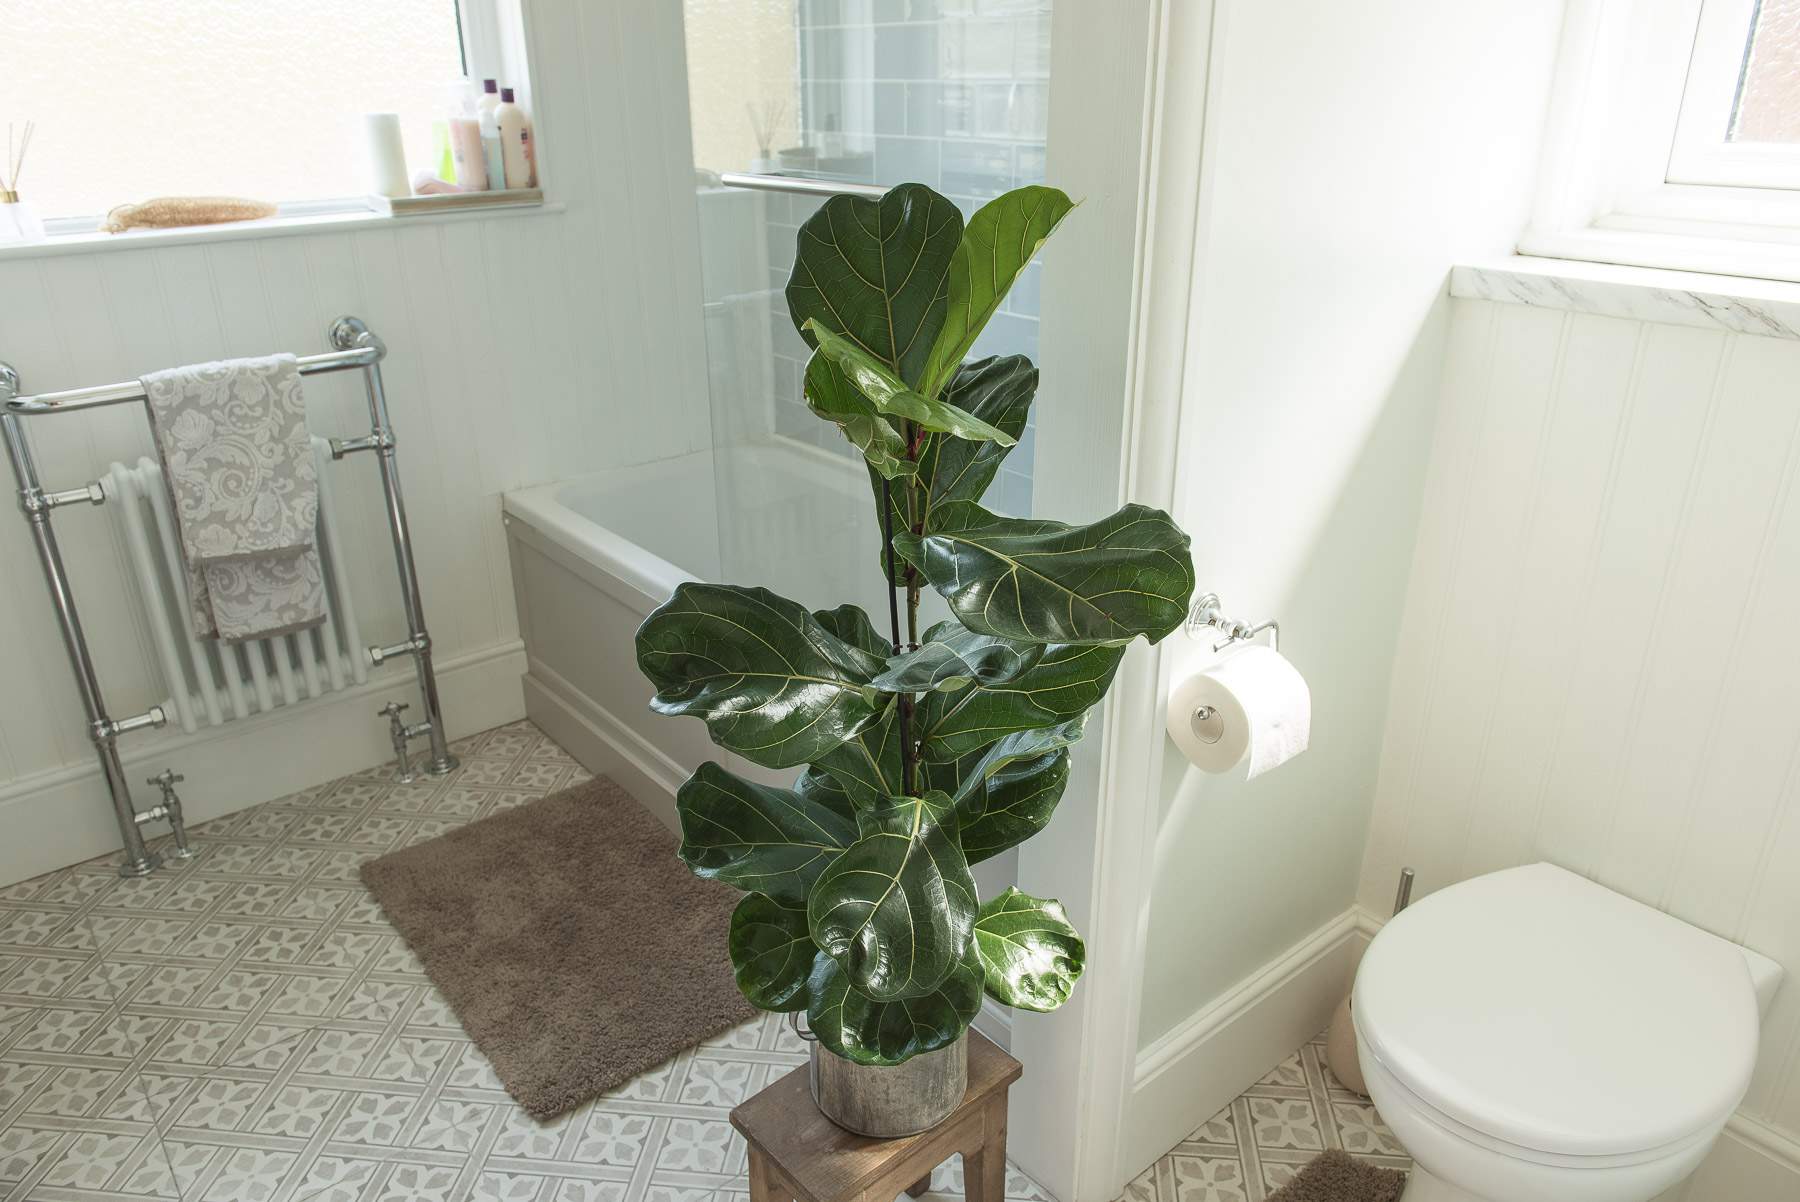
Now upstairs to the family bathroom which was once separated into a bathroom and a loo. We didn’t have a huge amount of money to spend on the bathroom renovation, so where possible we tried to cut costs like plumbing, keeping the layout pretty much the same.
We really lacked head height for a shower in this room too, so it made sense to just partially remove the separating wall to make it one big bathroom, and use the leftover part of the wall as the shower.
When my family comes to visit they love this room. They say it’s like a little taste of a spa! We don’t know about that, but we are really pleased with the neutral, relaxing scheme we’ve achieved in here.
Interested in seeing more? Take a look at our bathoom renovation post.
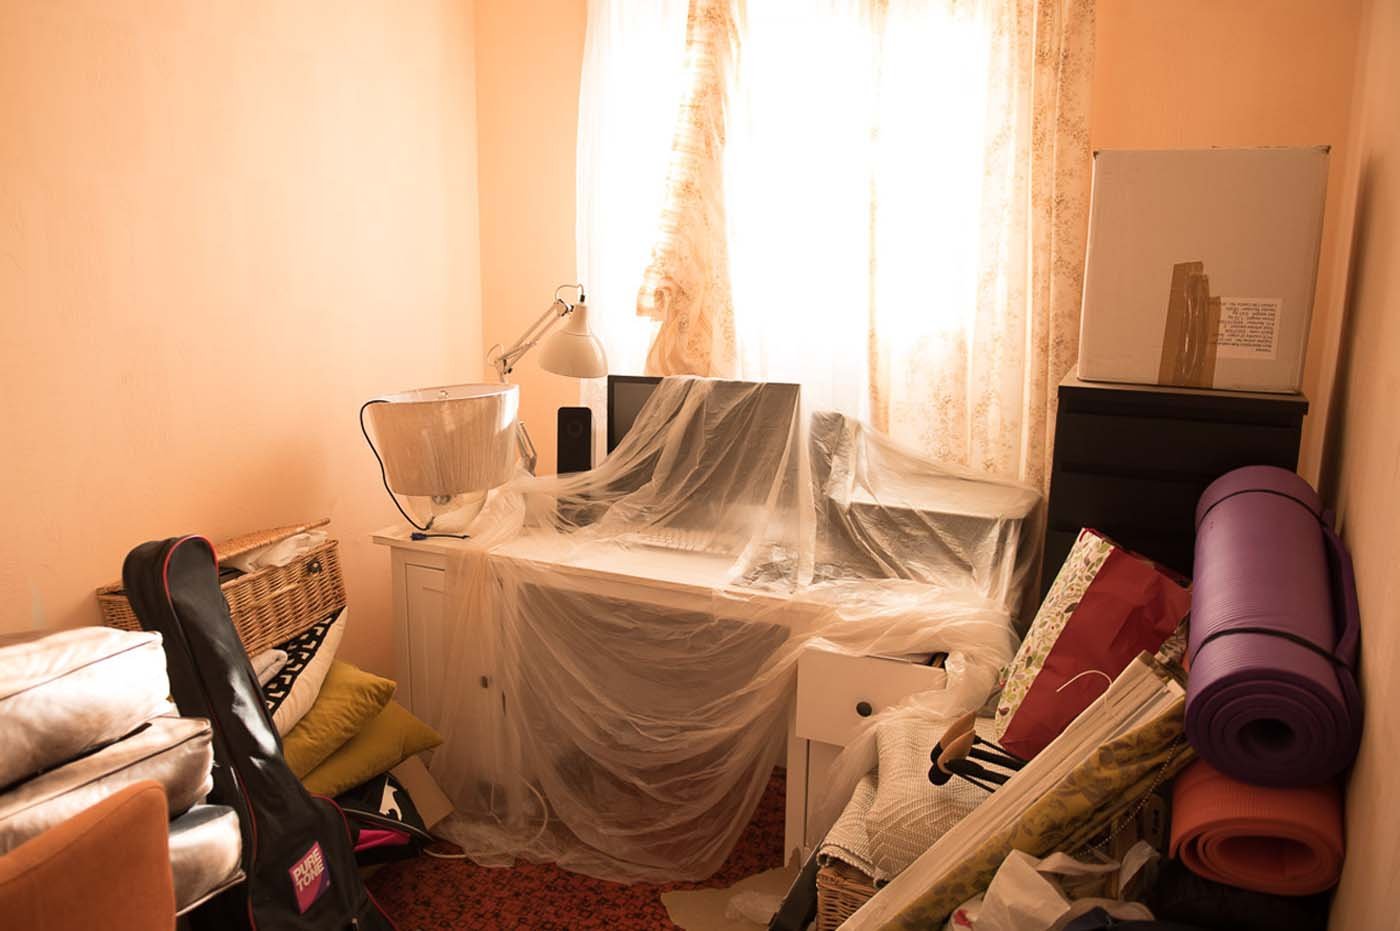
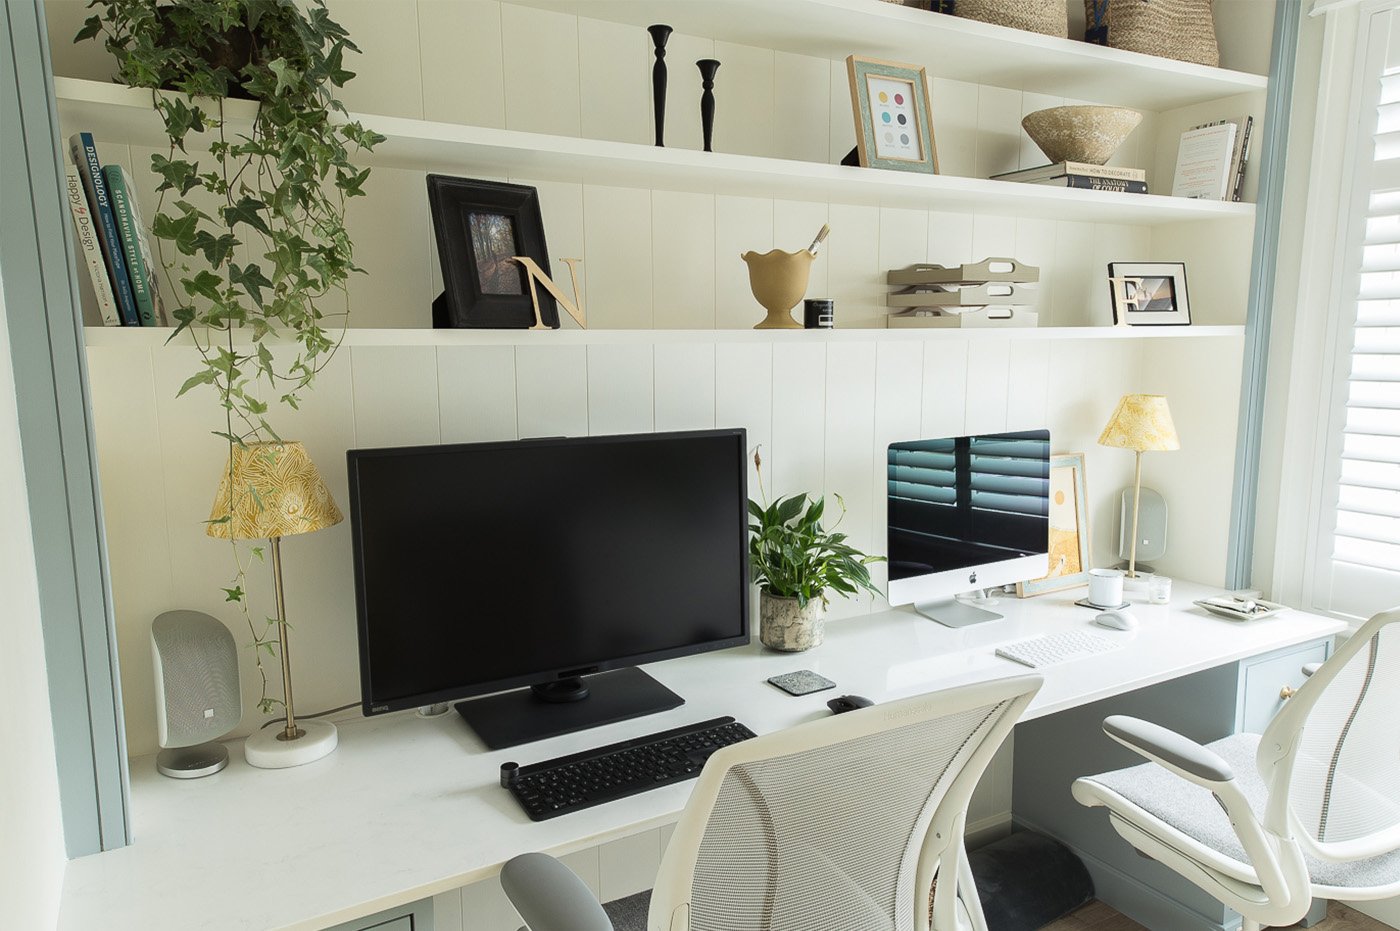
The Office
OK we might be cheating here by showing the worst ‘before’ shot known to humanity! Nevertheless, this office project was one of our proudest transformations of our renovation. Since we spend the majority of our time in this room, every element was planned, designed and custom built specifically for our every need. Fi’s interior design knowledge combined with her home design process, meant that we were able to achieve a fresh, cohesive and timeless style that considered all of our requirements.


The Utility Room - Before and After
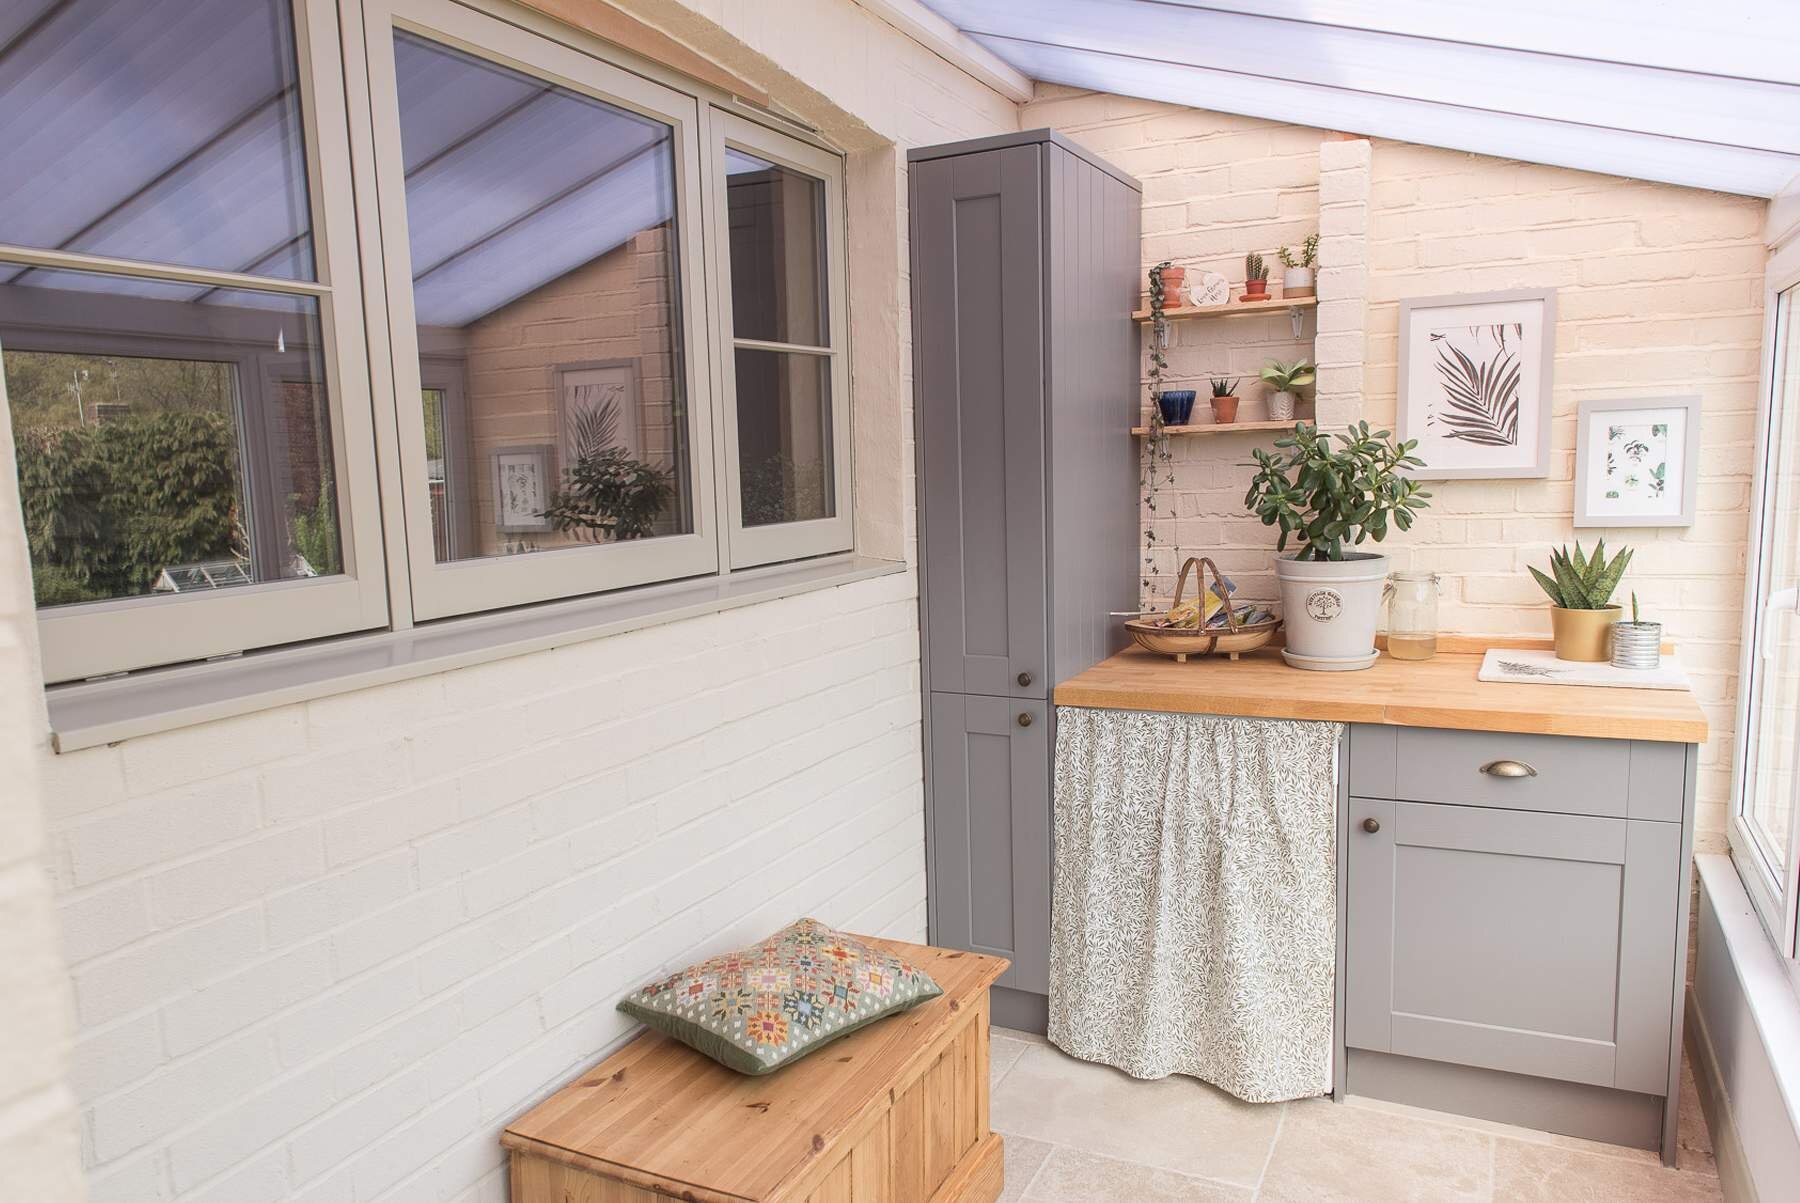
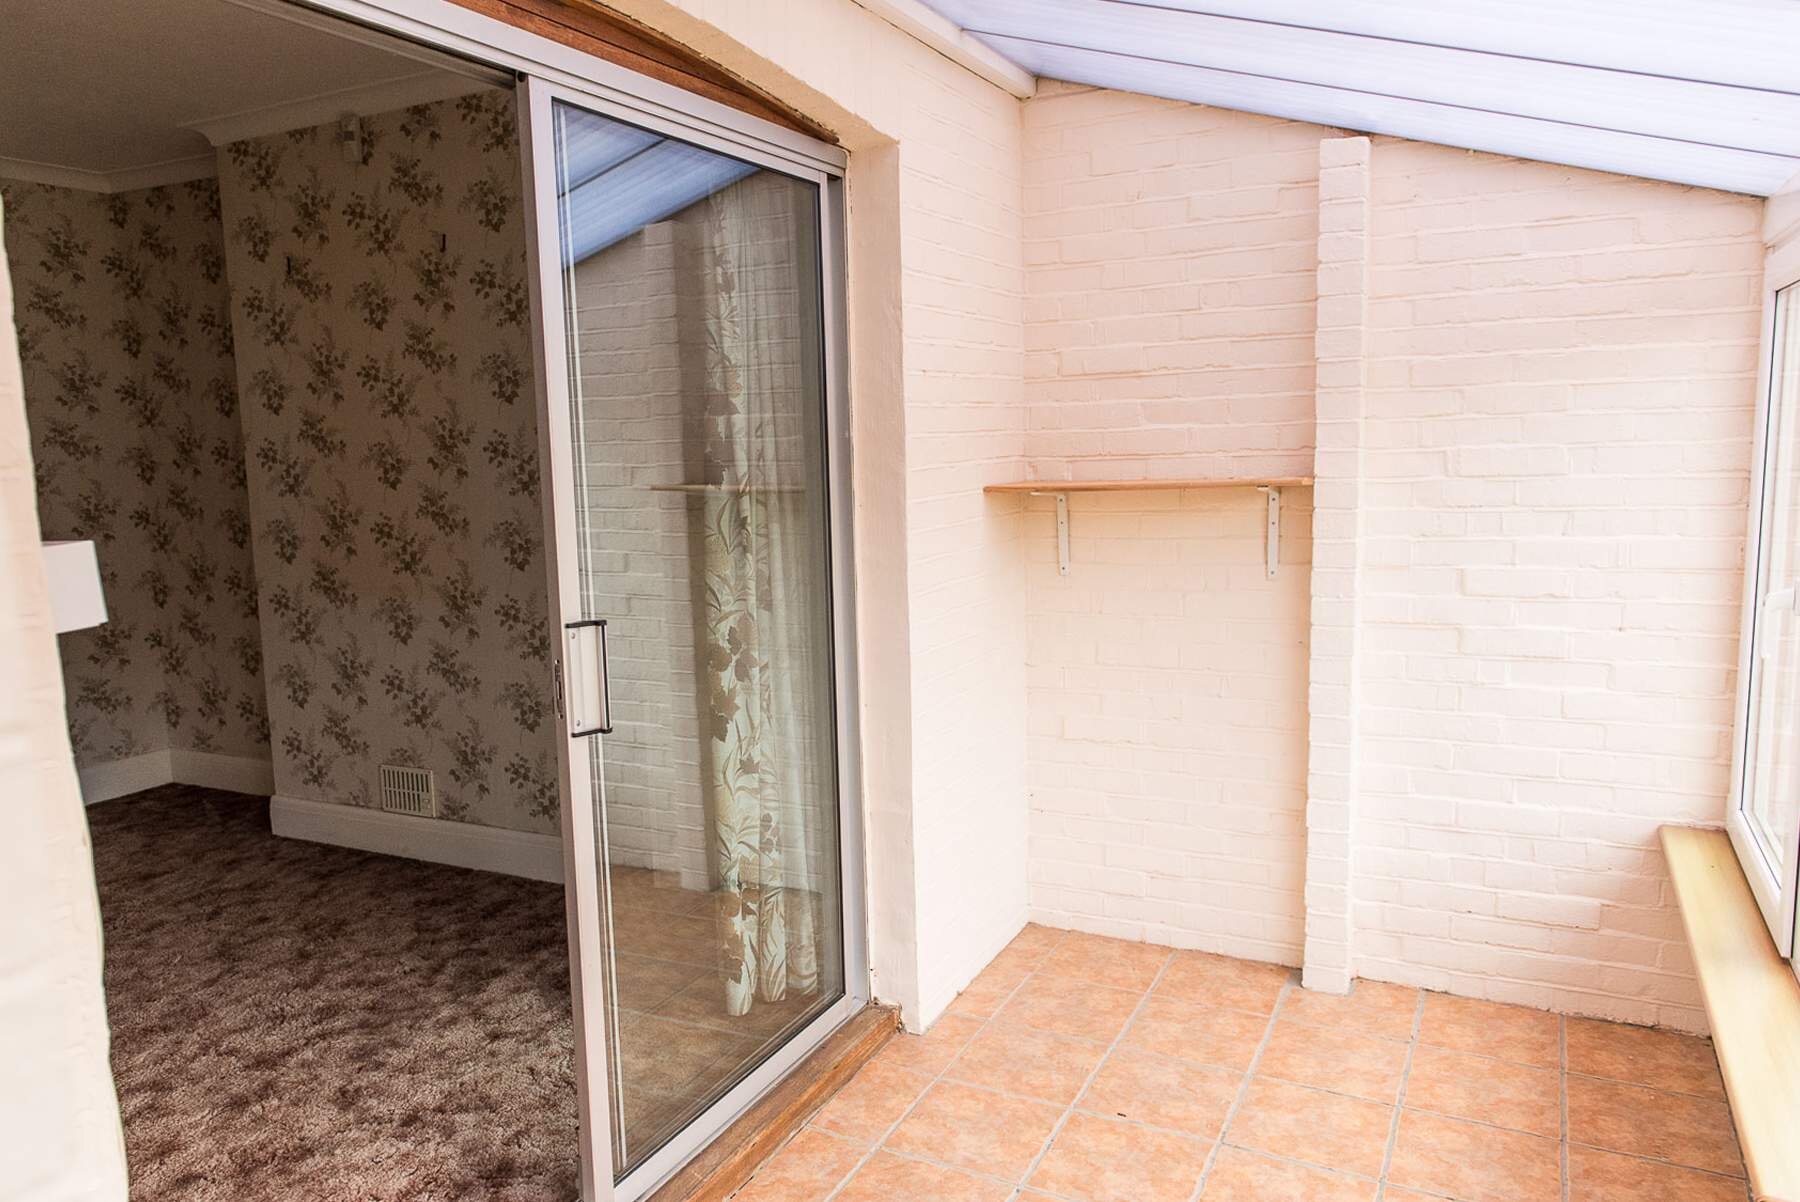
We decided to abandon our £80K kitchen extension idea and instead went with a more humble design, working with the existing footprint of the building. We’re big advocates now of asking yourself hard questions about what you really need.
This space is a lovely functional space now for washing and drying clothes and it’s also a great place to sit and watch the birds eating all of the food we’ve put out for them! We’re looking at replacing the roof for something a little classier when we get around to it which is going to look even lovelier.
That’s a little sample of what’s been happening in our house over the last few years. It’s been tough but we’ve thoroughly enjoyed learning and blogging it all throughout the process.

Need help with your renovation? We’ve distilled everything you need to know to save you time, stress, money and months of research, into our renovation online course - for first time renovators. If you want just a little taste of what is inside the course, check out our FREE renovation guide.
Thanks for reading!
Neil and Fi xoxo
Update: Like what you see?
Fi is now an interior designer in Sussex offering a design and renovation support to local and national homeowners. If you’re looking for design or renovation support, take a look at her services.