Our Master Bedroom Renovation – Before + After
/This post contains gifted products + affiliate links. See our disclosure policy.

Most of you reading this will already know about our current renovation project but in case you’re new to Fifi McGee, you can catch up on our full 1930s semi detached house renovation.
Since the day we got handed the keys back in 2016, we’ve documented every inch of wallpaper removal, avocado suite tear out and all the unique discoveries we’ve found beneath the floorboards and between joists in the loft!
It’s been such an exciting period of our lives, renovating a house step by step. Every time we get to share another room transformation with you, there’s no feeling like it.
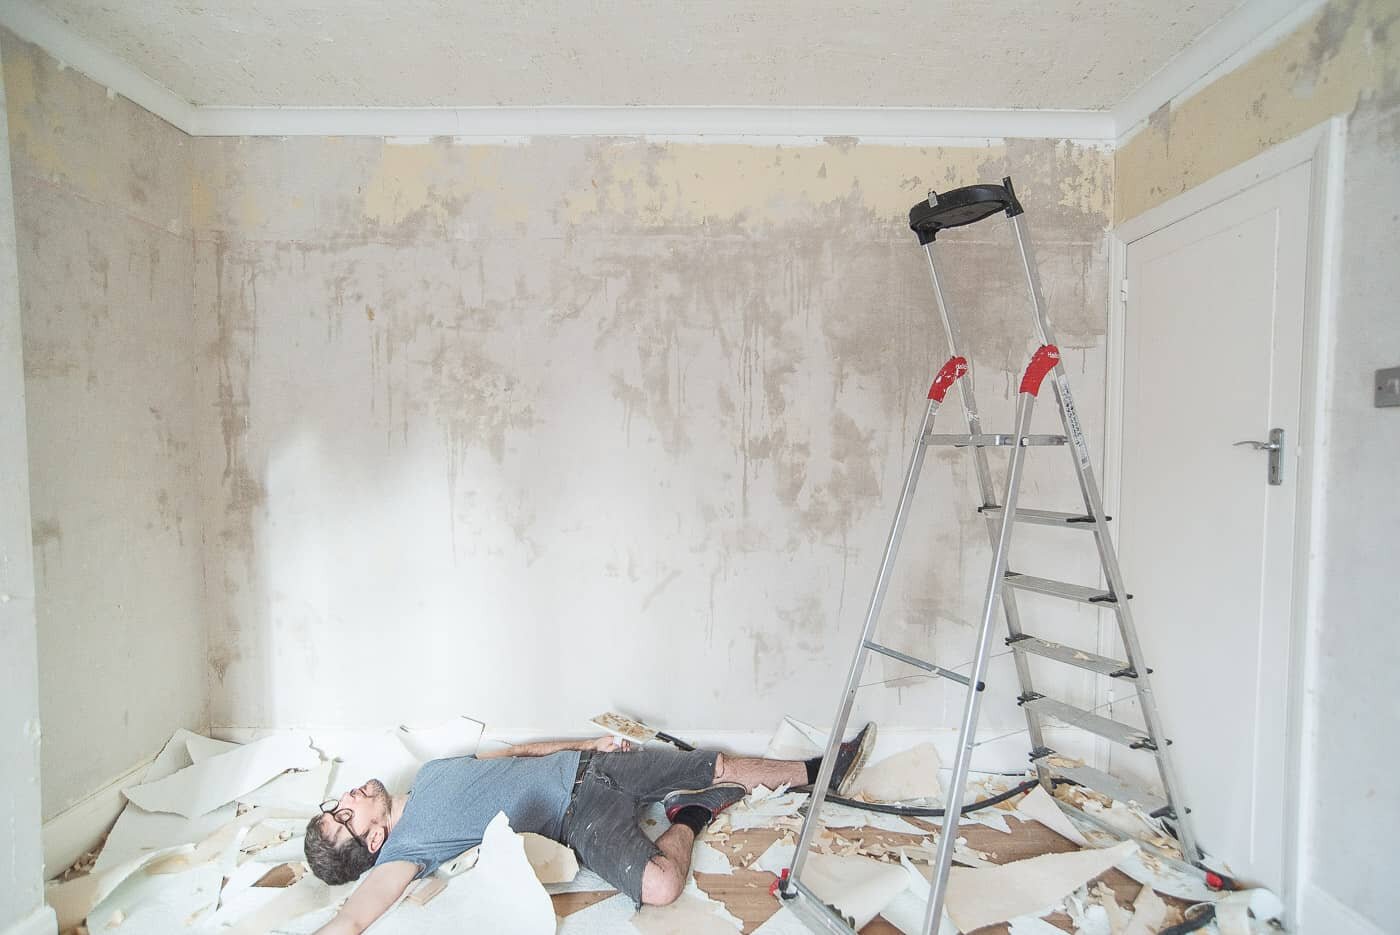
A few weeks of planning and designing the room led to over a year of trying to bring it to life. Covid happened, the supply chain was flattened, lead times were crazy in our industry, then so many items were taking months to be delivered. We just didn’t want to compromise on anything so we started, stopped, started and stopped again, experiencing all the elation, exhaustion, and relief now it’s done. Only renovators will know that cocktail of emotions when you finally get a room complete and it was a rocky ride but you bloody love it!
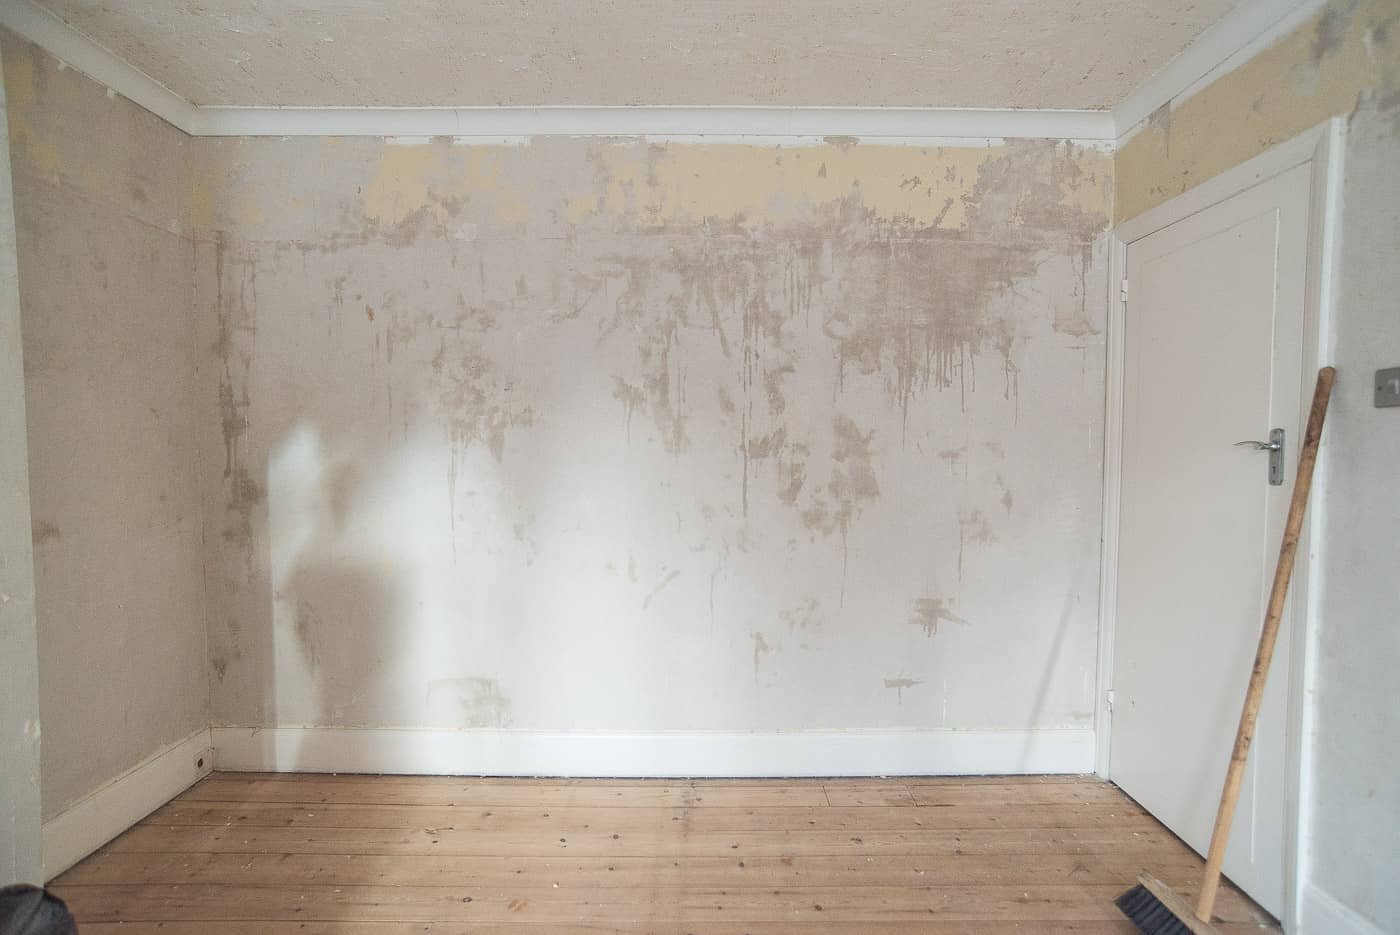
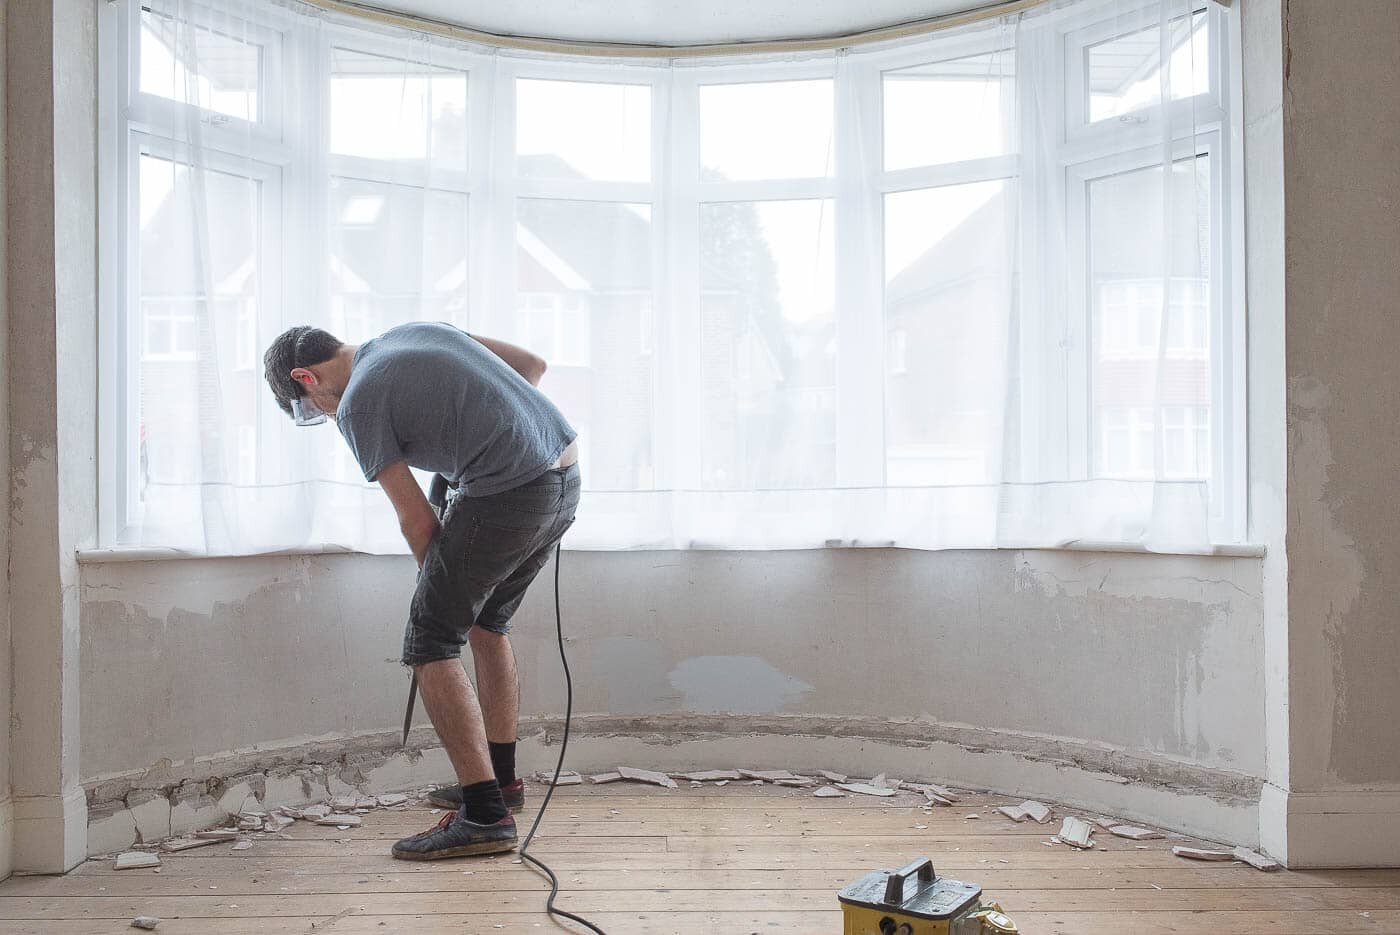
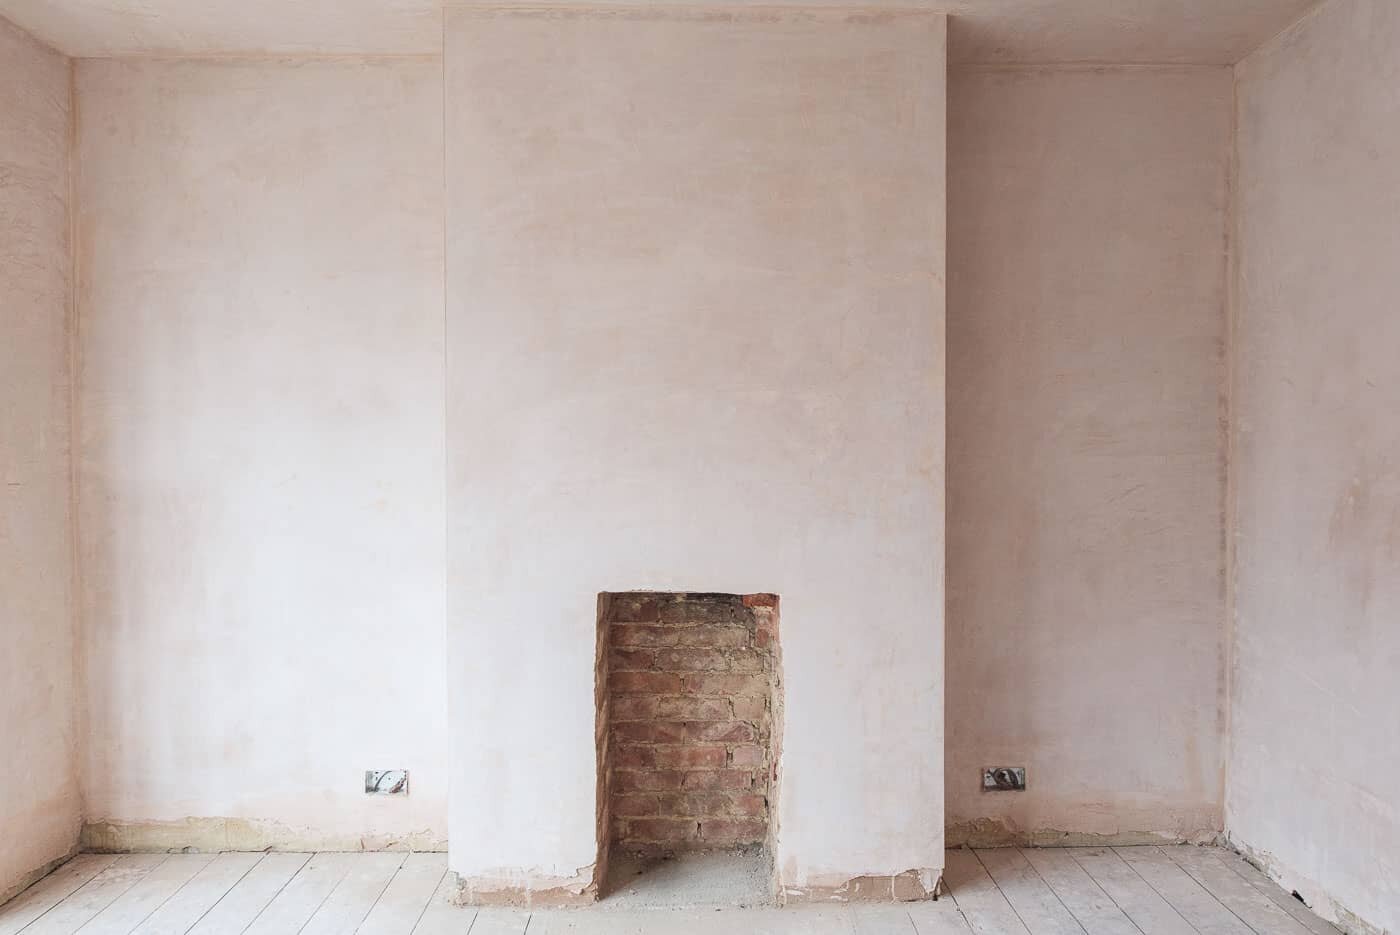
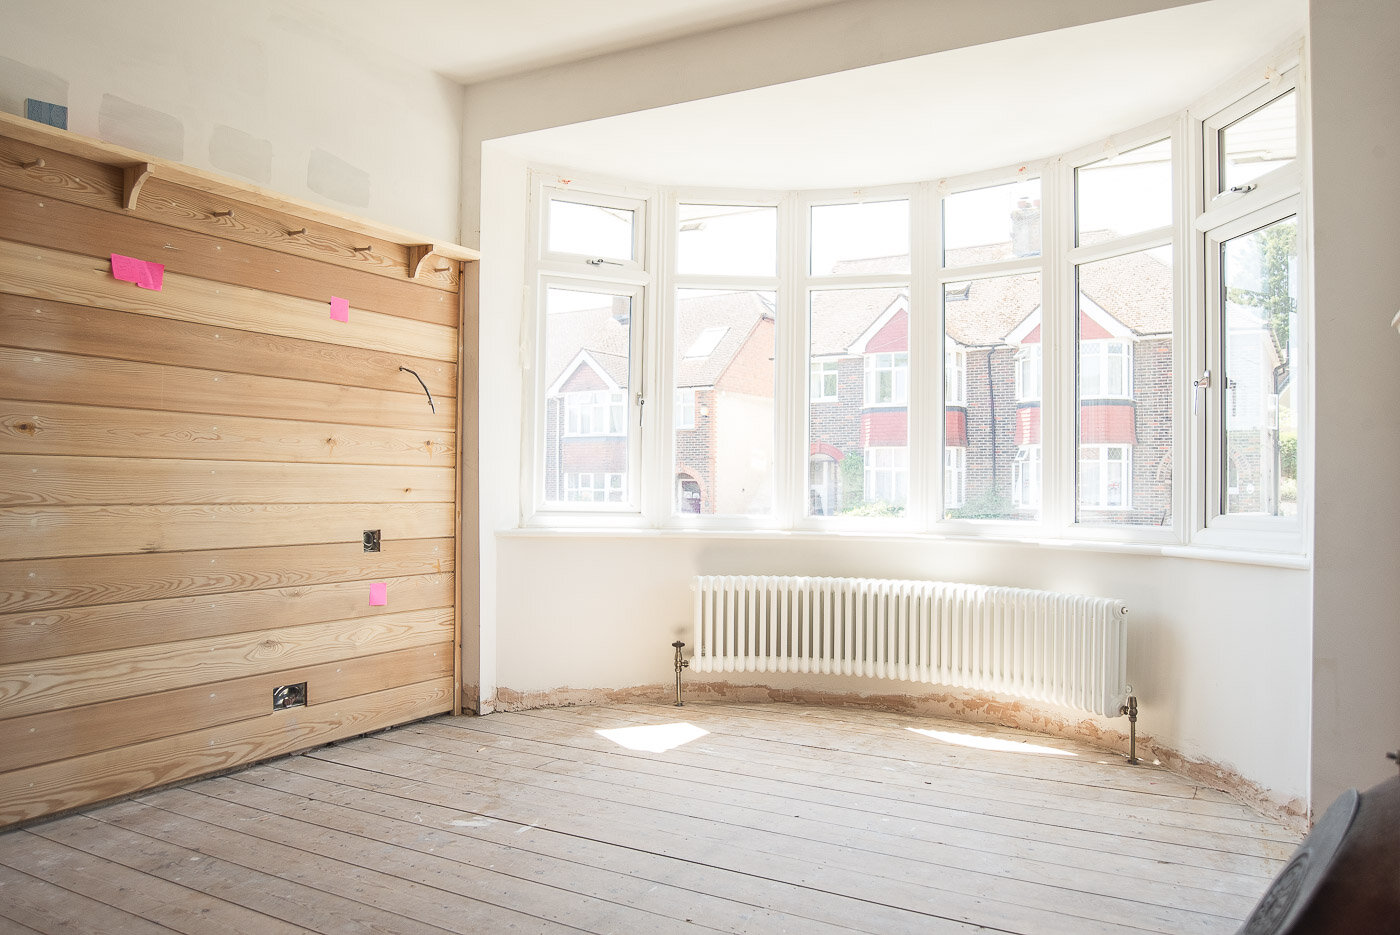
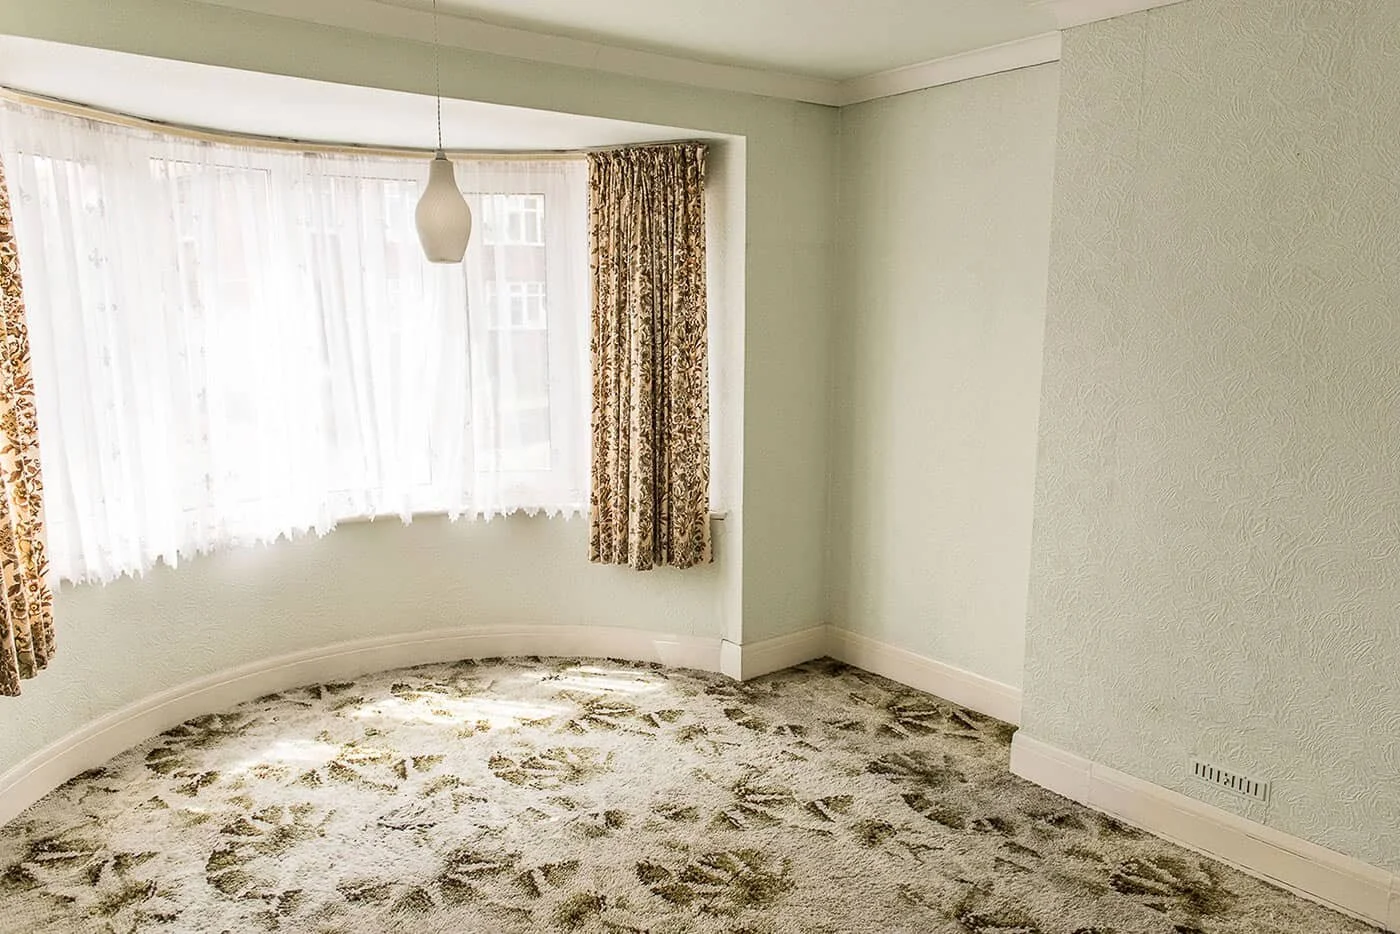
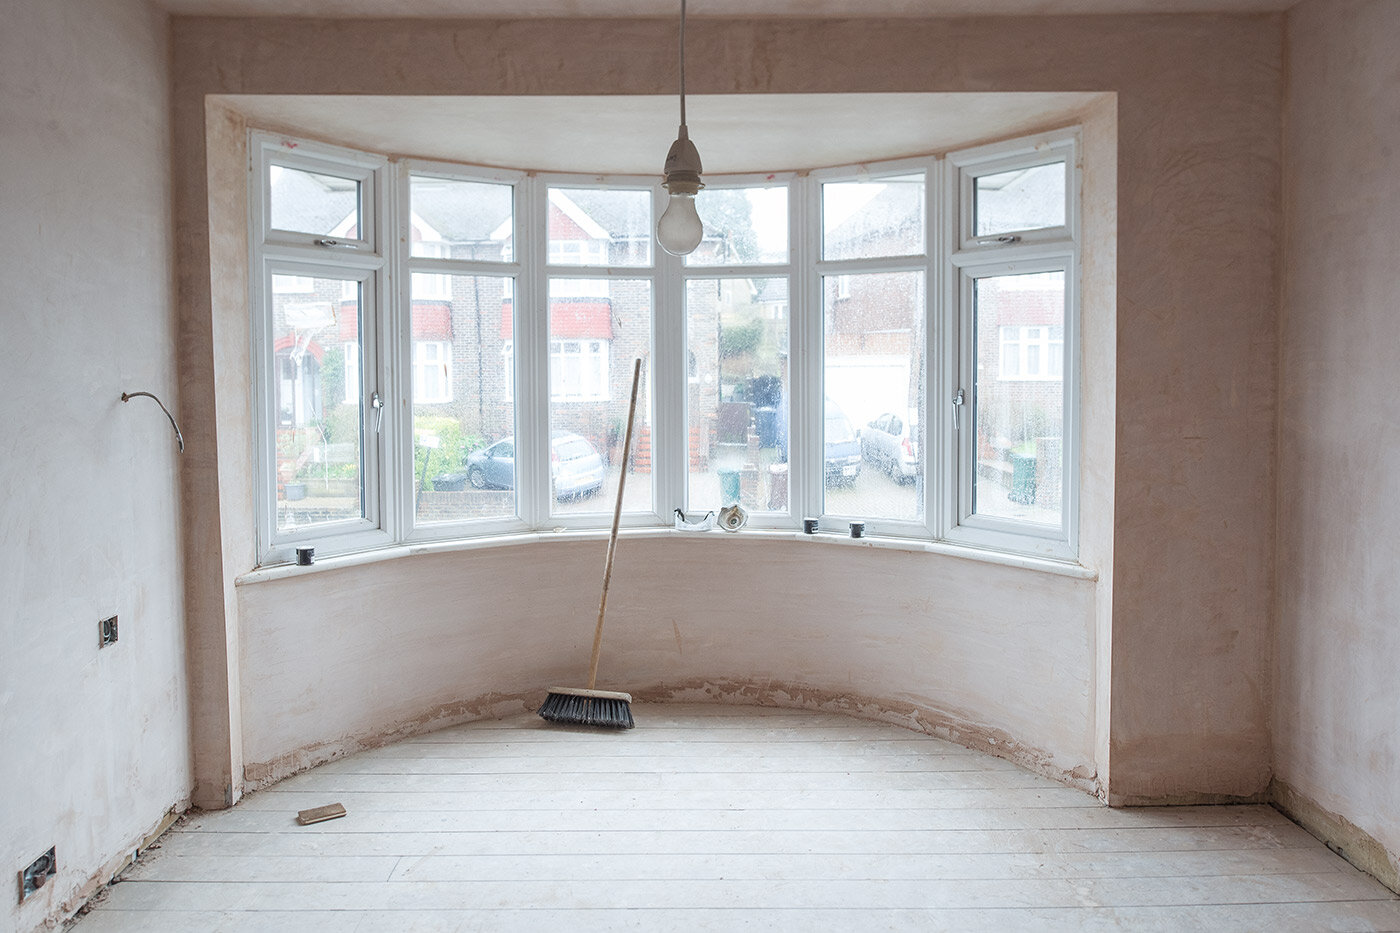
So let’s rewind to 2016, and just remind ourselves how dated the Master Bedroom was when we came to view the property.
How the room looked before
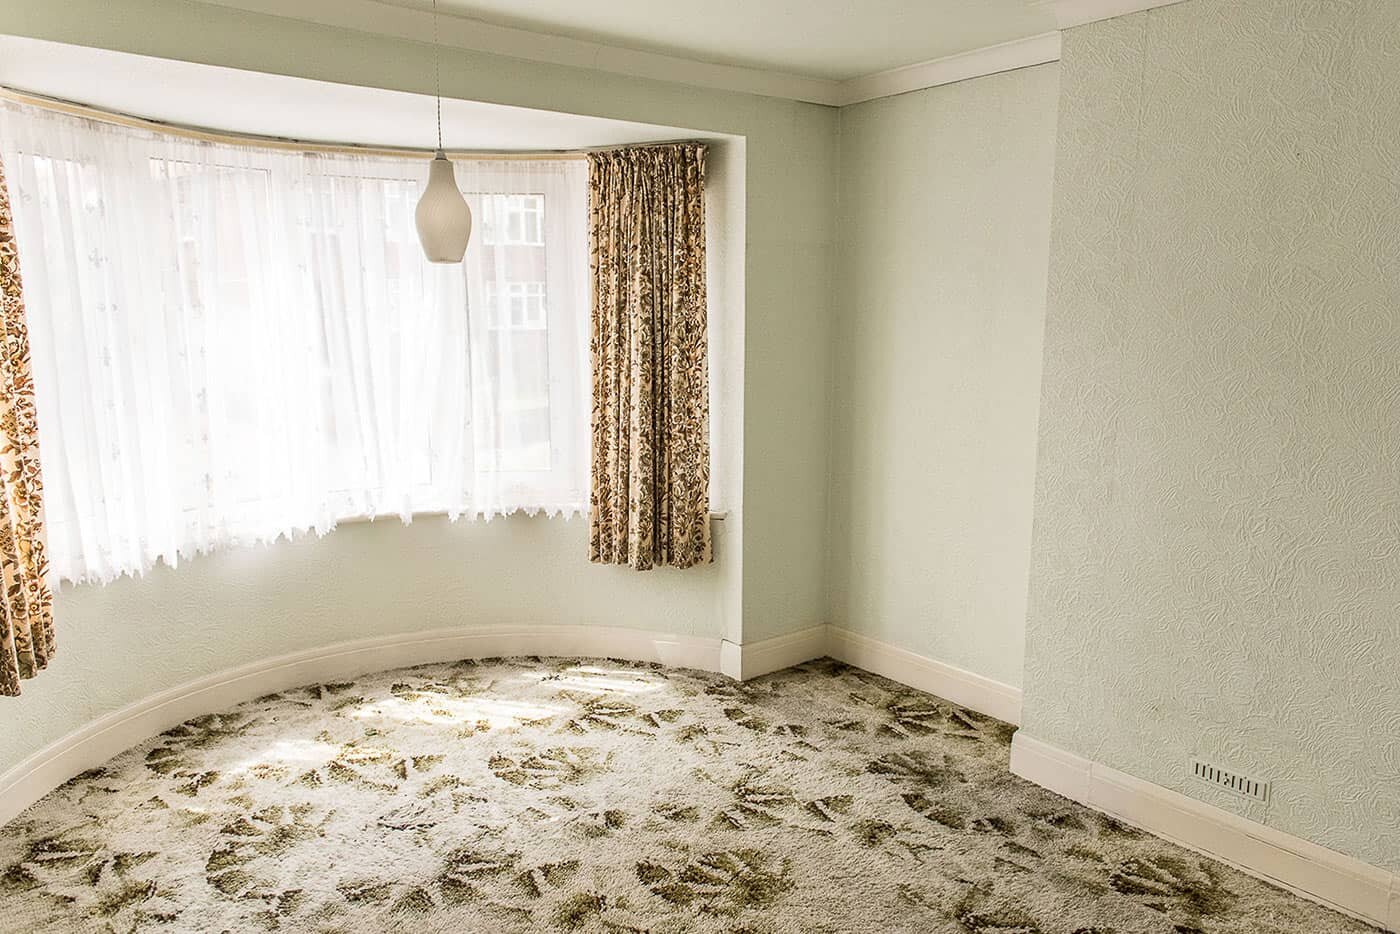
I’ll never forget when the (incredibly hungover) estate agent said to us “the previous couple said they felt an energy in this room” as we circled around the bed admiring the bay.
Our response? …😳
His comments didn’t stop us!
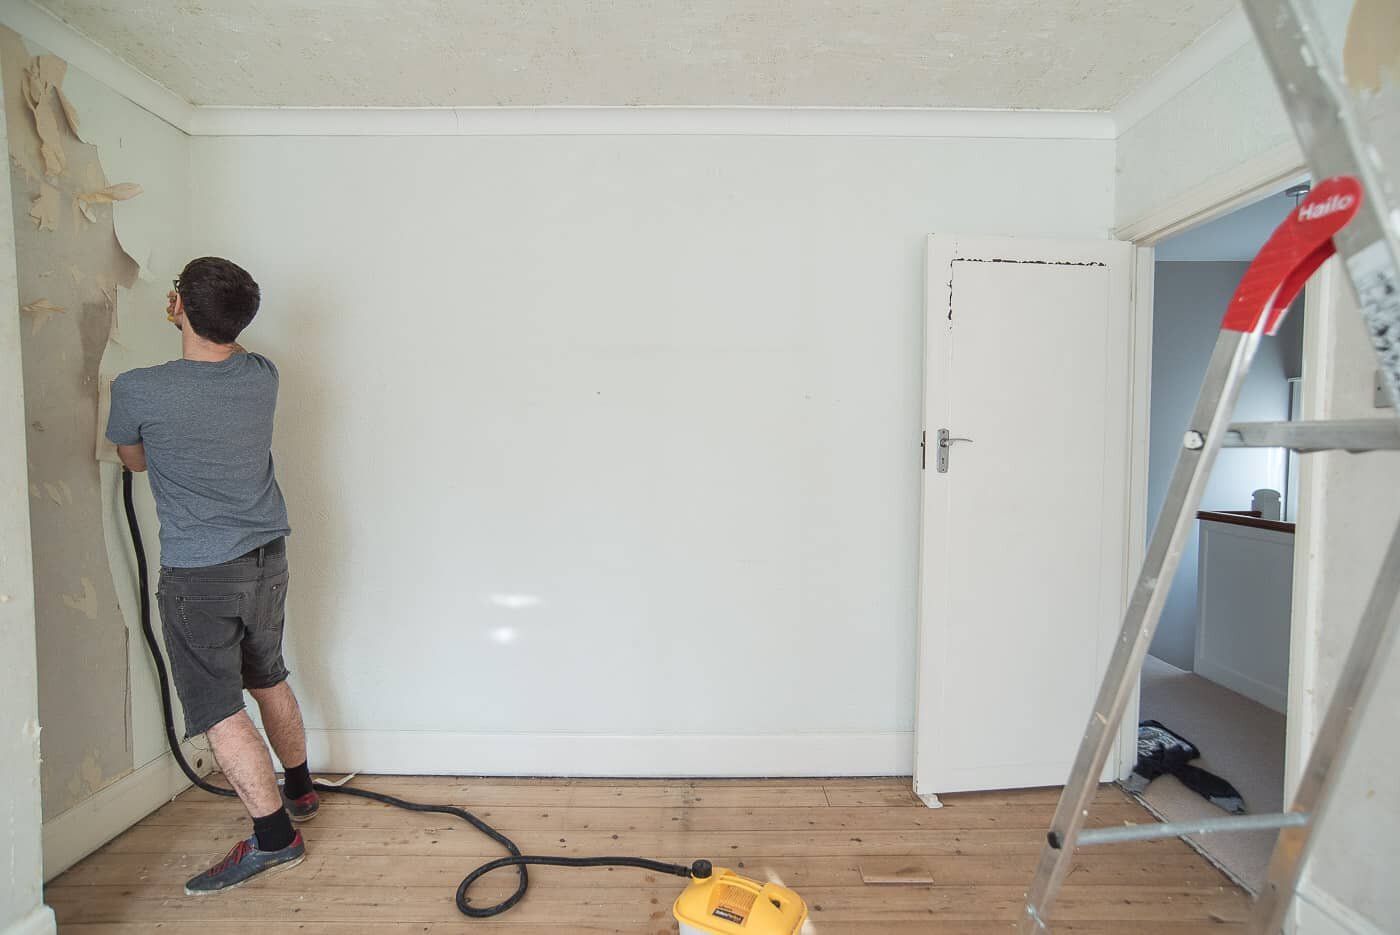
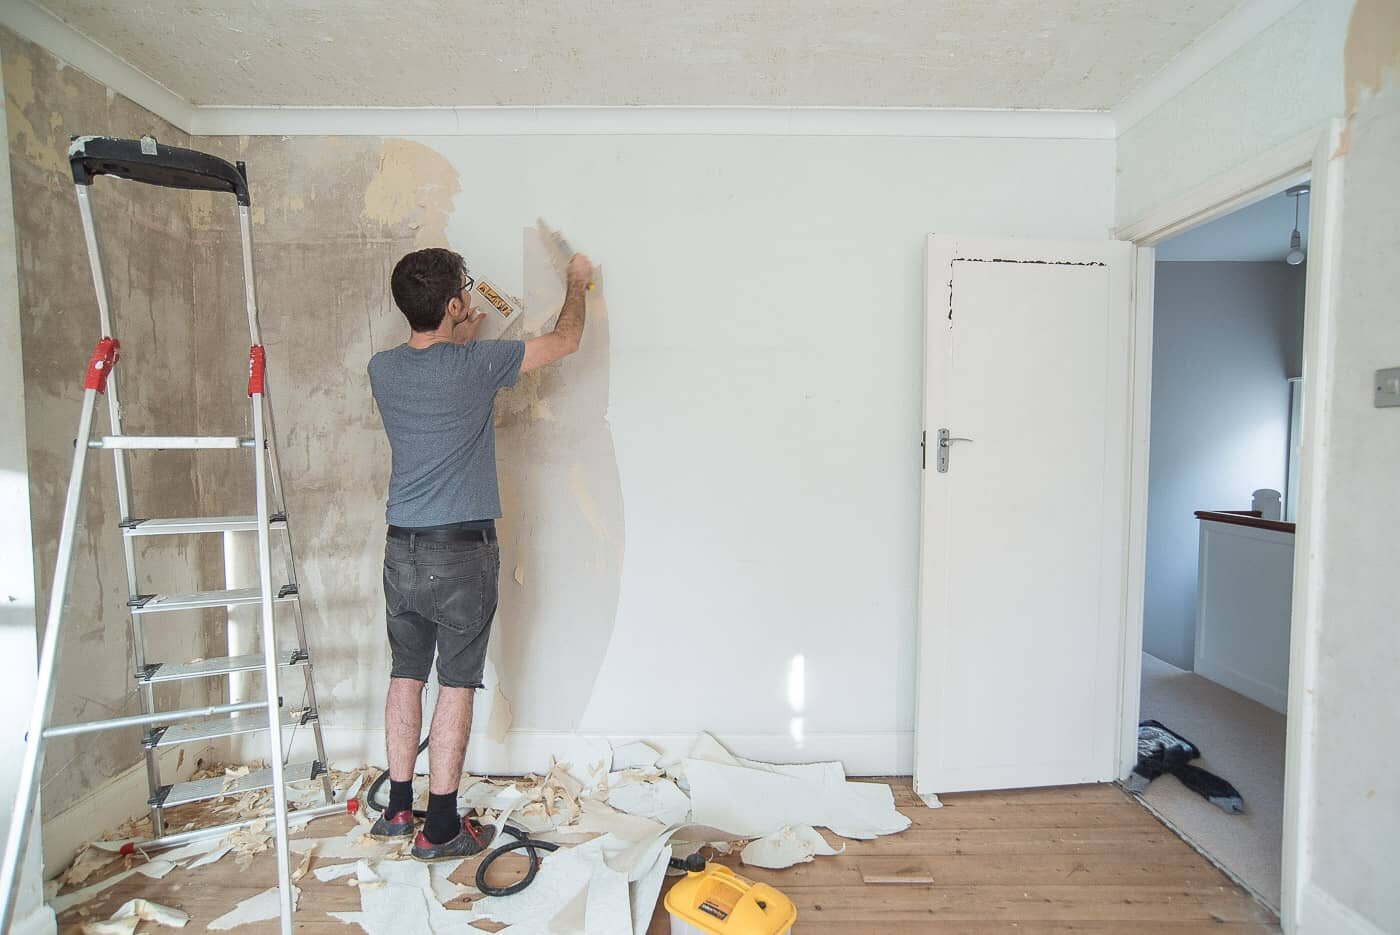
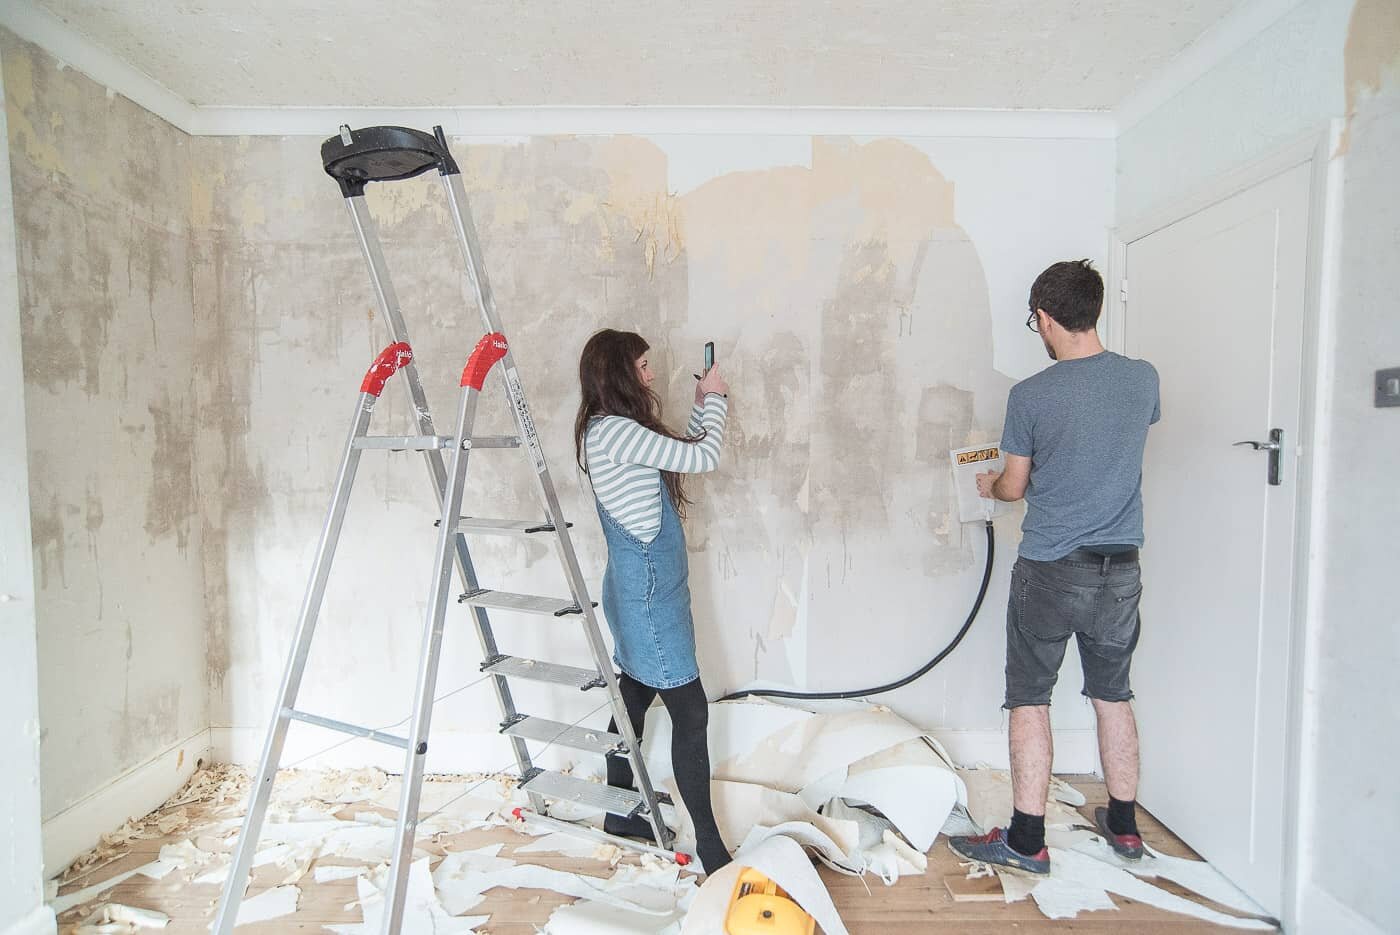
Every wall and ceiling had wallpaper on it – a kinda nice spearmint colour to be honest, but we quickly got sick of it when the wallpaper steamer threw scorching drips down our arms as we tried to scrape off each layer to reveal the plaster underneath.

One of the first things we did when we moved in was lift the carpets.
Expecting quite a heavy-lifting job, it turned out easy as pie. Renovations always do that, don’t they? A job you think will take 30 minutes turns out to be 3 days. It’s a nice surprise when it takes quicker than you expect for a change.
Peeling back the dense layer of fluffy shag pile, the carpet literally broke off in our hands as we attempted to roll it up.
The bulk of it we threw out the window and straight into our temporary skip – our driveway and back garden – and the rest… well, we discovered the most amazing finding underneath. The carpet was laid on top of a layer of newspaper from the 1930s. It felt like our little time-capsule reading the newspapers as WW2 was imminent with Hitler was rising to power (you can read more here if you’re interested).
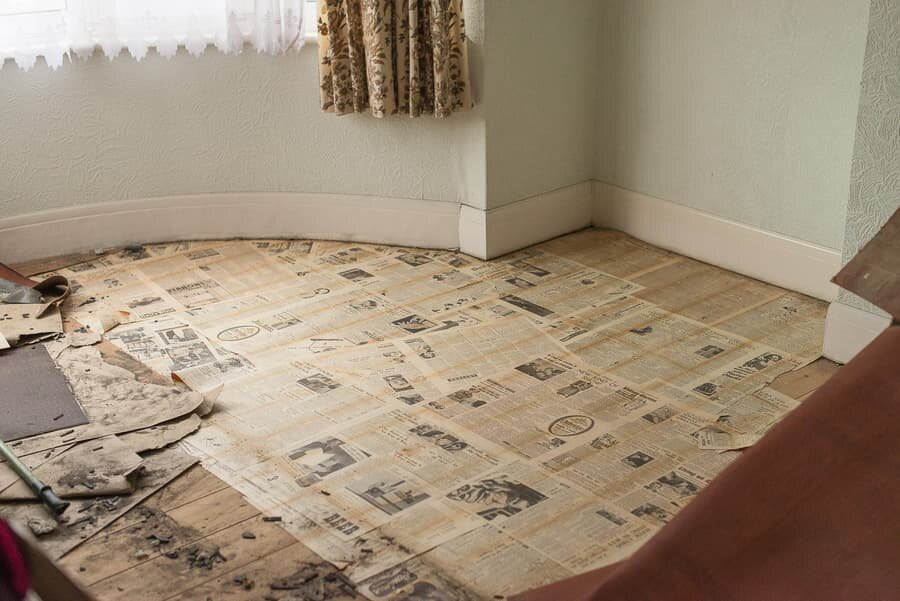
We carefully removed the newspapers (they’re in the loft now, waiting for a rainy Sunday when we’ll pull them down for a read) revealing pristine pine floorboards underneath.
We were thrilled at the time.
In an excited naivety – we just revealed gorgeous floorboards – I jumped up and down in the room (you can tell this was our first reno job, everything was exciting then) and stupidly stood down onto a rusty nail poking up from the floor.
Ouuuuuch.
It skimmed the back of my heel so it could have been worse, but I rushed myself to get a tetanus jab just in case. The docs laughed at my hypochondriac ways and gave me the jab anyway… 😂
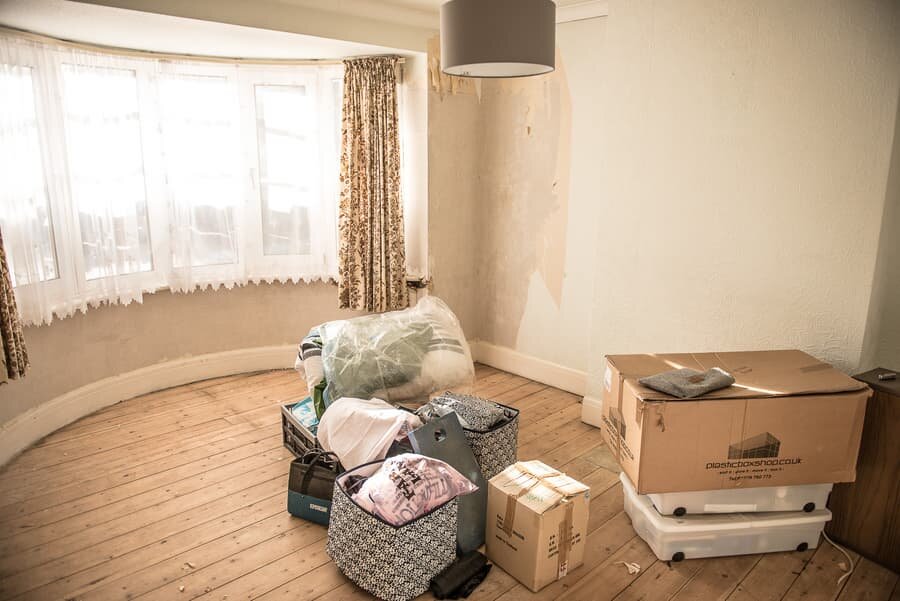
Left with a blank canvas, the room stayed like this for years as we turned our attention to the more important areas of our home like the kitchen renovation, bathroom renovation, living room renovation.
The room became a renovation ‘storage area’ / dumping ground for lighting deliveries, suitcases, my collection of crochet blankets… and just a lone mattress for any lucky guests.
My sister and brother-in-law stayed in this room every Christmas. No central heating, no carpet, no curtains… and every year we’d laugh and wonder whether by Christmas next year they’d at least have a bed frame.
Nope. It just wasn’t a priority for us.
When you renovate, and need to make your cash reserves stretch, you just can’t do everything at once – plus, there was no way Neil nor I wanted to rush this room. It was the master.
So fast forward to 2020 and we were buzzing when work began. We planned the budget and design well in advance using our own renovation online course as a step-by-step guide (read more about the planning phase here) which got us focused and allowed us to speed through the plans.
People are often surprised when we tell them we use the exact same method in every renovation project to budget, plan and implement the work. But when it’s taken you years (and many mistakes!) to refine, you hold onto that approach and every project just gets easier and easier. See our home office which we completed after this.
After lots of time planning, the work commenced
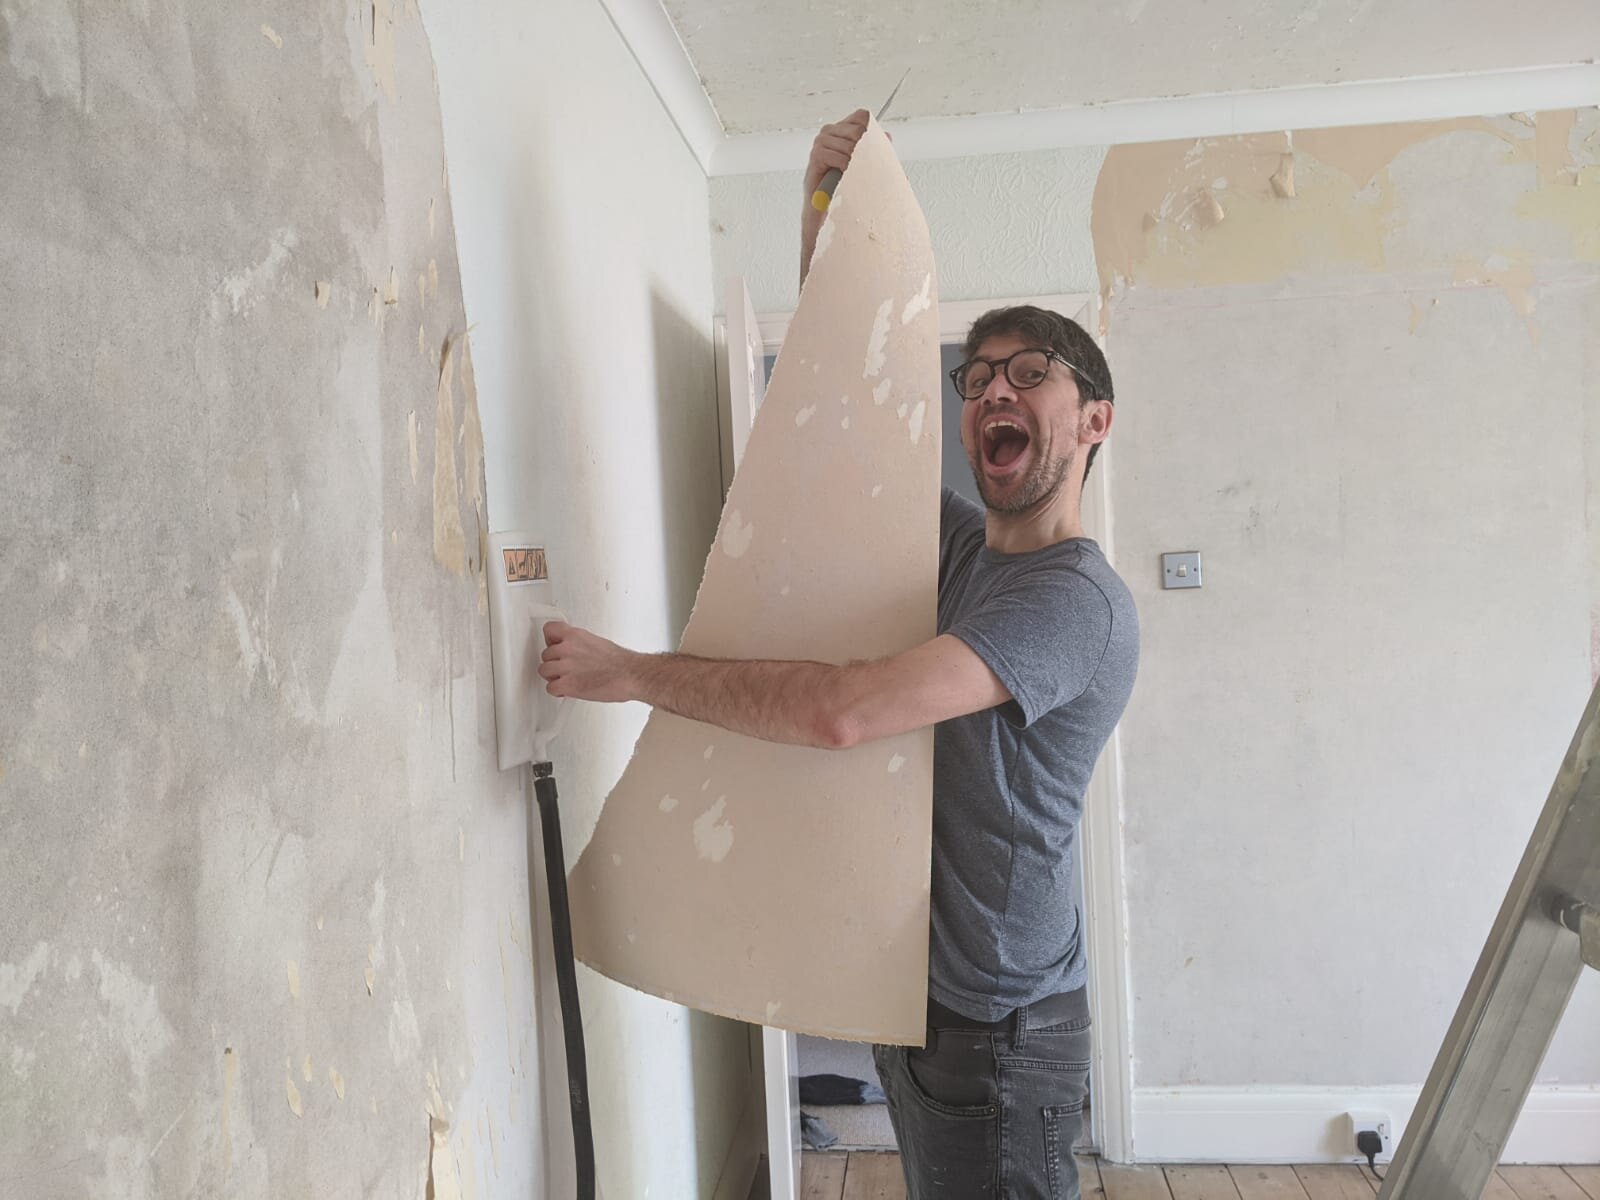
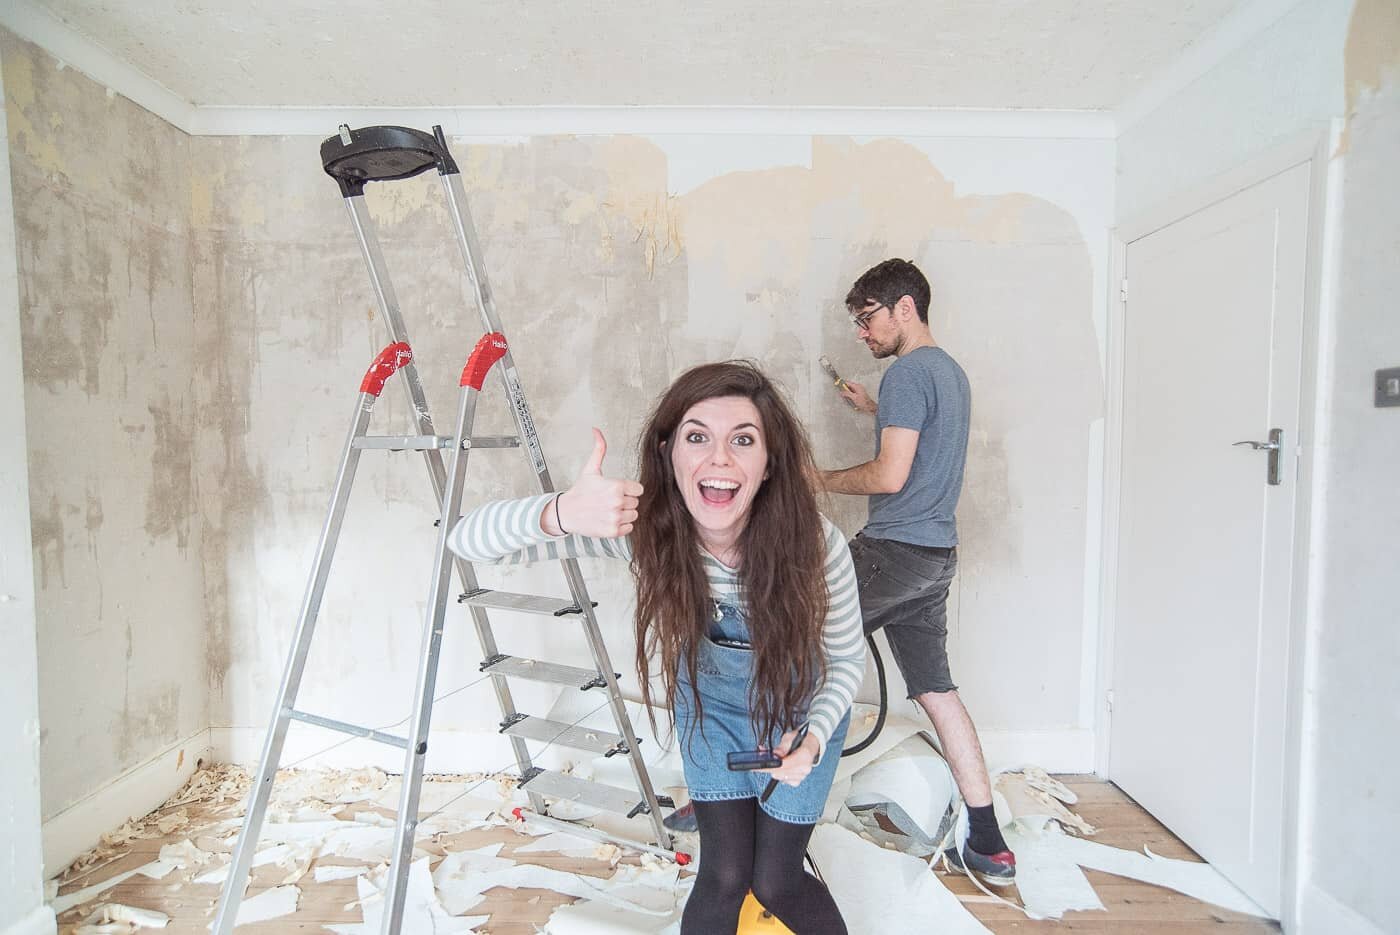
THE FACE OF JOY: THE LAST OF THE WALLPAPER STRIPPING
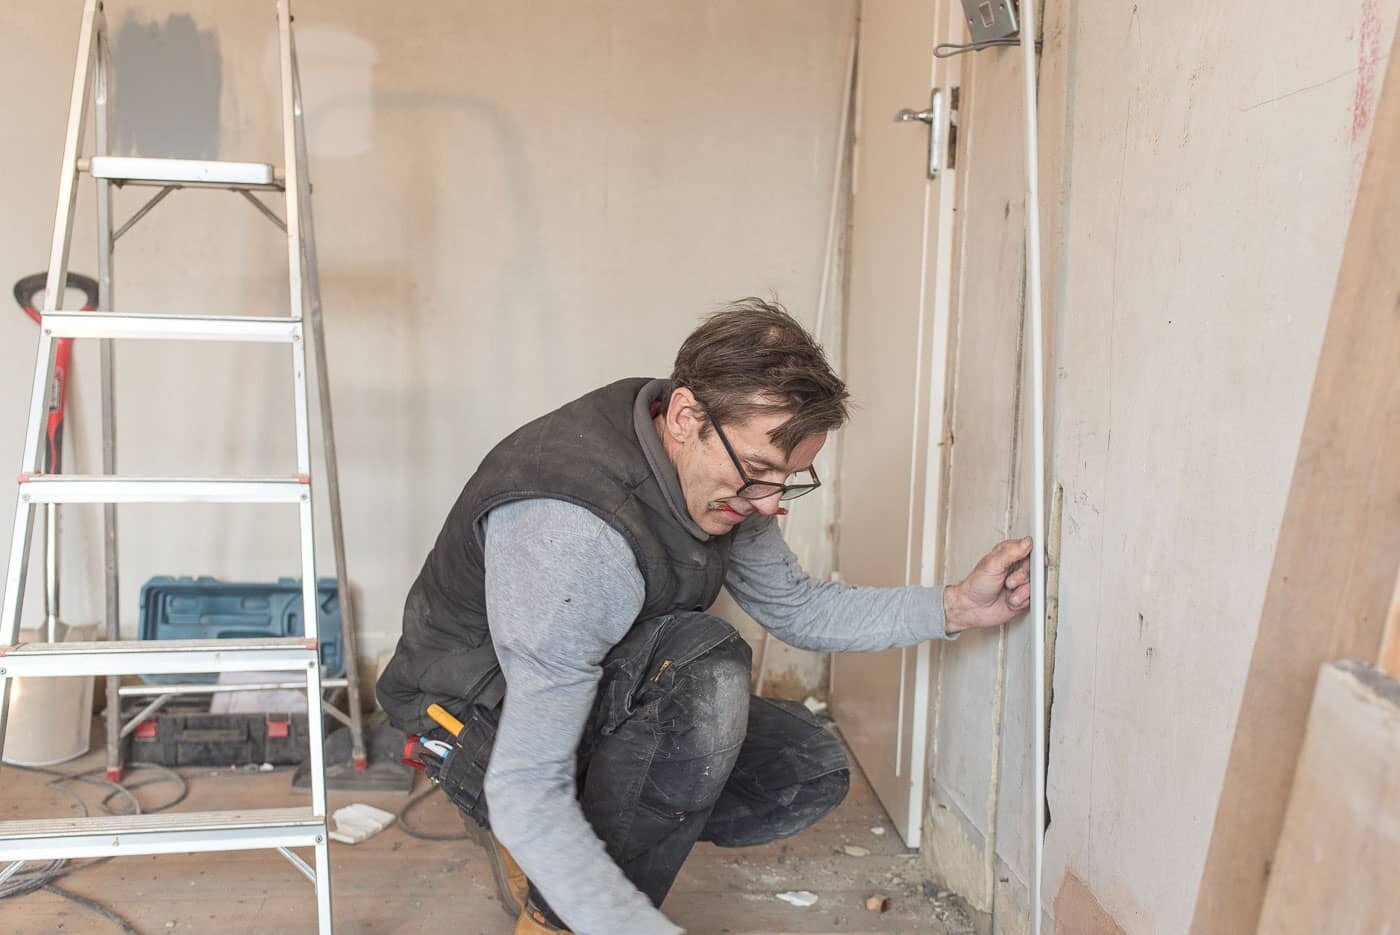
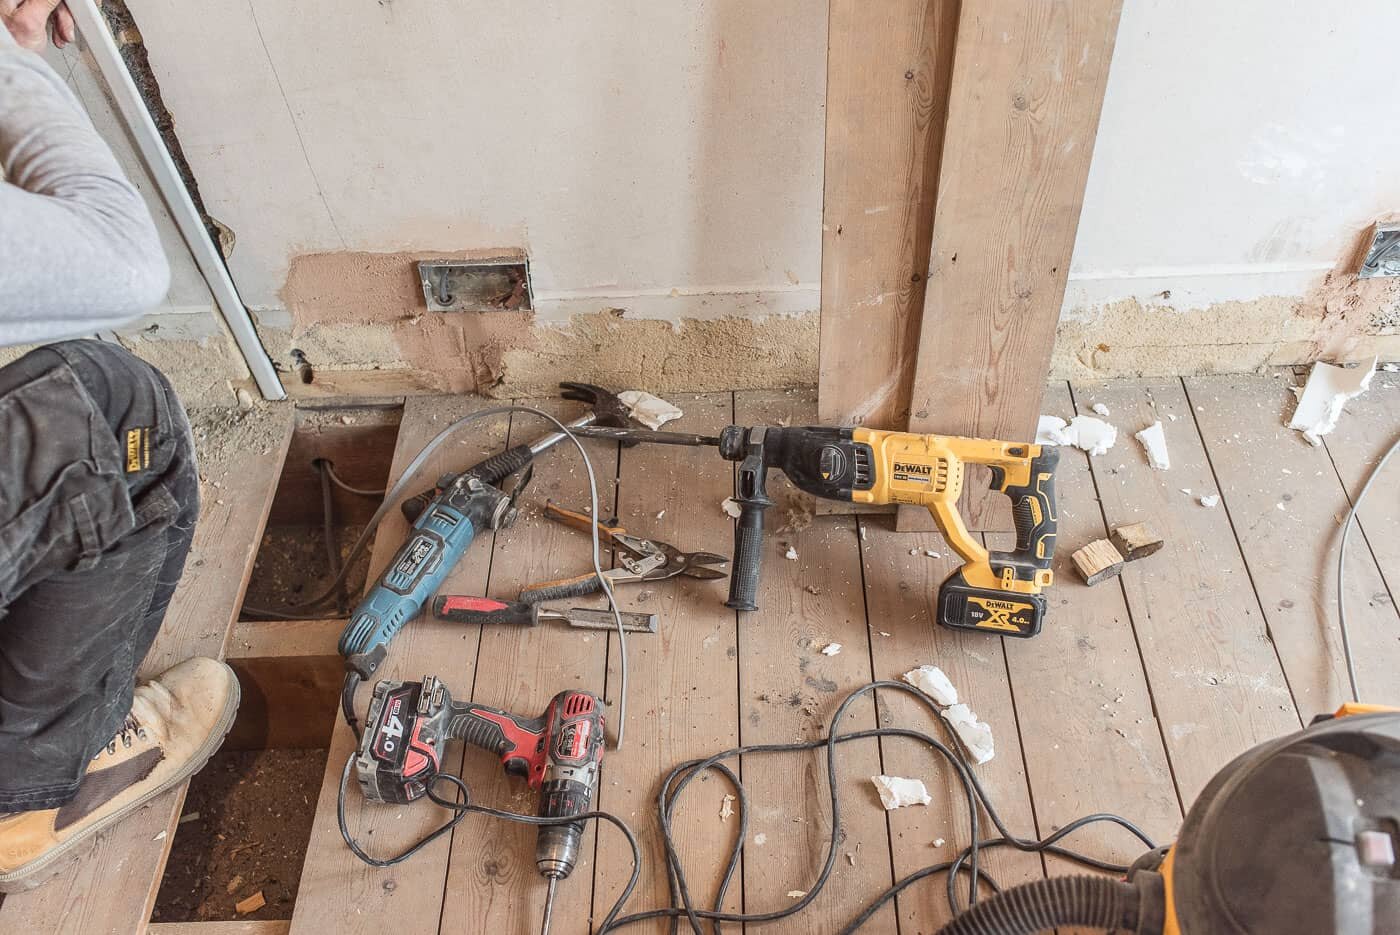
The first fix electrics
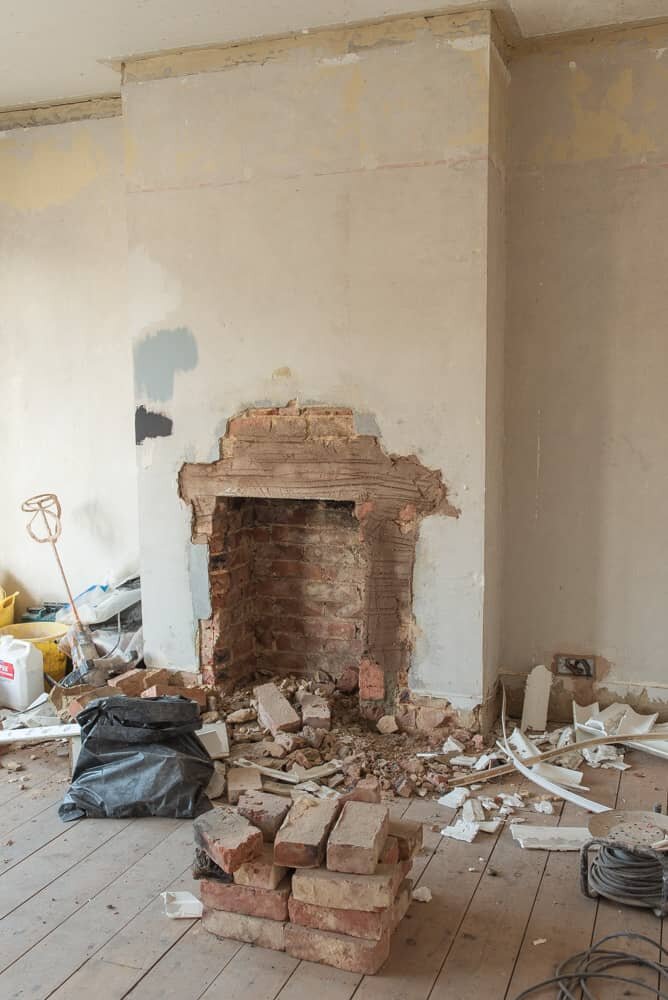
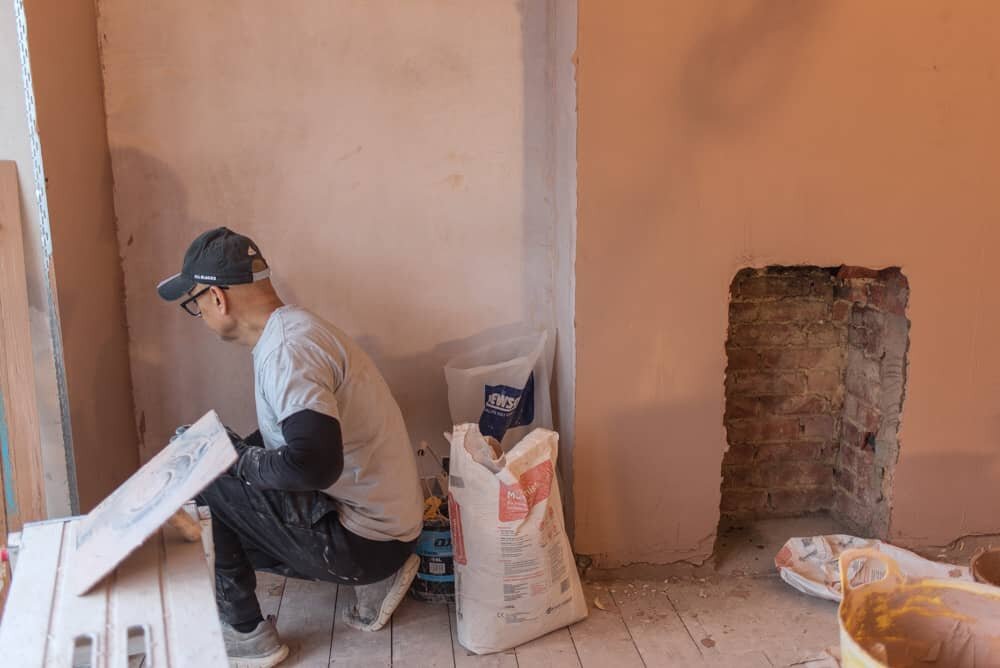
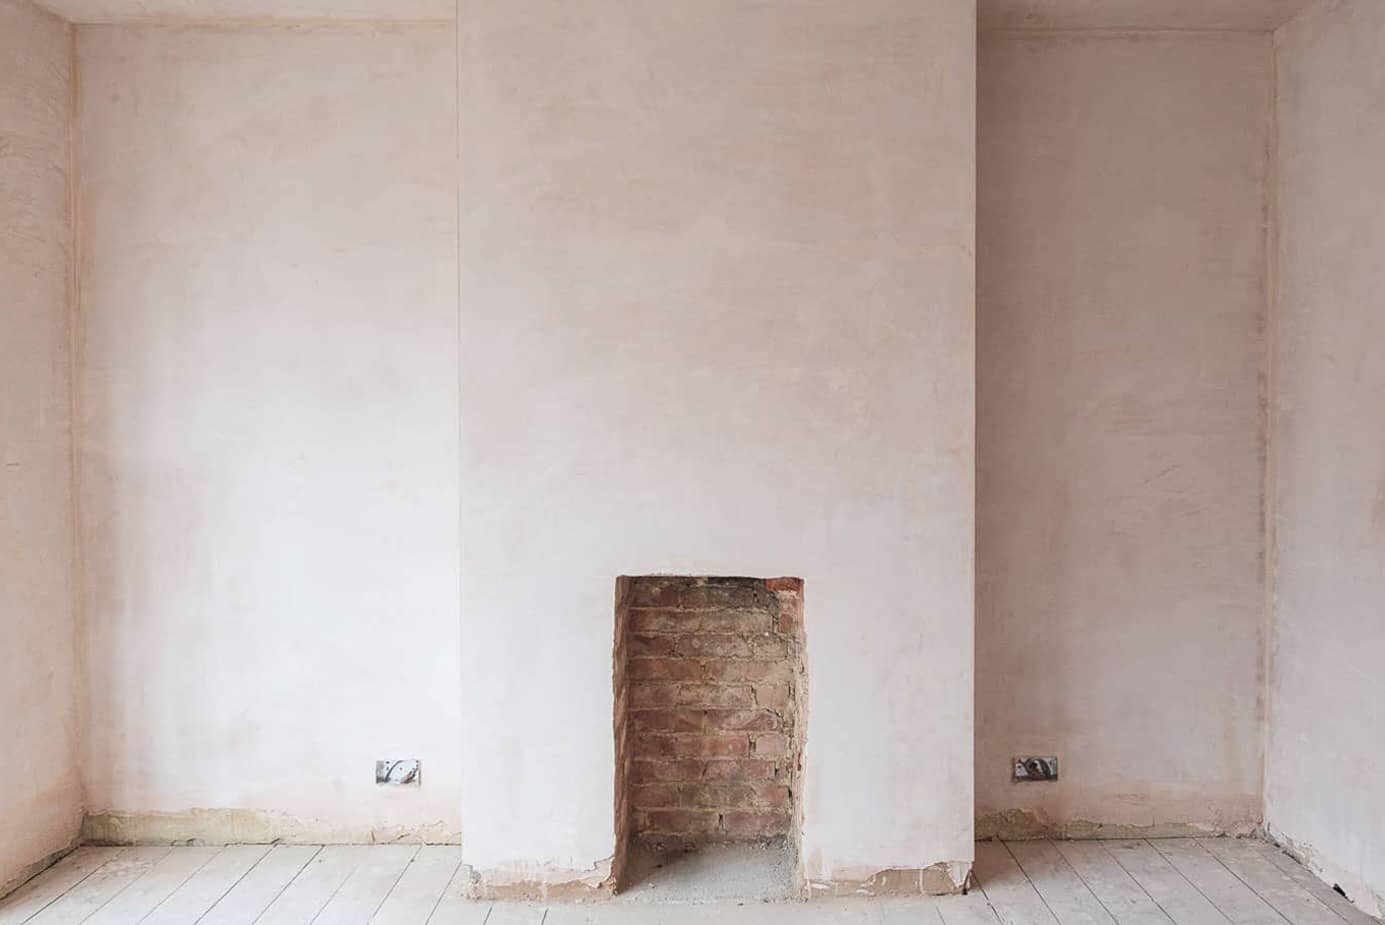
Opening up the fireplace
Unfortunately our project wasn’t without it’s tough times. We opened up our bricked up fireplace which is a fairly easy job with a breaker drill, but during the job, Neil thinks his ear plugs were too loose fitting which resulted in hearing damage / tinnitus. He used to be in a heavy metal band for years and religiously wore ear plugs and never had any real issues, but during this one session damaged his hearing permanently.
Learn from his mistake - buy yourself some proper ear defenders if doing this type of work!
We wanted to widen the fireplace but unfortunately we found out that the right hand side was supporting parts of the chimney stack! If we chipped into that bit we’d have problems. Therefore we made the decision to work around it and create a smaller opening. We would just need to find a different fireplace insert than the one originally planned.
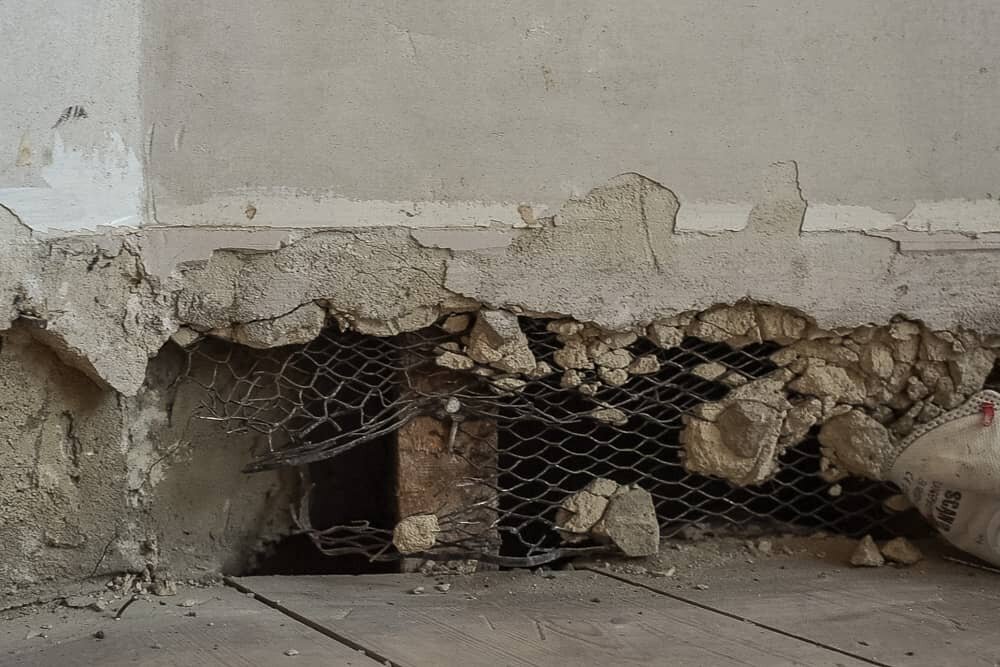
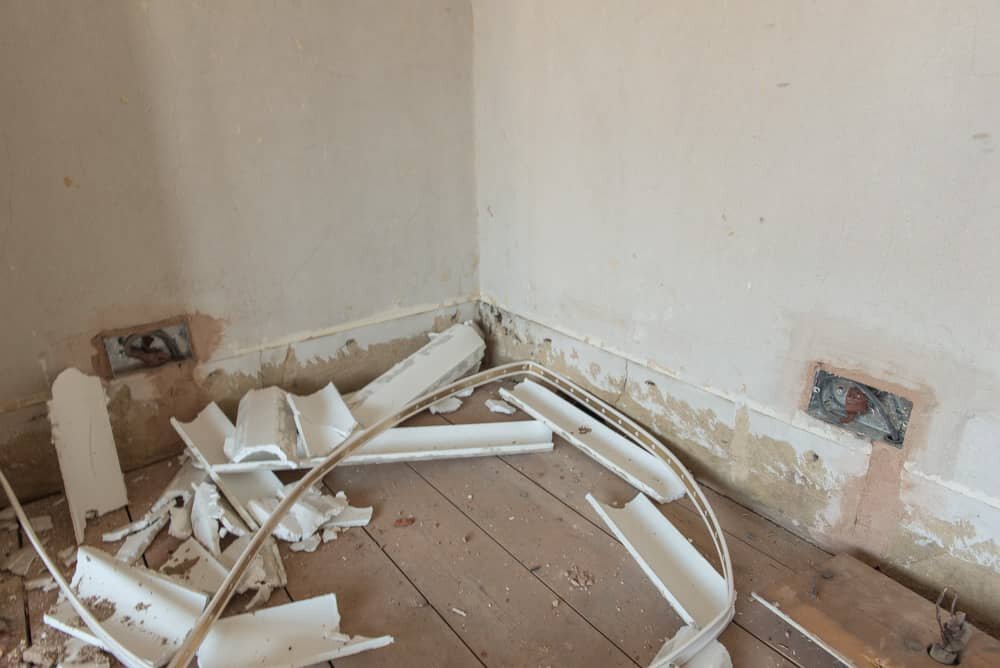
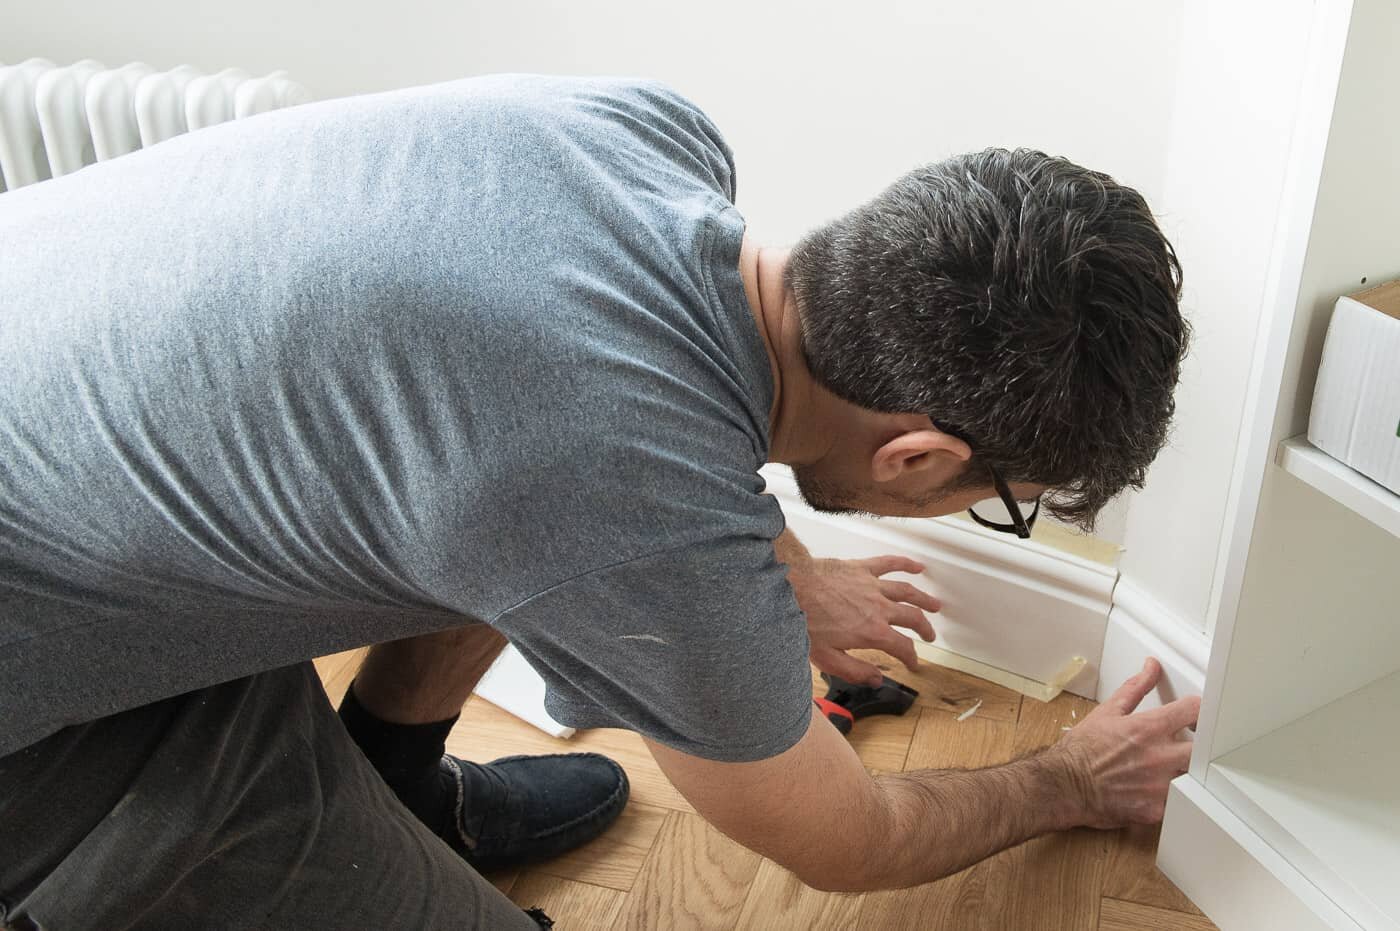
Removing the existing skirting
We decided we wanted to change the skirting because it was in poor condition. Believe it or not, the existing skirting in our curved bay wasn’t wood, it was some kind of cement or render.
We originally found this out during our living room renovation. So it needed to be drilled out, and to make matters worse the backing was a metal grid which meant that it just moved around whilst drilling. A horrible job but it needed to be done.
Our solution for the curved bay was to install a piece of flexible skirting (provided by WM Boyle)- something that seemingly wasn’t available when we did our living room renovation (so we resorted to cutting pieces of skirting and merging them in with filler). It isn’t perfect but it’s damn better than spending a few hundred quid on MDF and the labour for a carpenter to bend it into place.
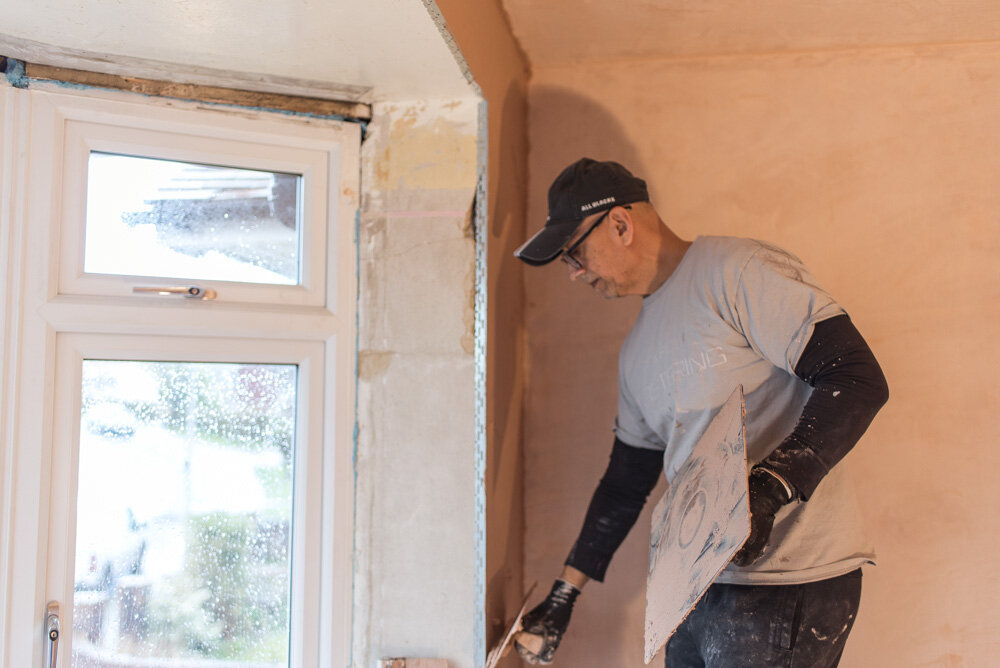
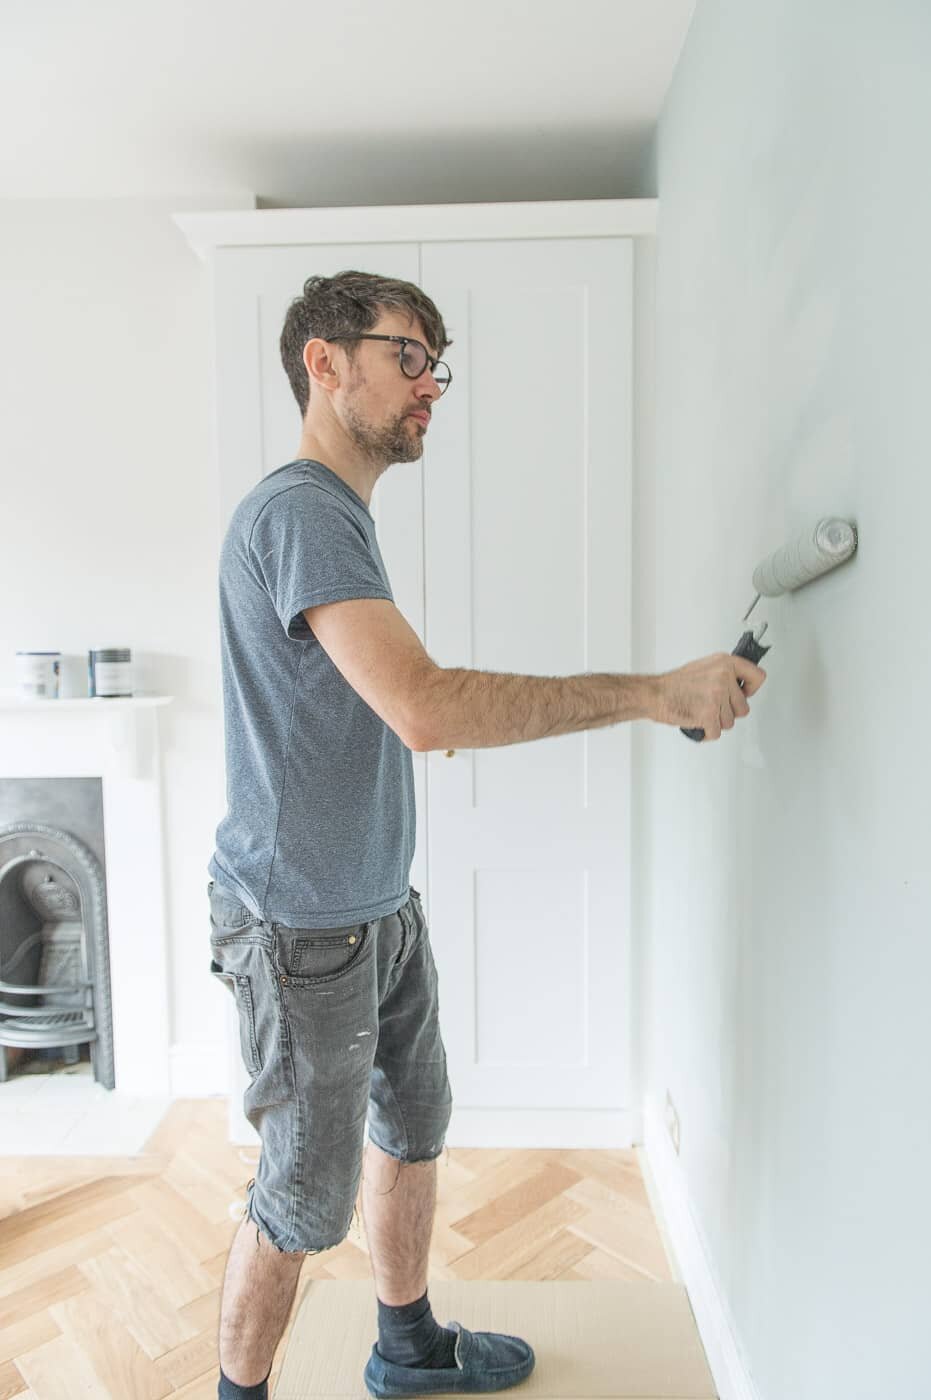
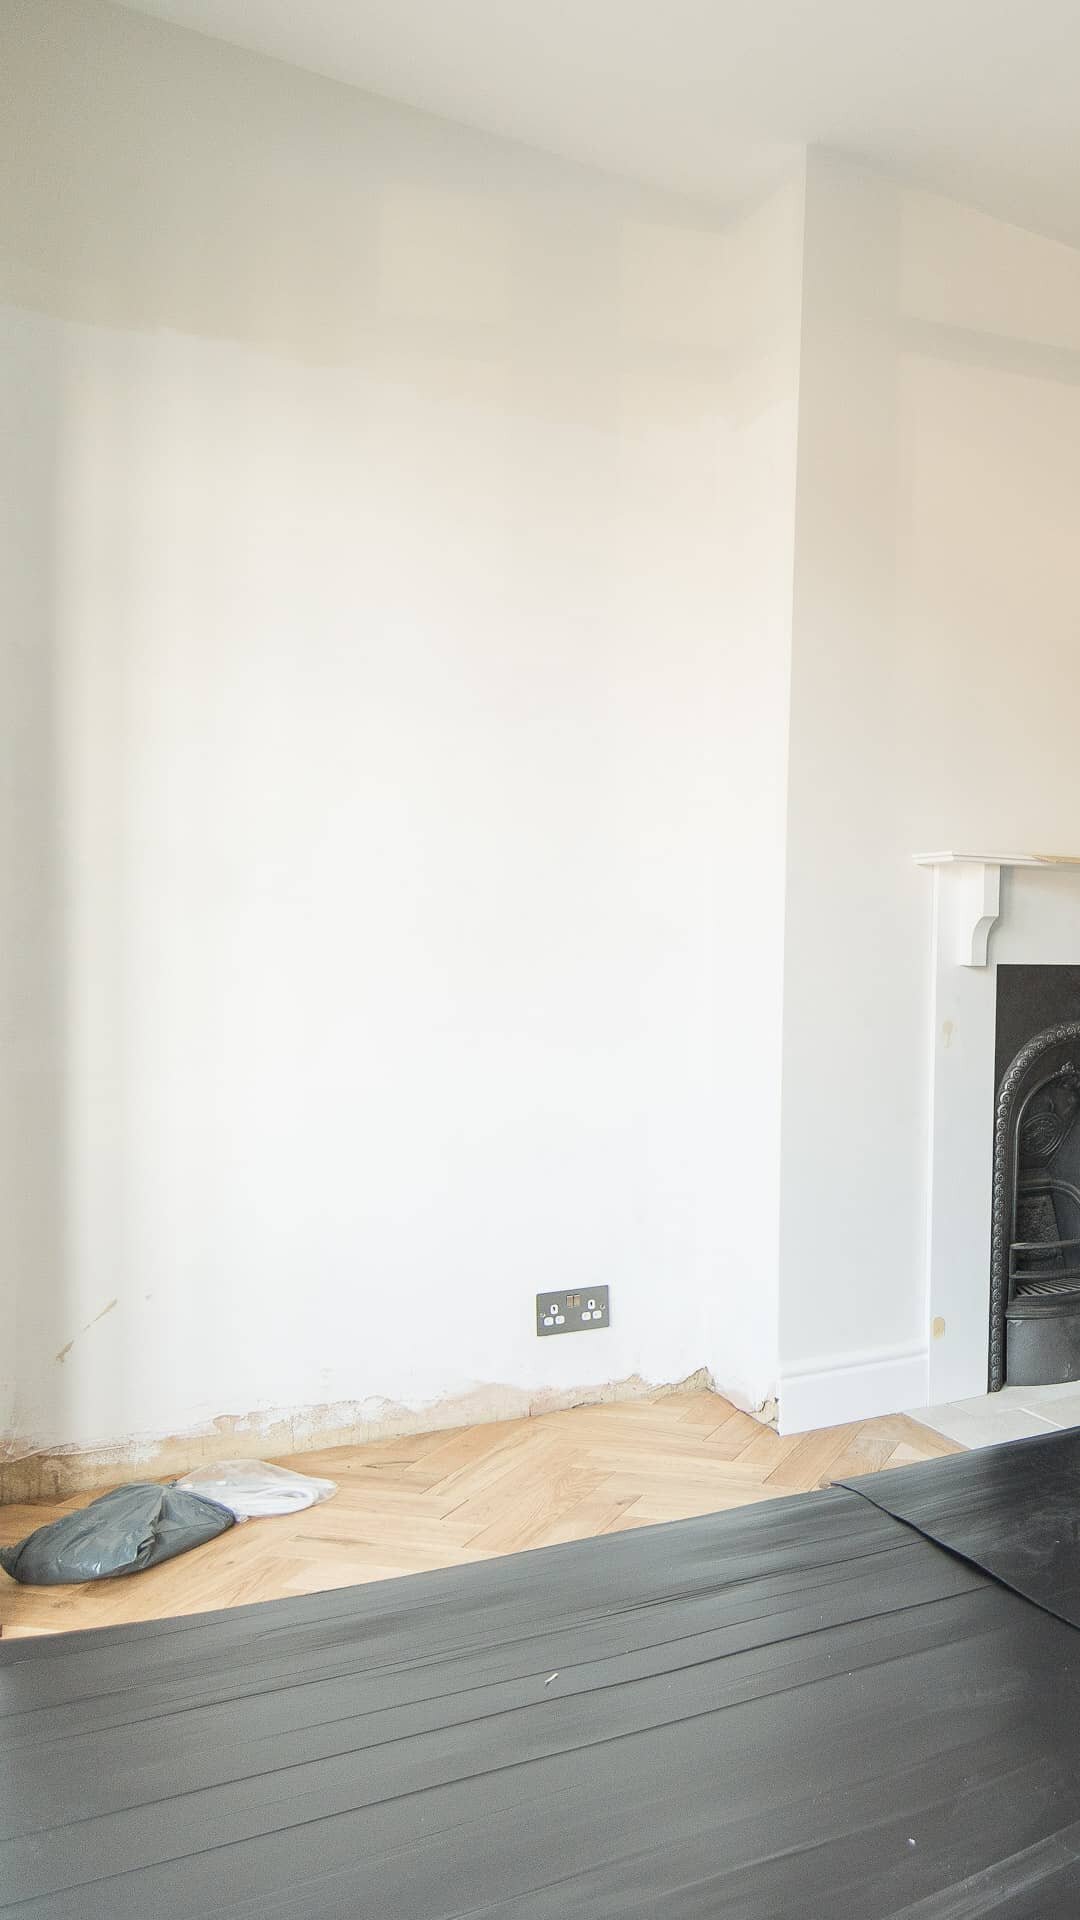
Skimming the room
During skimming the room, all went to plan apart from one thing - some of the plaster (or the bonding agent) got onto the uPVC window and it’s very tough to remove so in future we would recommend masking the entire window frames with tape or something to protect them.
We shared a few of these pics with our amazing Reno Club community a few months back and asked them if they had any questions about how we designed the room. So we’ll walk through each element and some of their questions to give you an overview of how it all came together.
Planning the electrics
Kate asked: “Please do share how you planned where to put plug sockets (aside from the usual bedside table ones).”
Planning electrics in a room becomes easier when you know how you’ll use the room and you’ve firmed up your layout.
Electrics are one of the first elements to happen in a project like this, so you need to have planned your layout / design way ahead of work starting. Neil and I got really clear on how we planned to use the room and what our requirements were for it which informed the layout, and then some of the electrics decisions. There are exercises in Home Design Lab designed to get people thinking about how exactly they plan to use the space which will ensure you’re optimising electrical points in the room.

So for us, just to give you a snippet of some of our needs and how that translates to electrics:
I needed somewhere to do makeup and dry my hair (electrical point needed for hair dryer + lighting)
Neil needed somewhere to charge his camera batteries overnight
Charging phones either side of bed
Lighting either side of bed
A lamp on a chest of drawers (we might add a chest of drawers to the right wall as you walk in)
I drew an electrics plan for our electrician to work to before the plasterer came, and that made communication easier.
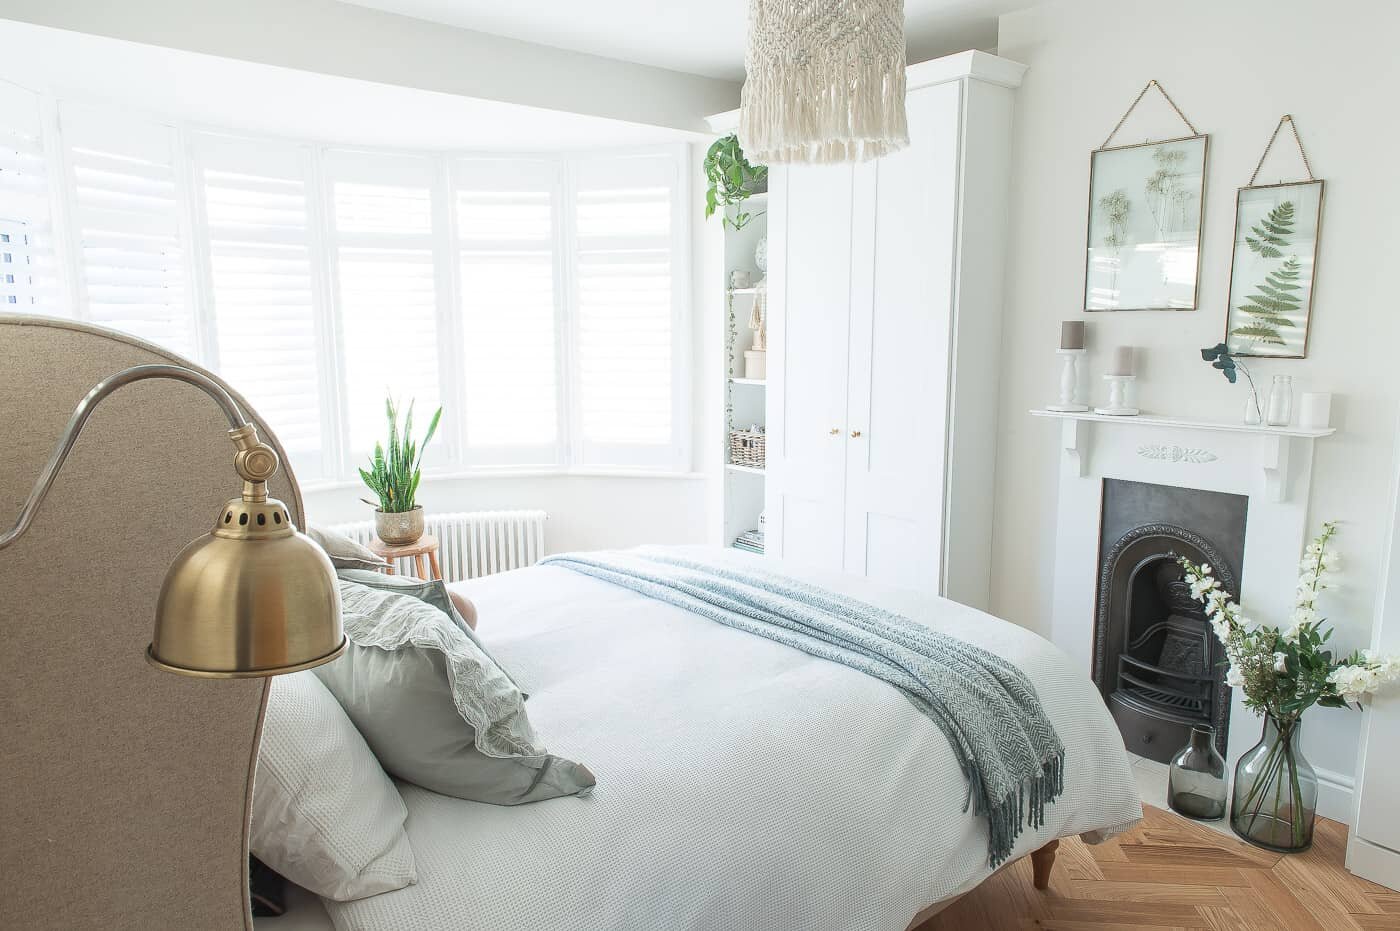
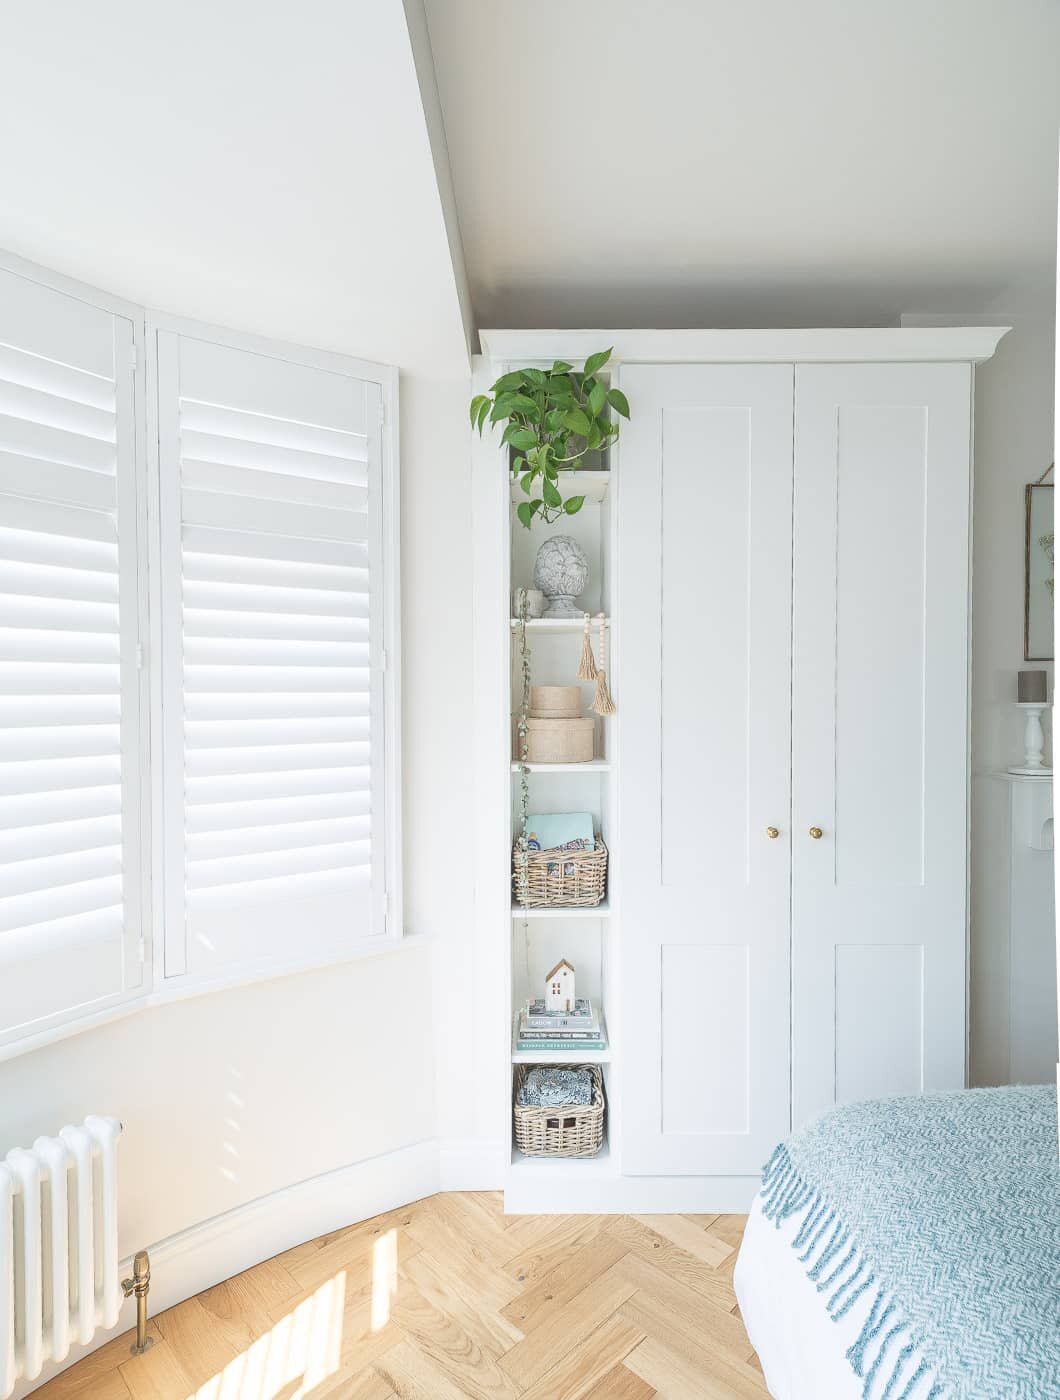
You’ll see from the pics that we decided to put electric points behind our built-in wardrobes so that we could feed an extension lead up the back and into one of the shelves. It’s perfect for makeup/hair drying and charging without cluttering the room.
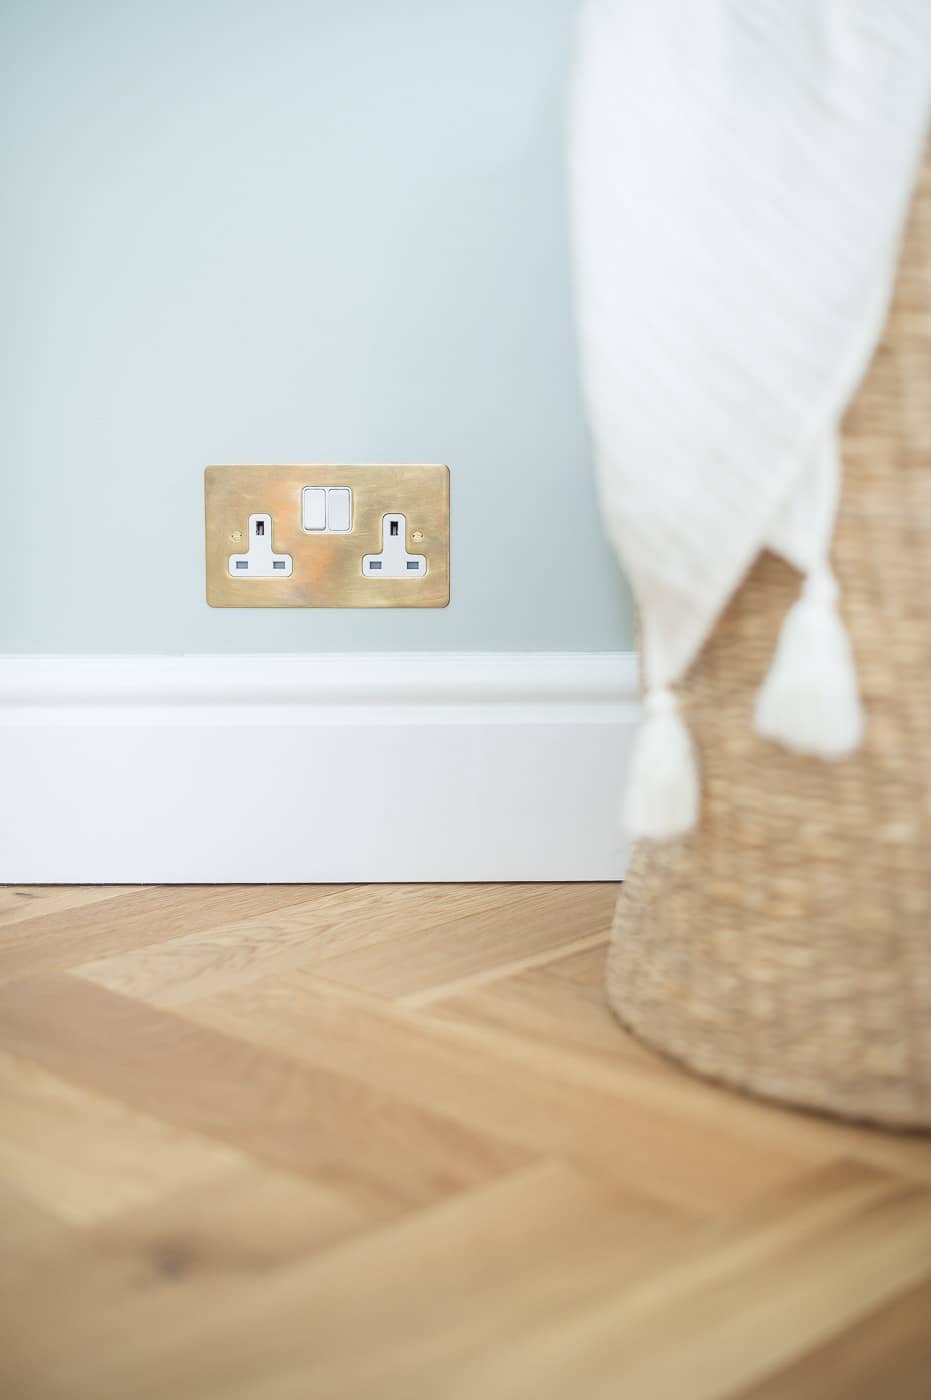
We chose antique brass for the finishes and I discovered a new favourite hardware company Corston Architectural who supplied our sockets, handles and door stop.
The electric back boxes installed
The panel wall lighting circuit
Shona asked: “I’m interested in the work involved to fit the bedside lights - and whether you made any other electrical changes (additional plugs) or moving radiators - and how complicated that all was.”

Before starting any room design, I ask: “is it being re-plastered?” and if the answer is ‘yes’, I’ll use this as an opportunity to rip out and plan all-new electrics and lighting. Chasing in wiring is a messy job and if you’re going to plaster anyway, you may as well bring the electrics, lighting and any heating up to spec first.
You’ll see we installed a panelled wall which meant that electrical points (switches, sockets and lights) had to be carefully measured prior to the wall being made. Matt (our legend carpenter) then cut round each point when the panelled wall was made.
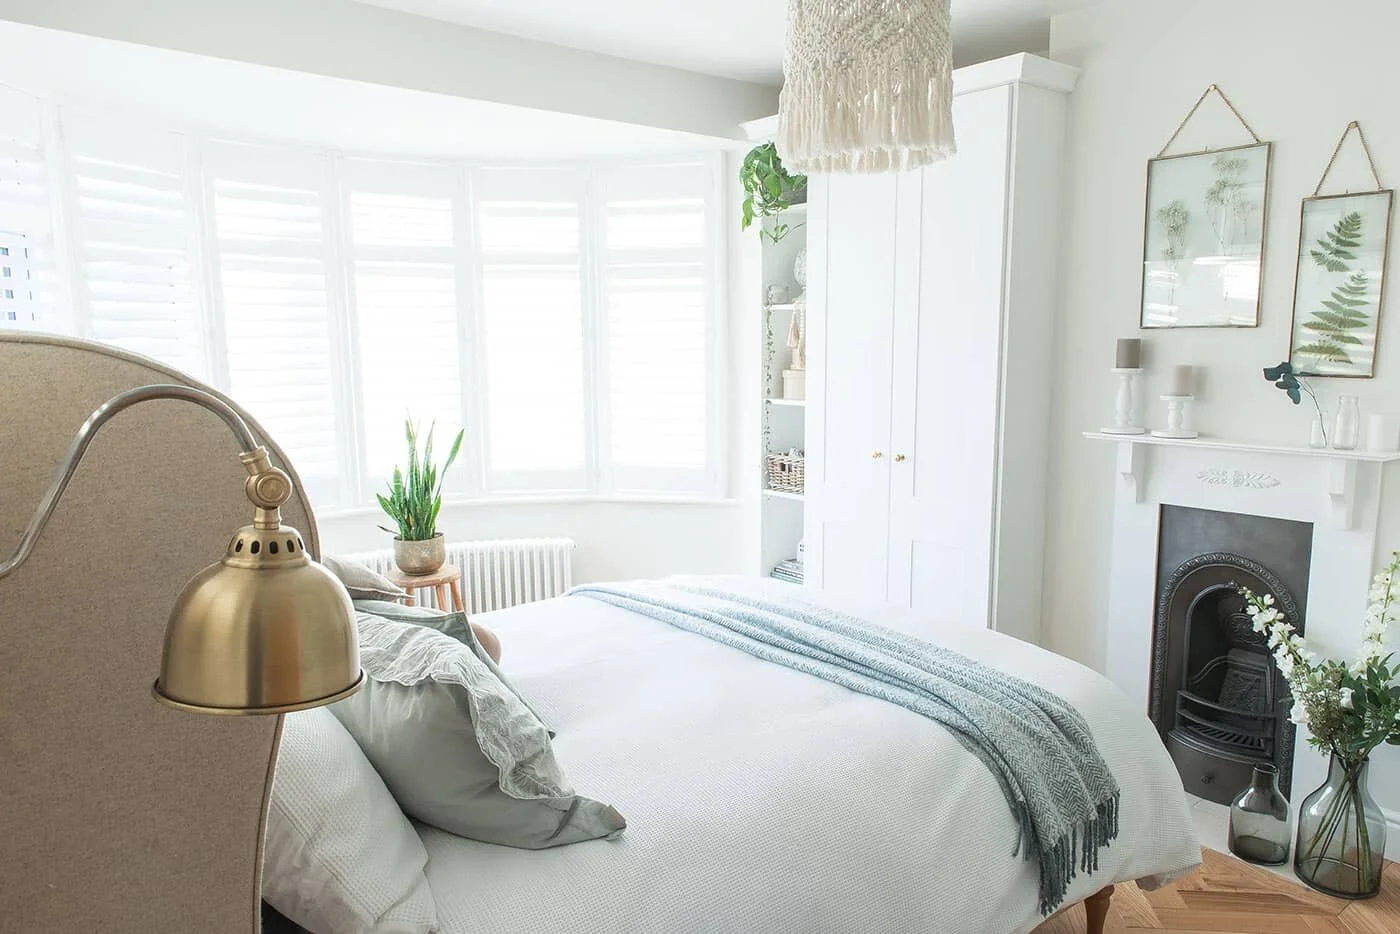
We fitted these beautiful brass Loaf Gaston lights either side on a dimmer and installed smart electrics to make both lights switch on and off with the sunrise. Yep, these are programmed to act like Lumie lights, preventing SAD symptoms. Read all about this in our lightwave review. It’s the first time we installed smart electrics in the house and we’re really chuffed with it!
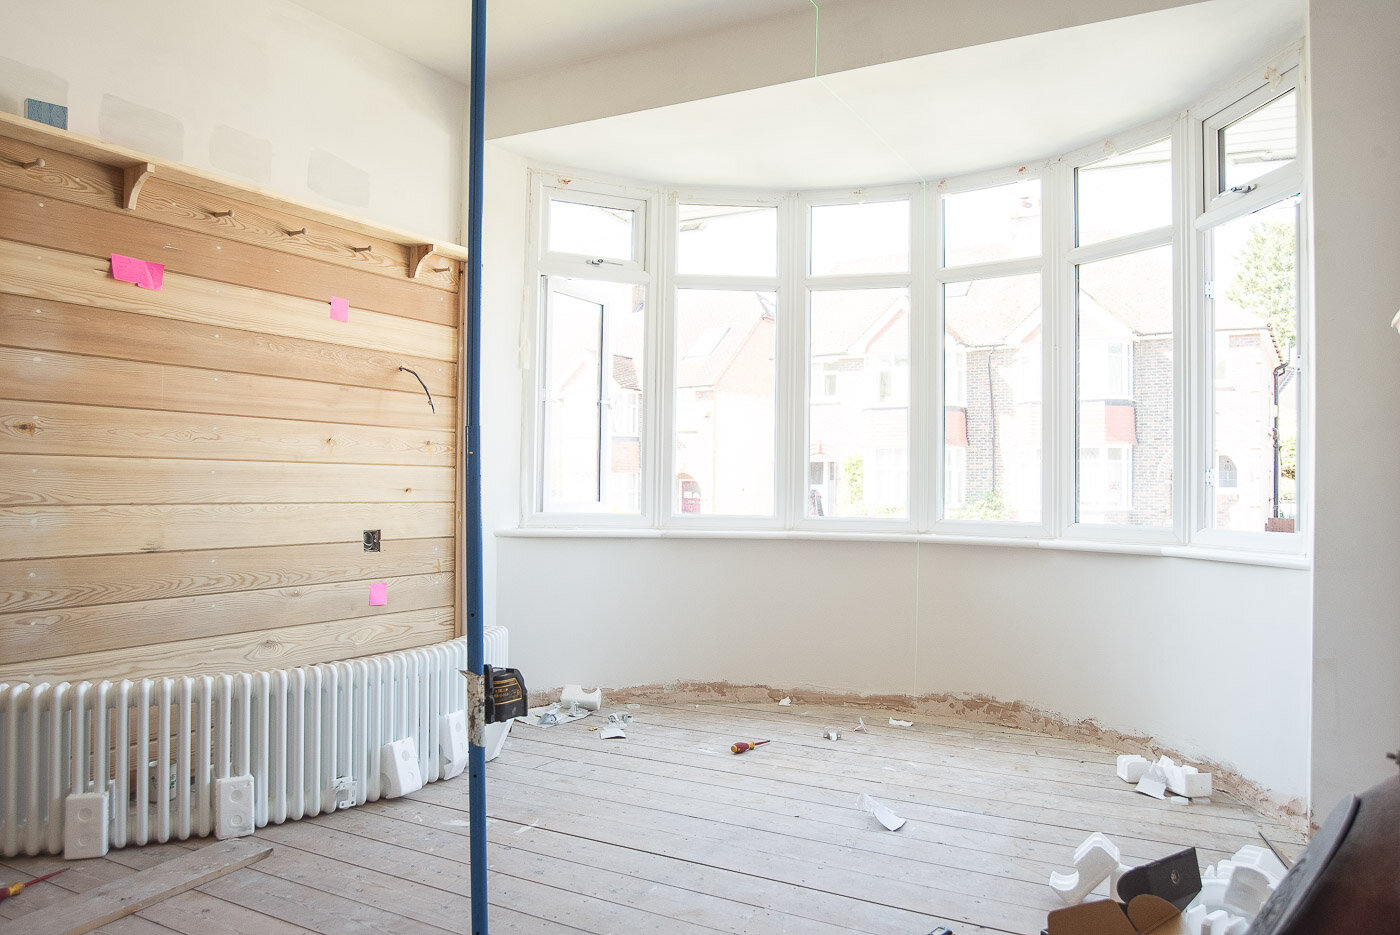
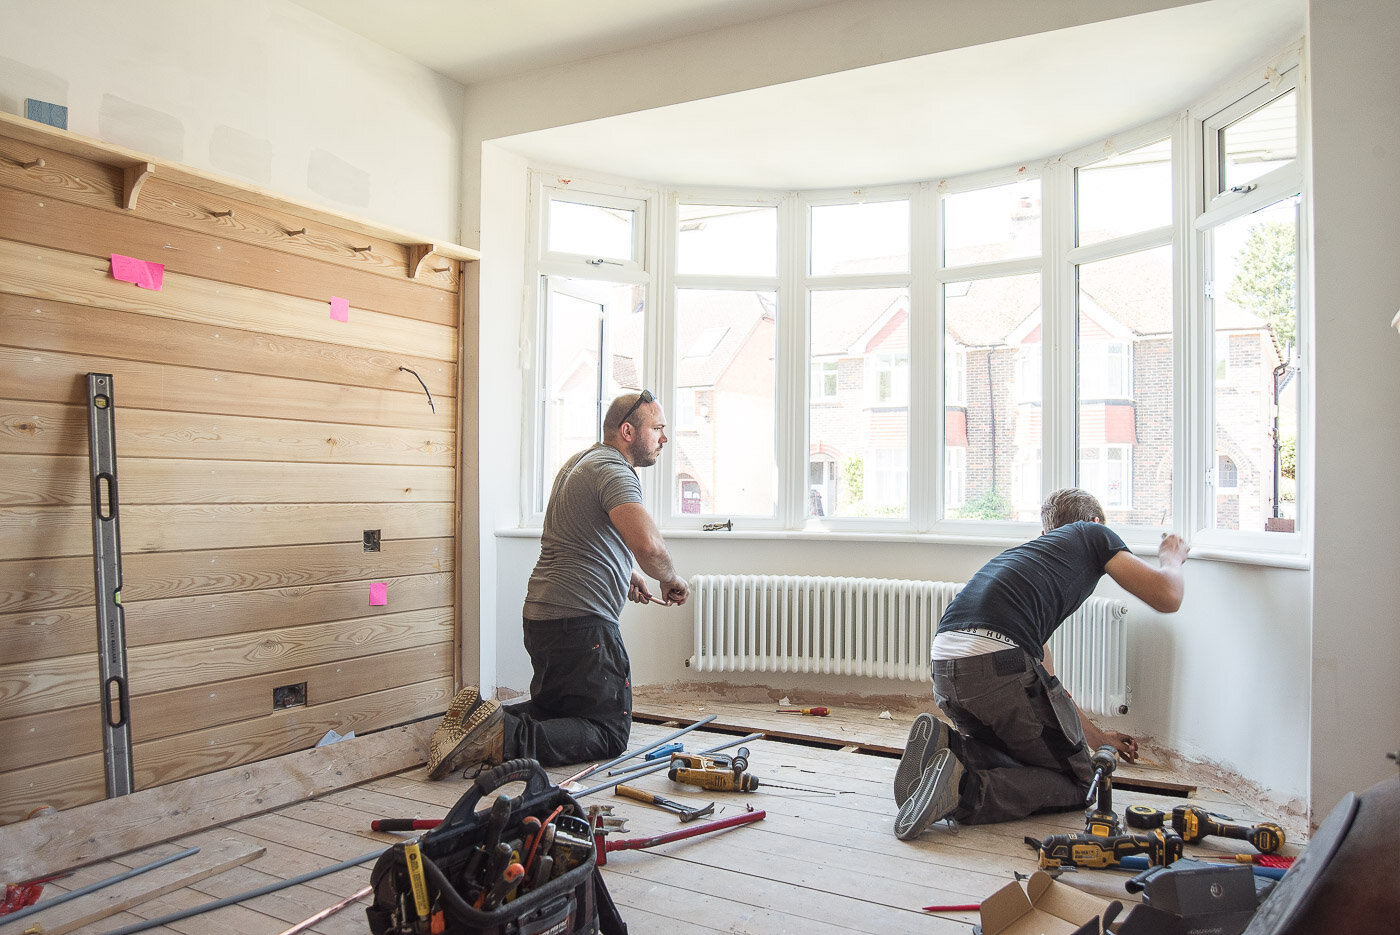
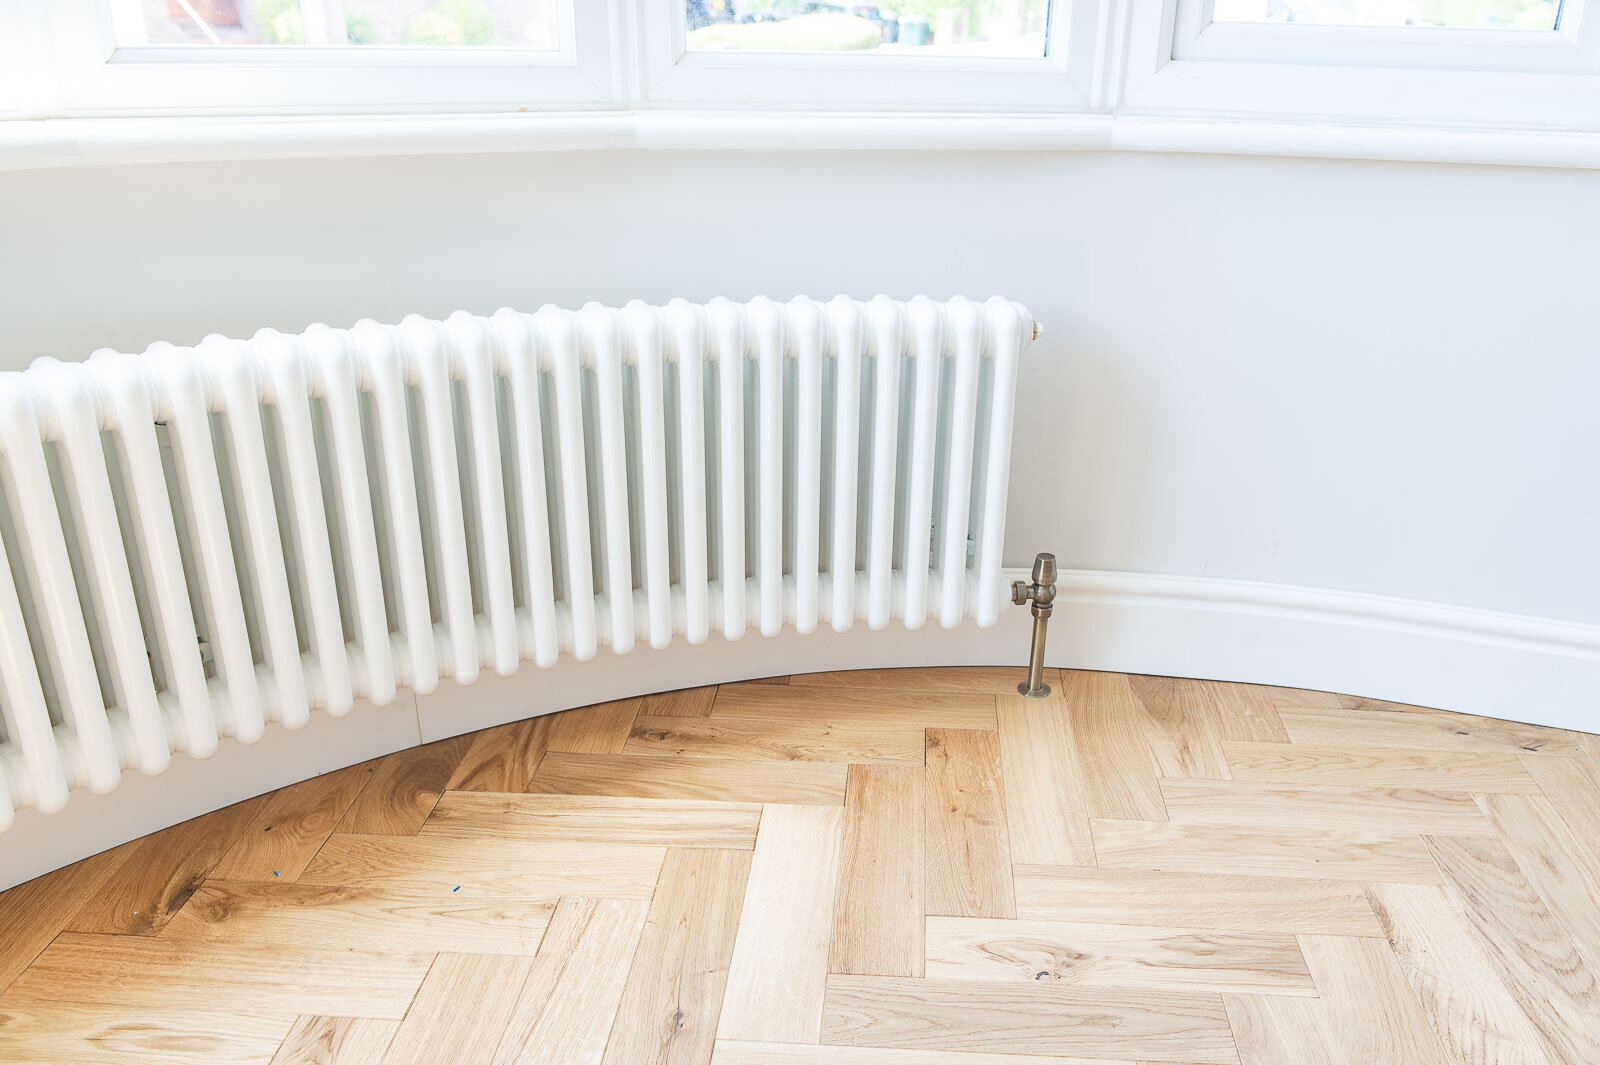
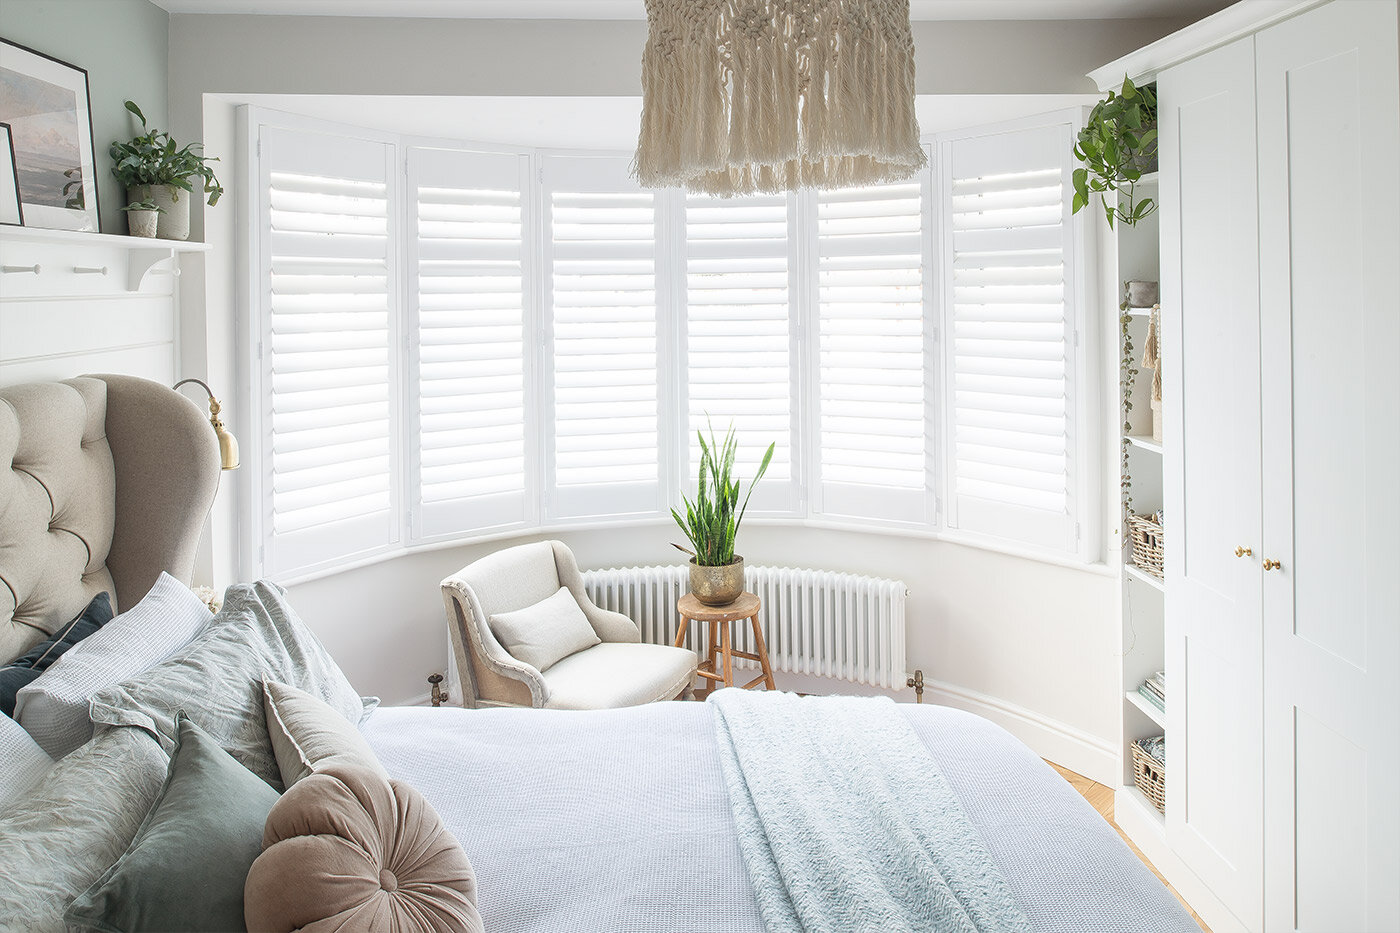
The room didn’t have plumbed in heating, only terrible night storage heaters which were a total pain to move. I worked muscles I never knew I had when removing every brick inside it! So we had a curved radiator from Stylish Radiators plumbed in (more on this further down the post) which was fairly straight forward to do (removing floorboards and bringing pipes up to the curved bay). But hanging the curved radiator onto a curved wall was a tricky job for our engineers (big shout out to Rob!).
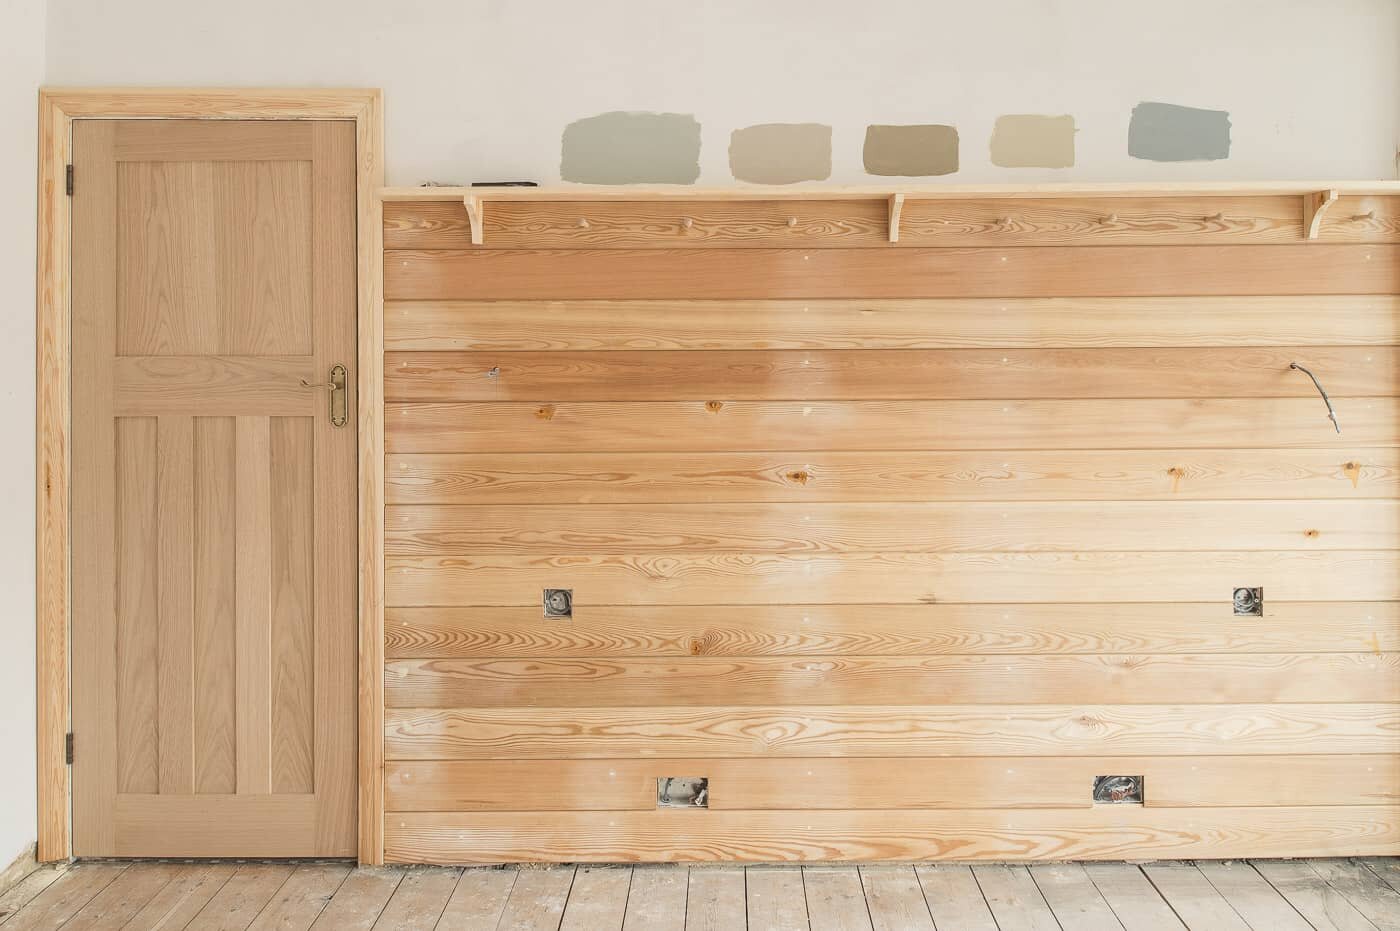
Installing the panelled wall
Lots of Reno Clubbers asked about our panelled wall. Katie said: “Would love info on your panel wall behind the bed. How you achieved that.” and Lydia said: “We’re thinking of panelling behind the bed too, so DIY tips for that would be awesome.”
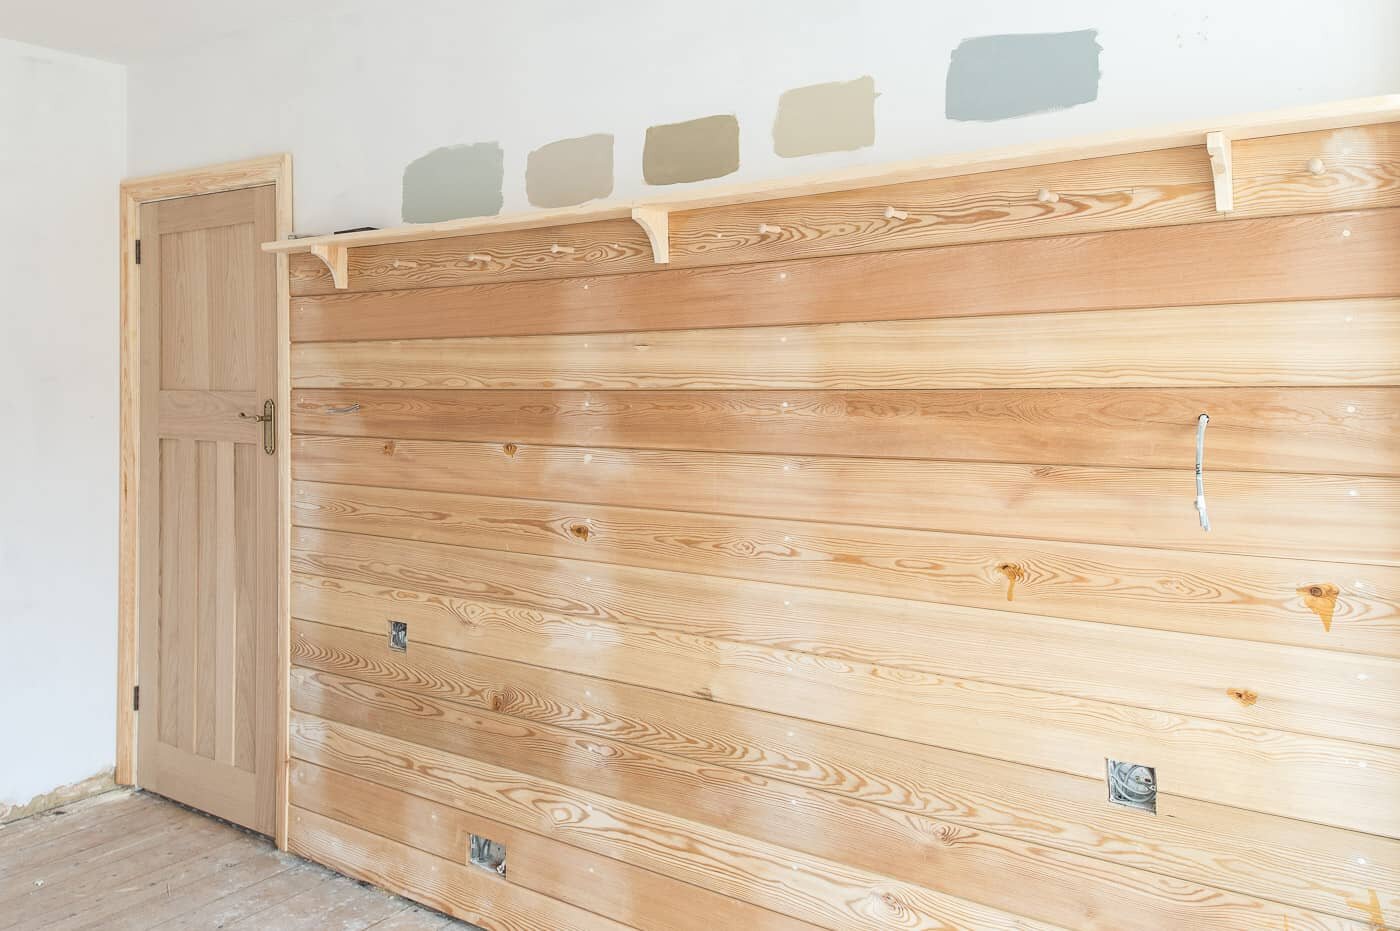
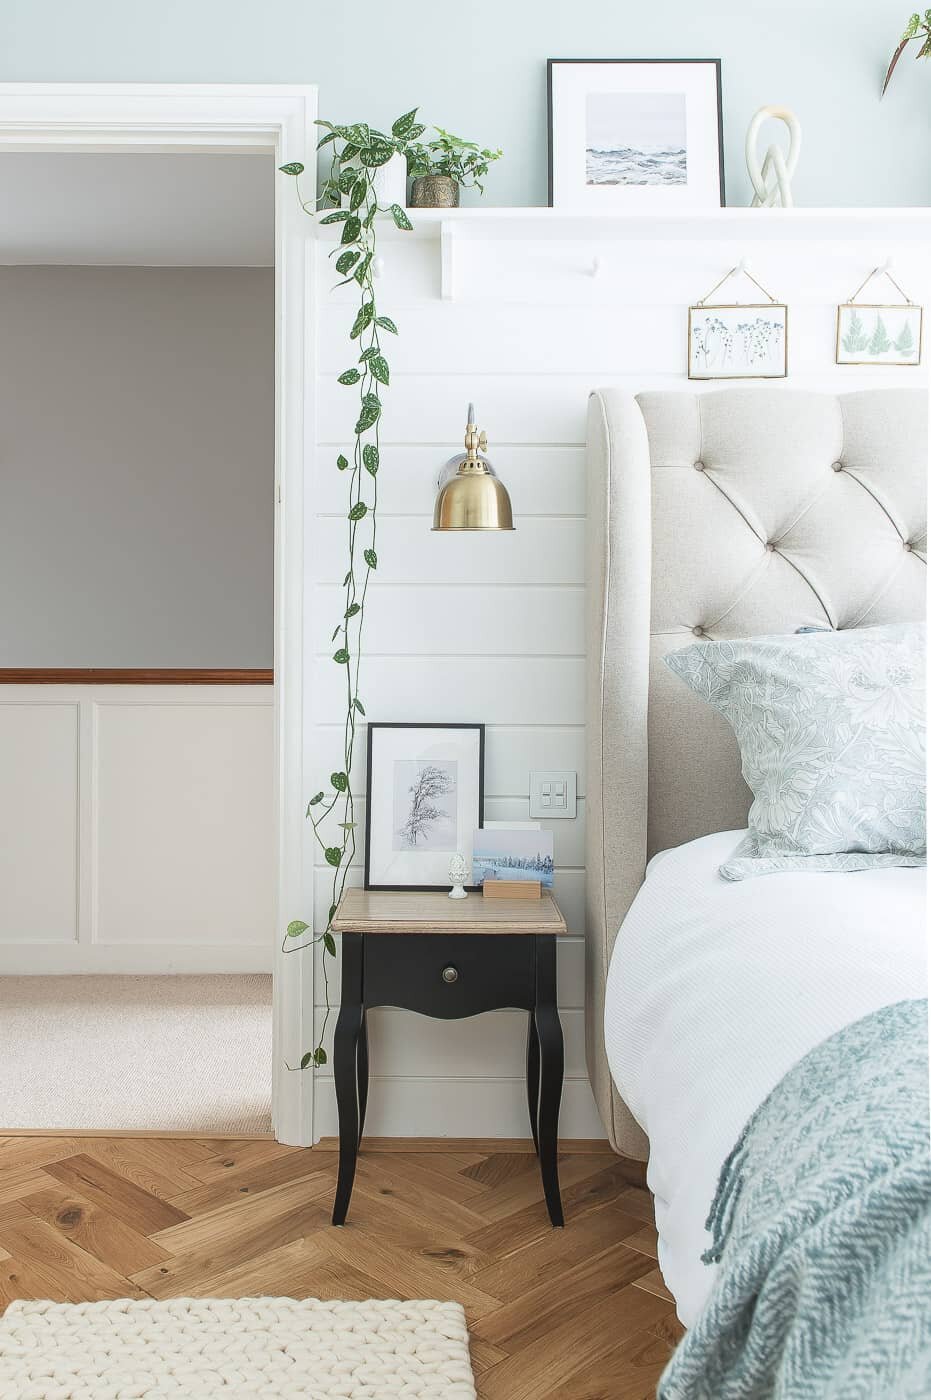
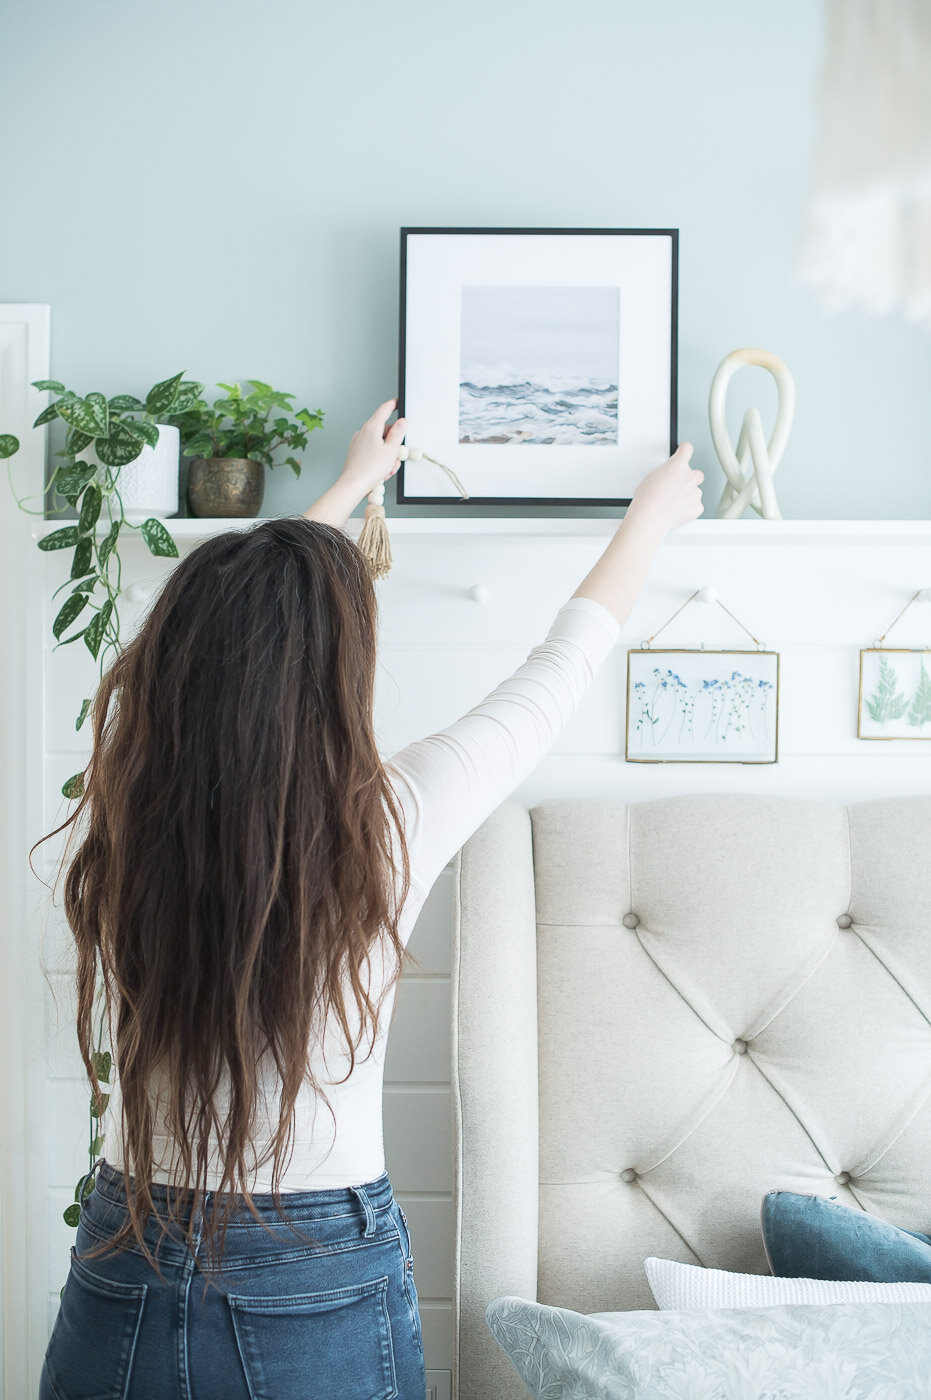
We were really adamant we wanted a panelled wall to bring character and shape to the room. Behind the bed is an obvious choice to frame the head board and add a focal point to the room. Neil came up with the idea to go with a horizontal board with a shelf above to line with plants and other styling bits.
We were adamant we wanted a look that was calm and fresh in this room, with a nature theme running through our design choices. Looking at it now it definitely has New England / Coastal vibes which I’m really pleased with.

The all important design meeting
We got our carpenter Matt to work his magic on this panelled wall for us. Neil drew a mockup of what we wanted on Photoshop, playing around with colours. Matt fine-tuned it and built it for us in about 2 days.
We laid Siberian Larch tongue and groove boards horizontally for a ship lap look. Then knotted, primed and painted it All White by Farrow & Ball. The pegs will add a nice touch to hang pictures and fairy lights from.
Matt drilled batons to the wall first, then cut and lay the boards over the top. So everything sits on a wooden frame underneath. This gave us a thick edge to fix a deep shelf on top.
Fitting a curved radiator
We shared instagram stories when our curved radiator from Stylish Radiators arrived and lots of people DM’d asking for more details.
Stylish Radiators gave us a discount on this radiator in exchange for photographs and content to support their marketing.
It was the best decision we made, getting a curved rad instead of a straight rad on another wall. The bedroom looks big when there’s nothing in it, but plonk a king size bed and some furniture inside the room and it quickly got filled! We needed all the wall space we could get so it made sense to utilise the wall underneath the window.
We chose a classic Traffic White radiator, 400mm high with 40 columns that were curved to the spec of our bay. Stylish Radiators were super helpful going back and forth on BTU requirements and measurements. For a more detailed look at how it was fitted and the specification we chose, read our curved bay radiator blog post.
We’re thrilled with how it looks and want one for the downstairs living room now, instead of our existing radiator blocked behind our sofa.
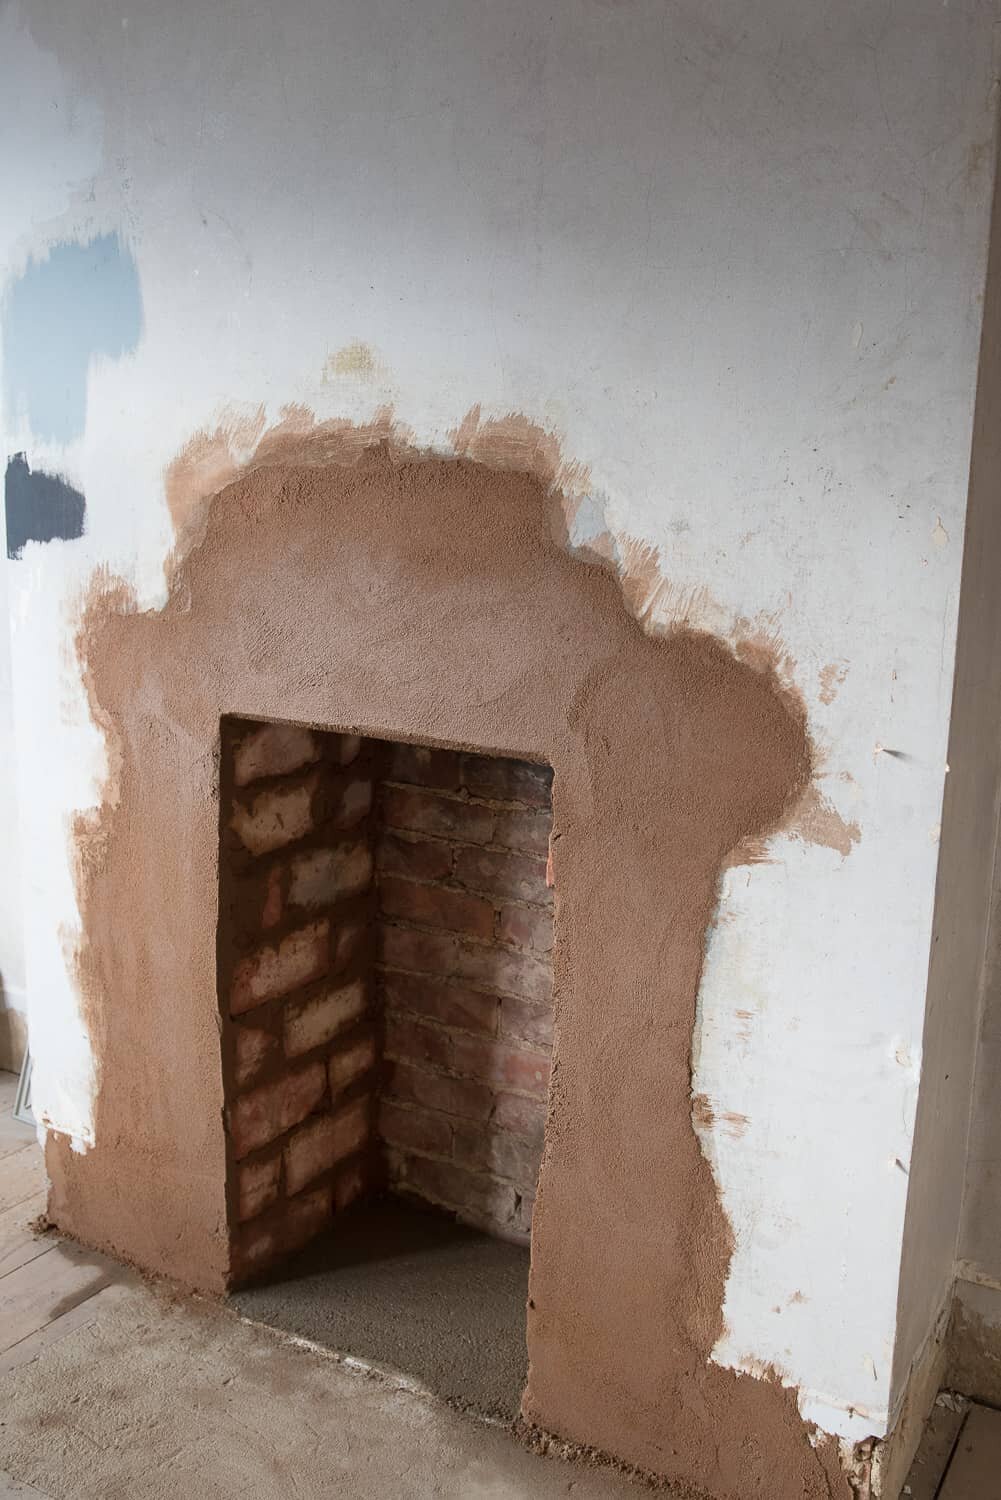
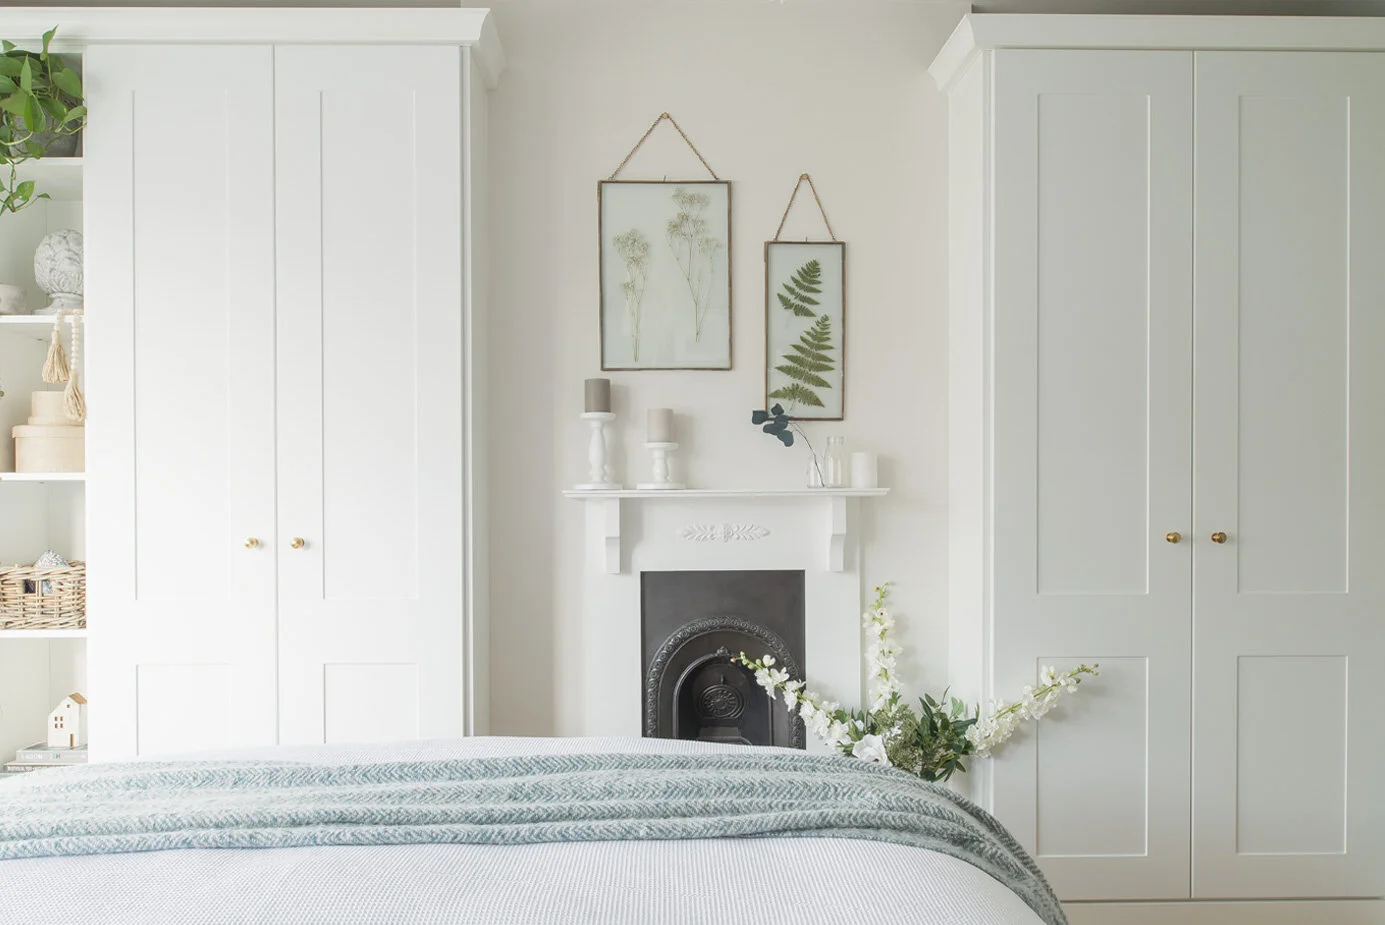
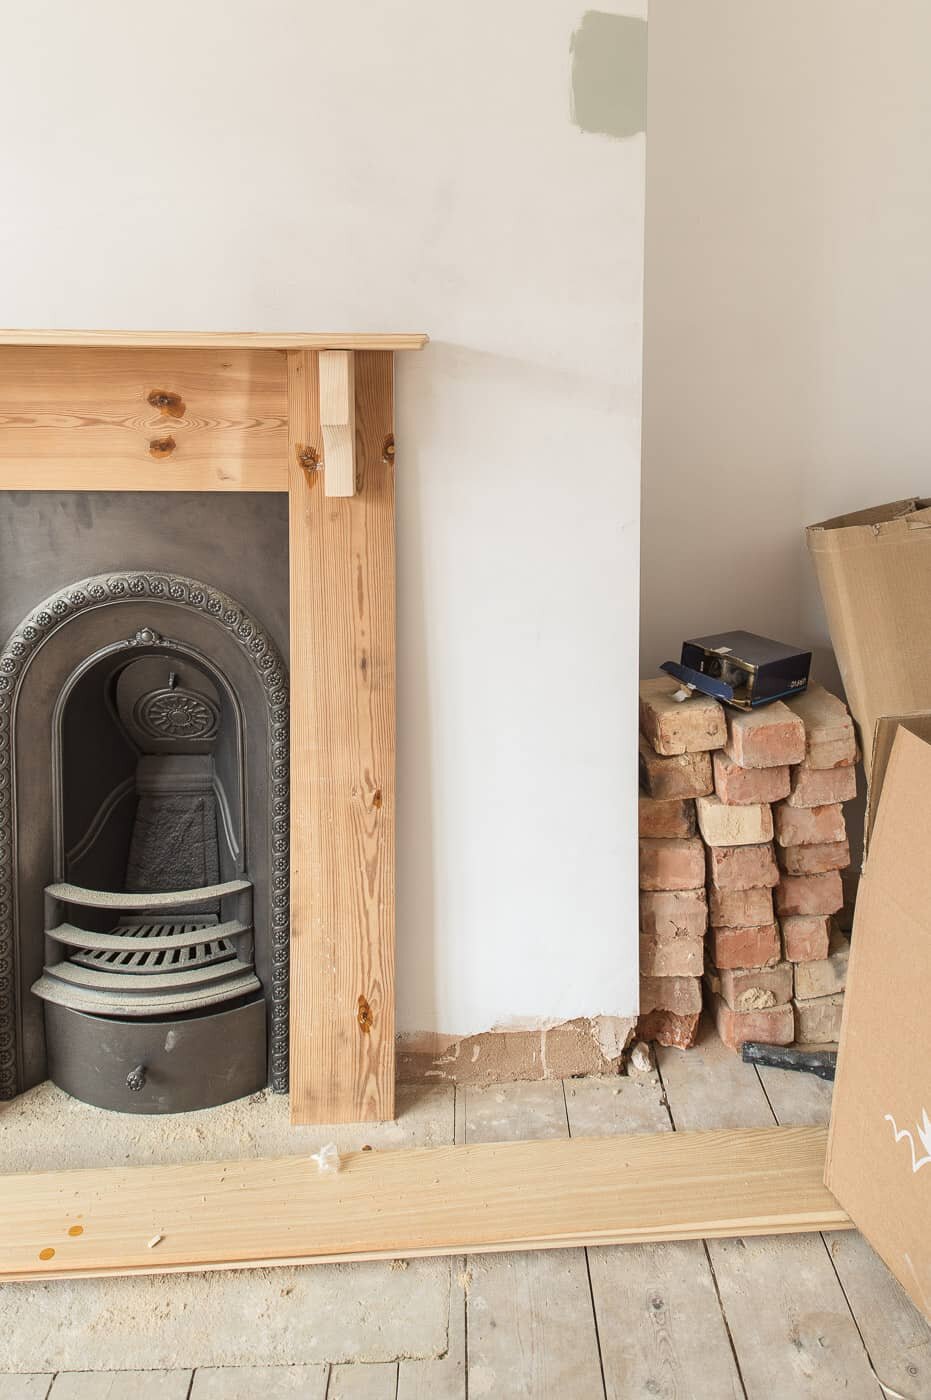
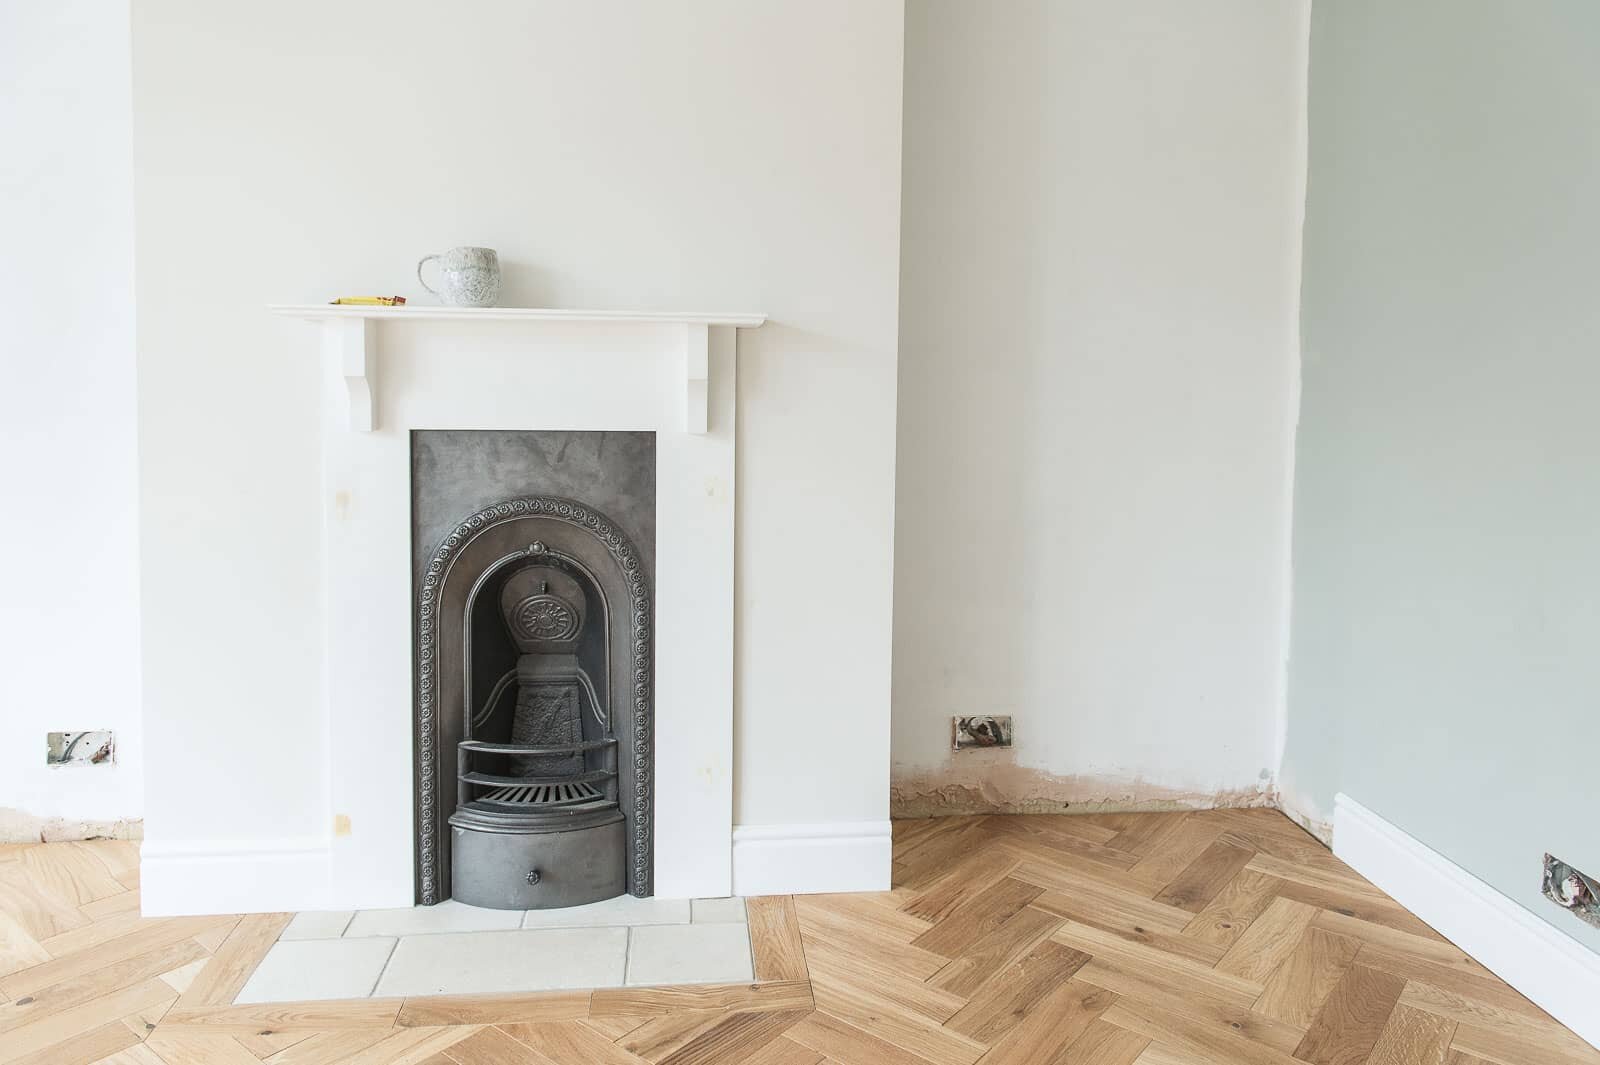
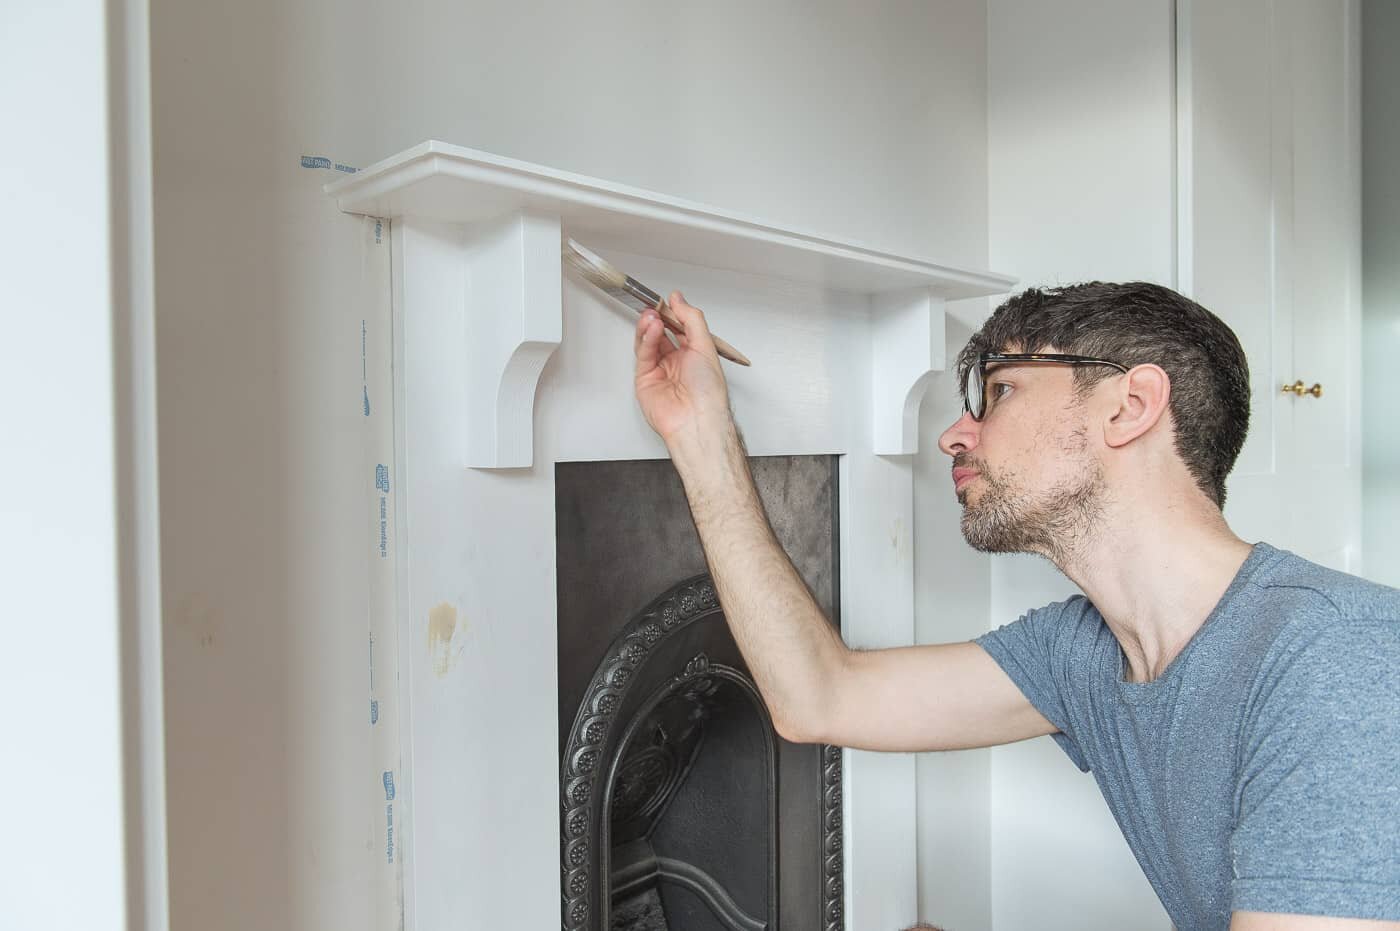
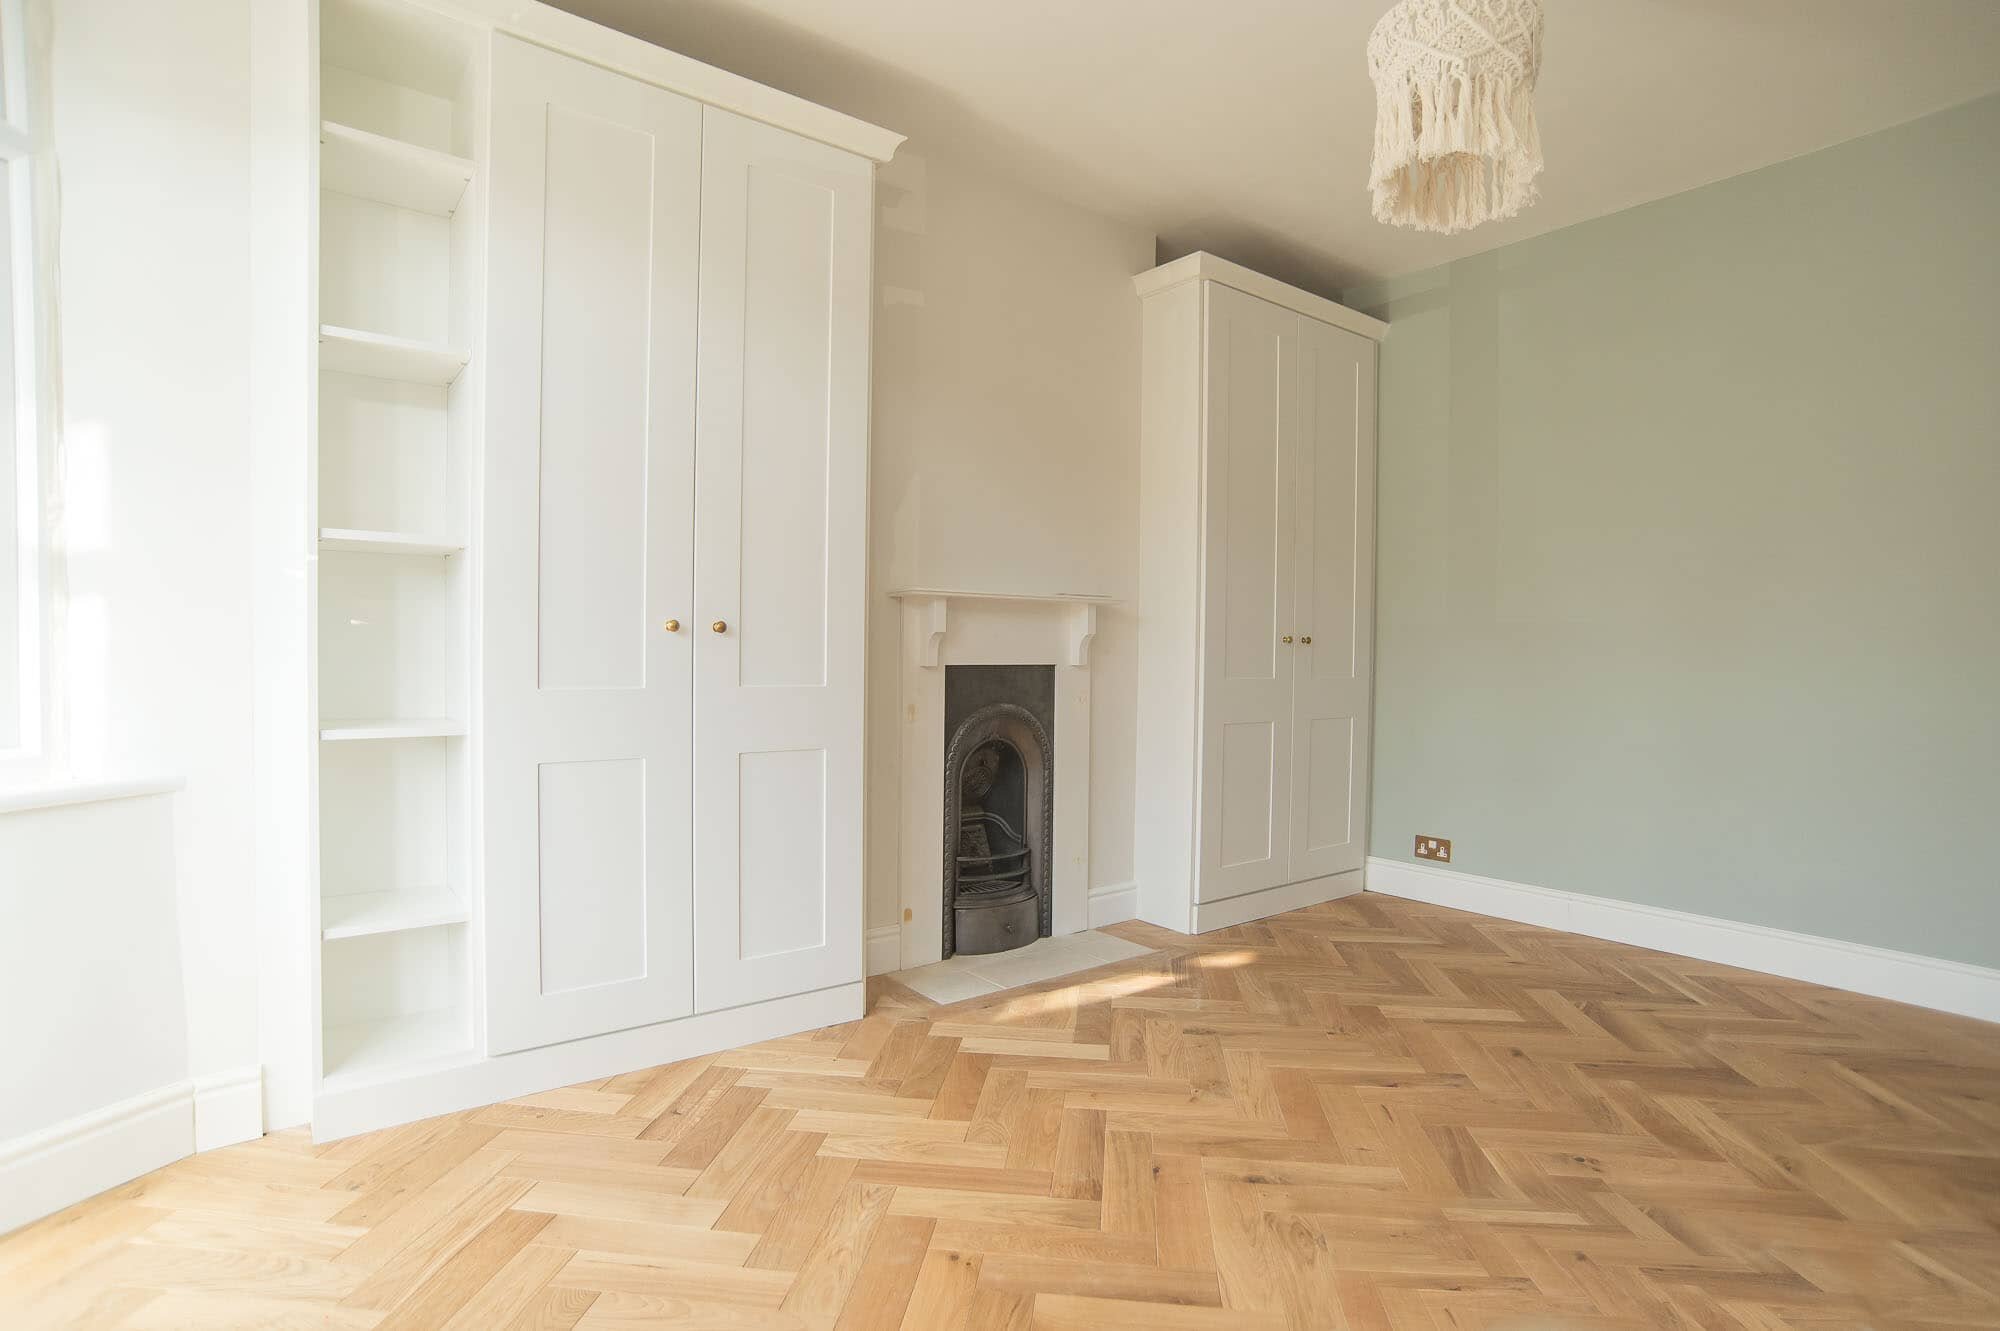
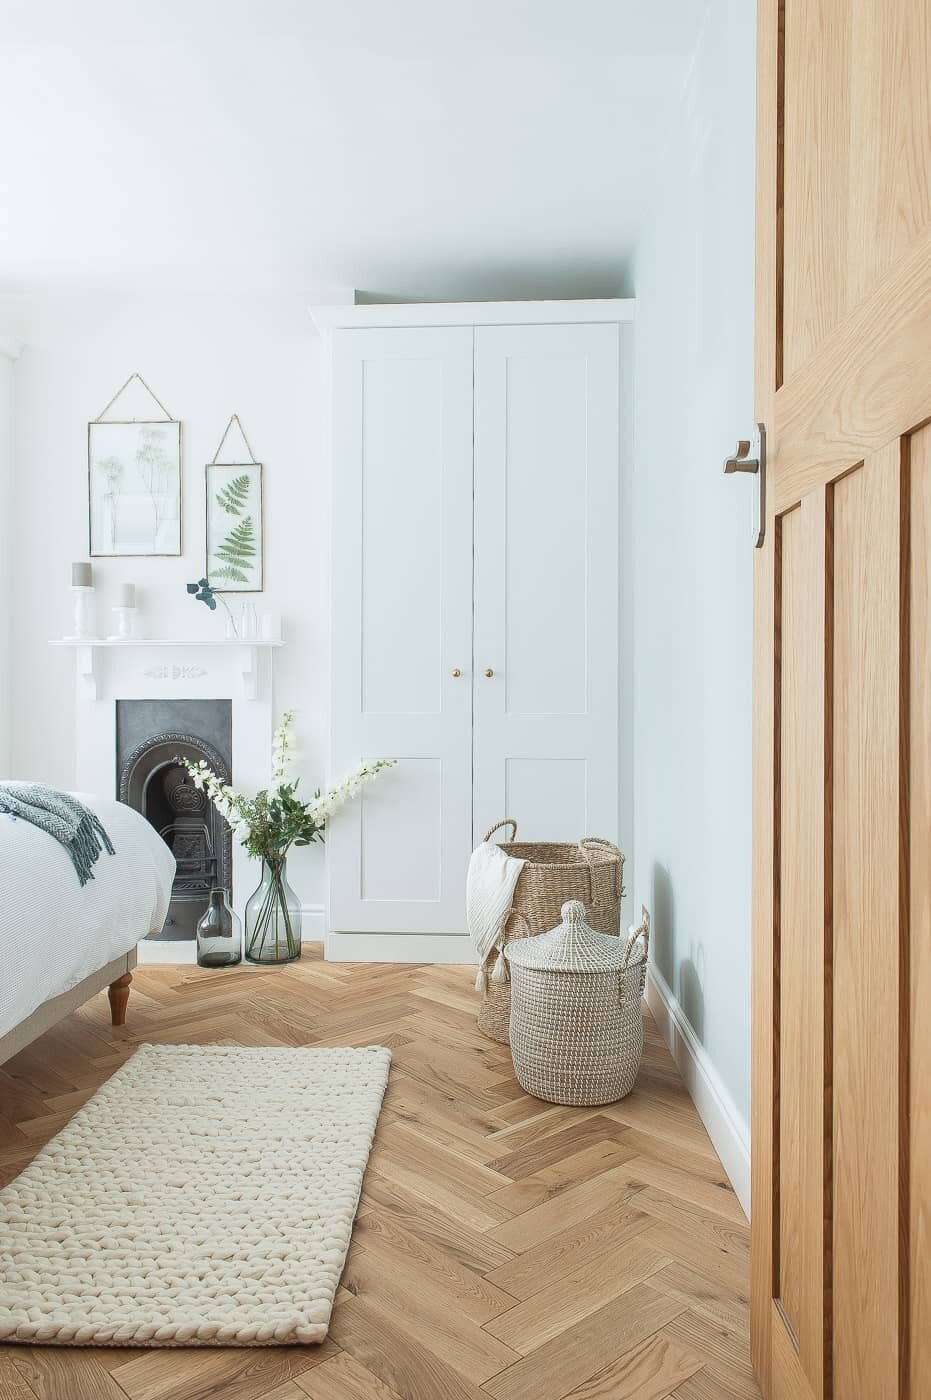
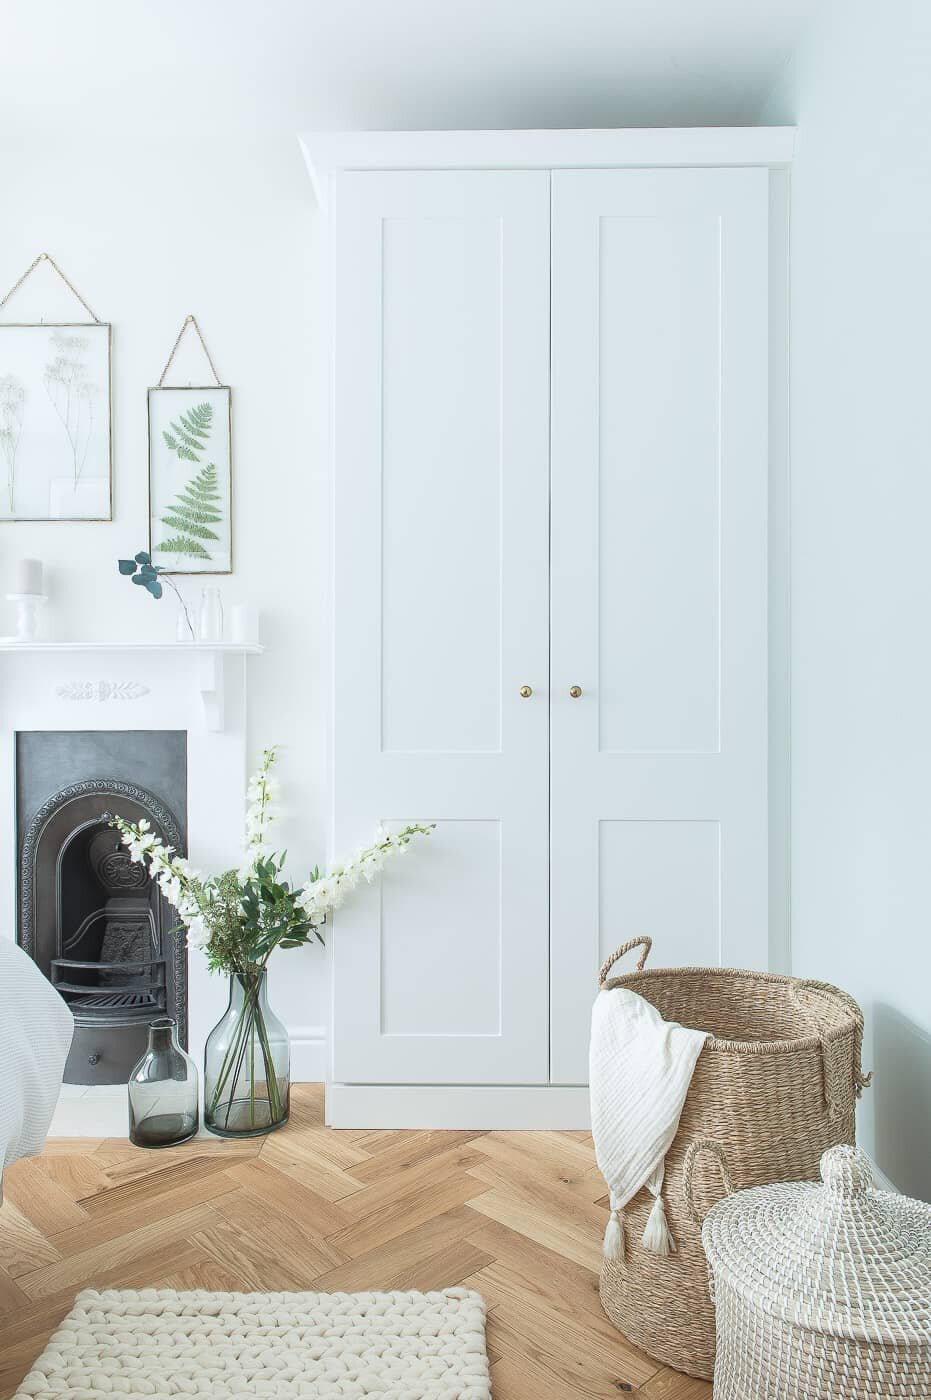
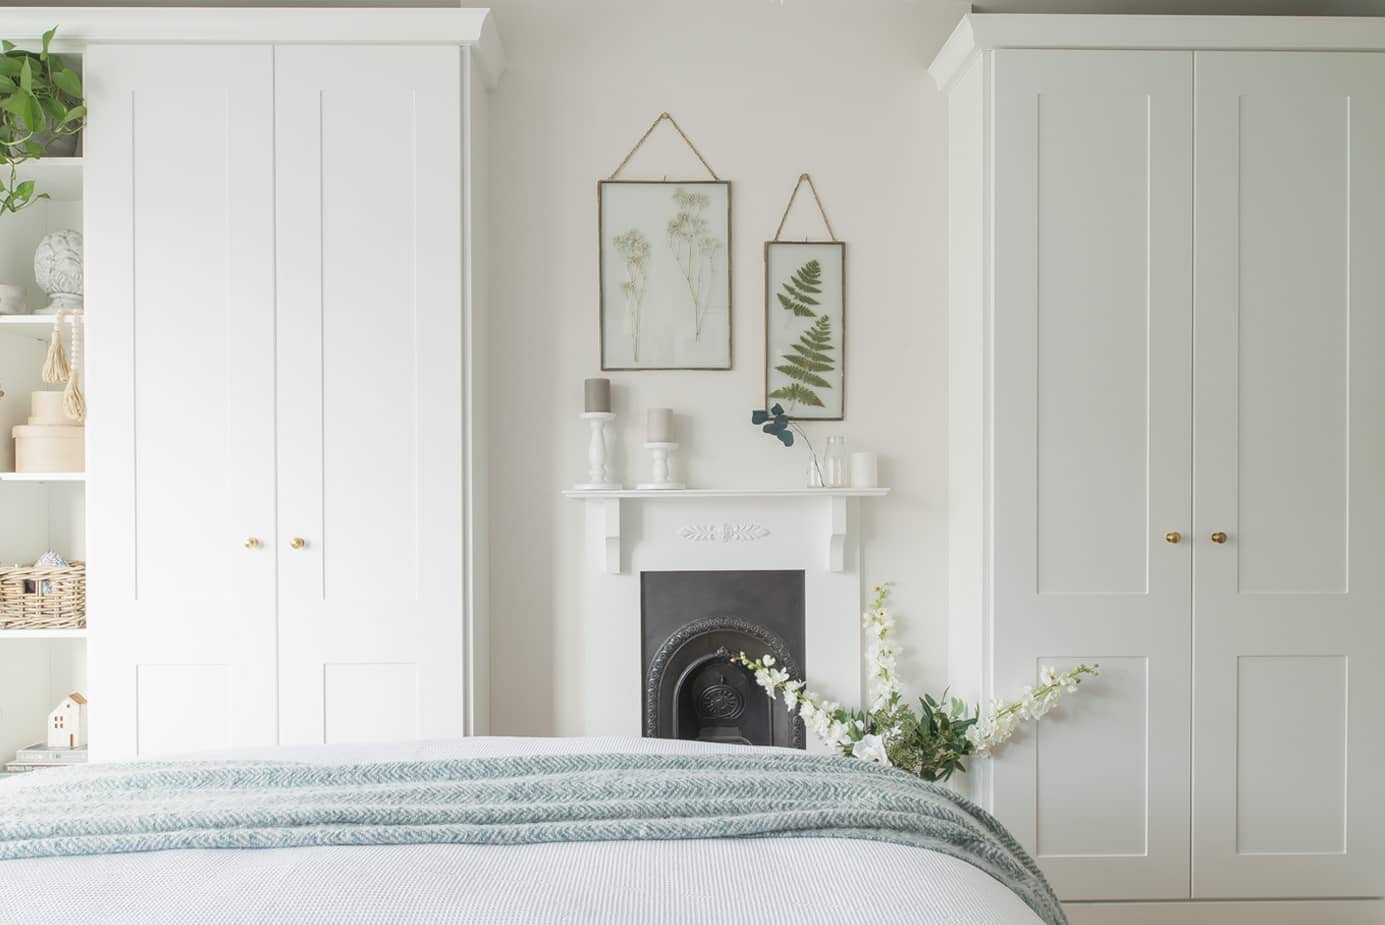
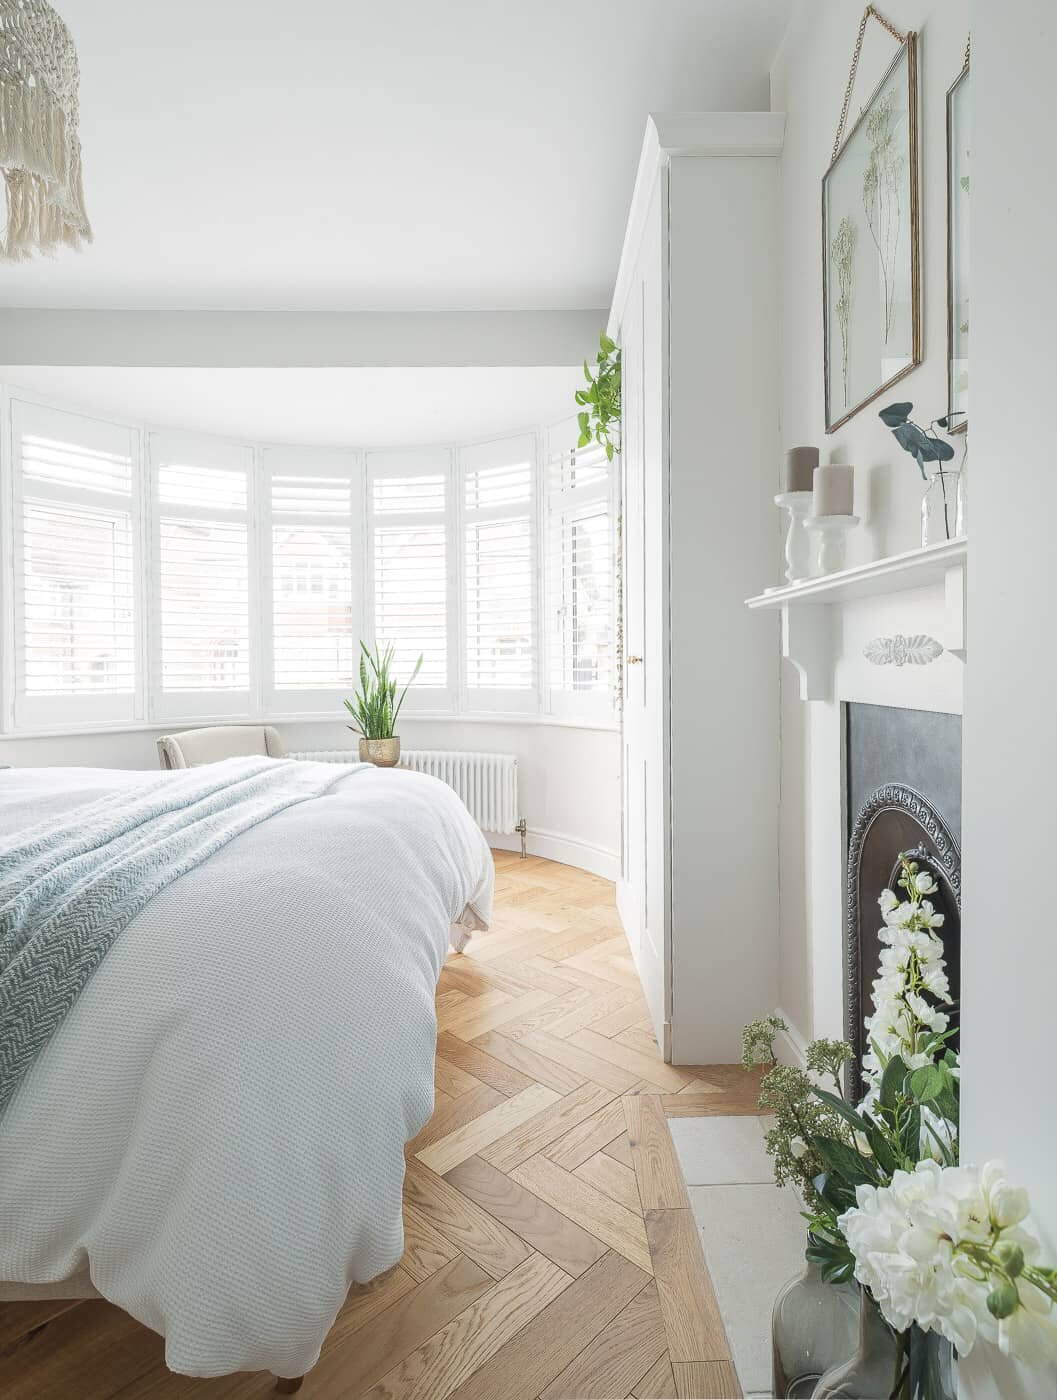
The fireplace
After our original plan for widening the fireplace failed, we came up with another solution which we actually think works better. We measured the new opening we were working with and ordered an insert from The Antique Fireplace Company. Our other carpenter LEJS Carpentry created a custom fire surround which was super simple - we didn’t want to overburden this small section.
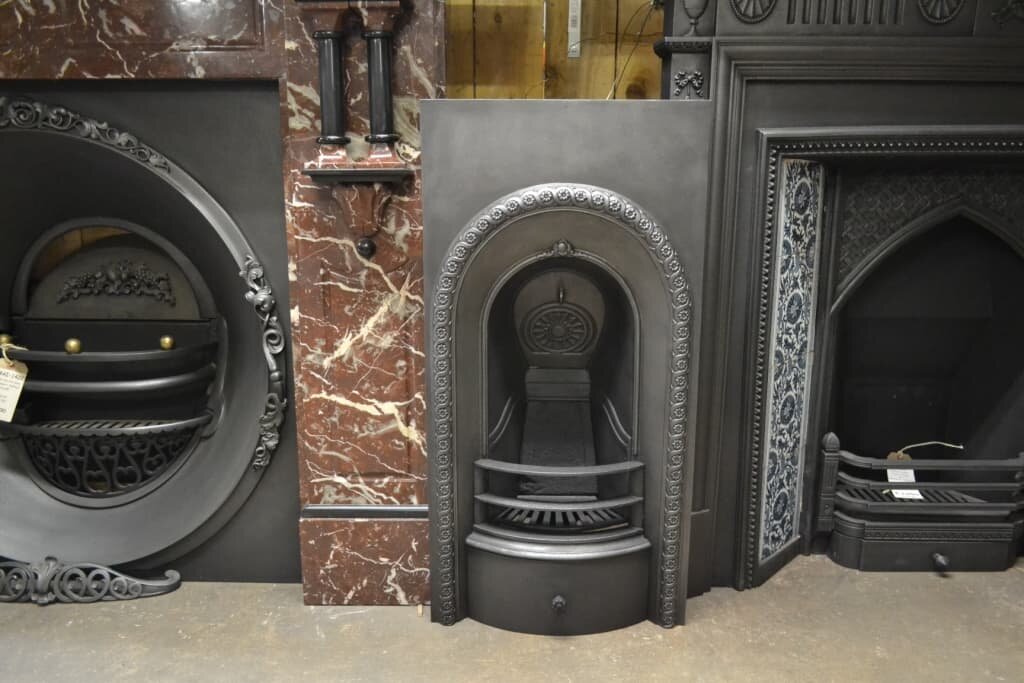
Image - The Antique fireplace company
Selecting flooring
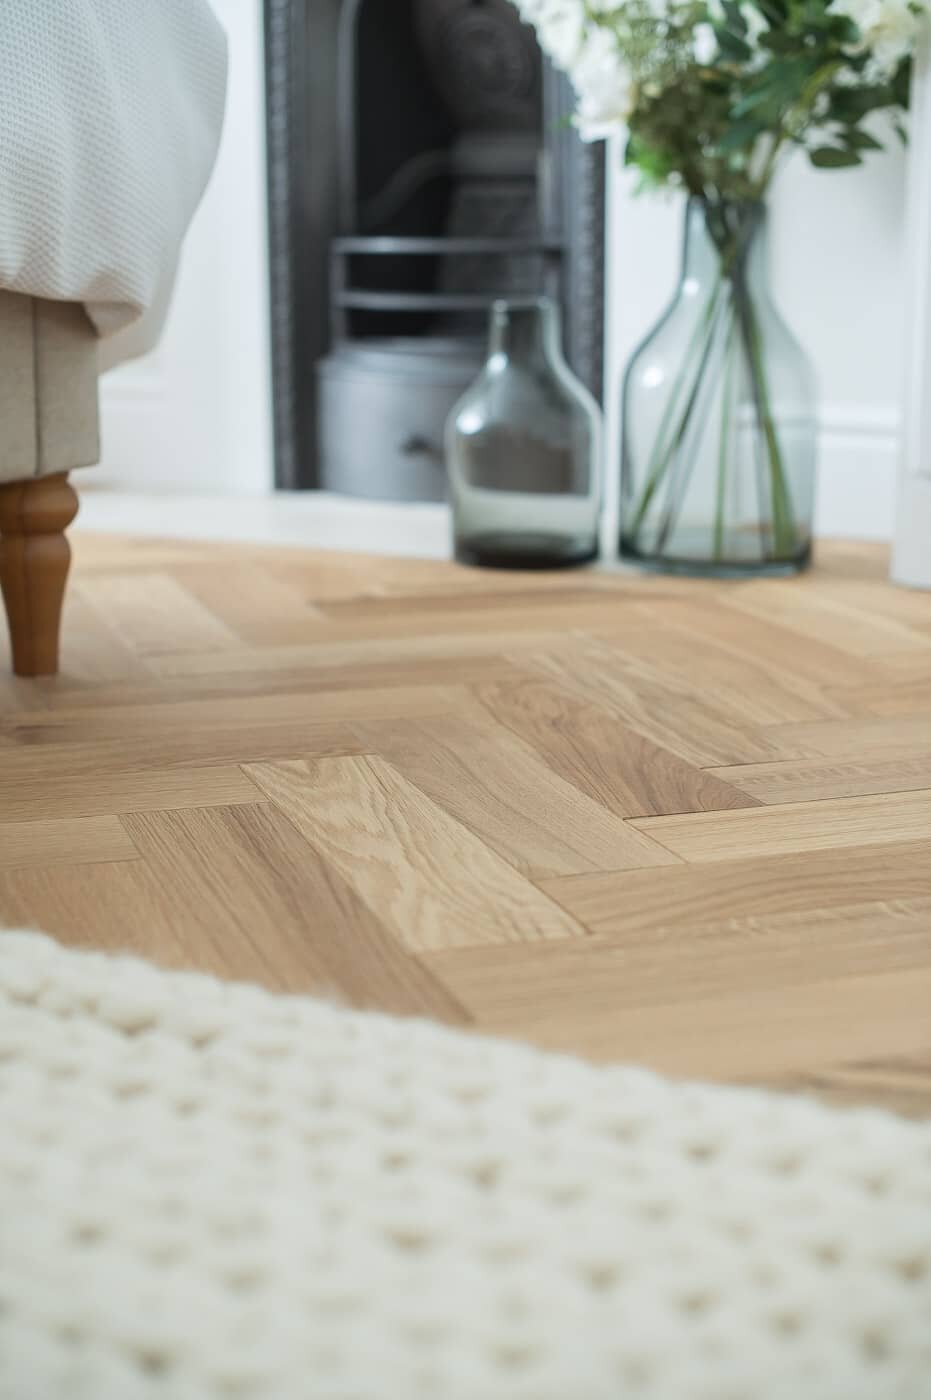
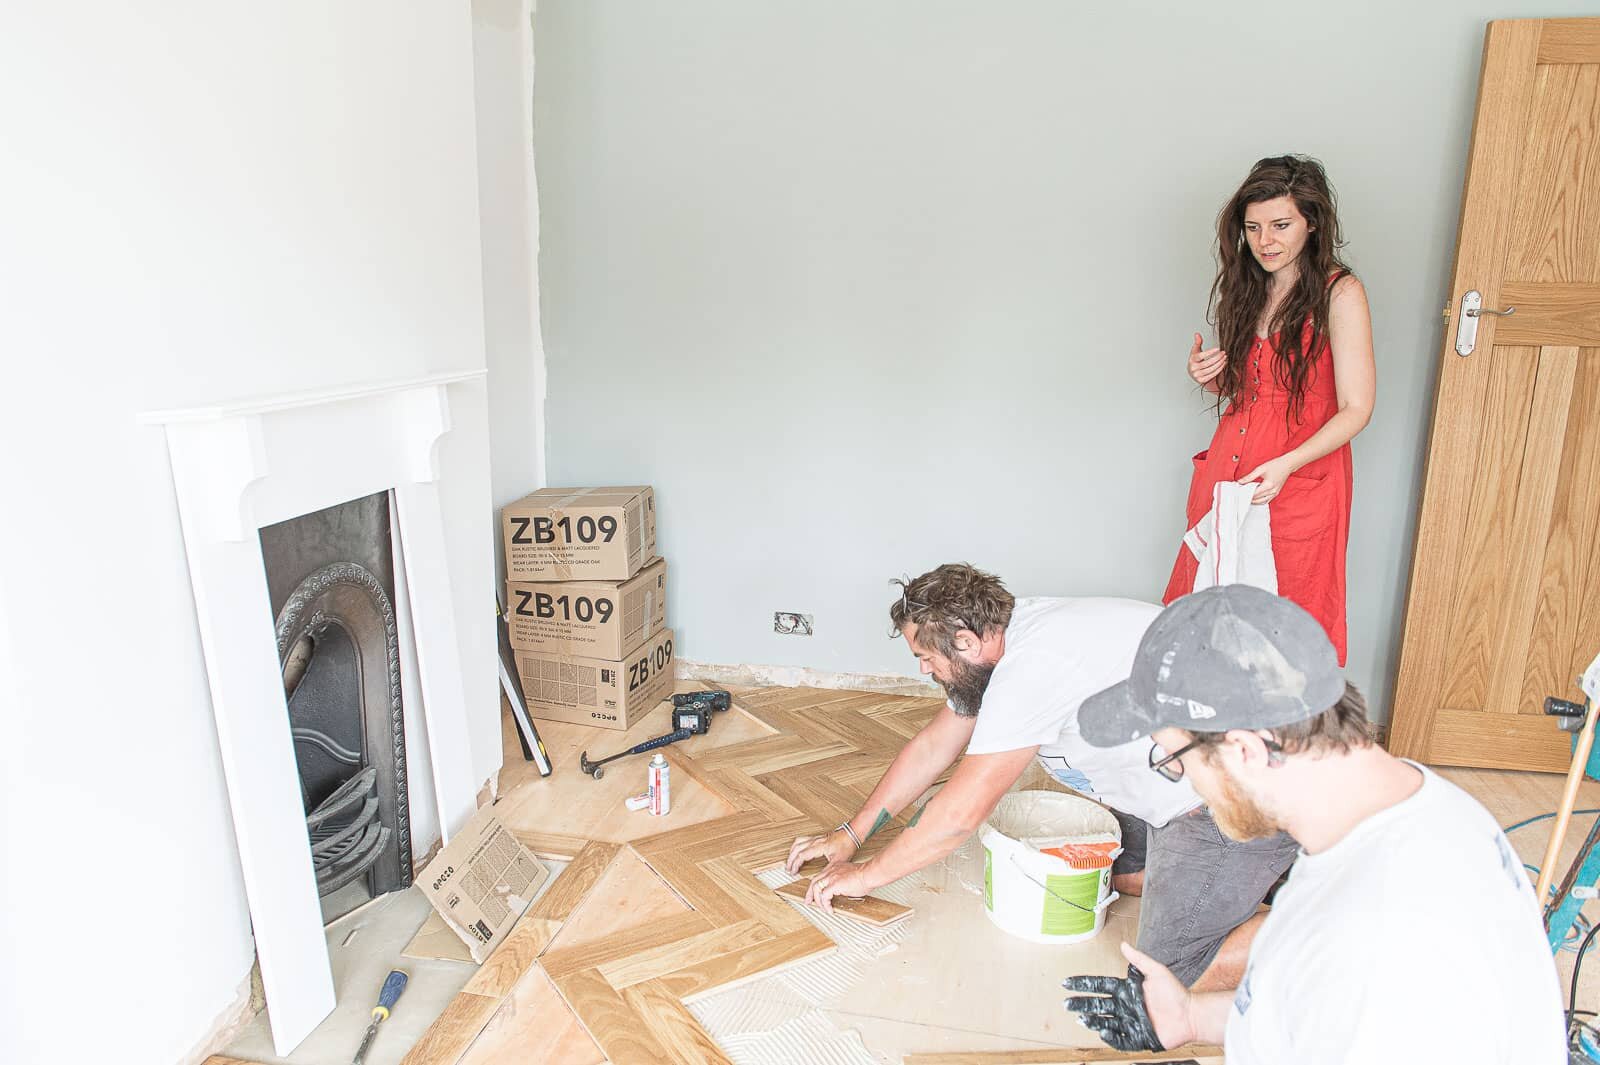
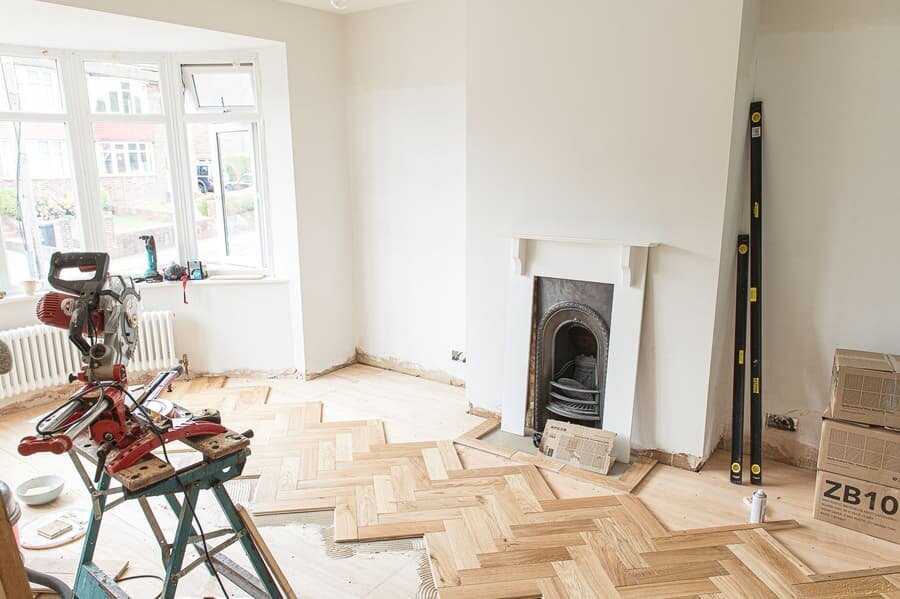
Since the day we got the keys back in 2016 we loved the thought of having parquet flooring somewhere in the house. We weren’t lucky enough to find any original parquet floors like many other 30s homeowners have, and opted for more practical flooring downstairs (laminate, mainly for the kitchen splashes!). So upstairs was the perfect place to install these wooden parquet floors.
We worked with Oakwoods Flooring who supplied us with the Woodlands Eco Pro Brushed & Lacquered floors. If you’re looking for more details about how these were laid and the exact price and spec, read our parquet flooring post.

Flexible skirting for the curved bay
As we’ve mentioned, we obtained some flexible skirting from WM Boyle to fit into our curved bay. This was a better solution for us since we previously had to do a workaround in our living room (cutting sections of MDF skirting which cost significantly more). It took a lot of filling to get right but it gave us the desired curve at a very reasonable cost.
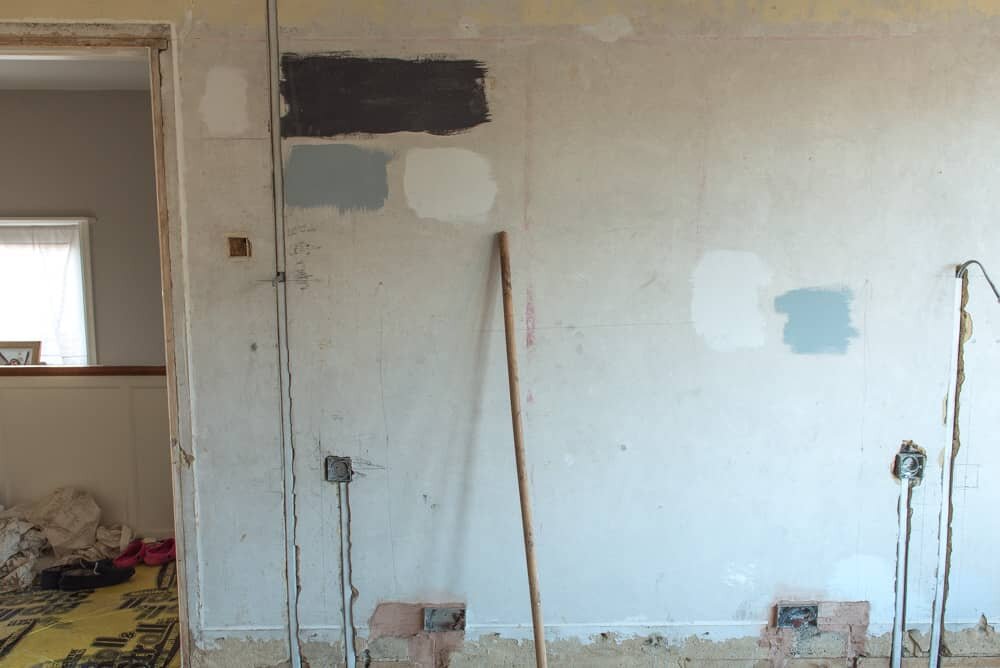
Choosing colours
Rachel from the Reno Club asked: “Would love to know the paint colours you've used, the green is stunning! It's beautiful, congrats and enjoy the fruits of your labour!”
The green is Alpine, by Neptune.
The chimney breast and wall behind the radiator is Salt, by Neptune (one of my favourite neutrals of all time)
The panelling is All White by Farrow & Ball*
The fireplace and skirting are Bradite One Can (RAL 9003) as this was a better match for the wardrobes.
My favourite part of this room is the Alpine colour above the panelled wall which we chose to make a feature wall on the right as you walk in. Neptune’s paints are underrated in my opinion. Not enough people know about them or use them. Their colour options are confined (in a good way) and their paint is silky to use.
This room was easy to select colours for, but darker rooms in our home (like our bathroom) needed more consideration.
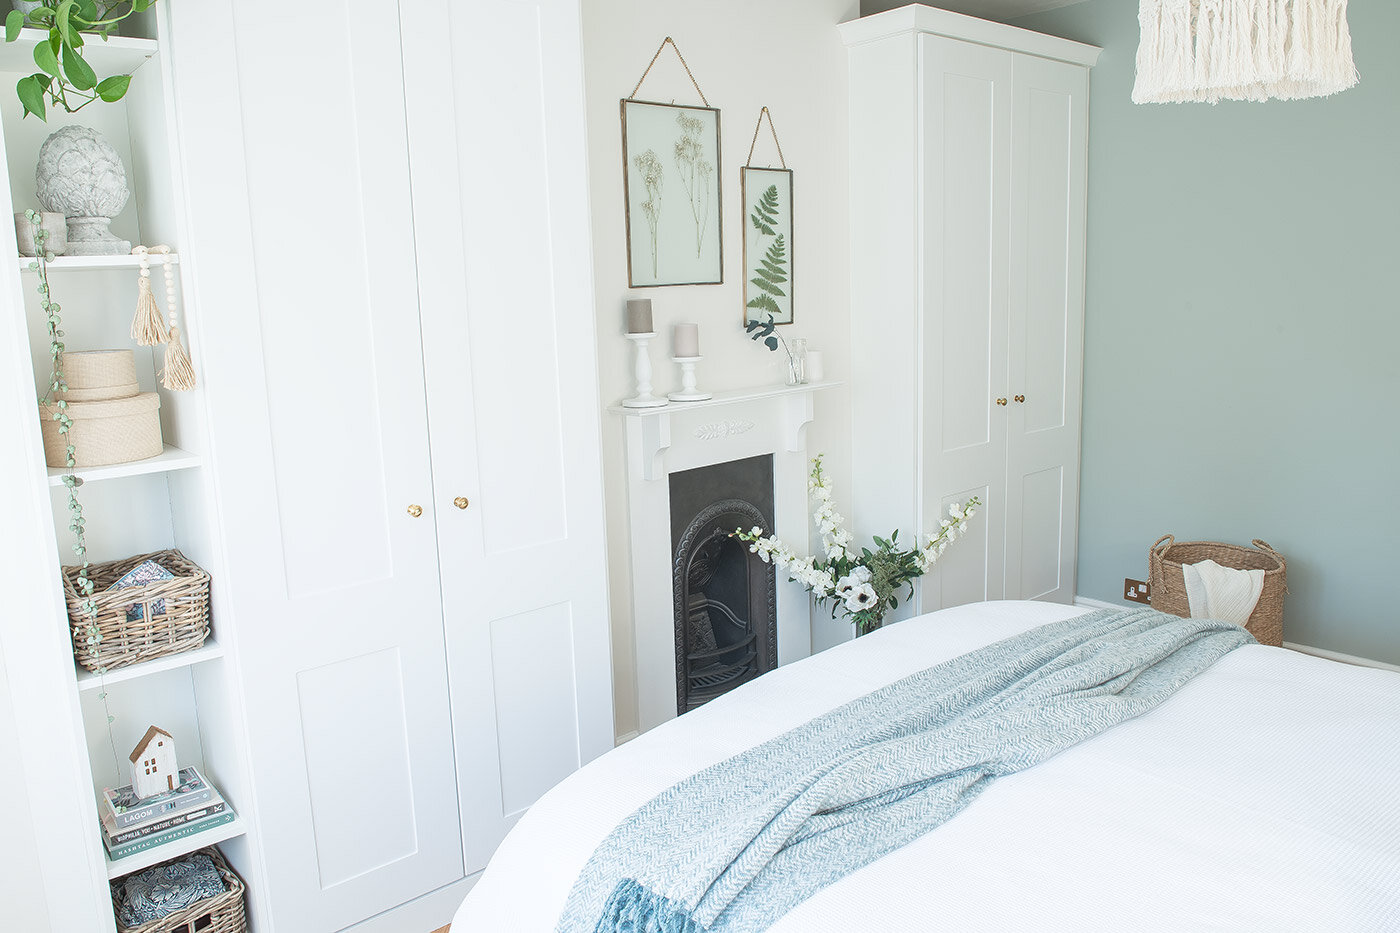
Our built in wardrobes
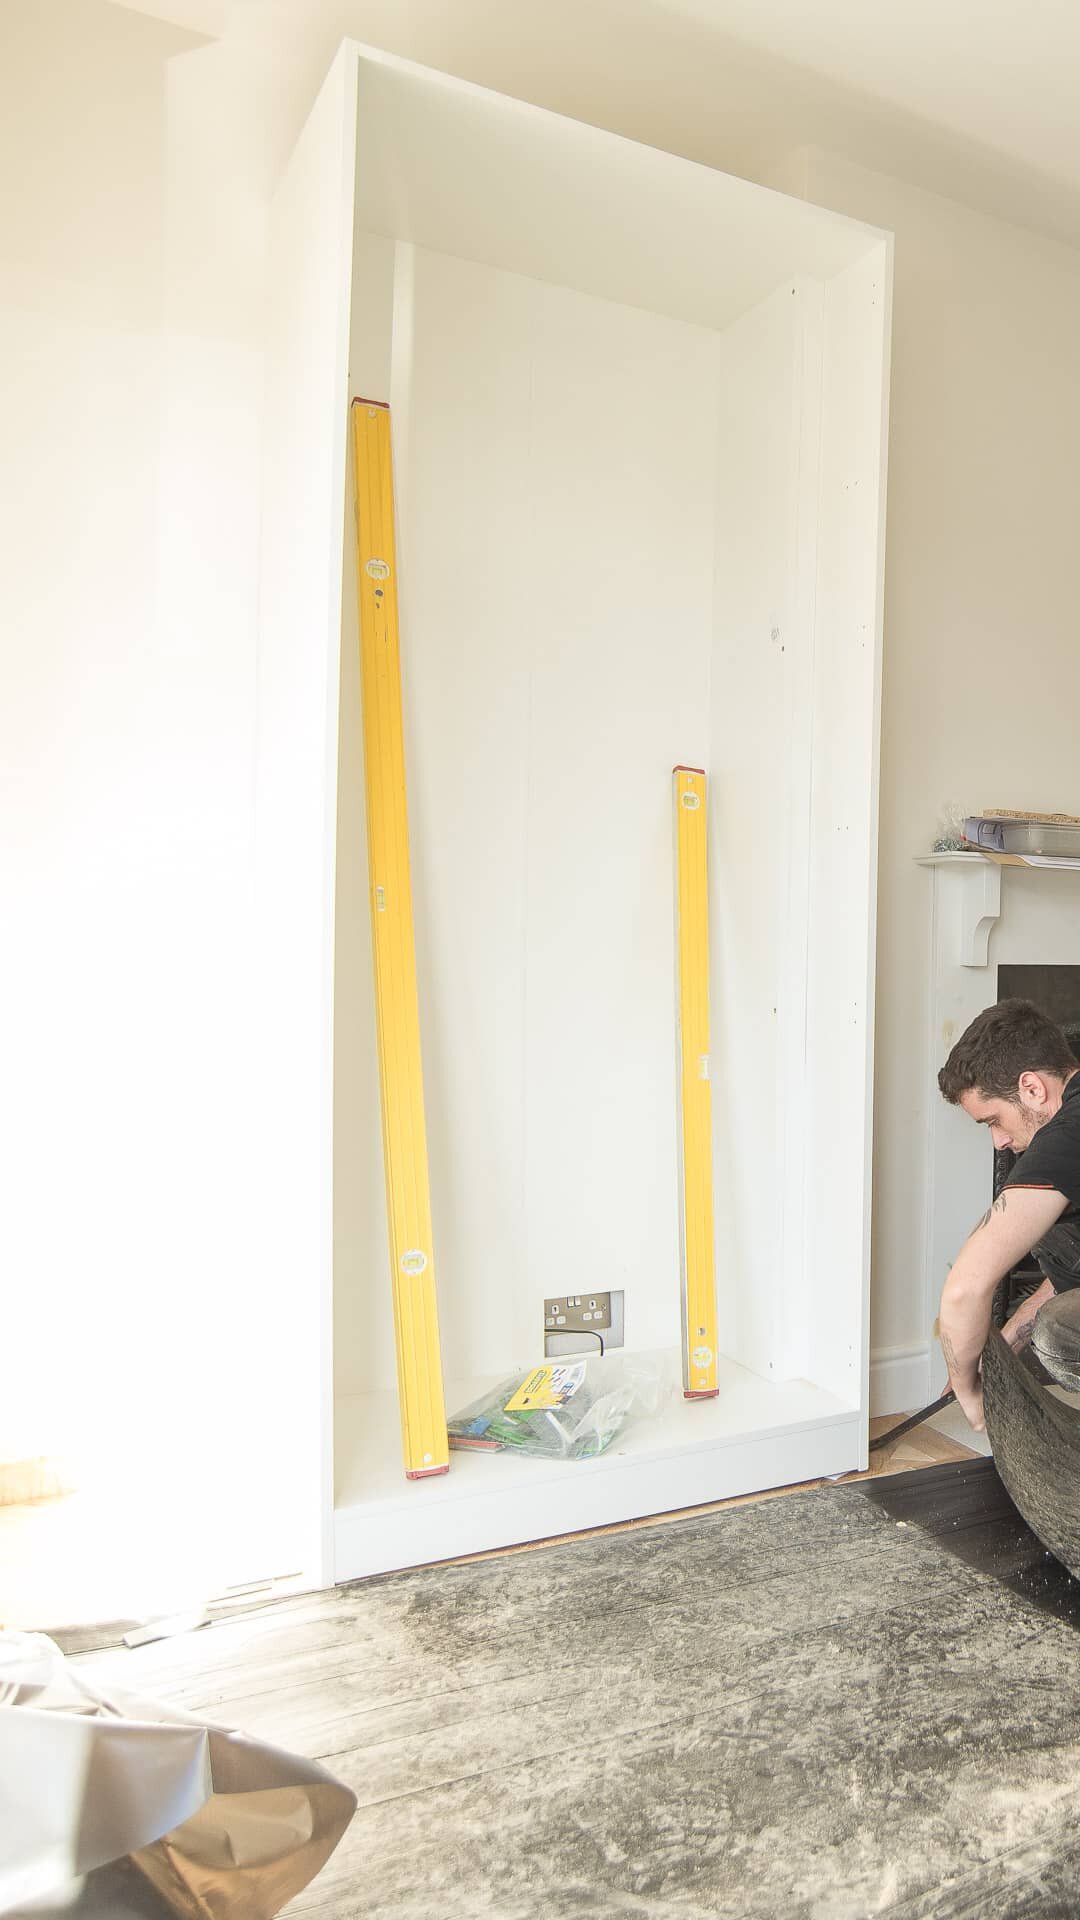
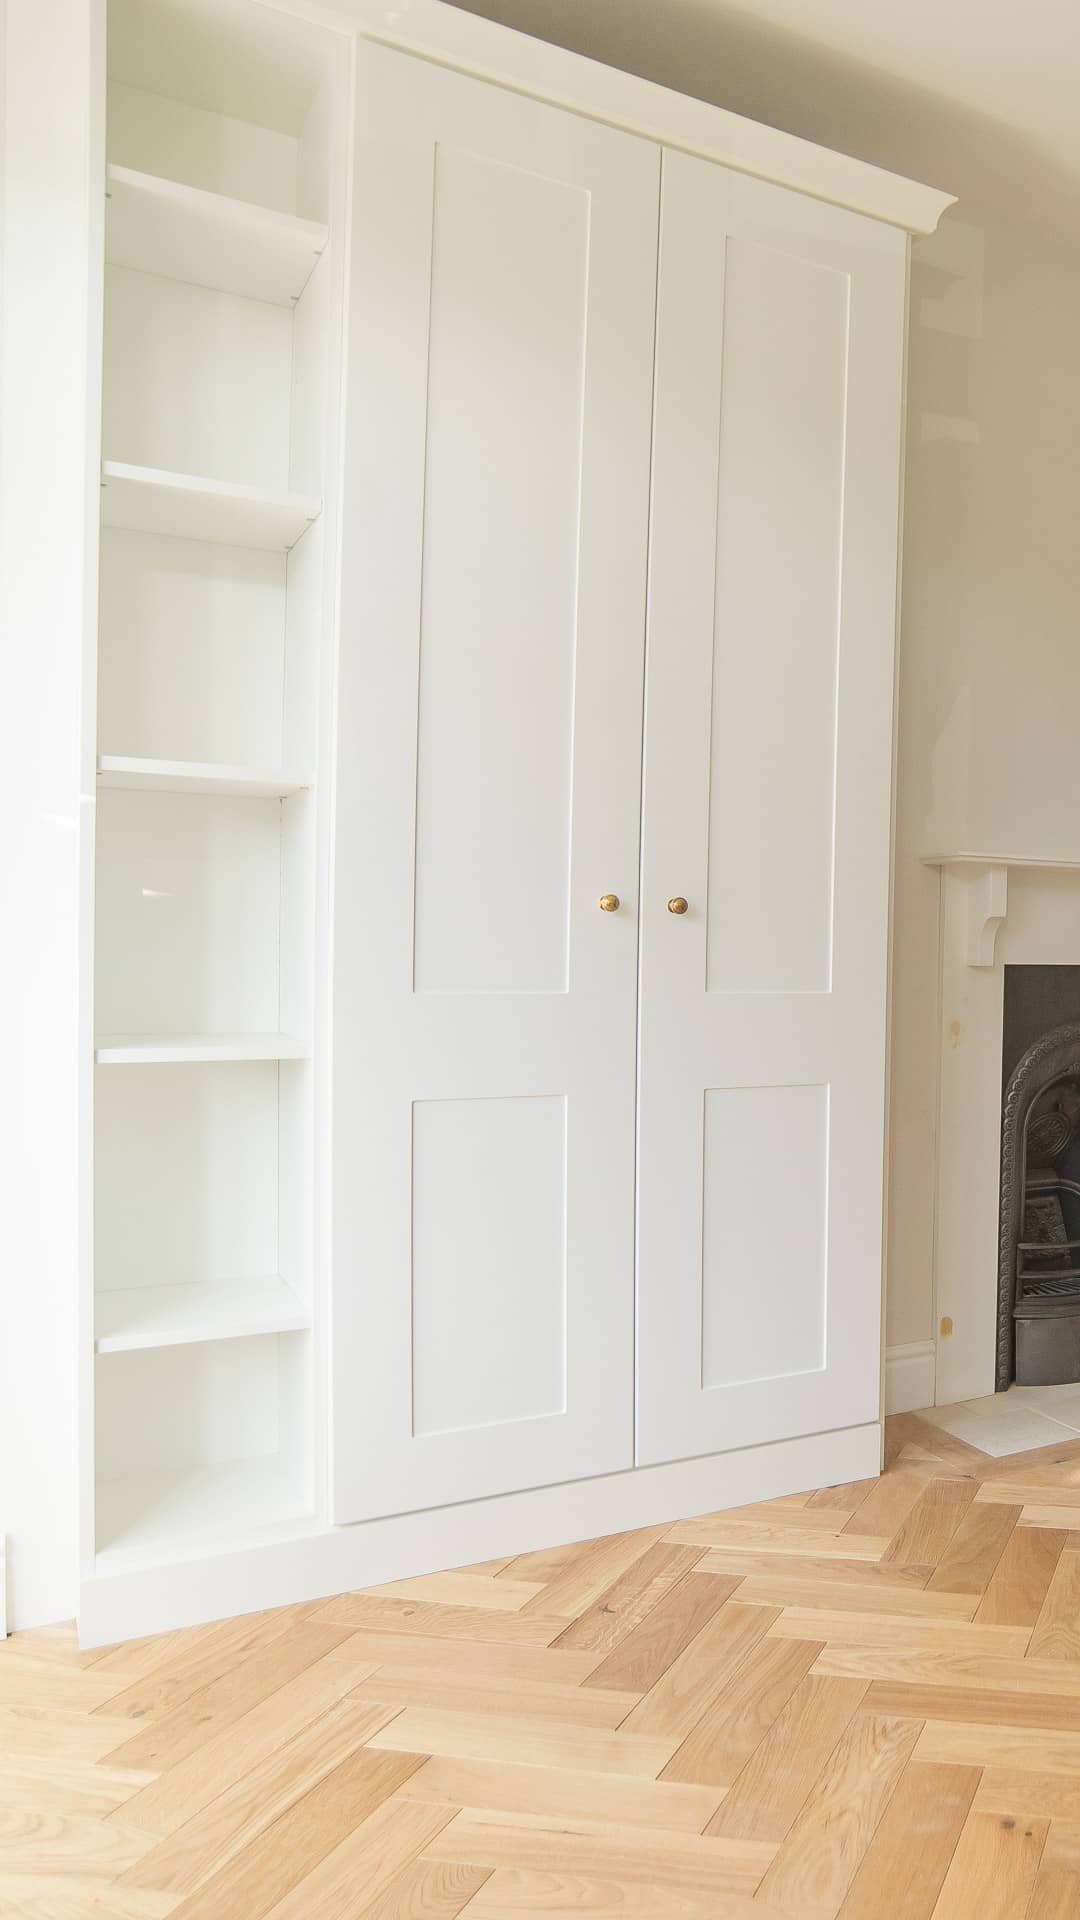
Of all the additions we made to the Master Bedroom, it’s these built in wardrobes that have had the most impact on our day to day living.
Previously, we had a shoddy IKEA wardrobe in the other bedroom. We worked with My Fitted Bedroom to design and install wardrobes to the alcoves, providing loads of storage, full length mirrors on the insides of all the doors and a make up station for me using the top drawer.
Whenever I get dressed and do my hair in here, everything’s just easy. That’s what good design should be. We considered the configuration very closely and now that it’s all built and playing out day to day, we’re really pleased with how it’s working on a practical level. Read all about our alcove wardrobes in this post. It’s a mammoth one with lots of juicy tips if you’re considering a fitted bedroom.
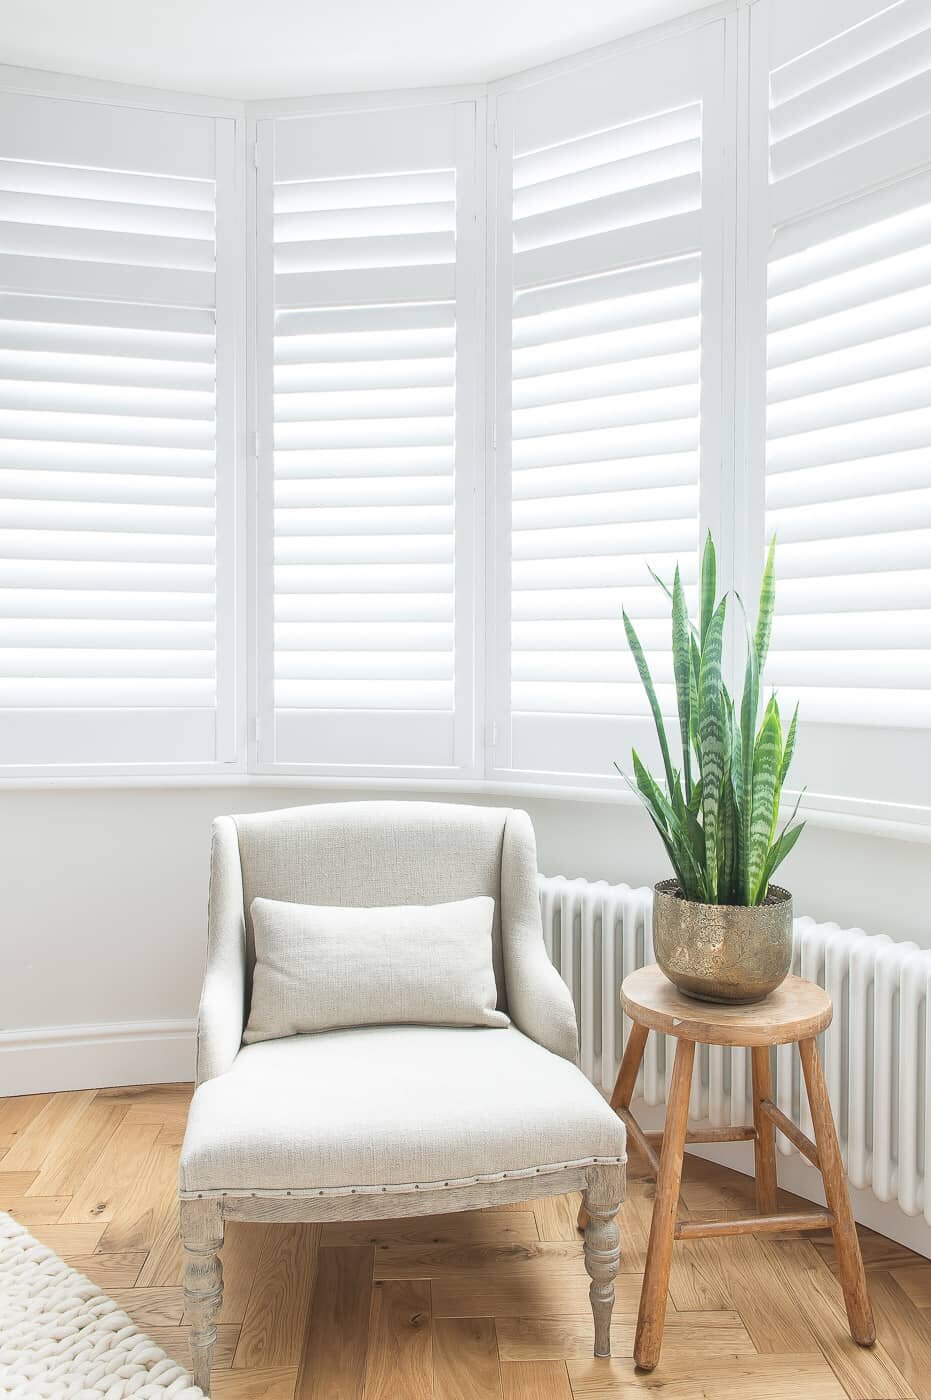
The shutters
Curved bay windows are notoriously tricky to dress. With little room either side, and finding it impossible to source curved poles, shutters for curved bay windows are a very easy choice – plus, they have the added bonus of smartening up the exterior of a house.
This bedroom gets hot in summer. We’ve not experienced a summer sleeping in this room yet, but neighbours tell us how when the sun comes round in the afternoon, it’s a hot box! Our thinking was that by installing shutters, we’ll be able to tilt the slats to reduce sunlight entering the room through the day – keeping it cooler.
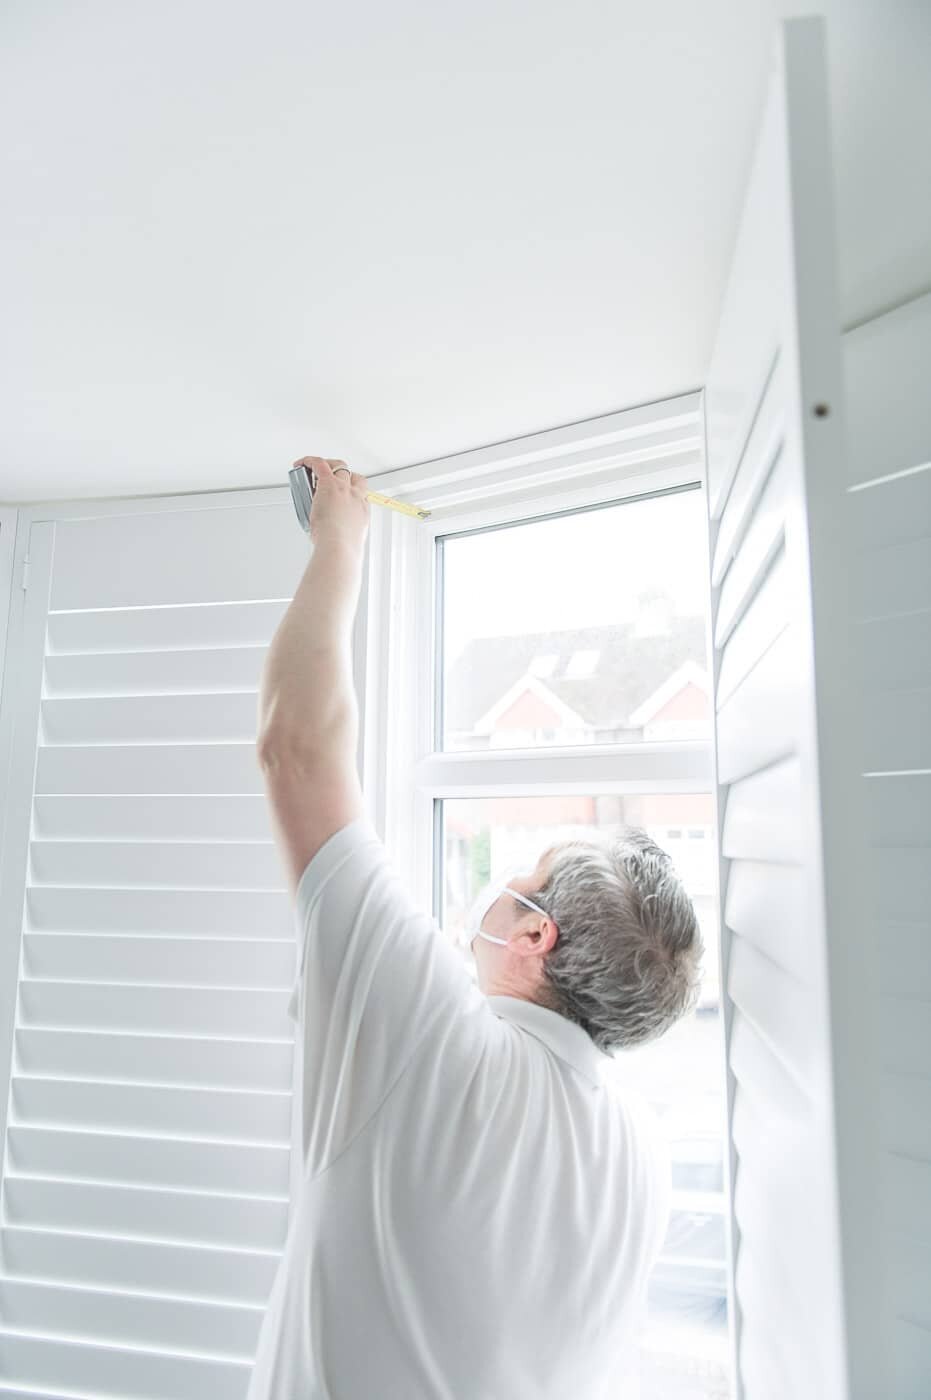

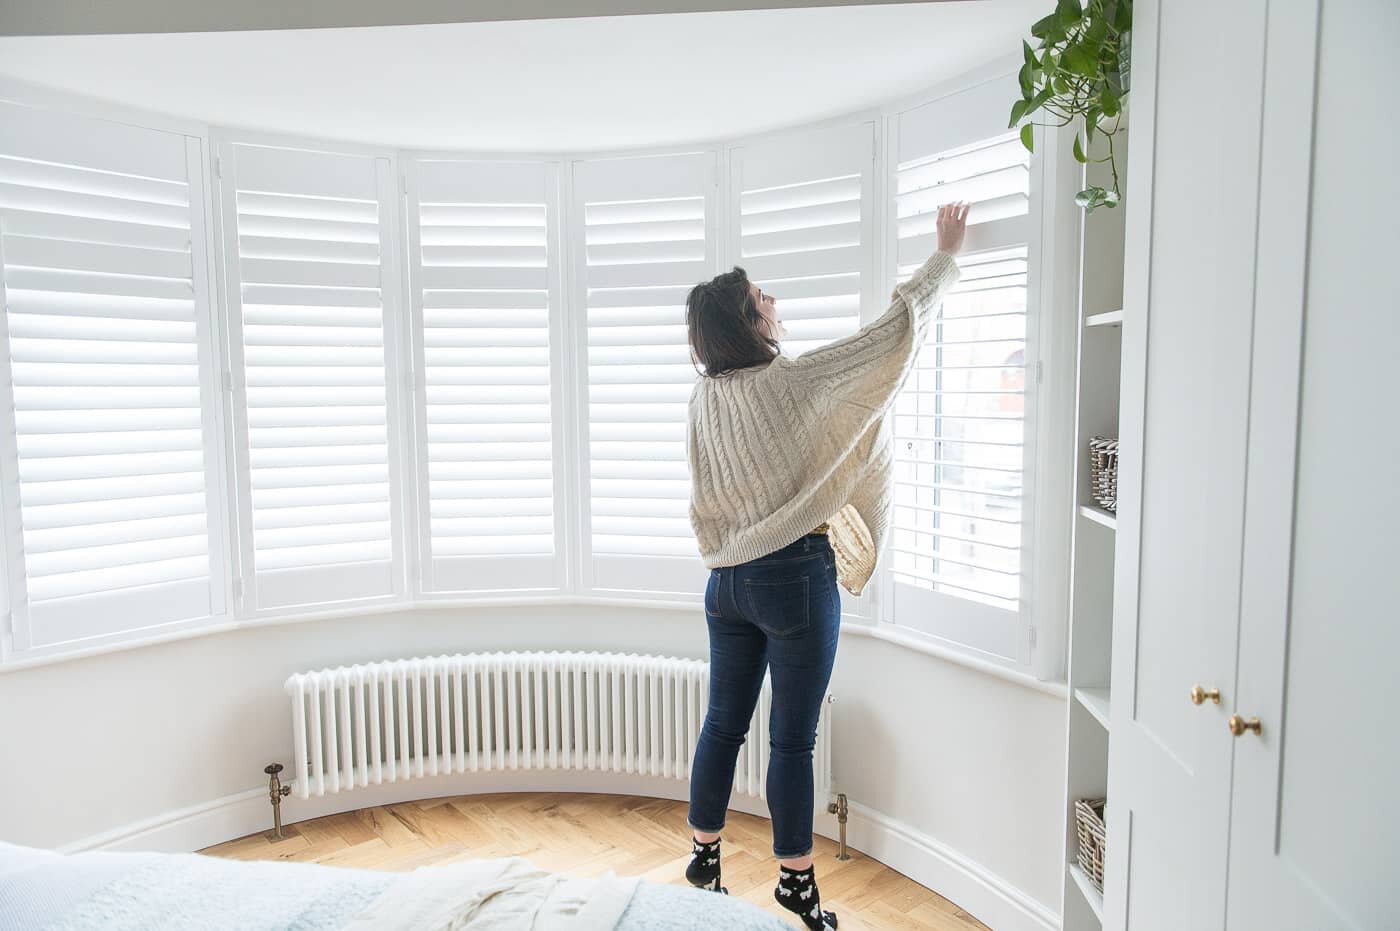
From a design perspective, shutters finish a room beautifully in a way that net curtains simply can’t. We’re slowly but surely replacing all of the window dressing for our front windows, so that each room matches with shutters. We can’t wait to show you how the exterior looks when this is complete.
Living with these shutters for 2-3 months now, we’re thrilled with them. They give us plenty of privacy when getting changed without blocking light. Love them!
These were part of a previous collaboration we discussed in detail in a Hillarys shutters review.
Choosing the bed and frame
One of the hardest decisions in the bedroom wasn’t things like layout, or how we wanted the electrics, it was finding a bed we both liked with the right dimensions in the right style for the room. Over the years, the more I work in interiors I realise how limited the UK is when it comes to furniture suppliers.
I have select suppliers I turn to for certain things, but it doesn’t stop me thinking that places like the States, their furniture options are boundless. Over here, to get quality furniture with the right design, the right dimensions, at a reasonable cost, it’s near impossible or takes an unreal amount of man hours to find something right.
We deliberated for a long time and lead times were even longer. We needed to choose a bed quickly. One that we didn’t have to ‘settle with’. We hate compromising. That’s when we found Button & Sprung who solved a lot of problems for us. They offer quality headboards and beds allowing you to choose from a wide range of beautiful fabrics and customise your base and legs. When we found The Camelia, we were smitten.
We chose the Button & Sprung King size Camelia Headboard which was upholstered in a high grade soft wool fabric. It’s a natural colour that complements the muted Alpine green and crisp All White cladding. It’s versatile too. If we ever decide to change the colours in this room, we’ll be assured that the Natural headboard fabric will suit a wide variety of schemes.
The first night we slept in this bed was luxury. We made a good decision getting it because it has a noticeably heavy base while still being raised from the floor. You perch your bum on the end and nothing moves but the mattress beneath you. Our old bed creaked and shifted about 5cm to the left or right whenever you sat on it!
The Master Bedroom Complete


CURVED SKIRTING from WM BOYLE

Other design choices – and a regret!
As we were going for quite a unique theme in here – a nature inspired, modern country design which ended up having a twist of New England – we chose a variety of different pieces to bring this through, discovering some really lovely brands along the way. I’ve listed the items featured in here below in case you’ve spotted something you like and you want to know where it’s from.
It was a stop-start project thanks to Covid delays and a few minor issues during the final fix of the electrics (turns out dimmable lights are pretty complicated to install) and I’m glad that the only regret were the bedside tables. We don’t recommend them.
We bought them from Wayfair, thinking they’d be good quality, but not at all. They’re so light and flimsy, the table top comes off when you pick it up, and there are dodgy paint splashes all over the legs. It’s such a shame as I really like the style – but our plan is to make do for a wee while until we find something to replace them with.
Aside from that, we have zero regrets. It’s entirely down to Neil and I having a strict and straight forward process to renovating and design, that ensures no regrets and minimal mistakes. We’ve learned a lot during our renovation and in client’s projects, and we pass this all on in our renovation online course which gives homeowners peace of mind that they’re going to get the results they want.
Conclusion – we’d love to support your project
If you’ve made it this far, thank you for reading about our master bedroom makeover and for following our renovation journey through the years.
Are you about to invest in a renovation project and you’re keen to get the home of your dreams? Neil and I specialise in supporting first time renovators with many ways we can help you avoid common mistakes and achieve a home that’s designed with you in mind, not trends! Take a look at our How to Renovate a House online course and sign up to hear when we next open enrolments.
Furniture, accessories etc:
Items marked with * are affiliate links
Armchair* – Graham & Green
Fire surround – Made by @lejscarpentry
Fire insert – Old Fireplaces
Hearth tiles – Dorsaf by Topps Tiles
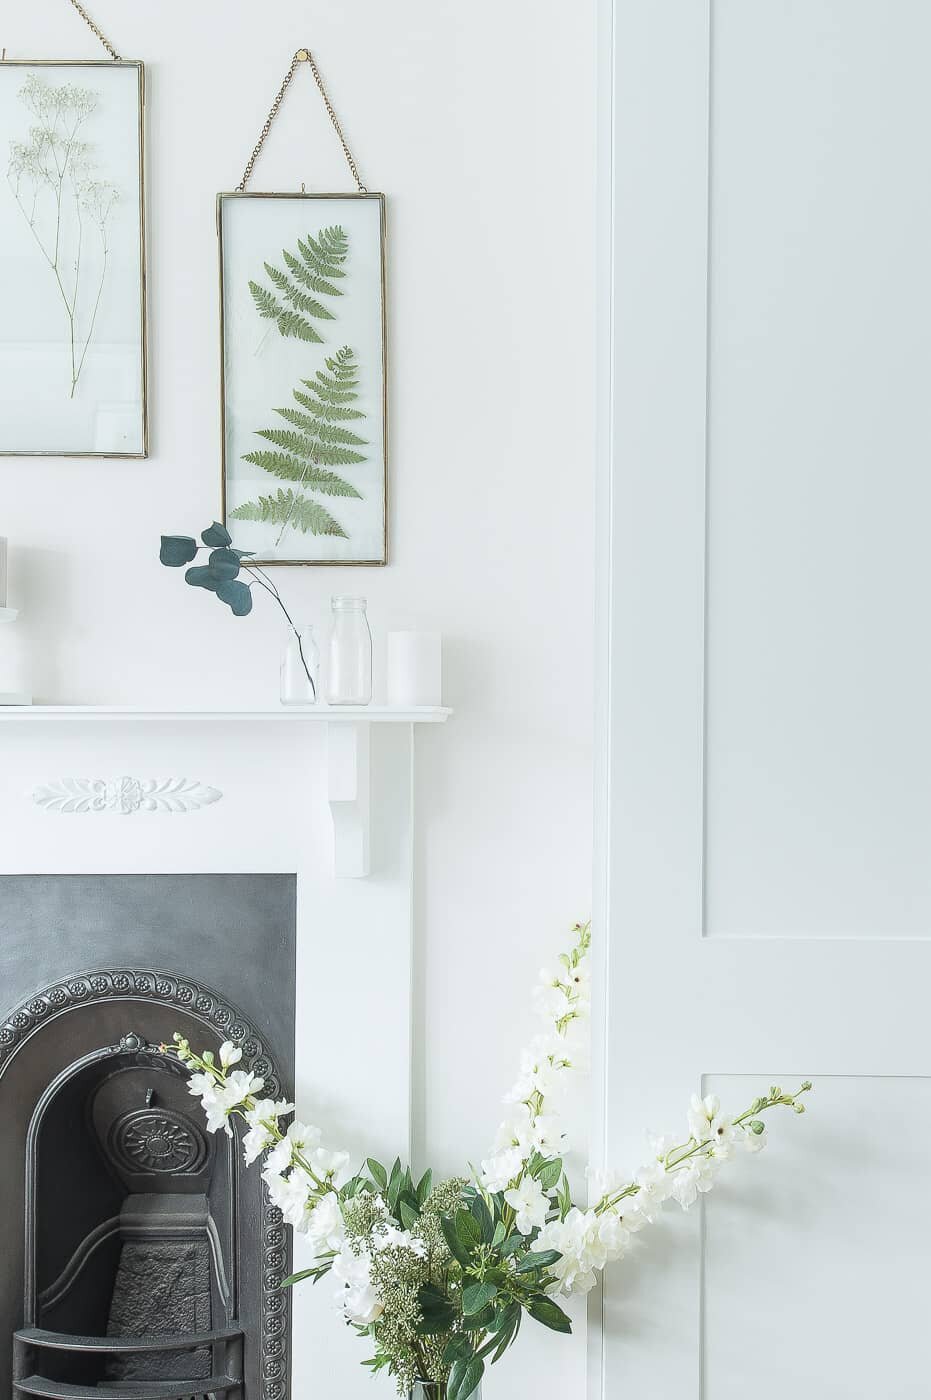
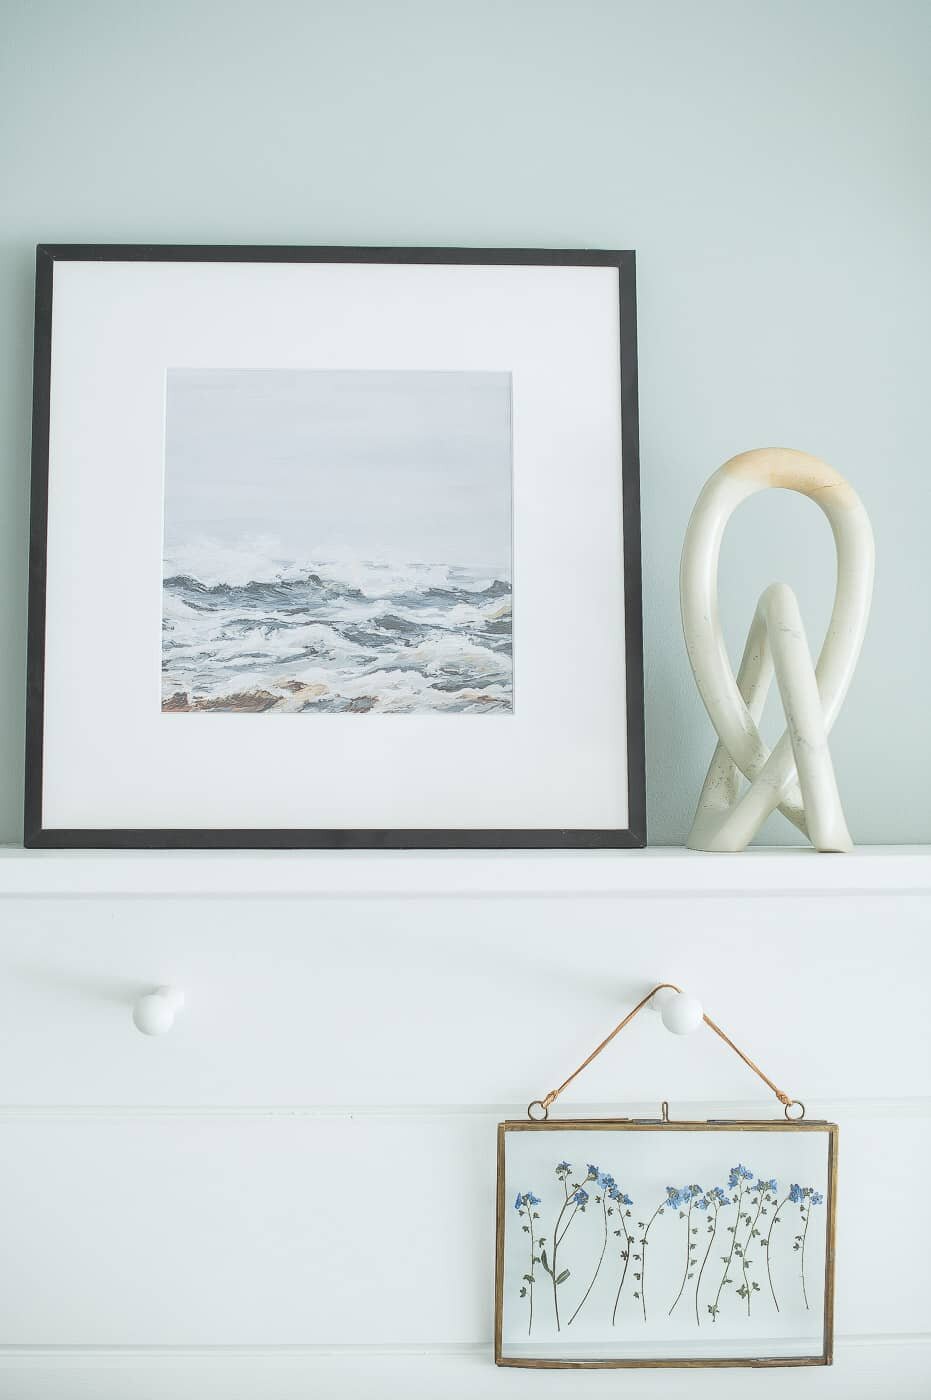
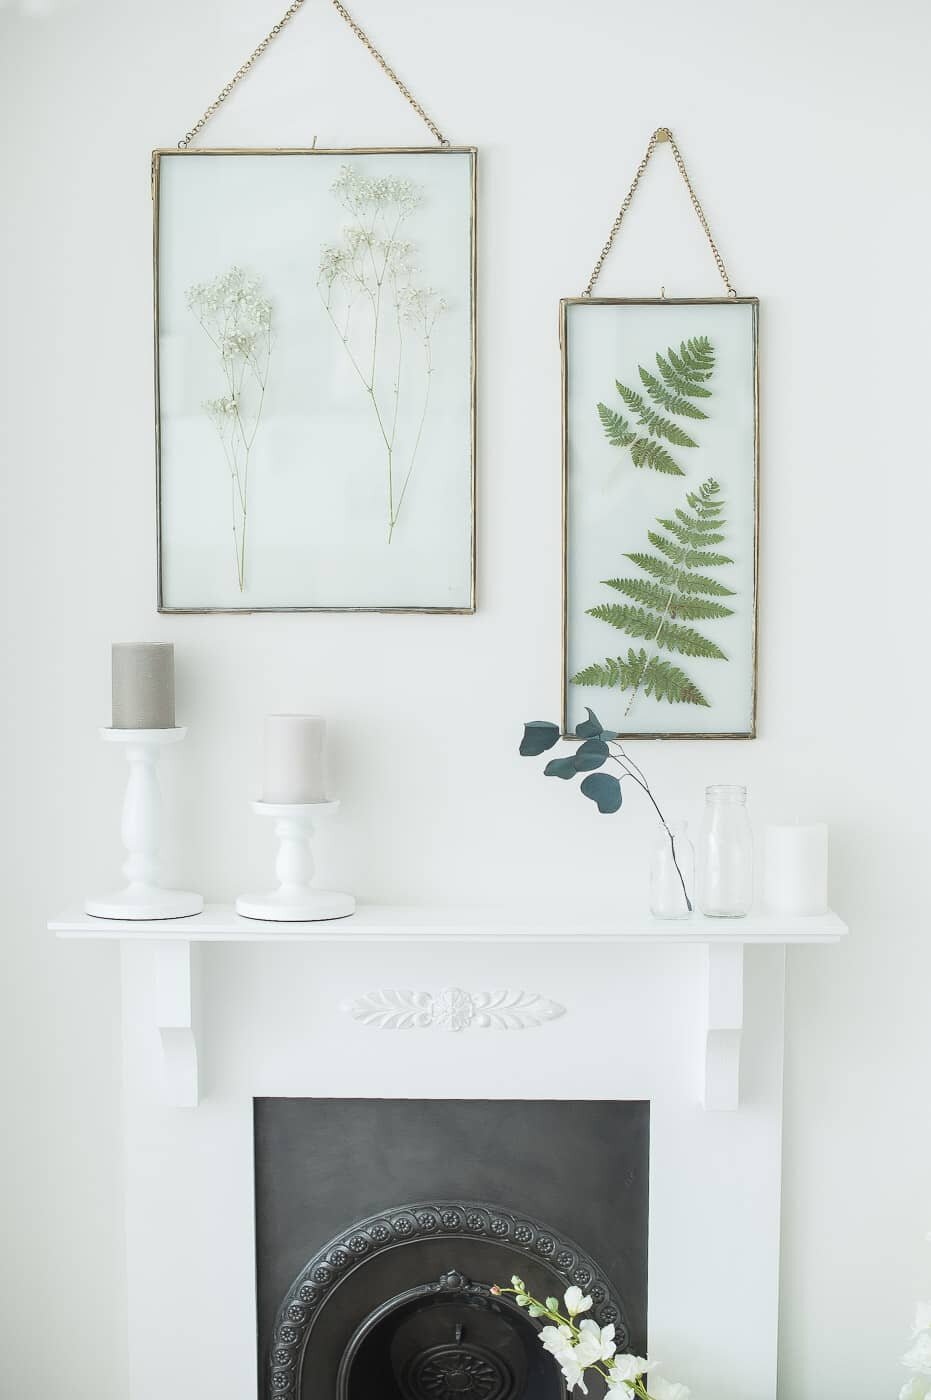
Large glass frames* (on chimney breast) – Nkuku
Black/Clear vases* – Cox & Cox
Faux flowers – A selection from Sophie Allport
Bedside rug* – La Redoute
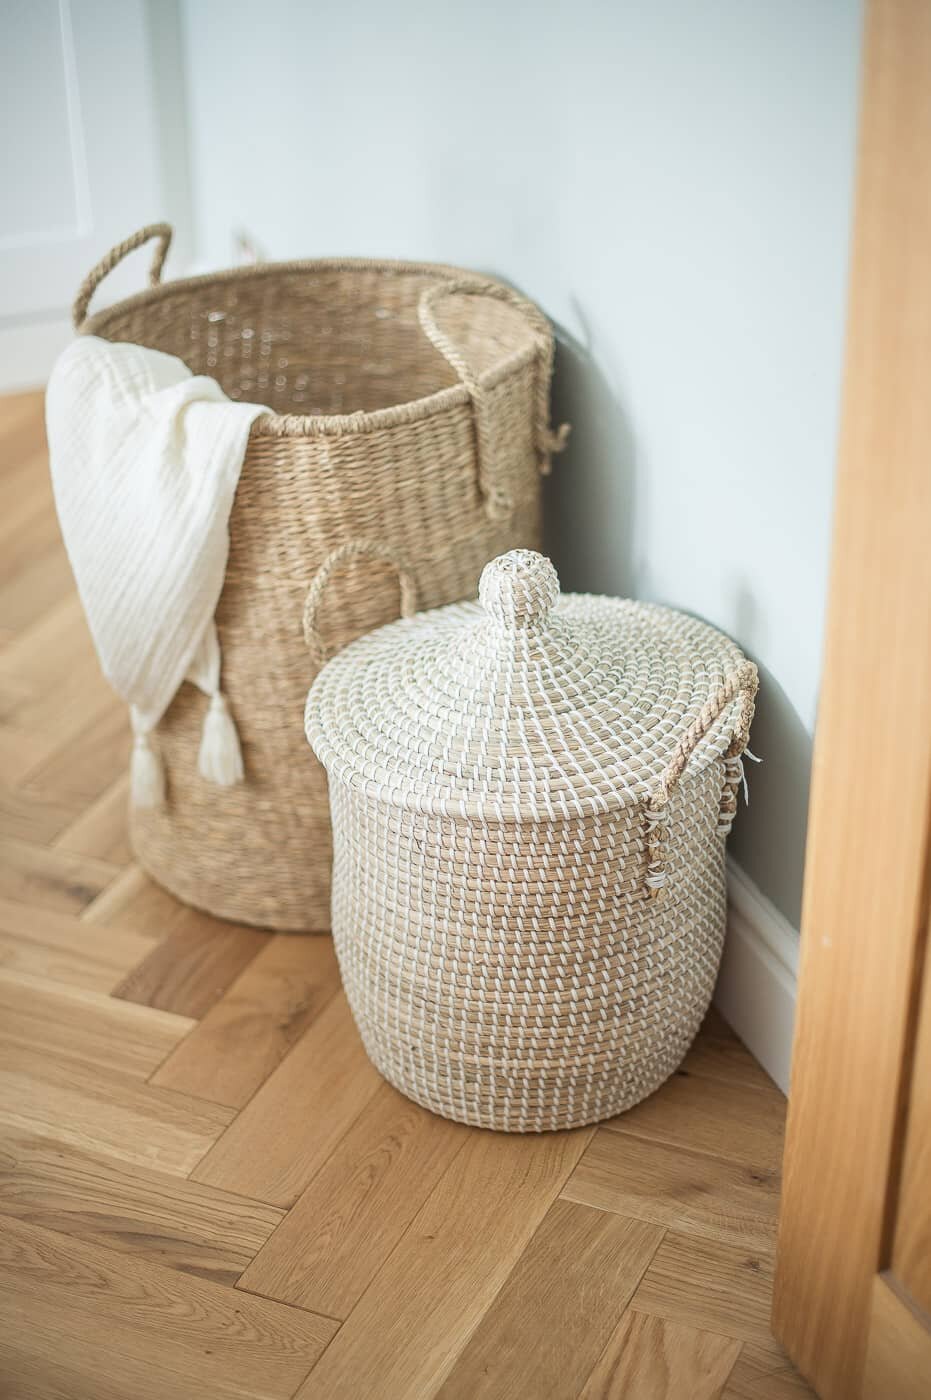
Woven laundry basket (Large)* – La Redoute
Woven laundry basket (Small)* – Stickmans on Etsy
Macrame ceiling shade* – FreelandHomeDesigns on Etsy
Teal blanket/throw* – Perch & Parrow
Morris & Co pillow cases* – Bedeck
Waffle white bed set* – M&S
Pink circle cushion – Mint & May
Stone artichoke – Cotswold Luxe